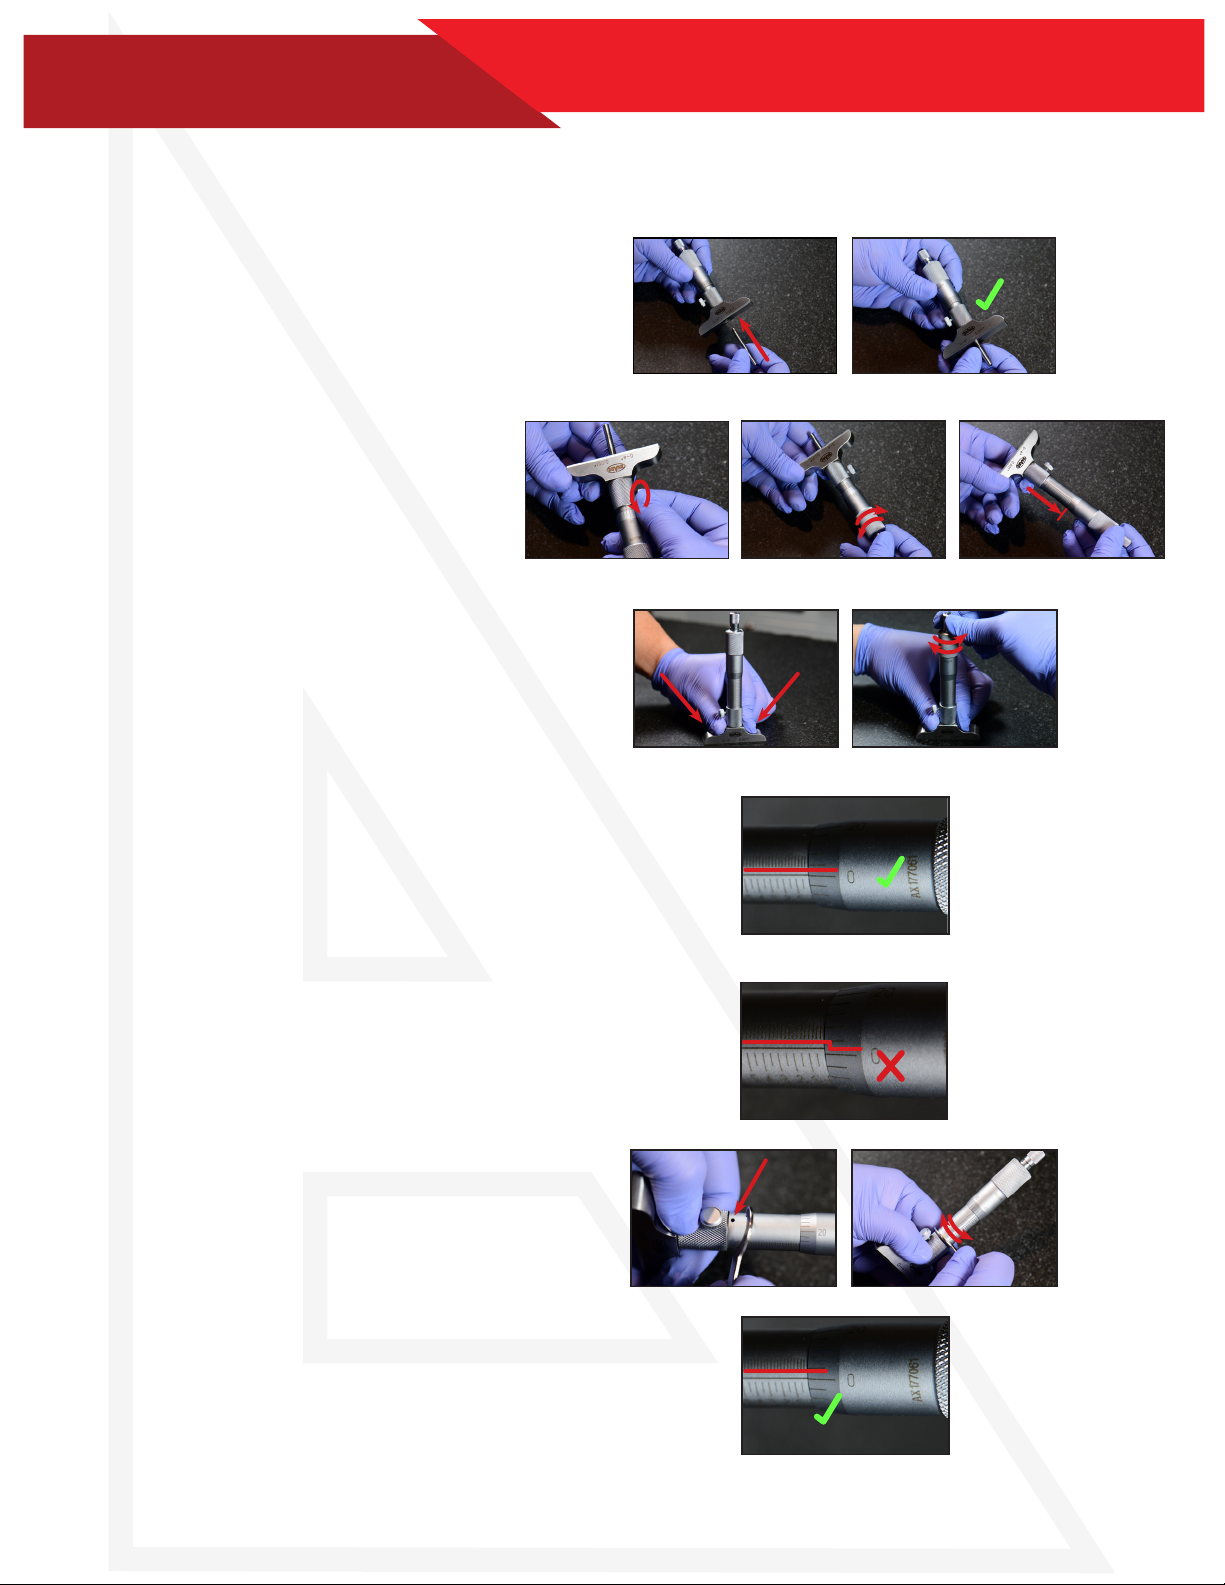
Before using, clean measuring face of interchangeable rod and face of base with soft cloth or soft paper. The zero position is set on
an accurate at surface with 25mm/1” interchangeable rod.
Insert the interchangeable rod with taper
end into the depth base.
(gures 1 & 2)
If the line marked “0” on the thimble does
not coincide with the reference line on the
sleeve (gure 9), adjust the zero position
using steps a and b. (gure 10 & 11)
a) Deviation within ±0.001” (or ±0.01mm)
Lock the spindle by the locking set screw
then adjust the sleeve with a wrench until the
reference line comes exactly in line with “0”
line on the thimble.
b) Deviation over ±0.001” (or ±0.01mm)
Lock the spindle by the locking set screw
and loosen the ratchet stop by a spanner.
Pressing the thimble to the ratchet stop bring
it so that “0” line coincides with the reference
line on the sleeve. Fasten the ratchet stop
and make the nal adjustment.
Zero Setting
1
Loosen the set screw (gure 3)and
rotate the thimble (gure 4)to retract the
interchangeable rod.(gure 5)
When the rod is ushed with the base
surface, the micrometer should read 0.
(gure 8)
Not necessary to reset when changing rod.
Holding down the base of the micrometer
rmly to the base surface, rotate the
thimble until the interchangeable rod is
ush with the base surface. (gure 6 & 7)
gure 1 gure 2
gure 3 gure 4 gure 5
gure 6 gure 7
gure 8
gure 9
gure 10 gure 11
gure 12
2
3
4
5
Do not disassemble and drop the instrument. Keep the instrument clean and dry. Use ratchet stop to keep precision measuring.

