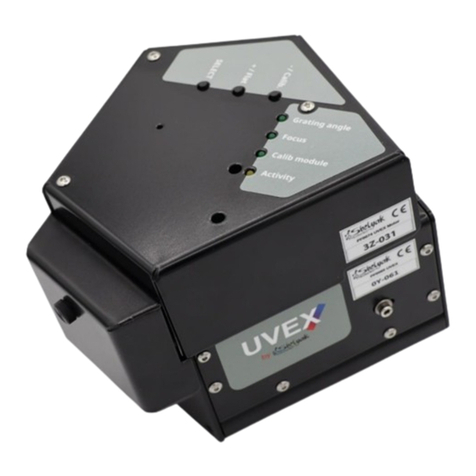
shelyak Alpy 600 User manual

DC0016B : feb.-2014
Alpy 600
User Guide
Olivier Thizy
François Cochard


Alpy 600 spectroscope
User Guide
Olivier Thizy
(olivier[email protected])
François Cochard
February 2014
Ref. DC0016 - rev B

Table of Contents
Introduction 4
1 Discover your Alpy 600 6
1.1 Outofthebox................................................ 6
1.2 Technical specifications . . . . . . . . . . . . . . . . . . . . . . . . . . . . . . . . . . . . . . . . . . . 6
1.3 Alpy 600 elements . . . . . . . . . . . . . . . . . . . . . . . . . . . . . . . . . . . . . . . . . . . . . 6
1.4 Mechanical interfaces . . . . . . . . . . . . . . . . . . . . . . . . . . . . . . . . . . . . . . . . . . . 8
1.5 Visual observation . . . . . . . . . . . . . . . . . . . . . . . . . . . . . . . . . . . . . . . . . . . . . 9
1.6 Alpy 600 principle . . . . . . . . . . . . . . . . . . . . . . . . . . . . . . . . . . . . . . . . . . . . . 10
1.7 Differentslits ................................................ 11
2 Alpy 600 - Spectroscopy in slit mode 14
2.1 Configuration for imaging . . . . . . . . . . . . . . . . . . . . . . . . . . . . . . . . . . . . . . . . . 14
2.2 Color or black & white ? . . . . . . . . . . . . . . . . . . . . . . . . . . . . . . . . . . . . . . . . . . 18
2.3 Preview of your spectrum . . . . . . . . . . . . . . . . . . . . . . . . . . . . . . . . . . . . . . . . . 18
2.4 Reference images . . . . . . . . . . . . . . . . . . . . . . . . . . . . . . . . . . . . . . . . . . . . . . 19
2.4.1 Offset image . . . . . . . . . . . . . . . . . . . . . . . . . . . . . . . . . . . . . . . . . . . . 20
2.4.2 Dark frames . . . . . . . . . . . . . . . . . . . . . . . . . . . . . . . . . . . . . . . . . . . . . 20
2.4.3 Flat field spectrum . . . . . . . . . . . . . . . . . . . . . . . . . . . . . . . . . . . . . . . . . 21
2.4.4 calibration spectrum . . . . . . . . . . . . . . . . . . . . . . . . . . . . . . . . . . . . . . . . 21
2.4.5 Typical observation . . . . . . . . . . . . . . . . . . . . . . . . . . . . . . . . . . . . . . . . . 21
2.5 Datareduction ............................................... 21
2.5.1 Prepare master files . . . . . . . . . . . . . . . . . . . . . . . . . . . . . . . . . . . . . . . . 21
2.5.2 First pass : raw profile . . . . . . . . . . . . . . . . . . . . . . . . . . . . . . . . . . . . . . . 22
2.5.3 Second pass : wavelength
calibration.............................................. 22
2.5.4 Third pass : Response curve
correction.............................................. 24
3 Alpy 600 - Stellar spectroscopy in slitless mode 26
3.1 Changing the slit position . . . . . . . . . . . . . . . . . . . . . . . . . . . . . . . . . . . . . . . . . 26
3.2 Visual observation . . . . . . . . . . . . . . . . . . . . . . . . . . . . . . . . . . . . . . . . . . . . . 26
3.3 Recording a star spectrum . . . . . . . . . . . . . . . . . . . . . . . . . . . . . . . . . . . . . . . . . 27
3.3.1 Tuning the instrument . . . . . . . . . . . . . . . . . . . . . . . . . . . . . . . . . . . . . . . 27
3.3.2 Stars observation . . . . . . . . . . . . . . . . . . . . . . . . . . . . . . . . . . . . . . . . . . 29
3.4 datareduction ............................................... 30
3.4.1 Firstpass .............................................. 30
3.4.2 Second pass . . . . . . . . . . . . . . . . . . . . . . . . . . . . . . . . . . . . . . . . . . . . . 30
3.4.3 Thirdpass.............................................. 31
4 Star spectra in slit mode 33
5 Next steps 35
5.1 Improve data quality . . . . . . . . . . . . . . . . . . . . . . . . . . . . . . . . . . . . . . . . . . . . 35
5.1.1 Signal / Noise Ratio (SNR) . . . . . . . . . . . . . . . . . . . . . . . . . . . . . . . . . . . . 35
5.1.2 Resolution.............................................. 35
5.1.3 Wavelength calibration . . . . . . . . . . . . . . . . . . . . . . . . . . . . . . . . . . . . . . . 36
5.1.4 Autoguiding (guiding module) . . . . . . . . . . . . . . . . . . . . . . . . . . . . . . . . . . 36
5.1.5 Cosmetic file . . . . . . . . . . . . . . . . . . . . . . . . . . . . . . . . . . . . . . . . . . . . 36
2

TABLE OF CONTENTS
5.1.6 Instrumental Response curve . . . . . . . . . . . . . . . . . . . . . . . . . . . . . . . . . . . 36
5.1.7 Write a log file . . . . . . . . . . . . . . . . . . . . . . . . . . . . . . . . . . . . . . . . . . . 36
5.2 Improve productivity . . . . . . . . . . . . . . . . . . . . . . . . . . . . . . . . . . . . . . . . . . . . 36
5.2.1 Keep the same setup . . . . . . . . . . . . . . . . . . . . . . . . . . . . . . . . . . . . . . . . 36
5.2.2 Dark frames library . . . . . . . . . . . . . . . . . . . . . . . . . . . . . . . . . . . . . . . . . 36
5.2.3 Exposure time . . . . . . . . . . . . . . . . . . . . . . . . . . . . . . . . . . . . . . . . . . . 37
5.2.4 Prepare for your observation . . . . . . . . . . . . . . . . . . . . . . . . . . . . . . . . . . . 37
5.2.5 One directory per observing session . . . . . . . . . . . . . . . . . . . . . . . . . . . . . . . . 37
5.2.6 Reduce your data quickly . . . . . . . . . . . . . . . . . . . . . . . . . . . . . . . . . . . . . 37
5.3 Share your results . . . . . . . . . . . . . . . . . . . . . . . . . . . . . . . . . . . . . . . . . . . . . 37
5.4 Get pro-like quality spectra . . . . . . . . . . . . . . . . . . . . . . . . . . . . . . . . . . . . . . . . 37
6 Typical observing session 38
7 Appendix 39
7.1 Alpy Modules & Accessories . . . . . . . . . . . . . . . . . . . . . . . . . . . . . . . . . . . . . . . . 39
7.1.1 Alpy Guiding module . . . . . . . . . . . . . . . . . . . . . . . . . . . . . . . . . . . . . . . . 39
7.1.2 Alpy Calibration module . . . . . . . . . . . . . . . . . . . . . . . . . . . . . . . . . . . . . . 39
7.1.3 DSLR camera barlow adapter . . . . . . . . . . . . . . . . . . . . . . . . . . . . . . . . . . . 40
7.1.4 C-mount camera adapter . . . . . . . . . . . . . . . . . . . . . . . . . . . . . . . . . . . . . 41
7.1.5 Optical fiber adapter . . . . . . . . . . . . . . . . . . . . . . . . . . . . . . . . . . . . . . . . 41
7.2 Alpy 600 with a DSLR camera . . . . . . . . . . . . . . . . . . . . . . . . . . . . . . . . . . . . . . . 41
3

Introduction
Welcome to the world
of spectroscopy !
Alpy is a modular product line, allowing you to
start in spectroscopy in a very easy way, and progress
up to producing high quality spectra on astronomical
objects. Alpy 600 is the main module in this family.
It has several operating modes. You can use it visu-
ally, on different light sources as well as on stars with
a telescope. You can also take pictures to share what
you see, and make scientific measurements : you’ll
be surprised how far you can go in astrophysics with
such a basic instrument. For instance, you’ll be able
to measure the temperature of a star, define its spec-
tral class, measure the expansion velocity of a nova,
observe the emission line of a Be star 1, measure the
expansion of the universe, and so on.
The Alpy 600 design meets several objectives:
– To offer an instrument which is easy to start with
and fun to use, but which is also powerful enough
for people who want to go deeper into the science.
There is no compromise on the spectrum quality:
the optics are specially designed for this spectro-
scope.
– To provide an affordable and scalable instrument.
Several additional modules are available. You can
use the Alpy 600 module alone to produce high
quality spectra, but adding the guiding and/or cal-
ibration modules will make your astronomical ob-
servations much easier and more productive.
– To be easily adaptable to your own setup (tele-
scope, camera...). the mechanical interfaces are
standard, and allow many different usages.
– In spectroscopy, there are different kinds of in-
strument : slitless, with slit, or with fiber optics.
All of them have advantages and drawbacks: It is
the type of observation which defines the optimal
configuration. The Alpy 600 allows all of them!
Then, you can decide for yourself what is best in
your case.
Prerequisites
Spectroscopy is a very large subject. Some parts are
very easy. For instance, looking visually at a spectrum,
during daylight or with a star, requires no experience.
However, if you want to take images or make scien-
tific measurements, it is highly recommended to have
some experience with your instrument - telescope and
camera. In this document, we assume that you’re new
to spectroscopy, but that you’re already familiar with
the basics of astrophotography. Specifically, we’ll not
cover here the following points:
– Setting up and tuning your telescope. You must be
able to point and track a star. Ideally, you should
have autoguiding (with external parallel optics,
off-axis or with the Alpy guiding module).
– Installing, starting and using most common soft-
ware. You should have a PC available, running un-
der Windows (we use MS Windows 7 in this doc-
ument).
– Astronomical imaging. You should know what is
a dark, an offset, a flat field and classical image
processing.
If you’ve already made some deep sky im-
ages, with long exposure and good process-
ing, moving to spectroscopy will be easy for you
- a new adventure which gives access to a new
dimension.
Recommended learning path
Here is a proposed learning path to guide you step
by step through the discovery of your Alpy 600:
– First, use the Alpy 600 in slit mode (as it is con-
figured in our factory), during daylight.
– start by looking at some lamps and daylight spec-
tra - the Sun spectrum, in fact.
– record images and reduce data.
– Secondly, change to slitless configuration, and in-
stall the Alpy 600 on your telescope.
– start first with visual observation of some bright
stars,
– then record & process star spectra images.
– Lastly, take star and extended object spectra in slit
mode.
This document follows this path.
Software
The Alpy 600 is shipped with a CD-ROM containing
all the software tools you need to observe and process
your data. These software are free - you can find their
latest versions on the web. Of course, you can use
your own software if you prefer. In this document,
1. http://arasbeam.free.fr/
4

we use AudeLA 2for acquisition and ISIS 3for data
reduction.
Equipment configuration
The Alpy 600 can be used in many configurations,
but we cannot document all of them ! This documen-
tation is based on a specific configuration (which fits
Alpy requirements perfectly). It will be easy for you
to adapt the instructions to your own equipment &
software.
– A Goto telescope, able to point and track a star in
autoguiding mode.
– A C8 telescope with F/6.3 reducer.
– A CCD camera Atik 314L+. It has a 8.9 x 6.7mm
CCD chip, with 6.45µm pixels. It covers the full
Alpy 600 spectrum.
– A PC running under Windows 7.
A CCD camera is the optimal choice for as-
tronomical observations. However, Alpy 600
can also be used with a DSLR camera. Because
the backfocus (distance between camera mount
and sensor chip) of a DSLR camera is much
higher than in a CCD camera, we’ve designed
an optical adapter for DSLR cameras. Refer to
Appendix for accessory descriptions.
Alpy modules
Alpy is a scalable instrument. This a family of mod-
ules, to best fit your own needs & observations. These
are the main modules :
– The Alpy 600 is the main module. It is the spec-
troscope itself. It can be used in different config-
urations, to cover most applications in astronomy
& the lab.
– The Guiding module : For astronomical applica-
tions, it is difficult to ensure that all the light from
the object you’re observing goes into the spectro-
scope. This module will help you to observe & con-
trol the spectroscope entrance.
– The Calibration module: For accurate results, a
spectrum must be properly calibrated, in wave-
length and intensity. The calibration module sim-
plifies this operation by providing both a calibra-
tion and white light. It can be used manually or
remotely.
– Accessories : DSLR camera adapter, C-mount cam-
era adapter, fiber optics connector.
Astronomical sectroscopy is a never ending story. We
have thought about a lot of applications (you can find
some ideas on the Shelyak Instruments website 4).
However, we know that you’ll invent new ones. We’ll
be very happy to take your experiences into account
to continuously improve this product : do not hesitate
to contact us if you have any comments !
We invite you to join the growing Shelyak Instru-
ments users and amateur spectroscopist community
on the Spectro-L Yahoo group 5and the Aras forum 6
to share your own experiences and ask questions to
the community. We are really interested to see your
results there.
It is now time to enter in this wonderful world...
Are you ready ? Enjoy Spectroscopy !
Olivier Thizy 7François Cochard 8
2. http://www.audela.org/
3. http://www.astrosurf.com/buil/isis/isis.htm
4. http://www.shelyak.com
5. http://groups.yahoo.com/group/spectro-l/
6. http://www.spectro-aras.com/forum/
7. olivier[email protected]
5

1
Discover your Alpy 600
1.1 Out of the box
When you receive your Alpy 600, it is assembled
in slit configuration, ready for mounting on a tele-
scope and for imaging with a CCD camera. The pack-
age contains the Alpy 600, as well as a tool set and a
CD.
1.2 Technical specifications
The Alpy 600 specifications are given in table 1.1,
and dimensions are given in figure 1.1. In addition,
the table 1.2 gives the wavelength covered depending
on the CCD length.
1.3 Alpy 600 elements
Remove the external body from the big ring:
CCD Sensor CCD length λmin λmax
4 mm 4560Å 6055 Å
5 mm 4293Å 6322 Å
1/2” 6.4 mm 3920 Å 6695 Å
KAF400 6.9 mm 3790 Å 6825 Å
9 mm 3650 Å 7380 Å
10 mm 3650 Å 7656 Å
11 mm 3650 Å 7923 Å
12 mm 3650 Å 8190 Å
ICX694 12.5 mm 3650 Å 8319 Å
13 mm 3650 Å 8457 Å
KAF1600 13.8 mm 3650 Å 8500 Å
15 mm 3650 Å 8500 Å
16 mm 3650 Å 8500 Å
Table 1.2: Covered bandwidth vs CCD size. Note that
above 7500 Å, the 2nd order may recover the 1st order.
Look at the slit, at the end of the spectroscope:
6

CHAPTER 1. DISCOVER YOUR ALPY 600
Description Value Unit Comment
Dimension Alpy 600 mm See drawing below
Weight 200 g with 1,25” nosepiece & without CCD camera
Resolution Power (R) @ 650nm ~600 - with 25µm slit
Resolution Power (R) @ 450nm ~400 - with 25µm slit
Spectral domain 370 - 750 nm
CCD min length 8.5 mm if smaller, only a partial spectrum is visible
Optical dispersing element Grism - grating + prism
Grating density 600 l/mm
Typical spectral dispersion 480 Å/mm
Input beam F-ratio F/4 - Telescope beam can be from F/4 to F/10
(optimal luminosity performance is at F/5)
Slit width (standard) 25 µm also included : hole 3mm, slit 300µm,
100µm 50µm, hole 25µm
Slit length 3 mm except for hole 25µm
Mechanical interface M42 x 0.75
thread
- Standard T-mount (or T2)
Table 1.1: Alpy 600 specifications
Figure 1.1: Alpy 600 dimensions (in mm)
7

Alpy 600 - user guide
Loosen the three small screws around the spectro-
scope body, and remove the Alpy 600 core element :
You have now a view of all the elements of the Alpy
600: Core element, Objective lens, external body and
nosepiece 1,25”.
As far as possible, standard threads have
been used on the Alpy 600 parts, to allow
you maximum flexibility with your own equip-
ment. For instance, the external body is made
with standard M42x0,75mm threads : you can
use a 2” eyepiece holder instead of the 1,25”
one.
Several slits are available. We’ll see in the next chap-
ters how to change it and under which conditions to
use each of them.
1.4 Mechanical interfaces
The Alpy 600 uses several standard threads for me-
chanical interfaces, to adapt the instrument to your
own setup.
The CCD camera interface is a standard T-mount
thread (M42 x 0.75mm)
The same thread is used on both ends of the exter-
nal body. For instance, you can replace the 1,25” nose-
piece by a 2”, using a common 2” to T-mount adapter.
8

CHAPTER 1. DISCOVER YOUR ALPY 600
The thread around the slit is of SM1 type: external
diameter 1,035" (26,29mm), 40 threads/inch (pitch
= 0.635mm).
The standard 1,25” nosepiece includes a standard
filter thread (M28.5 x 0.6mm): you can easily mea-
sure the response curve of any filter mounted in a
standard ring.
1.5 Visual observation
Now, take the core element and look at any light
source: classical lamp, or spectral lamp, or even the
sky, cloudy or not (do not look directly at the sun, it
is far too bright).
Do not look directly at the Sun, with or even
without a telescope !
You’ll see your first spectrum. Look at different sources,
to see the different spectra types :
A tungsten lamp has a continuous spectrum:
A power saving lamp has several bright emission
lines and some bands:
The Sun shows a continuous spectrum, with a huge
number of Fraunhofer absorption lines:
This shows that each source of light has it own
spectrum, and the spectrum reveals a lot of scentific
information about its origin.
This will be the same for stars and any astronomical
object : each one has its own spectrum, which reveals
many physical parameters of the star.
9

Alpy 600 - user guide
This document follows the standard con-
vention for presenting astronomical spectra.
The blue end of the spectrum corresponds to
the highest frequencies, or lower wavelength.
The red end is for lower frequencies or higher
wavelength. Usually, in Astronomy, we show the
spectra from lower to higher wavelength. From
now on, get into the habit of putting blue on
the left, and red on the right.
1.6 Alpy 600 principle
The principle of the Alpy 600 is as follows. A point
light source is sent to a collimator lens which makes
the beam parallel. This parallel beam goes through
a dispersing element (usually a prism or a grating):
all outcoming rays of the same wavelength (or color)
go in the same direction, but the output angle differs
for other wavelengths. Then, an objective lens collects
all these beams and focuses them on the focal plane,
where we put the sensor.
To make the source point-like, we usually use a nar-
row slit: only the light which goes through the slit is
spread out. The narrower the slit, the higher resolu-
tion the spectrum is, but the less light goes through:
there is a compromise to find for each case.
In Astronomy, we’re lucky : stars themselve are point-
like. So, when looking at stars, we can afford to re-
move the slit:
The Alpy 600 is designed in a modular way. The
core element consists of the the slit, the collimator
lens, and a grism. A grism is a combination of a grat-
ing and a prism. The grating spreads out the light, but
also deviates the beam by a significant angle. Using a
prism brings the beam back onto the axis of the input
light. In this way we have an on-axis instrument.
The light coming out the core element is then a set
of parallel beams. This is exactly what the eye needs :
a parallel beam is comparable to a beam coming from
infinity. Then, if you put your eye behind the core el-
ement, you’ll see the spectrum.
10

CHAPTER 1. DISCOVER YOUR ALPY 600
If you want to take an image with a camera, you
need to add the objective lens, to focus the parallel
beams onto the CCD sensor. This is built into the Alpy
600 body:
On the next picture, you can see the objective lens,
part of the Alpy 600 body:
The eye contains its own objective lens - the
crystalline lens. Then, it accomodates any
beam coming from the infinite !
1.7 Different slits
The Alpy 600 is a versatile instrument. As described
in section1.6, a spectroscope requires a point light
source to properly work - the smaller the source, the
better is the resolution. Alpy 600 contains several slits,
to fit to several usages. Table 1.3 shows some of them.
To work with an extended source (which is the case
in most everyday situations), use the standard slit -
25µm wide. It is optimized for visual usage, and for
bench measurements. The resulting spectrum is a wide
band (top line of table 1.3).
In some conditions, it is better to only have a small
hole : this way, the spectrum is always at the same
position in the image - but it is more difficult to see
visually. To a certain extent, this is a way to reproduce
in the lab what will be seen with stars (second line).
There is another useful case : working in slitess
mode. This is applicable to stars, which are point-like.
The advantage is that you’ll see a bigger star field, and
you’ll be able to find easily the star you’re looking for.
To do that, you can totally remove the slit from the
Alpy 600, but it is better to keep in position the “3mm
hole” : this way, you’ll limit the optical aberrations at
the field edges - and you’ll not lose the slit (third line).
Sometimes a wide slit is useful. For instance, when
you have no guiding module but want to eliminate
most of the sky background, or when you want to
collect the full star light if the star image is bigger
than 25µm. In this case, you can use the 300µm slit
(last line).
The Alpy 600 also includes 50µm and 100µm slits.
Changing the slit position
The slit position is easy to change. It is mounted
with two screws. Remove the outer one, and just loosen
the central one. Choose the slit you want, and put its
notch in front of the outer screw’s hole. Put back the
11

Alpy 600 - user guide
Standard slit : 25µm
Hole 25µm
Hole 3mm
Wide slit 300µm
Table 1.3: Alpy 600 slits
12

CHAPTER 1. DISCOVER YOUR ALPY 600
outer screw, and tighten carefully the two screws.
The slit is a fragile component - take extra
care when changing its position, and make
sure that you can move it freely, before turning
it.
Cleaning the slit
Over the time, there can be some dust on the slit. A
dust particle in the slit is seen in the image as a dark
line along the dispersion axis. You can clean-up the
slit with a soft, dry cloth, or gently blow away loose
particles.
13

2
Alpy 600 - Spectroscopy in slit mode
In the previous chapter, you’ve looked at lamp spec-
tra using the Alpy 600. Now, you probably want to
take a picture of what you’ve seen, either to share
it with others, or to make measurements. This is the
purpose of this chapter. Here you will work in slit
mode, with everyday light, working on a bench.
2.1 Configuration for imaging
As explained in section 1.6, compared to visual ob-
servation, we need to add more optics behind the
grating, to create an image at the focal plane (the
CCD surface). These optics are contained in the Alpy
600 body:
The body is threaded, for tuning the distance be-
tween the optics and CCD when it is mounted in the
CCD camera adapter. (The nominal distance is about
19,5mm) . A threaded ring is used to lock the body in
the focused position.
Watch out that the optics do not touch or
damage your camera sensor.
Assemble the CCD camera adapter to your camera:
The camera used here has a T-mount
(M42x0,75mm thread). If you are using a
C-mount camera, an optional C-mount adapter
is available (see appendix 7.1.4).
14

CHAPTER 2. ALPY 600 - SPECTROSCOPY IN SLIT MODE
Put the Alpy 600 core element in the body. It can turn
freely : this will be used to put the spectrum horizon-
tally.
There are three small screws around the body, to
lock it in the right position:
Now, put the camera in a stable position, and point
the slit towards a daylight source (sky or window).
Start your acquisition software. Setup the CCD cam-
era cooling at -5°C for instance. Take a first image of
the spectrum. You may have something like this:
Even if the weather is cloudy, the daylight is
always the Sun light. You don’t need to wait
for good weather when taking a solar spectrum.
The first point to check is that the image is not satu-
rated. The CCD camera has a capability of recording
a certain level of light (this is the dynamic range spec-
ification). If the source exceeds this level, the camera
considers it is like a “maximum light”, and cannot see
any details in it. The Atik 314L+ camera has a dy-
namic range of 65535 ADU. If a pixel in the image
is above this value, it means that image is saturated.
To solve this problem, you must reduce the exposure
time, or reduce the source intensity if it is possible.
At the opposite end, if the maximum level of the
image is at the bottom end of the dynamic range of
the camera, you lose the capability to see details in
your images. You can then increase the exposure time.
The optimal level is about 80% of the camera max
level.
If the image is totally black or white, it can
be due to the image visualization threshold
settings in the software. Move the cursor in the
image and check the pixel level (bottom right).
Or change the thresholds by clicking on “Auto”
button (bottom left).
The spectrum is probably unfocused, and in any di-
rection. To put it horizontally, simply rotate the Alpy
600 core element in the body:
15

Alpy 600 - user guide
To focus the spectrum, turn the body in the CCD
camera adapter. Proceed step by step, taking continu-
ous images.
When you turn the body in the CCD camera
adapter, you change the spectrum focus, but
also its orientation. To see the focus improve-
ment, it is better to keep the spectrum with the
same orientation. To do that, fix the the CCD
camera firmly (we often use a small hand-vice),
take the Alpy 600 core element in one hand
to keep it in place, and turn the body with the
other hand.
When the spectrum image is correct, tighten the threaded
ring around the body, and the three screws to lock the
Alpy 600 core element.
You should have something like this:
The spectrum must be orientated with blue on the
left, and red on the right... It is not obvious to see in
a black & white image ! With experience, you will im-
mediately recognize the Sun spectrum. Refer to this
image to put it in the right position:
You’ve completed the most complex part of spec-
troscopy with Alpy !
At this stage, your camera is equiped with the spec-
troscope, and any image you take will be a focused
and horizontal spectrum of the light coming into the
slit.
When The Alpy 600 is focused, you can
remove the core element and put it back
quickly : the focus is not lost. You’ll have only
to tune the rotation angle, to put the spectrum
horizontal in the image.
Test now different kinds of lamps: tungsten, power
saving lamps, neon lamp, Alpy calibration lamp... each
source has its own spectrum. The table 2.1 shows
some examples.
For the next step, record at least one image of the
Sun spectrum in FITS format.
FITS format is the image file format for As-
tronomy. This is a format which keeps the
whole information in the image (no compres-
sion), and adds some key data in a file header,
such as date, image size, observer, observing
site, object coordinates, and so on.
16

CHAPTER 2. ALPY 600 - SPECTROSCOPY IN SLIT MODE
Description Images
Sun light
Halogen lamp (flat field lamp of the Alpy
calibration module)
Candle light
Argon / Neon (Alpy calibration module)
Neon lamp
Argon (Habitat lamp)
White LED
Power saving lamp
Blue paper, illuminated by a halogen lamp
Red paper, illuminated by a halogen lamp
Table 2.1: Some examples of common light sources. The color version of each spectrum is colorized by software.
17

Alpy 600 - user guide
2.2 Color or black & white ?
When you look visually at the spectrum, you see a
rainbow, with beautiful colors. Using most CCD cam-
eras, you get only a black & white image. This is nor-
mal, because the CCD camera is not color-sensitive.
If you had used a color camera (or a DSLR camera),
you would have a colored spectrum like this one:
You might think it is better to have the color... it
depends ! If this is only for sharing what a spectrum
is, this is true. But if you want to make measurements
on your spectrum, a black & white camera is prefer-
able : its surface is uniformly sensitive, and there is
no effect of the colored pixels (Bayer matrix effect).
Anyway, keep in mind that color or black & white
only depends on the camera : the spectroscope itself
works in color.
2.3 Preview of your spectrum
You’ve recorded your first spectrum image. That’s
great, but not very useful in this format. Usually, a
spectrum is presented as a profile, giving the light
intensity vs the wavelength. To make the conversion
from image to profile, you must use spectral data re-
duction software. Alpy 600 is provided with ISIS soft-
ware, which is one recommended tool. This docu-
ment isn’t a tutorial of ISIS (refer to the ISIS doc-
umentation 1, and specially the Alpy tutorial 2), but
shows very quickly the basics for this first experience.
Here is how to proceed with your Sun spectrum.
Run ISIS, ang go to the "Settings" tab. Select "ALPY
600 (without calibration module)" in the spectrograph
model, and specify the working directory where you’ve
storedyour images (FITS files):
Go in the tab “Image”. Select your Sun image (Sun-
1.fit), and display it :
If you don’t see the spectrum, it is probably because
it is outside of the displayed zone. You can move in
the image using the scrollbars
Select the checkbutton “Reticule”.
It will display the area of the image which will be
selected for profile extraction. If the area is not in the
spectrum, double click in the middle of the spectrum
: it will put the reticule there.
Then, click the button “Next”; ISIS switches to the
“2.General” tab, and updates automatically several fields.
Put “Sun” in the object name. In the options area, se-
lect the “don’t remove background” checkbutton. This
is to tell ISIS that your spectrum is from an extended
object (the spectrum is not a single line in the im-
age). Unselect “wavelength calibration”, because at
this stage, we’ve no data for calibration.
1. http://www.astrosurf.com/buil/isis/isis.htm
2. http://www.astrosurf.com/buil/isis/guide_alpy/tuto_en.htm
18
Table of contents
Other shelyak Measuring Instrument manuals
Popular Measuring Instrument manuals by other brands

Loavto Electric
Loavto Electric DME D305T2MID instruction manual

ADInstruments
ADInstruments AD2821A Operation manual
GDD Instrumentation
GDD Instrumentation MPP3wifi instruction manual
Hanna Instruments
Hanna Instruments HI 99181 instruction manual
R&S
R&S FSPN user manual
Environmental Express
Environmental Express OAKTON PD250 instruction manual
