Shimmer 3 User manual

Copyright © Shimmer 2017
Realtime Technologies Ltd Shimmer User Manual
All rights reserved Rev3p
1
Shimmer User Manual
Revision 3p

Copyright © Shimmer 2017
Realtime Technologies Ltd Shimmer User Manual
All rights reserved Rev3p
i
Legal Notices and Disclaimers
Disclaimers
REALTIME TECHNOLOGIES LTD. MAKES NO WARRANTY OF ANY KIND WITH REGARD TO THIS MATERIAL, INCLUDING, BUT
NOT LIMITED TO, THE IMPLIED WARRANTIES OF MERCHANTABILITY AND FITNESS FOR A PARTICULAR PURPOSE. REALTIME
TECHNOLOGIES LTD. ASSUME NO RESPONSIBILITY FOR ANY ERRORS THAT MAY APPEAR IN THIS DOCUMENT. REALTIME
TECHNOLOGIES LTD. MAKES NO COMMITMENT TO UPDATE NOR TO KEEP CURRENT THE INFORMATION CONTAINED IN
THIS DOCUMENT.
THIS SPECIFICATION IS COPYRIGHTED BY AND SHALL REMAIN THE PROPERTY OF REALTIME TECHNOLOGIES LTD. NO
LICENSE, EXPRESS OR IMPLIED, BY ESTOPPEL OR OTHERWISE TO ANY INTELLECTUAL PROPERTY RIGHTS IS GRANTED
HEREIN.
REALTIME TECHNOLOGIES LTD. DISCLAIM ALL LIABILITY, INCLUDING LIABILITY FOR INFRINGEMENT OF ANY PROPRIETARY
RIGHTS, RELATING TO USE OF THE MATERIALS AND IMPLEMENTATION OF INFORMATION IN THIS SPECIFICATION. INTEL
DO NOT WARRANT OR REPRESENT THAT SUCH USE OR IMPLEMENTATIONS WILL NOT INFRINGE SUCH RIGHTS.
NO PART OF THIS DOCUMENT MAY BE COPIED OR REPRODUCED IN ANY FORM OR BY ANY MEANS WITHOUT PRIOR
WRITTEN CONSENT OF REALTIME TECHNOLOGIES LTD.
REALTIME TECHNOLOGIES LTD. RETAINS THE RIGHT TO MAKE CHANGES TO THESE SPECIFICATIONS AT ANY TIME,
WITHOUT NOTICE.
CAUTION
RISK OF EXPLOSION IF BATTERY IS REPLACED BY AN INCORRECT TYPE.
DISPOSE OF USED BATTERIES ACCORDING TO THE INSTRUCTIONS.
Legal Notices
Realtime Technologies Ltd. software products are copyrighted by and shall remain the property of Realtime Technologies
Ltd. Use, duplication or disclosure is subject to restrictions stated in the three clause BSD license, or in the case of software
delivered to the government, in accordance with the software license agreement as defined in FAR 52.227-7013.The
Shimmer logo is a registered trademark of Realtime Technologies Ltd.
Other brands, marks and names mentioned herein may be the property of their respective owners and used in accordance
with published guidelines.
© REALTIME TECHNOLOGIES LTD. 2008-2017, All Rights Reserved

Copyright © Shimmer 2017
Realtime Technologies Ltd Shimmer User Manual
All rights reserved Rev3p
ii
Informed Consent Statement
Shimmer is an open flexible platform intended for qualified personal conducting research in wearable sensor
applications. Consequently, although great care was taken in the design of this device, there is some inherent
risk both with the design and manufacturing that you assume when the device is in close proximity to your
body or the body of your test subjects. Depending on local regulations, Shimmer may not fully comply with
commercial product testing standards. Shimmer as sold lacks medical certifications (e.g. ANSI/AAMI/IEC).
Shimmer devices should never be used for diagnostic purposes without full consideration of operator and
subject risk. The following list describes some of the subject risks:
There is a risk of electrical shock due to manufacturing defects or improper use (see usage guidelines
and warnings).
There is also a risk of sustaining a burn due to a catastrophic failure of the device which could result
from overheating of components.
There is a risk of radio interference with the operation of other electronic devices and we make no
claims to the consequences of this.
There is a risk of some minor skin irritation from electrode pads over prolonged periods of time which
may cause discomfort.
The device is not designed with proper safeguards for defibrillation. As such, electrodes must be
removed before defibrillation is attempted.
Data privacy limitations: It should be understood from the outset and you should communicate to test subjects
that the physiological data that is streamed, stored, and analyzed through use of the device is not anonymized
or privacy-protected in any way and you should take appropriate precautions in the protection and handling of
such data in your research activities. Shimmer itself may buffer raw physiological data unencrypted on the
integrated flash memory device. RF data streaming from the Shimmer may not be encrypted and could be
intercepted by others. RF data downstream from an aggregation device, such as a cell phone may not be
encrypted and is likewise susceptible to access.
Physiological data generated through use of Shimmer may indicate conditions that your test subject was
previously unaware of prior to participation in research using the device.
There may be a risk of exposure to minute amounts of chemicals from the manufacturing process or the
components themselves (such as latex, lead etc.).
There may be an increased risk of physical injury by the physical presence of the device on a test subject’s
body and you fully assume this responsibility.
Realtime Technologies Ltd is not liable for damage or loss of data when using the Shimmer platform.
Some Shimmer peripherals rely on 3rd party driver support. Whilst Realtime/Shimmer Research have tested
features using a typical system, in some cases the end user will need to contact the peripheral vendor for
resolution of installation, compatibility or operational issues.
By your use of Shimmer you acknowledge these and other risks inherent in the use of an experimental device
and you assume full responsibility for testing this device with human subjects.
This device cannot be marketed or put into service within the EU until it has been made to comply with the
Medical Devices Directive 93/42/EEC. In the United States, Shimmer is an investigational device, limited by US
law to investigational uses.
Copyright © Shimmer 2017
Realtime Technologies Ltd Shimmer User Manual
All rights reserved Rev3p
iii
Agency Compliance
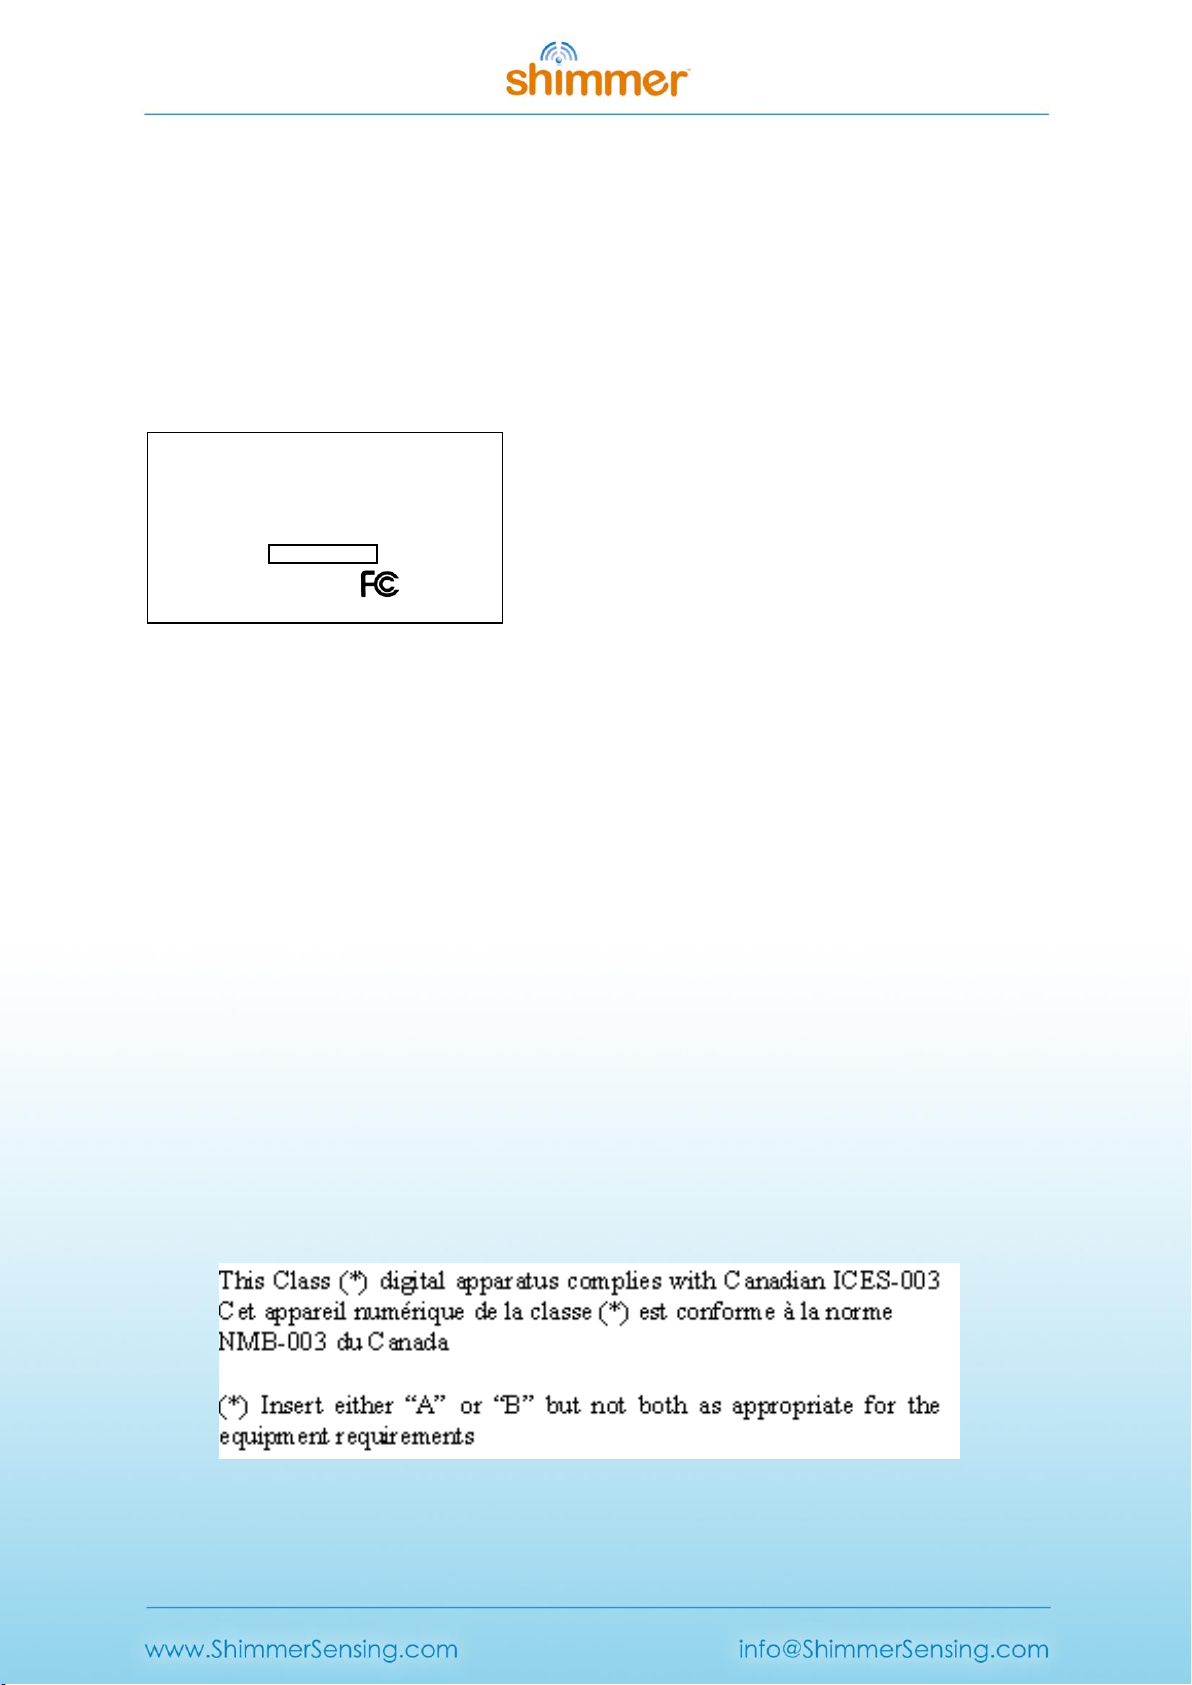
FCC
Contains FCC ID: X2W-SR7-1
The FCC ID marking label is attached to the back of the Shimmer and is to remain attached at all times to
comply with FCC requirements for Modular approval:
Here is an example of the text on the FCC ID marking label:
Model: Shimmer 3
Contains: FCC : TJ-RN42
IC : 6514A-RN42
BT RADIO ID:
Made in Ireland
This device complies with Part 15 of the FCC Rules.
Operation is subject to the following two conditions:
(1) This device may not cause harmful interference, and
(2) This device must accept any interference received, including interference that may cause undesired
operation.
RADIO AND TELEVISION INTERFERENCE
This equipment has been tested and found to comply with the limits for a Class B digital device, pursuant to
Part 15 of the FCC rules. These limits are designed to provide reasonable protection against harmful
interference in a residential installation. This equipment generates, uses, and can radiate radio frequency
energy and, if not installed and used in accordance with the instructions, may cause harmful interference to
radio communications. However, there is no guarantee that interference will not occur in a particular
installation. If this equipment does cause harmful interference to radio or television reception, which can be
determined by turning the equipment off and on, the user is encouraged to try to correct the interference by
one or more of the following measures:
- Reorient or relocate the receiving antenna.
- Increase the separation between the equipment and the receiver.
- Connect the equipment into an outlet on a circuit different from that to which the receiver is connected.
- Consult the dealer or an experienced radio/TV technician for help.
Changes and Modifications not expressly approved by Realtime Technologies Ltd. can void your authority to
operate this equipment under Federal Communications Commission rules.
ICES-003 Label

Copyright © Shimmer 2017
Realtime Technologies Ltd Shimmer User Manual
All rights reserved Rev3p
iv
Welcome Message
Thank you for your purchase of Shimmer!
This User Manual will provide essential operating instructions and help you to understand the
capabilities of the Shimmer3 platform. Please note that the User Manual for the Shimmer2r platform
(and previous) is available for download from our website, www.shimmersensing.com. The latest
version of this manual is also available for download from our website.
In addition to the Shimmer User Manual, your Shimmer kit ships with the Shimmer User Resources
distribution USB. It is recommended that you browse the contents of the Shimmer User Resources by
initially opening the README file in your web browser and following the appropriate links. Updated
versions of the items in the Shimmer User Resources may also be available for download from the
Shimmer website.
If you have queries or need information in addition to that outlined in this document, it is
recommended that you consult with our additional documentation, which is included in the
Shimmer User Resources distribution and is available for direct download from our website. The
website also contains an extensive FAQ section which may help to clarify any issues you might have.
Also, check out the large number of tutorial videos on YouTube which can be found by search for
'Shimmer Sensing'. Should you have further queries you can contact or support service or use the
Shimmer-users mailing list.
info@shimmersensing.com (non-technical questions)
www.shimmersensing.com/support/wearable-sensing-support (technical questions)
www.shimmersensing.com (Shimmer website)
Best wishes,
The Shimmer Team

Copyright © Shimmer 2017
Realtime Technologies Ltd Shimmer User Manual
All rights reserved Rev3p
v
Table of Contents
Legal Notices and Disclaimers........................................................................................................i
Informed Consent Statement ....................................................................................................... ii
Agency Compliance..................................................................................................................... iii
Welcome Message...................................................................................................................... iv
Table of Contents......................................................................................................................... v
1. Introduction ........................................................................................................................1
2. Quickstart............................................................................................................................ 2
2.1. Powering On/Off the Shimmer.............................................................................................. 2
2.2. LogAndStream LED Indication ...............................................................................................2
2.3. Charging the Shimmer...........................................................................................................4
2.4. Pairing a Shimmer..................................................................................................................4
2.5. Setting up a Shimmer data stream........................................................................................7
3. Shimmer3 Platform Overview ............................................................................................ 14
3.1. Components ........................................................................................................................14
3.2. Shimmer Dock......................................................................................................................18
3.3. Consensys Base....................................................................................................................24
3.4. Other Accessories and Shimmer Platform Components.....................................................25
3.5. Maintenance........................................................................................................................27
4. Software............................................................................................................................ 30
4.1. Software Applications..........................................................................................................30
4.2. Software Development........................................................................................................37
5. Firmware........................................................................................................................... 39
5.1. Firmware Solutions..............................................................................................................39
5.2. Programming a Shimmer.....................................................................................................44
5.3. Firmware Development.......................................................................................................47
6. Hardware .......................................................................................................................... 49
6.1. Shimmer Hardware Overview .............................................................................................49
6.2. Hardware Sub-System Detail...............................................................................................49

Copyright © Shimmer 2017
Realtime Technologies Ltd Shimmer User Manual
All rights reserved Rev3p
vi
7. Troubleshoot ..................................................................................................................... 55
8. References......................................................................................................................... 57
9. Appendices........................................................................................................................ 58
9.1. Appendix A - Mainboard detail for Debug and Testing.......................................................58
9.2. Appendix B - Legacy Support...............................................................................................64
9.3. Appendix C –Opening or assembling the Shimmer3 enclosure..........................................64
Glossary..................................................................................................................................... 68

Copyright © Shimmer 2017
Realtime Technologies Ltd Shimmer User Manual
All rights reserved Rev3p
1
1. Introduction
Shimmer is a small wireless sensor platform well suited for wearable applications. The integrated
kinematic sensors, large storage and low-power standards based communication capabilities enable
emerging applications in motion capture, long-term data acquisition and real-time monitoring.
Shimmer3, the latest revision of the Shimmer platform includes improvements to the original design
based on years of field trials and deployments. We have made improvements in wearability while
expanding capabilities with a flexible kinematic sensor array, more powerful CPU and improved user
interface. The terms ‘Shimmer’and ‘Shimmer3’are used interchangeably in this manual, to refer to
the Shimmer3 device. Much of the information applies generically to Shimmer Products.
If you are new to the Shimmer platform, there is Quickstart information in Section 2, whilst Section 3
gives a high level overview of the Shimmer platform. Section 2(Quickstart) is essential reading,
Section 3(Shimmer Platform Overview) is recommended reading and the remaining sections are best
browsed based on personal interest and development goals. For details on legacy devices please
refer to Shimmer Clock Drift
Like many embedded devices, the clock on the Shimmer device is prone to drift. Laboratory
experiments have indicated that Shimmer-to-Shimmer clock drift is variable and can be up to 12
µs/s. To equate this to longer recording periods 12µsec/sec is equivalent to 0.72 ms/min, 43
ms/hour and 1.04 s/day.
Appendix B - Legacy Support.

Copyright © Shimmer 2017
Realtime Technologies Ltd Shimmer User Manual
All rights reserved Rev3p
2
2. Quickstart
The Support > Getting Started section of the Shimmer website contains step-by-step instructions for
new Shimmer users to help with quickly going from delivery of hardware to streaming data over
Bluetooth to a Windows PC or an Android device. It is highly recommended for new customers to
refer to those instructions.
This Quickstart guide is aimed at those who do not have access to the online instructions and its
purpose is to allow those users to swiftly get up and running with their Shimmer sensing platform on
both a Windows OS and Linux OS. For a more in depth understanding of the Shimmer platform
please refer to the later sections of this User Manual.
Shimmer units are shipped pre-programmed with the LogAndStream firmware program which
allows for Shimmer configuration and data capture over Bluetooth as well as capturing data onto the
SD card of the Shimmer. This Quickstart guide assumes the device has been programmed with
LogAndStream v0.8.0 or later.
2.1. Powering On/Off the Shimmer
Use the slide switch to turn the Shimmer On/Off, as shown in Figure 2-1. Some applications may use
the user push-button to switch between suspend and active modes; details of this functionality can
be found in the appropriate application manual.
Figure 2-1 Shimmer3 in enclosure
2.2. LogAndStream LED Indication
There are two LED locations on the Shimmer3, as shown in Figure 2-1; location A has three LEDs,
coloured red, yellow and green, whilst location B has two LEDs, coloured blue and green. These LEDs
are used to indicate the state of the device, according to the firmware that is programmed on it.
Figure 2-2 and Figure 2-3 provide a summarised translation of LED behaviour when LogAndStream is
running on the Shimmer (for a full LogAndStream LED translation table refer to Section 5.1.1). The
relative size of the LED symbols in the figures denotes how long the LED of the relevant colour is on
or off for, in each case.
| "ON"
O "OFF"
LED location B
LED location A

Copyright © Shimmer 2017
Realtime Technologies Ltd Shimmer User Manual
All rights reserved Rev3p
3
LED Pattern
Description
Docked or in
Multi Charger
Full Charge
Green Solid ON
Charging
Yellow Solid ON
Undocked
Full Charge
Green 0.1s ON/5s OFF
Medium Charge
Yellow 0.1s ON/5s OFF
Low Charge
Red 0.1s ON/5s OFF
Figure 2-2 LED indicators for LogAndStream (Location A)
LED Pattern
Description
Docked or Undocked
Standby
Blue 0.1s ON/2s OFF
Bluetooth
Connected
Blue Solid ON
Streaming only
Blue 1s ON / 1s OFF
RTC not set
0.1s Blue/0.1s Green
Undocked only
Configuring
Green 0.1s ON/ 0.1s OFF
SD error
0.1s Red/0.1s Yellow
Logging only
Green 1s ON / 1s OFF
Streaming and
Logging
1s Blue/1s Green
Figure 2-3 LED indicators for LogAndStream (Location B and A)
Note: The above SD error LED sequence is present in LogAndStream_v0.8.0 and later. Older versions
of LogAndStream couple both SD and RTC errors into a 0.1s Blue/0.1s Green LED flashing sequence.

Copyright © Shimmer 2017
Realtime Technologies Ltd Shimmer User Manual
All rights reserved Rev3p
4
2.3. Charging the Shimmer
A Shimmer unit may be charged using a Shimmer Dock, Multi Charger, a Shimmer charging cable or a
Consensys Base. This section is limited to the description of the Shimmer Dock (referred to as "the
Dock" in the following) for charging purposes only. For a full description of the Dock functionality
and charging with the Shimmer Multi Charger please refer to the Shimmer3 Platform Overview
section of this document or the individual User Guides for these items.
Connect the Dock to a powered USB socket.
Warning: If you connect the Dock to a PC, do not allow Windows to install the driver automatically,
as some versions of Windows (typically old than Windows 10) will not install the correct driver1.
Driver installation is not required for charging purposes. For further details on driver installation
please refer to the full description of the Shimmer Dock in the Shimmer3 Platform Overview section.
If using a single Shimmer Dock, insert the Shimmer3 unit into the dock with the Bluetooth ID label
facing away from the USB cable.
Warning: Forcing the connector may cause permanent damage to your Shimmer. If you have
difficulty inserting the unit into the dock, check that you have the correct orientation.
A detailed explanation of the charging process is outlined in the Section 3.2.3 of this document.
If the Shimmer is powered on, when a charging source is available, the Shimmer will indicate charge
status using the Battery status LEDs on the device; while the Shimmer is charging, the yellow LED will
be on and once the battery is full, a green LED will be on.
2.4. Pairing a Shimmer
In order to capture data from a Shimmer sensor using a Bluetooth connection, the Bluetooth
connection must first be set up in a process called Pairing. Two pairing procedures are outlined
below: one for a Windows operating system and another for a Linux operating system. You should
follow the procedure which applies to the OS you are using.
Note: The host side machine must have a plug-in or built-in Bluetooth radio installed and activated
to continue.
2.4.1. Bluetooth Pairing in Windows
To pair the Shimmer (or any Bluetooth device) with a Windows OS, ensure that the unit is powered
on and follow the steps below.
View Devices
In order to view the list of devices connected to the PC already, follow the path Control Panel →
Hardware and Sound →Devices and Printers. A window similar to Figure 2-4 containing a list of
devices is presented. Both Bluetooth devices and non-Bluetooth devices are shown.
1Note that Windows 7 has been found to install the correct driver.

Copyright © Shimmer 2017
Realtime Technologies Ltd Shimmer User Manual
All rights reserved Rev3p
5
Figure 2-4 View Devices and Printers
Search for Shimmer Devices
To add a Shimmer to the list of devices connected with the PC, select the Add a Device button on the
top left of the window (see screenshot on left of Figure 2-5). Windows will now search for Bluetooth
devices that are within range of your PCs BT radio and display them as in the screenshot on the right
of Figure 2-5.
Figure 2-5 Searching for available Bluetooth devices
Warning: If Windows fails to find the Shimmer device, ensure the following;
The PC attempting to find the Shimmer device is Bluetooth enabled.
The Shimmer unit is powered ON (refer to Section 2.2 to identify if Shimmer is powered ON).
The Shimmer unit is within Bluetooth range of the PC (<12m approximately).
Pair to a Shimmer device
To pair with a particular device, select the device from the list; the device name will be “RN42-XXXX”
or “Shimmer3-XXXX”, depending on what hardware version you have purchased, where “XXXX” are
Pressing the Add a Device button
Instructs Windows to search for
available devices
When Windows finds a device, it
displays it in the box

Copyright © Shimmer 2017
Realtime Technologies Ltd Shimmer User Manual
All rights reserved Rev3p
6
the last four digits of the BT radio’s MAC address (printed on the Shimmer label). Windows will
attempt to establish a connection with the device.
Figure 2-6 Pairing validation
To complete the pairing process, select the Enter the device’s pairing code (see Figure 2-6) option at
which point, a dialog box will appear prompting for a security code. The default code is 1234.
Verify successful Bluetooth pairing
Return to Control Panel →Hardware and Sound →Devices and Printers where the list of devices
connected with the Windows machine should now include the Shimmer that you paired (see Figure
2-7). In order to use the device with many host side Shimmer applications, it is essential to know the
COM port that the Windows machine has assigned to the Shimmer. To identify the COM port
number, right click on the Shimmer, select Properties and go to the Services tab. The COM Port
number is displayed as a Serial Port (SPP) service (e.g. COM74 in the screenshot on the right of
Figure 2-7).
Figure 2-7 Locating COM port associated with the Shimmer unit
Right click on the Shimmer
device and select Properties
Right click on the Shimmer
device and select Properties

Copyright © Shimmer 2017
Realtime Technologies Ltd Shimmer User Manual
All rights reserved Rev3p
7
2.4.2. Bluetooth Pairing in Linux
The operation of pairing a Shimmer device in Linux may vary from distribution to distribution. The
following procedure has been tested in Ubuntu 10.04, Slackware 13 and OpenSuse 11.3.
All the commands given here should be entered from the command line (in a terminal window).
Bluetooth Radio
The BlueZ Bluetooth libraries and tools need to be installed. See http://www.bluez.org for details.
Ensure the Bluetooth radio is available by running the hciconfig command.
tiny2@ShimmerLive:~/Desktop$ hciconfig
hci0: Type: USB
BD Address: 00:19:0E:0A:D6:62 ACL MTU: 1021:8 SCO MTU: 64:1
UP RUNNING PSCAN
RX bytes:1013 acl:0 sco:0 events:34 errors:0
TX bytes:1347 acl:0 sco:0 commands:34 errors:0
Search for Shimmer Devices
Scan for the Shimmer by running the hcitool scan command.
tiny2@ShimmerLive:~/Desktop$ hcitool scan
Scanning ...
00:06:66:42:22:BD RN42-22BD
00:A0:96:28:DF:E8 FireFly-DFE8
00:06:66:42:24:18 RN42-2418
Pair to a Shimmer device
To use the Shimmer, for example, with Bluetooth radio ID “RN42-2418”, it must be bound to an
rfcomm device. The rfcomm bind <n> <MAC_ADDRESS> command achieves this. The <n> parameter
gives the rfcomm device number, which must be different for each Shimmer paired, and the
<MAC_ADDRESS> parameter is the Shimmers MAC address which can be obtained from the hcitool
scan output above. This command normally needs root privileges, so “sudo” is used.
tiny2@ShimmerLive:~/Desktop$ sudo rfcomm bind 0 00:06:66:42:24:18
[sudo] password for tiny2:
Verify a Successful Bluetooth Pairing
Running the rfcomm command with no arguments shows which Shimmer is bound to which rfcomm
device, along with the current connection status.
tiny2@ShimmerLive:~/Desktop$ rfcomm
rfcomm0: 00:06:66:42:24:18 channel 1 clean
rfcomm1: 00:A0:96:28:DF:E8 channel 1 clean
2.5. Setting up a Shimmer data stream
2.5.1. Setting up a Shimmer data stream on Linux
ShimmerCapture is a host side application used to configure a single Shimmer and stream data from
it. The application is available for the Linux operating system and is available from the Shimmer User
Resources or for download from the members section of the Shimmer website. Follow the steps
below on setting up a stream in ShimmerCapture.
Copyright © Shimmer 2017
Realtime Technologies Ltd Shimmer User Manual
All rights reserved Rev3p
8
Run ShimmerCapture
Launch the ShimmerCapture application on a Linux OS.
Linux: The application must be run using the mono framework. The method of doing this varies and
depends on the Linux distribution and the desktop environment being used. To run from the
command line navigate to the folder containing the executable and run the mono
ShimmerCapture_Linux.exe command.
tiny2@ShimmerLive:~/Desktop$ mono ShimmerCapture_V0.2_Linux.exe
Select a Shimmer
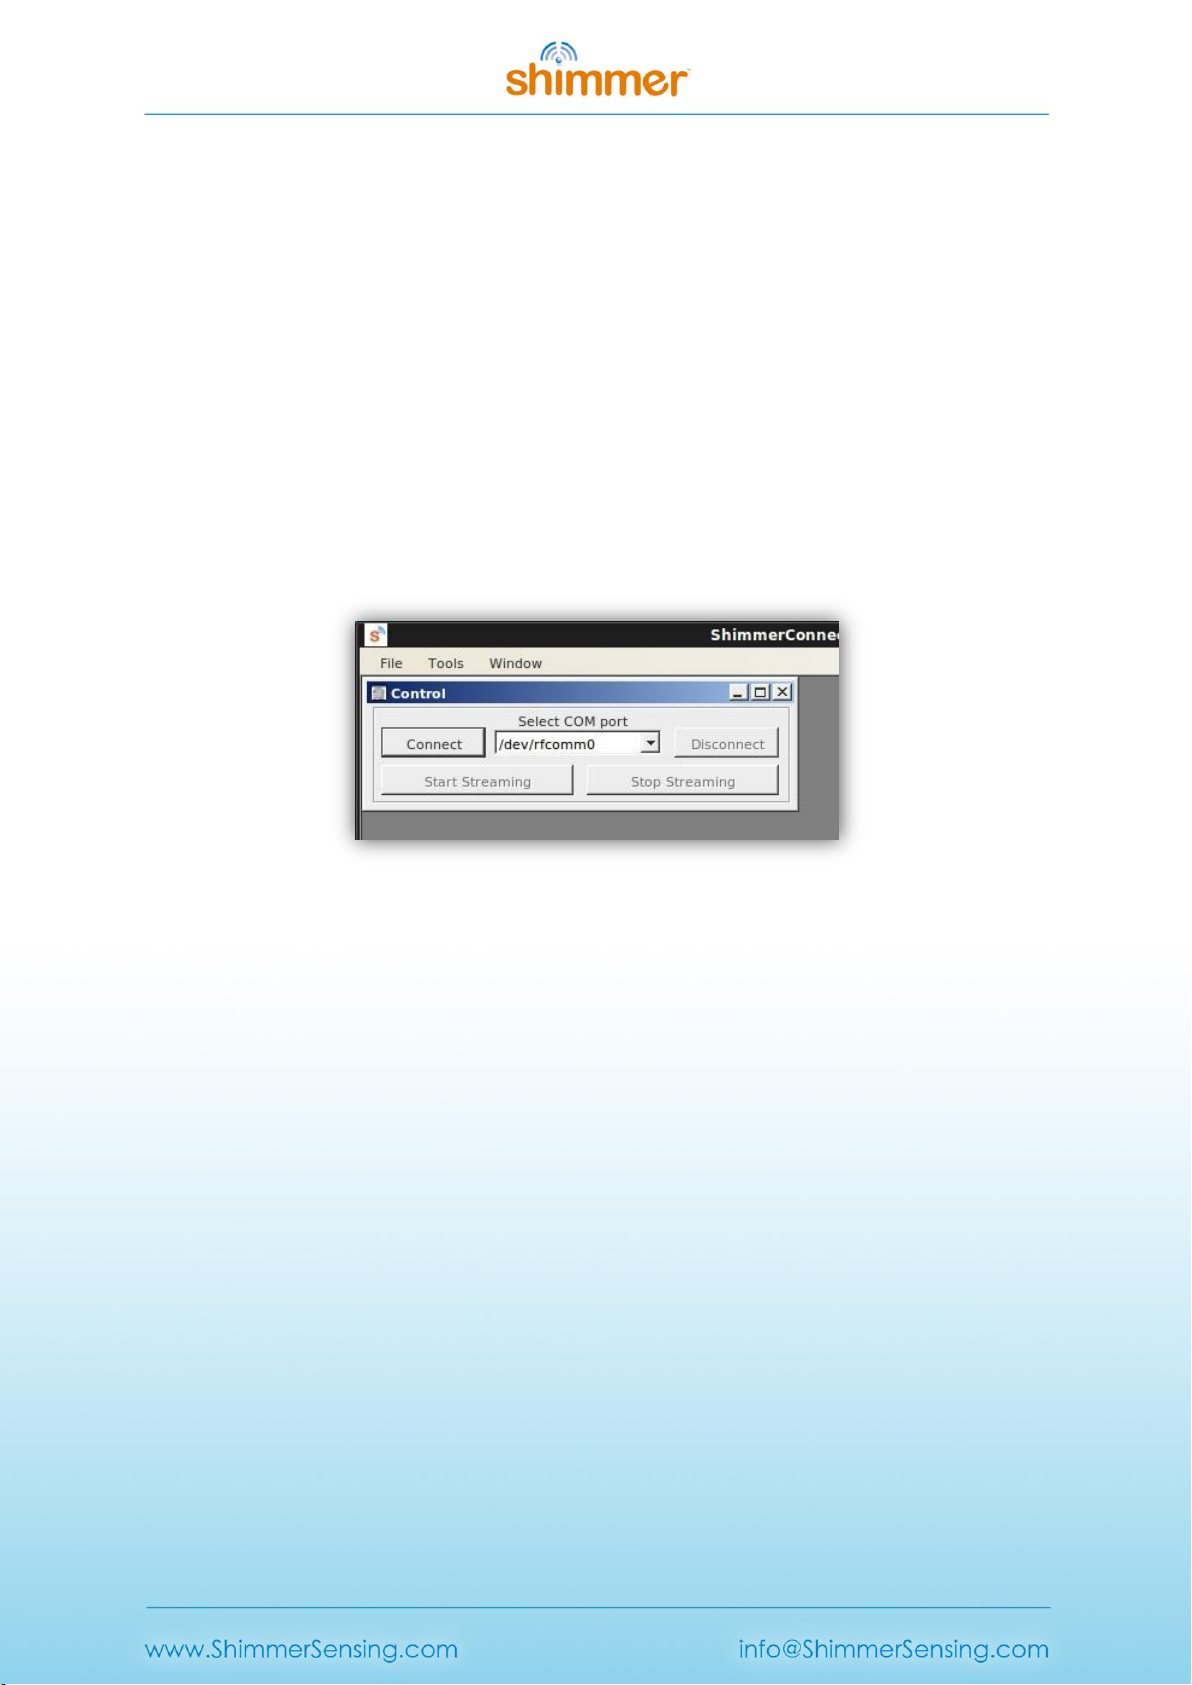
If you are running ShimmerCapture on a Linux OS, enter /dev/rfcomm<n> in the Select COM port
field as in Figure 2-8. Only /dev/rfcomm0 will be populated in the drop down menu, other values
will need to be typed in manually.
Figure 2-8 Selecting COM port in ShimmerCapture for Linux OS
Connect to a Shimmer
Ensure the Shimmer unit is powered on and press the Connect button on the ShimmerCapture
application to establish a Bluetooth connection between the Shimmer and the host side machine. As
per Figure 2-3, the blue LED on the Shimmer will remain on when a successful connection has been
made.
Note: If you have trouble connecting to a Shimmer please refer to the troubleshoot section of this
manual.
Configure the Shimmer
To configure the Shimmer, select Tools →Configure Shimmer. Here, Shimmer daughter boards can
be enabled/disabled and sensor settings like the sampling rate can be defined. In Figure 2-9 the low
noise accelerometer, wide range accelerometer and gyroscope sensors are enabled a sampling rate
of 51.2Hz.

Copyright © Shimmer 2017
Realtime Technologies Ltd Shimmer User Manual
All rights reserved Rev3p
9
Figure 2-9 Configuring the Shimmer
Stream data from the Shimmer
Press the Start Streaming button to start the Shimmer streaming data to the ShimmerCapture
application. The blue LED on the Shimmer will blink with a 50% duty cycle at a rate of 0.5Hz (1s ON –
1s OFF). The data is displayed on the screen as in Figure 2-10.
Figure 2-10 Shimmer streaming data
Data can be stored to a CSV file by pressing Tools →Save to CSV. To stop transmission, press the
Stop Streaming button. If you press the Disconnect button, it will release the connection to the host
application and remain idle.

Copyright © Shimmer 2017
Realtime Technologies Ltd Shimmer User Manual
All rights reserved Rev3p
10
For more information on the functionality of ShimmerCapture please refer to the Section4.1.2 of this
manual. For more information on the use of LogAndStream firmware please refer to the Section
5.1.1 of this manual.
2.5.2. Setting up a Shimmer data stream on Windows
ConsensysPRO is a host side application used to configure one or more Shimmers and stream data
from it. The application is available for Windows from the Shimmer User Resources or for download
from the Shimmer website. Follow the steps below for setting up a stream in ConsensysPRO.
Navigate to the live data tab
When ConsensysPRO is launched press the Live Data button or tab as indicated below in Figure 2-11.
Figure 2-11 Navigating to setting up data stream in Consensys
Connect to a Shimmer
Ensure the Shimmer unit is powered on and running LogAndStream firmware (v0.8.0 or later), then
press one of the Connect buttons highlighted in Figure 2-12. The blue LED on the Shimmer will turn
continuously on when a successful connection has been made.
1

Copyright © Shimmer 2017
Realtime Technologies Ltd Shimmer User Manual
All rights reserved Rev3p
11
Figure 2-12 Connecting to the Shimmer
Accessing the Shimmer configuration
To configure the Shimmer, select one of the Configure buttons as shown below in Figure 2-13.
Figure 2-13 Accessing the Shimmer configuration
2
3

Copyright © Shimmer 2017
Realtime Technologies Ltd Shimmer User Manual
All rights reserved Rev3p
12
Configuring a Shimmer
Here, Shimmer sensors can be enabled/disabled and sensor settings like the sampling rate can be
defined. In Figure 2-14 the low noise accelerometer at a sampling rate of 51.2Hz is enabled. Press
the WRITE CONFIG button to write the configuration over Bluetooth to the Shimmer.
Figure 2-14 Writing the Shimmer configuration
Stream data from the Shimmer
Press one of the Start Streaming buttons to start the Shimmer streaming data to the Consensys
application. The blue LED on the Shimmer will blink with a 50% duty cycle at a rate of 0.5Hz (1s ON –
1s OFF). The data is displayed on the screen as in Figure 2-15.
4

Copyright © Shimmer 2017
Realtime Technologies Ltd Shimmer User Manual
All rights reserved Rev3p
13
Figure 2-15 Shimmer streaming data
Recording data from the Shimmer
Data can be stored to the PC (via a Consensys database) and/or locally to the Shimmer’s SD card as
shown in Figure 2-16. It can then be exported to a text file for data visualtation or data processing.
For more information on the functionality of ConsensysPRO please refer to the Section 4.1 of this
manual. For more information on the use of LogAndStream firmware please refer to the Section
5.1.1 of this manual.
Figure 2-16 Shimmer recording data
5
6
Other manuals for 3
4
Table of contents
Other Shimmer Accessories manuals


