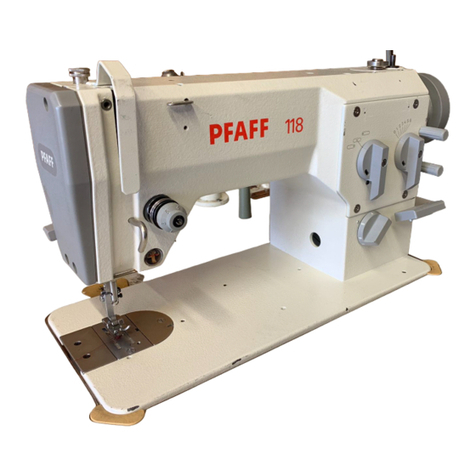
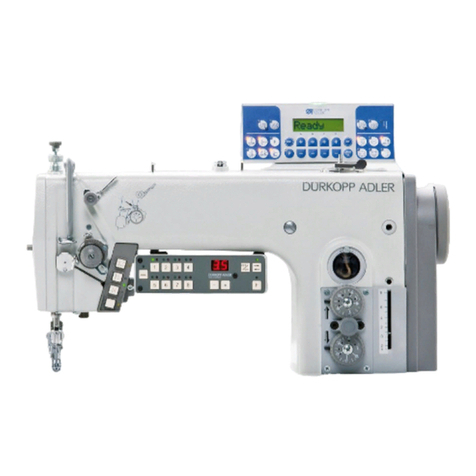
SHING RAY FW-720 User manual

索 引
一 安全上的注意事項
1-1 作業環境的安全
1-2 安裝的安全
1-3 操作中的安全
1-4 保養維修的安全
1-5 危險標示﹒請注意標示
二 使用說明
A 安裝
B 潤滑
C 潤滑油之更換
D 濾油器之更換
E 針之更換
F 穿線方式
G 押腳壓力強度之調整
三 調整說明
A 針棒高度之調整
B 針與勾針之時位關係
C 下勾針與針之引量
D 勾針與針之間隙關係
E 針與後護針片調整
F 針與前護針片調整
G 針與上勾針及線導片之關係
H 送步齒高度調整
I 勾針控線凸輪之調整
四 自動切線調整說明
A 下切刀組相關位置調整
B 下切刀組切線之相關位置
C 下切刀組與針線及下勾針線之關係
D 上切刀組與上飾線﹒針及上勾針之關係
E 撥線器相關位置調整
五 簡易故障排除
A 清潔保養
B 故障(用戶)自主檢查
C 結論
INDEX 頁/PAGE
SAFETY PRECAUTION
1-1 WORK ENVIRONMENT 1
1-2 SAFETY IN INSTALLATION 2
1-3 SAFETY IN OPERATING 3
1-4 SAFETY IN MAINTENANCE AND REPAIRS 3
1-5 DANGER ANDCAUTION SIGNS 4
OPERATION GUIDE
A INSTALLATION 5
B LUBRICATION OIL 6
C OIL CHANGE 7
D REPLACING OIL FILTER 7
E HOW TO REPLACE THE NEEDLES 8
F THREADING 8
G ADJUSTING THE PRESSURE OF PRESSER FOOT 9
ADJUSTMENT GUIDE
A THE HEIGHT OF NEEDLE BAR 10
B TIMING OF NEEDLE AND LOOPER 11
C THE POSITION OF NEEDLE AND LOOPER 12
D THE TIMING OF NEEDLE AND LOOPER 13
E
ADJUSTING NEEDLE AND REAR NEEDLE GUARD
14
F
ADJUSTING NEEDLE AND FRONT NEEDLE GUARD
15
G
"THE RELATIVE POSITION OF NEEDLE,SPREADER"AND SPREADER THREAD GUIDE
16
H ADJUSTING THE HEIGHT OF FEED DOG 17
I THE ADJUSTMENT OF LOOPER THREAD TAKE-UP 17
AUTO THREAD TRIMMER ADJUSTMENT GUIDE
A
THE RELATIVE POSITION ADJUSTMENT OF BOTTOM TRIMMER CUTTING PARTS TRIMMER CUTTING PARTS
18
B THE RELATIVE POSITION ADJUSTMENT OF BOTTOM TRIMMER﹒ 20
C
"THE RELATIVE POSITION OF NEEDLE, LOOPER" THREAD AND BOTTOM TRIMMER﹒
22
D
"THE RELATIVE POSITION OF SPREADER THREAD," "NEEDLE, SPREADER AND TOP TRIMMER﹒"
23
E THE RELATIVE POSITION OF TOP WIPER 25
REGULAR MAINTENANCE
A THE CLEAR AND MAINTENANCE 26
B
ERROR MESSAGES(THE USER INSPECTS THE MACHINE BY THEMSELVES)
28
C CONCLUSION 32

-1-
安全上的注意事項:
使用本機前請詳細閱讀本說明書及所搭配之
馬達說明書,配合正確使用,並須由受過正
確訓練之人員來安裝或操作。
1-1 作業環境的安全
(1) 電源電壓:
電源電壓請遵照馬達與控制箱 牌
所標示之規格±10%範圍內操作。
(2) 電磁波干擾:
請遠離高週磁波器或電波發射器等,
以免產生的電磁波干擾本驅 裝置,
因而發生錯誤 作。
(3) 溫濕度
1﹒請不要在室溫45度C以上或5度C以下
的場所操作。
2﹒請不要在日光直接照射的場所或室外
運作。
3﹒請不要在暖氣(電熱器)旁運作。
SAFETY PRECAUTION :
Please read this manual carefully,
also with related manual for the
machine head before use﹒ For perfect
operation and safety,installing and
operating this product by trained
personal is required﹒ When install and
operate HVP-70 MINI SERVO MOTOR,
precaution must betaken as the
following﹒ This product is designed
for specify sewing machine and must
not be used for other purposes﹒
1.1 Work Environment :
(1) Power voltage :
Only use Power Voltage indicated
on the name plate of the HVP-70 +
10% ranges﹒
(2)
Electromagnetic pulse interference :
To avoid the false operate, please
keep the product away from the
high electromagnetic
machinery or electro generator﹒
(3) Temperature :
a﹒
Please don't operate in room tempe-
rature is above 45 C or under 5 C
b﹒Avoid operating in direct sun
light or outdoors area﹒
c﹒Avoid operating near the heater﹒
-2-
4﹒請不要在相對濕度30%以下或95%以
上或有露水的場所運作。
1-2 安裝的安全
(1)
機器、馬達、控制箱:請遵照說明
書正確裝好。
(2) 電源線:
1﹒請注意不要被外物壓住或過度扭曲
電源線
2﹒裝釘電源線時請不要靠近會轉 的
手輪、皮帶輪及三角皮帶,最少要
離開3∼5公分以上。
(3) 接地:
1﹒
為防止雜訊干擾或漏電事故,請做
好
接地工程。
2﹒電源線的接地線須以適當大小的導
線和接頭連接到生產工廠的系統地
線,此連接必須被永久固定。
d﹒Avoid operating in the area
which humidity is 30% or less
and 95% or more, also stay away
from dew area﹒
(4) Atmosphere :
a﹒
Avoid operating in dusty area,
and
stay away from corrosive material﹒
b﹒
Avoid operating in evaporate
or
combustible gas area﹒
1.2 Safety In Installation :
(1) Motor and control box :
Follow the instruction in this
manual for correct installation﹒
(2) Power cord :
a﹒Avoid power cord being applied
by heavy objects of excessive
force, or over bend﹒
b﹒Power cord must not set to be
near the handwheel, keep 3mm
spare or above﹒
c﹒
Check the outlets voltage before
plugging the cord, make sure it
match the voltage shown on the
name plate of the HVP-70 in + 10%
ranges﹒
(3) Grounding :
a﹒
To avoid the static interference
and current leakage, all ground
ing
must done﹒
b﹒Use the correct connector and
extension wire when connecting
ground wire to Earth and secure
it tightly﹒

1-3 操作中的安全
(1) 在第一次開電後,請先以低速操作
縫紉機,並檢查轉 方向是否正確。
(2) 縫紉機運轉時請不要去觸摸手輪、
皮帶輪、三角皮帶、天秤、針等會
作的部位。
(3) 請不要在拆下皮帶護蓋及其它安全
裝置的情形下操作。
(4) 操作縫紉機時,針棒前方之透明護
目板,必須移到針鎦前方之正常位子。
1-4 保養維修的安全
在操作以下 作前,請先關閉電源:
(1) 要拆卸馬達或控制箱時,或在控制
箱上插或拔任何連接插頭時。
(2) 控制箱裡面有危險高壓電,所以關
閉電源後要等10分鐘以上,方可打
開控制箱蓋。
(3) 翻抬車頭時,與更換車針或穿線時
(上圖所示)。
(4) 機械上的修理及調整時。
(5) 機械休息不用時。
-3-
1﹒3 Safety In Operating :
(1) When turn on the machine in the
first time, use low speed to operate
and check the correct rotation
direction﹒
(2) During machine operation, don't
touch any moving parts﹒
(3) Please don't operate the machine
under to take out the Belt Cover
and another safety advice
(4)
When you operate the sewing machine,
the "Eye Guide" must be moved to
the correctly position which in
the front of needle holder﹒
1.4 Safety in Maintenance and Repairs :
Power must be turned off first, when:
(1)
Uninstall the motor to the control
box﹒, or plug and unplug any
connector﹒
(2) Turn off the power and wait 10
minutes before opening box cover﹒
(3) Raising the machine arms or
changing needle, or threading
needle﹒(show as above)
(4) Repairing or doing any mechanical
adjustment﹒
(5) Machines rest﹒
-4-
1-2 危險標示,請注意標示:
(1) 這兩個標示符號表示機
器安裝時,如有錯誤會傷害到人體
或機器會受到損壞,所以機器方面
有危險 的地方會有此標示。
(2) 這個標示符號表示有高壓電等
電氣方面有危險 的地方會有此標
示。
1.5 Danger and Caution Signs :
(1) Risks that may cause personal
injury or risk to the machine
are Marked with this symbol
in the instruction manual﹒
(2)
This symbol indicate electrical
risks and warnings

-5-
1. 請依本機配件盒內電件圖所附之正
確桌板尺寸裁製圖、裁製桌板。
2. 桌板厚度約 50mm。
3. 直驅微型小馬達之機頭與桌板之安
裝固定方式,請參照(圖1)之安裝注
意事項1、2點。
4. 直驅微型小馬達機器之桌板、腳
架、電腦控制策及其他相關配件之
安裝位置示意圖,請參考(圖2)。
A 安裝:
1. Before installing machine, please
refer to Table Cut-Out Drawing.
To cut the table out in correctly.
2. The table thickness is 50mm.
3.
Please refer to (Fig. 1) and the Remark
1 & 2 for installing the "Directly
Driving Type Mini-Servo Motor "
machine head and table.
4.
Please refer to the Installation Schematic
Drawing (Fig.2) for
installing the
"Directly Driving Type
Mini-Servo
Motor" machine head,
foot stand,
control box and accessories.
Remark :
For security reason, We are warning
all of users that please always
install the grounding wire to avoid
the Static Electricity﹒
A. INSTALLATION :
OPERATION GUIDE
使用說明


-6-
1. 請選用與
PMOBIL#10
同級之潤滑油。
2. 在新機使用前請先注入潤滑油。旋
開頂蓋上的噴油檢視蓋(A),將油
緩緩注入機器中,待油量滿至油標
指示窗(B)上下線之間即可(圖3)。
3. 於每天開機操作時,請先檢查噴油
狀態是否正常,且注意油量是否低
於指示窗之下限,若低於下限請隨
時補充新油。
B 潤滑:
1.
Please use MOBIL #10 or it's equivalent.
2. Before operating the new machine,
to remove Oil Sight Window (A) and
fill the oil slowly until the oil level
reaches between lines H and L of Oil
Sight Gauge (B). (Fib.3)
3. When you begin operating the machine
in everyday, please check whether all
the lubricating systems at normal
condition. If oil level is lower than L
of Oil Sight Gauge, please refill oil.
B. LUBRICATION OIL :

-7-
1. 將放油螺絲(A)鬆開,使油槽內的舊
油完全排出後,再將放油螺絲鎖緊
(圖4)在依C-2的步驟注入新油。
2. 為延長本機的使用壽命,請於開始
使用的一個月內更換第一次新油,
往後約每6個月更換一次。
C 潤滑油之更換:
1. Remove screw (A) and drain all
the oil from the tank. After drain
ing,
tighten screw (a) without fail.
Please
refer to B-2 for replenishing new
oil. (Fig.4)
2. For the long life of machine, please
change lubrication oil completely
after one month of initial operation.
After first time, to change lubrication
oil every six months per time.
本機裝有濾油器,新機使用一個月後
必1更換新品。此後僅需每6個月更換
一次。(圖5)
This machine is equipped with an
Oil Filter, to change the Oil Filter
after one month of initial operation.
After that, please change Oil Filter
every six months.
(Fig.5)
C. OIL CHANGE :
D 濾油器之更換: D. REPLACING OIL FILTER :
-8-
1. 請選用UY128GAS,11番的針或其他
相同規格之針。
2. 旋開鎖針螺絲(A),並取下舊針,將
新針插至針座之最頂端,且使長溝
面向自己。(圖6)
3. 重新將鎖針螺絲鎖緊(A)。
E 針之更換:
1. Please use UY128GAS #11 of
Organ's needle or it's equivalent.
2. Loosen screw (A), then, pull out the
used needles. Insert the new needles
into the holder holes as far as they
can go, and let the long groove of the
needle face you. (Fig.6)
3. Fasten screw (A).
1. 請按照圖中所指示的穿線方式正確
穿線,若穿線方式錯誤,將會引起
斷線、跳針或車縫不平坦等現象。
(圖7)
1. Threading should be made correctly.
Refer to the illustration. (Fig.7)
The wrong threading may cause
thread breaking, skipping stitch
or puckering.
E. HOW TO REPLACE THE NEEDLES :
F 穿線方式: F. THREADING :

-9-
1. 若要求布料推送順暢且縫合完美,
押腳壓力應儘量輕些。
2. 鬆開螺母(A),轉動螺絲(B),調整其
適當壓力後再鎖緊螺母(A)。(圖8)
1. Pressure of Presser Foot should be
as weak as possible, so that cloth
can be sewed and fed smoothly.
2. To increase the pressure of Presser
Foot, to turn Adjusting Screw (B)
clockwise after loosening Lock Nut
(A) and to decrease the pressure
turn Screw (B) counterclockwise. (Fig.8)
G押腳壓力強度之調整: G .
ADJUSTING THE PRESSURE
OF PRESSER FOOT :
-10-
1. 先將針棒升到最高處,此時最長針的
針尖與針板的距離為7.6~7.8mm。
(圖9)
2. 若需要調整時,請先打開機頭前蓋之
止油膠蓋(A),放鬆針棒連桿上的螺
絲(B),上下調整針棒的高度後再固
定之。(圖10)
注意:
(1)針必須完全裝入針鎦孔最頂端。
(2)經過針棒高度調整後,必須確定每一根
針皆通過針板的針孔正中央,不可以偏
斜,且三根針需呈平行。(圖11)
A 針棒高度之調整:
1. Please lift the Needle Bar to the
highest position. During this time, the
standard height between the longest
right needle point and Needle Plate
are 7.6˜7.8 mm. (Fig. 9)
2. If you would like to adjust the height
of Needle Bar, please remove the rubber
plug of front cover and loose the screw
(B) on Needle Bar Rod (A). Adjust
the Needle Bar up or down to require
height and fix the screw. (Fig.10)
Remarks :
(1) Be sure insert the needle into the
Needle Holder as far as it can go﹒
(2) After the Needle Bar adjustment,
please make sure that every needle
are passed though the center of the
needle hole on the Needle Plate﹒
Beside, the three needles must be in
parallel and the gap must be even﹒
(Fig﹒11)
A
. THE HEUGHT OF NEEDLE BAR :
ADJUSTMENT GUIDE
調整說明

-11-
當勾針由右死點往左移至左針左側,
勾針尖與針孔之距離和勾針由左死點
往右回移左針右側時,勾針尖與針
孔之距離(a)均相等,此為最佳之時
位。(圖12、13、14)
註:
左針之針孔至勾針尖的距離約為1∼1﹒2mm
(a)。
B 針與勾針之時位關係:
B.
THE TIMING OF NEEDLE AND LOOPER :
(1-1.2mm)
When the Looper move to left from right
dead point to the left side of left needle,
the distance (a) between the tip of looper
and needle hole is same as the Looper
move to right from the left dead point to
the right side of left needle. This timing is
best one. (Fig. 12,13,14)
Remarks :
The clearance between the needle hole of
left needle and the tip of looper is
1∼1﹒2mm(a)﹒
-12-
1. 當針棒示降至最低點及下勾針退至右
定點時,右針之中心點與下勾針之距
離為2.8~3.0mm。
2. 鬆開勾針座上的螺絲(F),調整下勾
針與右針的正確距離(圖15)。
C 下勾針與針之引量:
1. When the Needle Bar lower to the
lowest position and Looper reverse to
right dead point, the distance between
the center of right needle to the tip of
Looper is 2.8˜3.0mm.
2. Loosen the screw (F) on the Looper
Holder to adjust the correctly distance
of Looper and right needle. (Fig. 15)
C.
THE POSITION OF NEEDLE AND LOOPER :

-13-
勾針由右往左移至右針時,其間隙為
0mm,至中針時為0.1~0.2mm,再往左
移至左針時,其間隙為0.2~0.3mm。
注意:
勾針前後運 之軌跡為正橢圓。
When Looper moves to the left and meet
the right needle, the clearance is 0mm.
When the Looper pass the center needle,
the clearance is 0.1˜0.2mm. When the
Looper move to left needle, the
clearance is 0.2˜0.3mm.
Remark :
The track of Looper pitching motion
is a correct ellipse﹒
D勾針與針之間隙關係: D. THE TIMING OF NEEDLE
AND LOOPER : E 針與後護針片調整: E. ADJUSTING NEEDLE AND
REAR NEEDLE GUARD :
-14-
1. 當後護針片往前移出至停止不動時,
後護針片之(G)線約在右針之針眼中
心位置。
2. 勾針尖端前移至右針中心時,後針
片往前移,與右針間隙為0.05mm,
與左針間隙為0.1~0.2mm。
(圖17、18)
1. When the Needle Guard moves to the
front dead point, the line (G) of Rear
Needle Guard should be at the center
of right needle hole.
2. When the tip of Looper moves to the
center of right needle and the Rear
Needle Guard to the front side, The
clearance between right needle is
0.05mm and between left needle is
0.1˜0.2mm (Fig.17, 18)

-15-
1. 勾針之尖端移到左針中心線時,左
針尖與前護針片之(G)線約1.5mm,
此為前護針片之高度。且左針與前護
針片間隙約為0.3mm。(圖19)
2. 當勾針退到右針中心的位置時,右針
與前護針片之距離亦為0.3mm。
(圖20)
3. 前護針片調整好時,為平行狀態。
1. When the tip of Looper moves to the
center of left needle, the distance of
the tip of left needle pass the line (G)
of Front Needle Guard is about 1.5mm.
This is the height of Front Needle Guard.
The clearance between the Front Needle
Guard and right needle is about 0.3mm.
(Fig.19)
2. When the Looper reverse to center of
right needle, the clearance between
right needle and Front Needle Guard
is 0.3mm. (Fig. 20)
3. When the situation of Front Needle
Guard set in parallel up which meaning
position is correctly.
F 針與前護針片調整: F. ADJUSTING NEEDLE AND
FRONT NEEDLE GUARD :
-16-
1. 當針棒於上定位時,上勾針(A)之底
部高於左針之針尖約1mm,此為上
勾針之高度(圖21)。
2.
當上勾針由右往左邊移時,上勾針之勾
線尖端(a)與左針之間隙為0.3~0.5mm,
當上勾針繼續移至最左時,上勾針之
(a)點與左針中心距離為4.5~5.5mm。
(圖22)
3.
當針棒移至最低點時,上叉導板(2)之線
溝剛好在導片(3)孔之下方。且上叉導
板(2)與上叉(1)之間隙為0.5mm。導線
片(3)與上導板(2)之間隙為1.0mm,且
線孔與線溝必須相對。(圖23)
1. When the tip of Looper moves to the
center of left needle, the distance of
the tip of left needle pass the line (G)
of Front Needle Guard is about 1.5mm.
This is the height of Front Needle Guard.
The clearance between the Front Needle
Guard and right needle is about 0.3mm.
(Fig.19)
2. When the Looper reverse to center of
right needle, the clearance between
right needle and Front Needle Guard
is 0.3mm. (Fig. 20)
3. When the situation of Front Needle
Guard set in parallel up which meaning
position is correctly.
G
針與上勾針及導線片之關係:
G.
THE RELATIVE POSITION OF NEEDLE,
SPREADER AND SPREADER THREAD GUIDE :

-17-
送布齒在最高位置時,送布齒齒尖面
與針板面平行,且此時主送布齒(A)與
差動送布齒(B),高度相同,且齒面高
出針板面1.0~1.2mm。(圖24)
H 送布齒高度調整:
When the Feed Dog rise up to the
highest position, the surface of Feed
Dog and Needle Plate must be in
parallel. Besides, the teeth of Main and
Differential Feed Dog must be aligned.
The standard height of Feed Dog is
about 1.0˜1.2mm from its top teeth to
Needle Plate. (Fig. 24)
H.
ADJUST THE HEIGHT OF FEED DOG :
1. 當針從最高點下降時,左針大約位於
勾針後面之一半的位置時(圖25),勾
針線必須脫離凸輪(P)之最高位置。
2. 須調整凸輪時,放鬆22個螺絲(1)調
整之。
I 勾針控線凸輪之調整:
1. When Needle comes down from the
highest position, and the left Needle
reaches around 1/2 position of the
Looper. (Fig. 25)
The looper thread will come over the
highest position of Thread Cam (P).
2. Loosen the two screws (1) for above
adjustment.
I.
THE ADJUSTMENT OF
LOOPER THREAD TAKE-UP :
-18-
注意:
下切刀組安裝於機器前須先檢查切刀
組之相關位置和滑順度及切線效果。
1. 當活動刀片往右移時,右邊刀口之尖
端(A)與固定刀之前端(B)須對齊。
且活動刀移至最右點時,左邊刀口
和固定刀前端的契合度為1.0mm。
調整時可放鬆螺絲(C)移動固定片。
(圖26)
2. 夾線片(D)之邊沿須與活動刀右邊刀
口內沿切齊,如(E)。可由螺絲(C)調
整。壓力片(F)前端與固定刀前端之
距離約為1mm,調整時,可放鬆螺
絲(G)移動壓力片(F)。(圖27)
A 下切刀組相關位置調整:
Remark :
Before you install the new Trimmer set into
machine, Please always to check the relative
position, the situation of sliding and the
trimming effect﹒
1. When Lower Moving Knife move to the right,
the Moving Knife hook (A) of right hand side
one align with the tip (B) of Fixing Knife. When
the Lower Moving Knife move to the right dead
point, The Moving Knife hook of left hand side
one pass the tip of Fixing Knife in 1.0mm. Loosen
the screw (C) for adjusting the position of Fixing
Knife. (Fig.26)
2. The edge of Clamp Spring (D) align with the
inside edge of Moving Knife of right hand side
hook (E). Please loosen the screw (C) to adjust
the position of Clamp Spring and Fixing Knife.
The distance between the top of Clamp Spring
Pressure and top of Fixing Knife is about 1mm.
Please loosen the screw (G) to adjust the position
of Clamp Spring Pressure. (Fig.27)
A
. THE RELATIVE POSITION ADJUSTMENT OF
BOTTOM TRIMMER CUTTING PARTS.
自動切線調整說明
AUTO THREAD TRIMMER ADJUSTMENT GUIDE :

-19-
3. 夾線彈簧片的壓力調整:
當下勾針線被切斷後,下勾針這端之
線頭須被夾線彈簧片與活動刀片穩定
夾住。調節夾線彈簧之壓力,可由螺
絲(H)旋轉調整。(順時鐘方向壓力愈
強,反時鐘方向壓力變弱)。(圖28)
注意:
夾線彈簧片之壓力調整須適中,壓力太強會
減短活 刀片之壽命,壓力太弱則下勾針線頭
易脫落。壓力之強度以能輕易切斷線即可。
3. When the looper thread has been cut
off, the Clamp Spring and Moving Knife
will clip the thread in stable. To increase
the pressure of clipping thread turn the
screw (H) clockwise and decrease the
pressure turn the screw (H) counter-
clockwise. (Fig. 28)
Remark :
The pressure of Clamp Spring must be moderate﹒
If the pressure has been adjusted into too
strong, it will decrease the life of Moving
Knife﹒ If the pressure has been adjusted
into too weak, the looper thread will easy
to lose from the Clamp Spring﹒ What is moderate
pressure? It is meaning that the pressure
to
cut the thread easily﹒
-20-
1. 下切刀組之前後位置—
當下切刀組由右定點移出至下勾針右
側 時 (第一段動作)活動片之刀尖
(
A
)
,約位於下勾針寬度中心,前、
後1/2位置。(圖29)
調整時可放鬆搖臂之偏心輪
(
B
)
上之
螺絲
(
C
)
,再轉動偏心輪,使活 動 刀
片移到正確位置。
偏心輪上之記號
(
D
)
正常時,大約處
於3點鐘方向位置。(圖30)
注:
當要調整偏心輪(B)改變切刀角度位置時,必
須先放鬆下切刀托架導引片(E)上之螺絲
(F),等調整好切刀組角度後再將導引片
(E)輕輕靠在下切刀托架,鎖緊螺(F)。
(圖30)
B 下切刀組、切線之相關位置:
1. The Front and Rear position of
Bottom Trimmer
-
When the trimmer moves out from right
dead
point to the right hand side of looper, (1st
action) the tip of Moving Knife (A) aim to
the center of looper ridge. (Fig. 29)
Please loose the screw (C) of Knife
Guide
Lever Eccentric Ring (B) and turn the Eccentric
Ring for regulating the Moving Knife into
right position.
Please set up the mark (D) of Eccentric
Ring
to 3 o'clock position in ordinary. (Fig.30)
Remark :
When you would like to adjust the Eccentric
Ring for changing the angle of under trimmer,
please loose the screw (F) of Lower Knife Carrier
Guide﹒ (E) Please let the Lower Knife Carrier
Guide (E) touch Lower Knife Carrier in gently
and lock the screw (F) down after the angle of
trimmer have been adjusted﹒ (Fig﹒ 30)
B.
THE RELATIVE POSITION ADJUSTMENT
OF BOTTOM TRIMMER.

-21-
2. 下切刀組之左右位置—
當下切刀組之活動刀片(A)往左移至左
定點時,活動刀(A)之刀尖,須超出下
勾針
(
B
)
之左邊穿線孔約1mm。(圖31)
調整時,可放鬆連結滑塊(C)上的螺絲
(D),再用螺絲刀旋轉螺絲(E),微調
活動刀片左右位置至正確點後,再鎖
緊螺絲(D)。(圖32)
注意:
1﹒ 下切刀組完成調整時,須再次用手動移出活
動刀片,確認相關位置是否正確、順暢。
2﹒ 當必須調整下切刀組相關位置時,須確認
針棒是否處於上定點,下勾針位於左定點
(此為切線點)。
2. The Right and left position of
Bottom Trimmer
-
When the Moving Knife move to the left dead
point, the tip of Moving Knife has passed 1mm
over than the threading hole of looper. (Fig. 31)
When you would like to adjust the right & left
position of Moving Knife. First, please loose the
screw (D) of Connecting Block (C), to turn the
screw (E) by screwdriver for micro adjusting the
correct right & left position of Moving Knife.,
then to locked the screw (D) down. (Fig.32)
Remark :
(1)
When you finish adjusted, please be moved
the Bottom Trimmer by hand to confirm the
relative position correctly & smoothly﹒
(2)When you adjust the relative position of
Bottom Trimmer, please always confirm the
needle bar in the top dead point & the looper
in the left dead point which are the timing
of cutting thread﹒
-22-
1. 當活動刀片
(
A
)
往左邊移時,必須通過針
線之線環
(
B
)
。(圖33-1)
2. 當活動刀片往左移至左定點時,下勾針
線(C)須滑入活動刀片(A)之左邊刀口(D)
內。(圖33-2)
3. 活動刀片往右回移時,活動刀片右刀口
須勾住針線,左刀口勾住下勾針線,一
起往右拉回。(圖33-3)
4. 針線及下勾針線由活動刀片拉回與固定
刀切斷,針線切斷後自然脫落,下勾針
線靠下勾針一端線頭須穩穩夾住於切刀。
(圖33-4)
C
下切刀組與針線及下勾針線之關係:
1. When the Moving Knife (A) move to the left
which must be passed the loop (B) of needle
thread. (Fig 33-1)
2.
When the Moving Knife move to the left dead
point which looper thread must be dropped
into the left hook (D) of Moving Knife (A).
(Fig.33-2)
3.
When the Moving Knife move to the right, the right
hook of Moving Knife must hooks the
needle
thread and left hook must hooks the looper thread
to pull into right side in same
time. (Fig.33-3)
4.
The needle & looper thread are pulled back
by
Moving Knife and be cut by Fixing Knife.
The
needle thread must be cut in efficiently and looper
thread has clipped by Bottom Trimmer in
stably. (Fig.33-4)
C.
THE RELATIVE POSITION OF NEEDLE,
LOOPER THREAD AND BOTTOM TRIMMER.

-23-
D
上切刀組與上飾線、針及勾針之關係:
1.
The height adjustment of Top Trimmer
-
When the Top Trimmer Moving Knife move to
the lowest point, the tip (C) of Moving Knife
align with top of Spreader (B). (Fig.34)
To loose the two screws (E) of Top Trimmer
(D) then, to adjust up and down for top trimmer
position. (Fig.35)
2. The pressure adjustment of Top Trimmer
-
The pressure of Top Trimmer Moving & Fixing
Knife which be adjusted via micro turn the screw
(F) to get the suitable pressure. (Fig.35)
D.
THE RELATIVE POSITION OF SPREADER THREAD,
NEEDLE, SPREADER AND TOP TRIMMER.
注:
安裝調整上切刀組前,必須先確認針棒是否
停於上定點,且上勾針之相關位置必須處於
正常狀態下。
1. 下切刀組高度調整:
當活動刀片(A)移至最低點時活動刀之刀
尖與上勾針(B)之上沿須切齊等高(C)。
(圖34)調整時放鬆上切刀組(D)上之兩個
螺絲(E),再上下移動上切刀組之位置。
(圖25)
2. 上切刀組之刀片壓力調整:
上切刀組之活動刀與固定刀壓力可由螺
絲(F)旋轉微調至適當壓力。(圖35)
-24-
3. 上切刀組角度之調整:
注:
調整上切刀組角度前,須先調好上切刀組之
高度。
當活動刀片(A)往下移至下定點時,活動刀
片(
A
)須位於針及上勾針(
B
)之間隙中央,特
別注意不可和針磨擦碰撞(圖36)。且活動
刀片(A)往下移時,刀片前端斜面須和上飾
線有磨擦接觸情形(C)(圖37),當活動刀片
往上收刀時,上飾線才能順利滑入刀槽內。
調整上述關係位置時,可放鬆上切刀組(D)
之固定座上螺絲(
E
)、(
F
)、(
G
)調整。(圖
38
)
三個螺絲放鬆順序為(E)→(F)→(G);鎖緊
時則反向順序為(G)→(F)→(E)。
3. The angle adjustment of Top Trimmer
-
Remark :
Before to adjust the angle of Top Trimmer, please
make sure the height of Top Trimmer is correctly﹒
When the Top Trimmer Moving Knife (A) move to
the lowest point, the Moving Knife (A) must be
located in the center of needle and spreader (B)﹒
We would like to special mention that the Moving
Knife don't touch and collide the needle﹒ (Fig﹒36)
When the Moving Knife moves down, the top bevel of
Moving Knife must be touch the spreader thread (C)
(Fig﹒37) which will cause the spreader thread drop
into the hook of Top Trimmer Moving Knife﹒
To adjust the above relative position, please loose
three screws (E), (F), (G) of Top Trimmer Fixed
Block for adjusting﹒ (Fig﹒38)
To loose the three screws step is (E)-(F)-(G)
and lock down step is (G)-(F)-(E)﹒

-25-
1. 撥線器(A)之高度—
當撥線片(B)往下擺動至呈水平狀態
時,撥線片底部與左針之針尖正好
切齊,此為撥線器之高度。(圖39)
2. 撥線片(B)之前後位置—
當撥線片(B)通過押腳時,撥線片與
押腳前沿之間隙為1mm。(圖39)
3. 撥線片(B)之左右位置—
當撥線片(B)移到左定點時,撥線片
之勾線尖端與左針之距離約為3.5mm。
(圖40)
注:
調整時,可放鬆兩個螺絲(C),調整撥線器
(A)之相關位置。(圖41)
E撥線器相關位置調整:
1. The height of Top Wiper (A)
-
When the Wiper (B) swings to the bottom
in level, the bottom of Wiper align with
the tip of left needle which is the height
of Top Wiper. (Fig.39)
2.
The front & rear position of Wiper (B)
-
When the Wiper (B) passed the Presser
Foot, the clearance between the Wiper and
Presser Foot is 1mm. (Fig.39)
3.
The right & left position of Wiper (B)
-
When the Wiper (B) swings to the left dead
point, the clearance between the hook tip
of Wiper and left needle is 3.5mm. (Fig.40)
Remarks :
To loose the two screws (C) for adjusting
the relative position of Top Wiper (A)﹒
(Fig﹒41)
E.
THE RELATIVE POSITION OF TOP WIPER.
-26-
1. 機器外表須經常保持乾淨避免棉屑阻
塞過線孔及夾線片,造成線跡不順。
2. 針板下方之送布牙架結構(A)縫隙之
清潔最為重要,須經常清除乾淨。
如有積油而造成滲油情況,就是棉屑
累積太多或吸油管阻塞造成的。故須
定期清除送布牙架(A)裡面及更換回
油管之吸油海棉(B)、(C)。(圖42)
A 清潔保養:
1.
Please always clean the machine appearance
to avoid the cotton waste obstructs the threading
hole and thread clamp which to cause the stitch
unstable.
2.
It's very import to always clean the crack (A)
of feed dog system which under the needle
plate. If the cotton waste accumulate too many
in cylinder or block the suck oil tube for which
will cause the oil leaking. Please always clean
the Feed-Dog System and change the felt of
suck oil tube (B), (C) in regularly. (Fig.42)
A. THE CLEAR AND MAINTENANCE.
簡易故障排除 REGULAR MAINTENANCE :
FW787
Fig.42

-27- -28-
狀況1 :跳針、斷線—
排除:
A 是否使用錯誤型號之機針。
B 使用機針是否已彎曲,毛邊或未裝至定位
或未裝正。
C 車縫線是否存放過久或線本身粗細不均,
接頭太多或有漏穿線情形。
D 注意針線及底線(下勾針線)之控線沙拉組
是否太緊或太鬆。
E 底線(下勾針線)之控線凸輪時位關係,檢查
是否已走位。(此項須由技術人員檢查調整)
F 檢查前後護針片之相關位置是否正確。
(此項須由技術人員檢查調整)
G 下勾針尖是否已毛邊磨損,或下勾針與針
之時位關係已被調整走位。(此項須由技
術人員檢查調整)
狀況2 :車縫不順產生布料波浪或斜紋
狀況—
排除:
A 針對布料性質調整前牙差動比率:
波浪情形—前牙差動調大;
斜紋情形—前牙差動調小。
B 注意押腳壓力須適中,且不能與針板面有
間隙。
B 故障(用戶)自主檢查:
Status 1 : Skipped Stitch, Broken Thread-
Solution :
(a) Do you use a wrong model needle?
(b) Does the needle bent? Does the tip of needle
cracked? Or, the needle doesn't be installed in
correctly position.
(c) Does the thread keep in stock too long? Does
the thread's thickness uneven? Does the thread
too many connecters? Or, there is lose
threading some threading eyelet.
(d) Please check the tension of needle & looper
thread have been adjusted too loosen or too tight
by Thread Tension Adjuster.
(e) The looper thread take-up is out of timing.
(Please ask the machinist to check and adjust it.)
(f) Please check the relative position of Front &
Rear Needle Guard are correctly. ( Please ask
the machinist to check and adjust it.)
(g) Please check the tip of looper have cracked or
wore. The timing of looper and needle is out of
order. ( Please ask the machinist to checkand
adjust it.)
Status 2 :
The Unstable Sewing engender Puckering
and the folding parts didn't be seamed
in even -
Solution :
(a) To refer the nature of fabric for adjusting the
differential feed-dog. Differential Rate :
Puckering
-
To adjust the differential feed-dog
ratio in large.
The folding parts didn't be seamed in even-To
adjust the differential feed-dog ratioin small.
(b)
The pressure of presser foot must be moderately.
Please take care that the needle plate between
presser foot didn't have any gap.
B. ERROR MESSAGES
(THE USER INSPECTS
THE MACHINE BY THEMSELVES)

-29-
C 送布牙須視車縫布料之厚薄、伸縮性質,
調整適當高度。
D 車縫人員控制衣物之手勢、力道,須視布
料性質不同做配合。
狀況3 :機器產生異音情形—
排除:
A 檢查機頭與桌板之固定螺絲、墊片、防振
塑膠等之安裝方式是否未依安裝說明安裝,
而產生桌板共振之異音。(以直驅式小馬達
機器為主)
B 檢查機器前蓋、面蓋螺絲是否有鬆脫或有
因拆裝後未密合即再鎖緊,而產生的異音。
C 檢查油量是否太少,造成機器潤滑不夠、
發燙產生之異音。
狀況4 :不噴油或不吸油情形—
排除:
A 檢查噴油管及吸油管是否有破裂或接頭未
鎖緊而有漏氣情形。
B 送布牙架下方之吸油管及針棒內側之吸油
管、如有積油情形時須檢查是否因棉屑累
積太多未清除造成吸油管阻塞。
(c)
The height of feed-dog must be refer to the nature
of fabric for adjusting a reasonable height.
(d)
The operator is according to the nature of fabric
for adjusting the holding way of sewing and the
tension of fabric be seamed.
Status 3 : The machine noise in operation-
Solution :
(a) Please always follow the installation to fix the
machine head and table. The wrong installation
will engender the noise which come from the
machine head and table resonance.
( Main item : D.D. Type Mini ServoMotor)
(b) Please check the front cover and screws. If the
noise come from the loosen screw or front cover,
please screw and fix them again.
(c)
Please check the lubrication oil is enough or not?
If the lubrication oil isn't enough which will to
cause the machine noise and heat.
Status 4 : The lubrication system don't spout out
the oil or inhale the oil back-
Solution :
(a) Please check the oil tube have broken or not?
Does the connector be locked well? If the oil tube
had broken, please change it. If the connector
didn't lock well, please lock it well.
(b)
If there are a lot of oil in the bottom of cylinder-
bed or the bottom of needle bar, please check
these two places have accumulated a lot of cotton
waste to block the Inhale Oil Tube or not?
"Please always clear the cotton waste at least
two times per week."
-30-
(c) Please check the Inhale Oil Tube have connect
with Inhale Felt in correctly place.
Status 5 : The "Bottom Trimmer" can't cut the
needle & looper thread out -
Solution :
(a) The point of trimming is incorrect. The needle
bar didn't stop at top dead point when the
machine stop.
(b) The moving knife of bottom trimmer move to
the left dead point which the moving stroke
isn't enough.
(c) In 1st motion of Bottom Thread Trimmer, the
tip of moving knife which position is correctly
or not?
(d)Is the pressure of clamp spring too weak?
(e) Please check the moving & fixing knife have
abraded or relative position is out of order.
(f) As the voltage drop, to cause the power of
solenoid for trimmer is going to weak.
(g)There is too much cotton waste to accumulate
under the needle platewhich impede the moving
knife didn't enter the thread hole inprecisely.
Status 6 : The "Top Trimmer" can't cut the
spreader thread out-
Solution :
(a) Please follow the installation manual of top
trimmer to check all of top trimmer relative
position is correctly or not?
(b)
Please check the pressure of top trimmer clamp
spring is too weak or not?
(c) Please check the relative position & stroke of
spreader is correctly or not?
C 檢查吸油管與吸油海棉是否正常接觸。
狀況5 :機器產生異音情形—
排除:
A 切線點不對,機器停的時候針棒是否未停
在上死點。
B 下切刀之活動刀片,前進至左定點時,行
程是否不夠。
C 下切刀組向左前方移出時(第一段動作)刀
尖之前後位置是否不正確。
D 刀片彈簧壓力是否調得太弱。
E 檢查活動刀,固定刀是否有磨損或相關位
置有異位。
F 電壓過低造成傳動之電磁閥力道變弱。
G 針板下方棉屑是否積存太多而影響活動刀
無法準確進入線圈。
狀況6 :上飾線(網線)切大斷情形—
排除:
A 依照上切刀之調整說明,檢查活動刀片剪
線之相關位置是否正確。
B 檢查上切刀上之彈簧壓力是否太弱。
C 檢查上勾針之相關位置及行程是否正確。

-31-
Status 7 :
The thread wiper can't take the needle
thread up -
Solution :
(a)
Please double confirm the bottom trimmer have
always cut the needlethread. If the needle thread
didn't be cut out, the wiper is impossible to take
the needle thread up.(*)
(b) Please check the position of thread wiper have
followed the installation manual to set up in
correctly.
(c) Please check the return elasticity of top wiper
is too weak, or the wiper didn't move smoothly.
Remark :
If the needle thread didn't be cut by trimmer which will
cause the "Top Wiper" can't take the needle thread up. Please
use the thread clipper to cut the needle thread which didn't
be cut by under trimmer. To let the "Top Wiper" return
backto the initial place which to avoid the hook of wiper
crash theneedle.
Status 8 :
To step on the pedal in the front which
the machine didn't operate -
Solution :
(a)
Please check the green light on the Under Trimmer
Position Security Switch is be switched on or off.
(The green light locate at back side of machine
head) If the green light is be switch off which
meaning is that under thread trimmer didn't return
back the position, the Security Switch have broken
the electric power in automatic which to avoid
the Looper crash the under thread trimmer.
(b)
Please check the error code which be showed on
the screen of control box. then, to follow
instruction manual for solving the problem.
狀況7 :撥線器無法將針線頭撥起時—
排除:
A 先試縫確認每次切線時,針線是否每次都
有被下切刀完全切斷;因針線未被下切刀
切斷時,撥線器則無法順利將線頭撥離針
板面。
B 檢查撥線器,安裝之位置是否有依前述說
明正確安裝。
C 檢查撥線器,回歸時彈力是否異常太弱,
有活動不良的情形。
註:
如是針線未被切斷導致撥線器無法將線頭拉出而卡
在針下方時,必須先用剪刀剪斷針線,使撥線器之
撥線勾針能回歸原點,否則會造成針與撥線勾針相
互碰撞的情形。
狀況8 :前踩踏板、機器不能運轉時—
排除:
A 檢查保護下切刀組回歸定位之安全開關小
綠燈是否亮著(位於機頭後方,安全開關
上)。如未亮則表示下切刀組未回歸定位,安
全開關自動斷電以保護下切刀不被碰撞。
B 檢查電腦控制箱顯示之代號,再對照馬達
說明書之故障代號說明,排除問題。
-32-
(c) Please check the plug of junction line which
between the servo motor and control box. Have
the plug been plugged in well? Or, the plug has
plugged too loose which to cause the bad
connection.
Status 9 : To step on the pedal in rear which
the Thread Trimmer System and
Pressure Foot Lifter didn't operate -
Solution :
(a)
Please check the terminal of Top, Bottom Thread
Trimmer and Pressure Foot Lifter junction line
for which locate at backside of machine head.
If the terminal didn't connect well, the signal is
going to bad transmission to cause these moving
parts didn't operate.
(b) Please use your hand to push the Under Thread
Trimmer System and Thread Pull-Off Mechanism.
Then, Please check these mechanisms move
smoothly or not?
(c) Please check the error code which be showed
on the screen of control box. then, to follow
instruction manual for solving the problem.
Dear Users,
We hope this "Instruction & Maintenance Book"
could offer you more information about our
"Shing Ray" products and help you to solve these
unusual conditions of our machine.
If you have any further requested and some
problems about the maintenance, we are warmly
welcome you to contact with our distributor and
sloe agency in your country. All of them are
willing to service you. Finally, we are sincerely to
thanks all of yours continuing supports.
C 檢查機頭馬達與電腦控制箱之中繼線、插
頭是否有鬆脫或未插緊,而造成接觸不良
的情形。
狀況9 :後踩踏板時,切刀組及自動
抬押腳全無動作之情形—
排除:
A 檢查機頭後方之連接端子上電線是否脫落,
造成各活動部位(下切刀、上切刀、抬押腳)
未接收到訊號,而無法動作。
B 用手動方式檢查切刀機構及鬆線機構是否
順暢無卡死情形。
C 檢查電腦控制箱上顯示之代號,對照說明
書上顯示之代號,對照說明書上之異常狀
況為何。
這本「操作說明書」希望能使您更了解星銳
公司的產品,也能助您排除一些異常狀況;
如有任何無法解決或維修上的問題,非常歡
迎您與我們各地區之經銷、代理商連絡,他
們都非常樂意為您服務,謝謝大家的愛護與
支持。
C 致 敬愛的用戶們: C. CONCLUSION :
This manual suits for next models
1
Table of contents
