SHINP A-500RGB User manual

LaserShowSystem
- 1 -
1. General instructions
Thank you for purchasing this product. Please read user guide for safety and operations information before using the
product for better use and safety operation. Keep this manual for future reference. This product can create perfect laser
programs and effects since it has passed a series of strictly tests before delivery.
Please handle with care after receiving the unit and check the attachments listed on the page after opening the carton. In
the event of carton damage or attachment missing in transit, please contact your dealer or our after sales service
department.
Attachments:
1. Laser Light 1PCS 2. Power Cable 1PCS 3. User Guide 1PCS
2. Notice:
1. Do not exposure the human eye direct to laser beam.
2. Do not turn on and off the unit frequently.
3. Before using this unit makes sure the power supply is ground.
4. This unit is intended for indoor use only and should be prevented form water, moisture and shake. The working
temperature of this unit is 18~30, do not use this continuously over 4 hours, otherwise it shortens the lifetime of the
unit.
5. Use cleaning tissue to remove the dust absorbed on the external lenses periodically to optimize light output.
6. Do not remove or break the warranty label, otherwise it void the warranty.
7. Always replace with the exact same type fuse, replacement with anything other than the specified fuse can cause fire
or electric shock and damage your unit, and will void your manufactures warranty.
This product installation operation and maintenance should be by professional.
Warning!Do not exposure the human eye direct to laser beam.
3. Installation
1. Before installation, please make sure power voltage is proper as the one marked on the unit.
2. This product should be installed by professional to make sure it is fixed safely and have adjusted suitable shining
angel.
3. When installing this unit, please make sure there is nothing flammable or explosive 0.5 meter near the unit. Make
sure there is 15 mm distance between the unit and the wall. Please make sure to use safety rope which can support
tenfold weight of the unit to assist fitting.
LaserShowSystem
- 2 -
exposure to dir ect or scattered radiation.
Visible or invisi ble radiation,avoid eye or skin,
2
3
4
1
POWER
MUSIC
MICRO
4. Front Panel
1. Laser Aperture 2. Sound Active Microphone
3. Sound Active Indicator 4. Power Indicator
Rear Panel
PATTERN SIZE
MIN MAX
ILDA INTERFACE
SERIAL No.
FUNCTI0N SETTING
MAX
MIN
OUT
IN DMX
100V-240V/AC/2A 50-60Hz
1
0
9
8
7
6
5
4
3
2
1
0N
OFF
POWER SWITCH
1 Address Code On/ Off 2 DMX Connector 3 Sound Active Knob
4 Pattern Knob 5 ILDA Connector 6 Fan
7 ILDA Connector 8 Switch 9 Power supply
10 Fuse
5. Function Setting
Dipswitches #10 are use to set 4 working modes as Sound active, Automatic, Slave/Master and DMX mode.
DMX MODE have DMX control channel address for setting, Namely DMX Address, see the function setting chart.
When dipswitch 10# selected ON, Function of #1~#9 as below: 0=OFF 1=ON
DIPSWITCH CHART
FUNCTION
#1 #2 #3 #4 #5 #6 #7 #8 #9 #10
0 0 0 0 0 0 0 0 0 0 SOUND ACTIVE
1 0 0 0 0 0 0 0 0 0 AUTO
1 0 0 0 0 0 0 0 0 1 DMX MODE

LaserShowSystem
- 3 -
6. Stand-Alone Operation (Sound Active, AUTO mode)
1. Set dipswitch to select Sound Active or AUTO mode.
2. The unit will react to the low frequencies of music via the internal microphone. Adjust the audio sensitivity knob on
the back of the unit to make the unit more or less sensitive in sound active.
7. Master-Slave Operation
1. Choose a unit to function as Master mode, set dipswitch to select Sound Active or AUTO mode. The others must be
set to Slave mode, set dipswitch to select Slave mode.
2. Use standard XLR microphone cable chain your units together via the XLR connector on the rear of the units. For
longer cable runs we suggest a terminator at the last fixture.
3. Turn on the all units' power, the units begins reset, and then the unit begins working. The slave units will action the
same as the master unit.
Master/Slave mode no need DMX controlled, There should be only one master unit in Master-Slave operation. For
working time of slave and the master unit should at the same time, we suggest Master and Slave unit run from one power
switch.
8. Master-Slave Connection
120
PIN2
PIN3
MASTER SLAVE SLAVE
PATTERNSI ZE
MIN MAX
ILDA INTERFACE
SERIALNo.
FUNCTI0NSETTING
MAX
MIN
OUT
IN DMX
100V-240V/AC/2A 50-60Hz
1
0
9
8
7
6
5
4
3
2
1
0N
OFF
POWERSWITCH
PATTERNSI ZE
MIN MAX
ILDA INTERFA CE
SERIALNo.
FUNCTI0NSETTING
MAX
MIN
OUT
IN DMX
100V-240V/AC/2A 50-60Hz
1
0
9
8
7
6
5
4
3
2
1
0N
OFF
POWERSW ITCH
PATTERNSI ZE
MIN MAX
ILDA INTERFACE
SERIALNo.
FUNCTI0NSETTING
MAX
MIN
OUT
IN DMX
100V-240V/AC/2A 50-60Hz
1
0
9
8
7
6
5
4
3
2
1
0N
OFF
POWERSWITCH
9. DMX Control Connection
The System only accepts the DMX512 signal of international standard to control the system mode, the laser beam
ON/OFF, running direction, running speed and twinkle speed etc.
DMX SIGNAL
120
PIN2
PIN3
PATTERN SIZE
MIN MAX
ILDA INTERFACE
SERIAL No.
FUNCTI0NSETTING
MAX
MIN
OUT
IN DMX
100V-240V/AC/2 A 50-60Hz
1
0
9
8
7
6
5
4
3
2
1
0N
OFF
POWER SWITC H
PATTERN SIZE
MIN MAX
ILDA INTERFACE
SERIAL No.
FUNCTI0N SETTING
MAX
MIN
OUT
IN DMX
100V-240V/AC/2A50-60Hz
1
0
9
8
7
6
5
4
3
2
1
0N
OFF
POWER SWITCH
PATTERN SIZE
MIN MAX
ILDA INTERFACE
SERIALNo .
FUNCTI0NSETTING
MAX
MIN
OUT
IN DMX
100V-240V/AC/ 2A 50-60Hz
1
0
9
8
7
6
5
4
3
2
1
0N
OFF
POWERSWITCH
LaserShowSystem
- 4 -
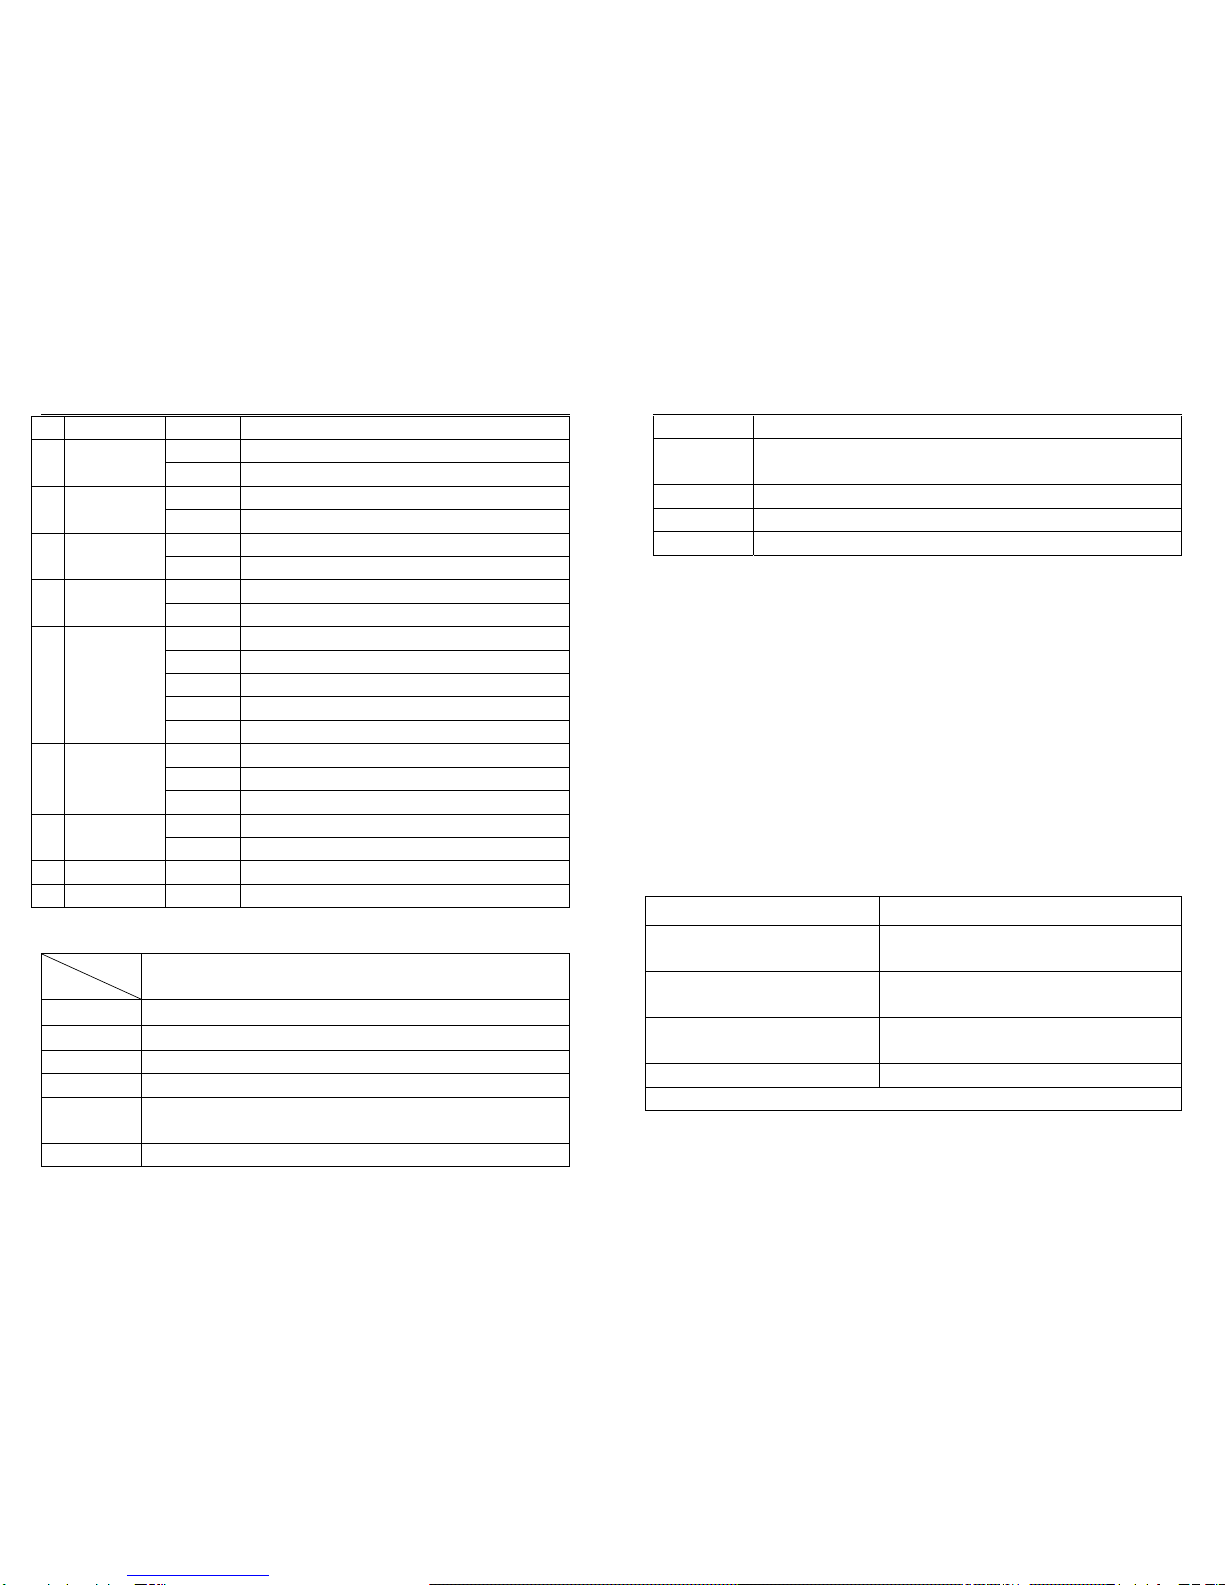
10. DMX Control Setting
Channel 512 Value Description
1 Mode
0-31 Off
32-63 Auto mode (music active)
64-95 Auto mode (music active)
96-159 DMX (auto active Motor turn “R” )
160-223 DMX (auto active Motor turn “L”)
224-255 DMX (auto active motor STOP)
2
Color Selection
0-20 Original color
21-41 Red
42-62 Green
63-83 Blue
84-104 White
105-125 Yellow
126-146 Purple
Color Selection
147-167 Cyan
168-188 Stochastic Color
189-209 Stochastic single Color
210-230 Stream color change
231-251 Dot effect
252-255 Off
3 Gobo Selection 0~255 32 gobos(0~255)/8=0~31
4 Gobo Team Selection 0-255 8 gobo teams(0~255)/64=0~3
5 Horizontal Rotation
0-138 Stationary Pan(0~360 degree)
139-202 Pan clockwise rotation speed (8 grade)
203-255 Pan anti-clockwise rotation speed(8 grade)
6 Vertical Rotation
0-138 Stationary Pan(0~360 degree)
139-202 Pan clockwise rotation speed (8 grade)
203-255 Tilt clockwise rotation speed(8 grade)
7 Centre Rotation
0-138 Stationary centre rotate angie(0~360 degree)
139-202 Centre clockwise rotation speed (8 grade)
LaserShowSystem
- 5 -
11. Technical Parameter
Item
Spec
A-500RGB
Laser Light Red; Green; Blue;
Laser Power Red: 120mW /638nm; Green100mW:Blue300mW
Dimension 312*257*110mm
Net Weight 3.0kg
Scan System
High speed XY Scanner Module (scan spee15kpps; scan angle±30°; input signal ±5v; linearity
distortion<2%)
System Port DMX512 input and output port, ILDA DB standard port
203-255 Centre anti-clockwise rotation speed(8 grade)
8 Horizontal move
0-142 Stationary horizontal move
143-255 Horizontal move speed(8 grade)
9 Vertical Rotation
0-142 Stationary Vertical move
143-255 Vertical move speed(8 grade)
10 Horizontal Elongate
0-142 Stationary Horizontal elongate
143-255 Horizontal elongate speed (8 grade)
11 Vertical Elongate
0-142 Stationary Vertical elongate
143-255 Vertical elongate speed (8 grade)
12 Gobo Zoom
0 Original size
1-127 Gobo size from small to big(127 grade)
128-169 Gobo dynamic zoom from small to big (41 grade)
170-211 Gobo zoom from big to small (41 grade)
212-255 Gobo dynamic cycle zoom(41 grade)
13
Gradual Drawing
MODE
0-15 Without gradual drawing mode
16-175 Color gradual change (8 grade)
176-255 Gradual drawing speed (8 grade)
14 Scanning Speed
0 Default scanning speed(value:10)
1-255 252 grade scanning speed(0~255)
15 Color Speed 0~255 256 class(slow to fast)
16 Flash Speed 0~255 9 grade flashing speed(0~255)/31=(0~8) grade without flash
LaserShowSystem
- 6 -
Control Mode Sound Active, Automatic, DMX512(16 channels), Master/Slave, PC Control
Demo Effect
Blanking, rotating, zoom, retro flexion, moving, strobe, 3D etc, used for words, Cartoon, and beam show
and laser advertisement.
Work Environment 10-35°C Indoor
Power Supply AC100/240V 50-60Hz 100W
Work Place Disco, KTV, Bars, Clubs, Family party, Opera House Advertisement etc.
12. Troubleshooting
1. In Stand-Alone operation, if the power supply indicator is light up and sound active indicator isn't light up, but the
laser is shut off doesn't work, Please check if unit has been set up in slave mode, then set up in master mode.
2. In Master-Slave operation, slave unit don't function, please check as below.
A. Make sure to there's only one master in the chain, and the others are set in slave mode.
B. Make sure to control the unit without DMX console controlling.
C. Make sure to take a good quality power cable and connection.
3. In DMX mode operation, the laser is OFF and the DMX signal indicator is unlighted, please check as below
Make sure to set up the DMX mode, make sure to have a good connection.
4. In DMX operation, the unit can’t be controlled by the DMX console, but the DMX signal indicator is flashing, please
make sure the DMX console and unit have the same channel.
5. If the unit is fail, please turn off the unit, and then turn on again after 5 minutes.
● After trying the above solution you still have a problem, please contact your dealer or our company for service.
Trouble manifestation Trouble shooting
If the power supply indicator doesn’t light up and laser
doesn’t work
Please check the power supply and the input voltage
If the sound active indicator isn’t light up with music
active Please increase the music volume or audio sensitivity with sensitivity knob
In Automatic mode operation, if power supply indicator
is light up, but laser light is not light up
Please check if any trouble with laser machinery
If the laser beam is at rest in working mode Product problem
After trying the above solution you still have a problem, please contact your dealer or our company for service
Table of contents
Popular Dj Equipment manuals by other brands


Akai
Akai MPC 2500 quick start guide

Yamaha
Yamaha EM2820 Operation manual

Native Instruments
Native Instruments TRAKTOR KONTROL S4 Calibration guide

EuroLite
EuroLite LED BAR-27 RGB 27x1W instructions

Chauvet Professional
Chauvet Professional Maverick Storm 1 Wash user manual

Beamz Pro
Beamz Pro BWA532 user manual


