Shintaro Blazer User manual
USB 3.0 Single/Dual
Display Docking Station
User's Manual

Table of contents
Safety instructions ...........................................................1
Copyright...........................................................................1
Trademarks .......................................................................1
Introduction.......................................................................2
Features.............................................................................2
Package contents.............................................................2
System requirements.......................................................3
Product overview................................................ ..............4
-
Front
.................................................................................
.4
-
Rear...................................................................................5
Connection..........................................................................6
- Dual display docking station
..............................................6
- Single display docking station
...........................................7
Installation ........................................................................ 8
- For Windows®7/ Windows®8 user
..................................8
- For Windows®Vista user
.................................................11
- For Windows®XP user
....................................................13
Verifying the driver……………………………………. ….. 14
Display configuration....................................................... 15
- Utility settings
.....................................................................15
- Multi-monitor configuration
.................................................18
Audio configuration ......................................................... 23
Uninstall the driver........................................................... 24
- For Windows®7/ Windows®8 user
…..............................25
- For Windows Vista® user
...................................................26
- For Windows XP® user
......................................................27
Specification........................................................................28
Regulatory compliance..................................................... 29
- FCC
conditions................................................................... 29
- CE
..................................................................................... 29
- WEEE information
.............................................................. 29

Before attempting to connect, operate or adjust this product, please save and read the
User's Manual completely. The style of the
product shown in this User's Manual may be different from the actual unit due to various
models.
Safety instructions
Always read the safety instructions carefully:
■ Keep this User’s Manual for future reference
■ Keep this equipment away from humidity
■ If any of the following situation arises, get the equipment checked by a service
technician:
•The equipment has been exposed to moisture.
•The equipment has been dropped and damaged.
•The equipment has obvious sign of breakage.
•The equipment has not been working well or cannot get it to work according to the
User’s Manual.
Copyright
This document contains proprietary information protected by copyright. All right are
reserved. No part of this manual may be reproduced by any mechanical, electronic or
other means, in any form, without prior written permission of the manufacturer.
Trademarks
All trademarks and registered trademarks are the property of their respective owners or
companies.
1

Introduction
The Shintaro Blazer Docking Station is a unique design for a computer that has extra
connectivity
demands.
Through the docking station, you can extend the connection of a
computer to more USB peripherals, Ethernet network, speaker and microphone using
only one USB port on your computer.
This docking station is built-in USB 3.0 ports which mean you can enjoy the super speed
data transmission between USB peripherals. Besides, this product is fully compliant with
the USB 1.1/2.0
specification.
Your previousUSB 1.1/2.0 devices can continue tofunction
as usually.
The video output is another feature. With the DVI (and HDMI® Dual Head Docking
Station model only) port(s), you can connect more monitor, LCD or projector. The
connected monitor can be configured to either mirror your primary screen, or extend
the Window desktop allowing visibility of more applications at the same time. No more
stacking windows within the confines of a single display.
As to the housing, aside from the impressive sailboat-like appearance, the upright
design of the body helps to spare your desktop space. Most peripherals are connected
behind while two USB ports and audio outputs are implemented on the front panel for
easier accessibility. An industry standard security lock is also provided for anti-theft
purpose.
Enhanced expansion capability plus the stylish appearance, surely this docking station
with video is the most versatile accessory that also
complements
your home or office
space.
Features
■ Compatible with USB 3.0/2.0 specification
■ Resolution up to 2048x1152
■ Support audio 2.1 channel
■ Support Gigabit Ethernet
■Support HDMI® 1.3 (Dual Display Model only)
Package contents
■ Docking Station x1
■ USB 3.0 Cable x1
■ Power Adapter x1
■ CD (Driver and User’s Manual) x1
■ Quick Installation Guide x1 2

System requirements
The minimum requirements for the PC are:
■ 1.6 single core CPU or higher processor clock. Intel
Pentium/Celeron family, or AMD K6/Athlon/Duron family, or compatible processor
■ 1GB of RAM
■ USB 2.0/3.0 port
■ 30MB of available disk space
■ Windows®XP 32-bit,Windows® Vista 32/64-bit,Windows®7 32/64bit, Windows®8
32/64bit.
To play DVD on the extra connected monitor through docking station, in addition to the
requirements above, the following requirements should also be met:
■ With dual core CPU at 2.0 GHz processor clock
3
Product overview
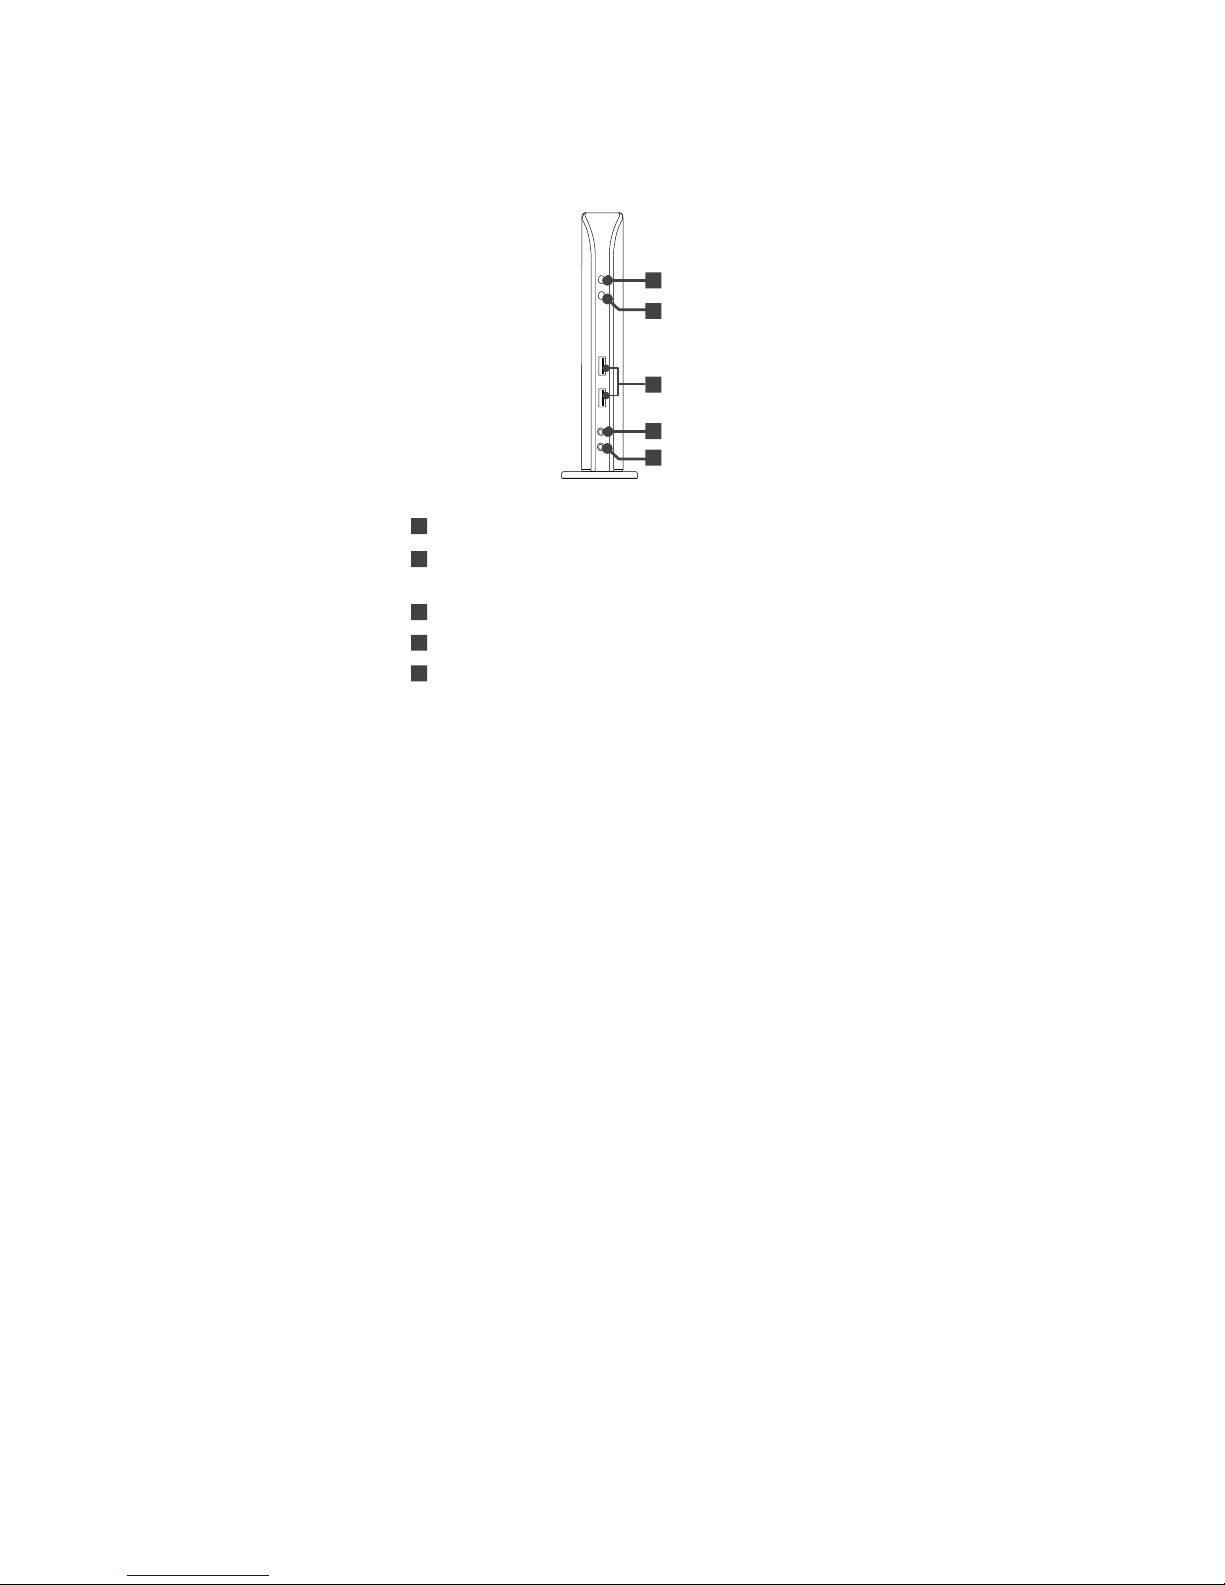
Front
1
2
3
4
5
1 Power indicator: Lights up when the power is on.
2 USB indicator: Lights up when a USB
device is plugged into this unit.
3 USB 3.0 ports: Connect to USB 3.0 devices.
4 Speaker jack: Connect to a speaker or earphone.
5 MIC jack: Connect to a microphone.
4
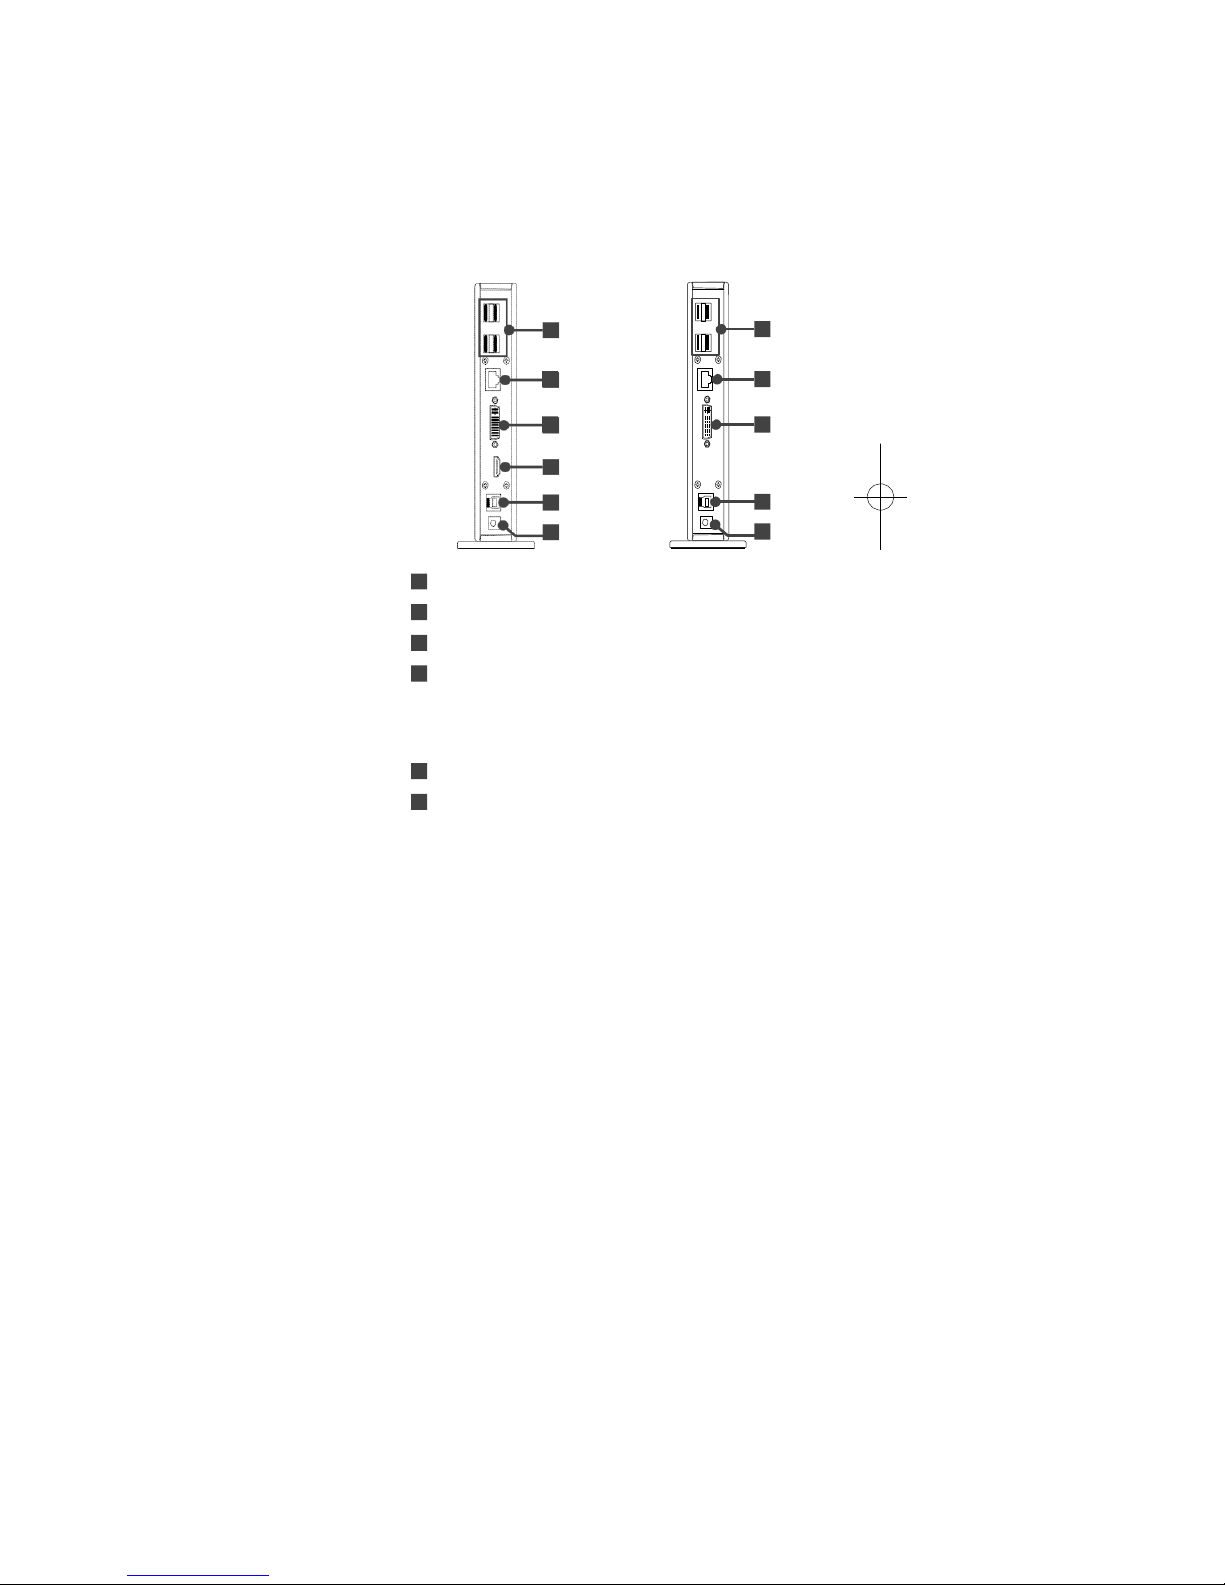
Rear
Dual Display
Docking station
Single Display
Docking Station
6 6
7 7
8 8
9
10 10
11 11
6 USB 2.0 ports: Connect to USB 2.0 devices.
7 RJ45 port: Connect to an Ethernet.
8 DVI connector: Connect to a DVI monitor or projector.
9 HDMI connector: Connect to a HDMI
monitor or projector.
Note: This function provided only on the model of Dual
Head Docking Station.
10 USB 3.0 port (Type B): Connect to a computer.
11 Power jack: Connect to the power adapter.
5
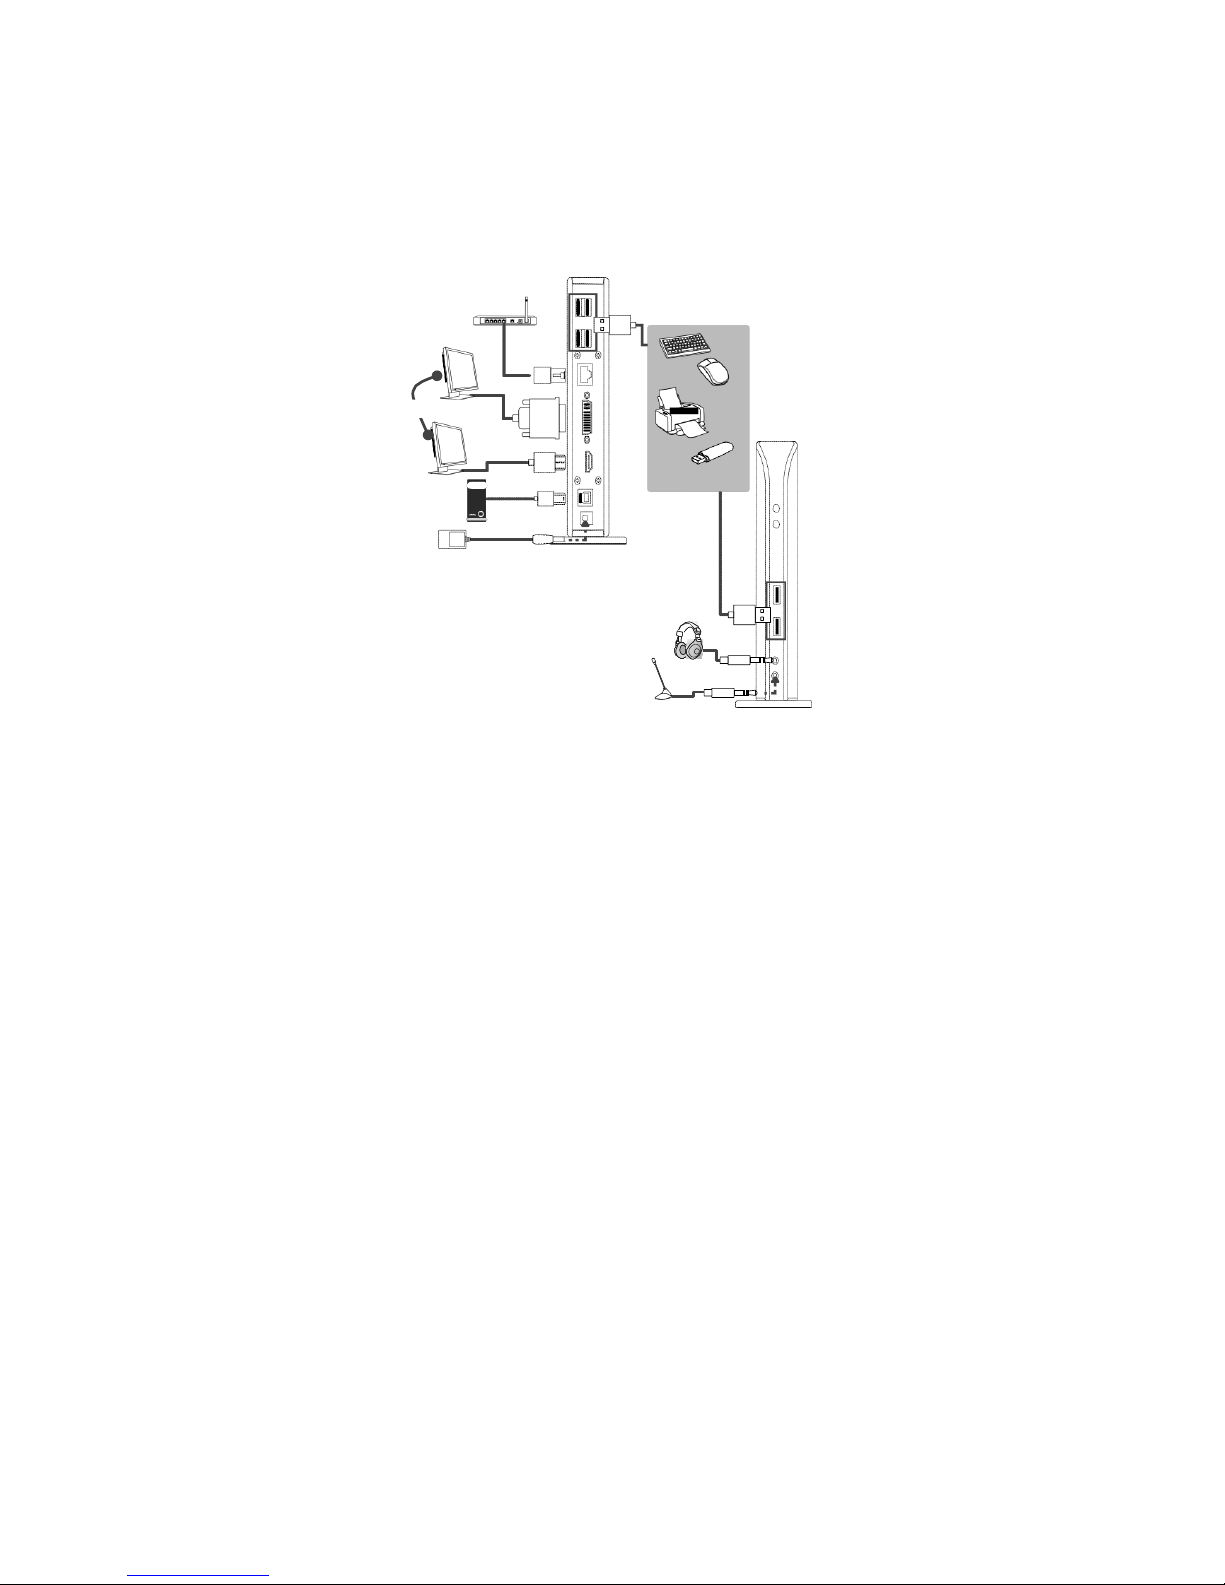
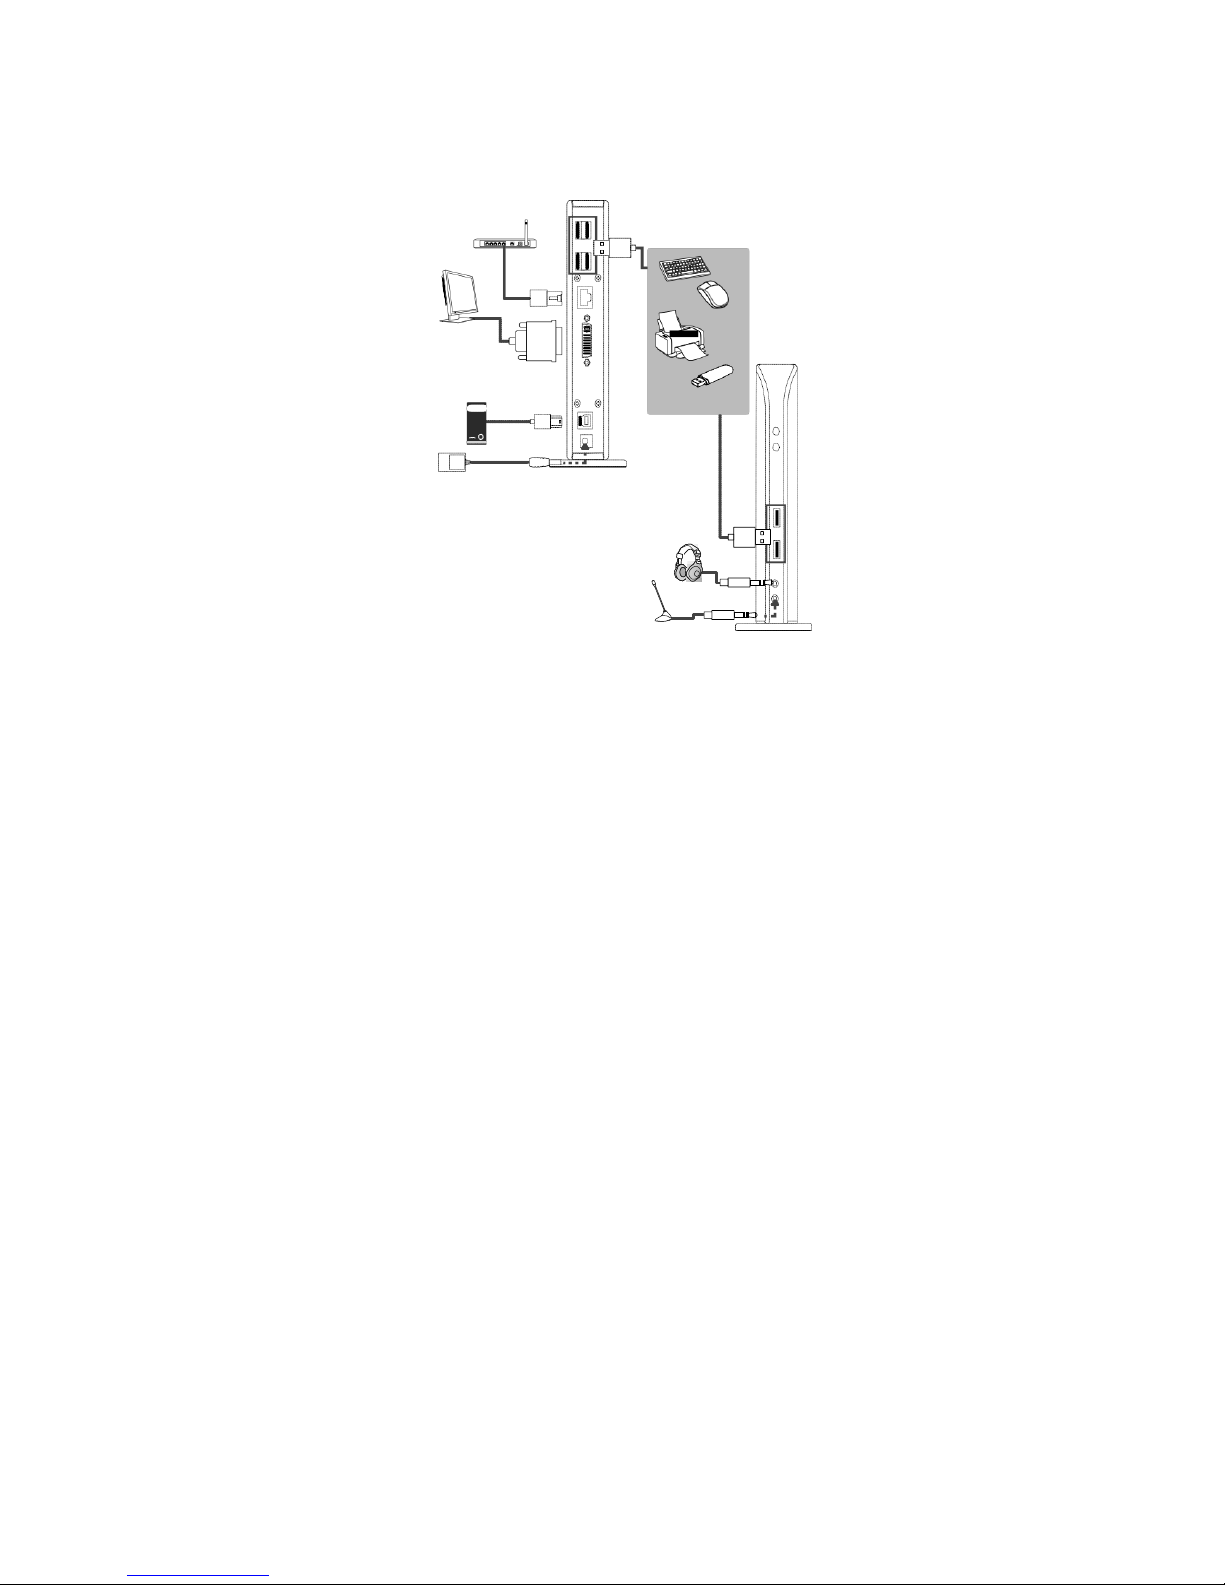
Connection
To connect the USB peripherals, Ethernet, speaker and
microphone,
follow the
illustrationsbelow to connect the
corresponding
connectors.
Dual display docking station
Router
Monitor
USB
peripherals
PC
Power adapter
Earphone
Microphone
6
Single display docking station
Router
USB
peripherals
PC
Power adapter
Earphone
Microphone
7
Installation
Caution: DO NOT connect the docking to a computer before
installing the provided driver.
Note that the following strings and screen shots shown on this
user's manual may vary slightly from each operation.
For Windows®7/ Windows®8 user
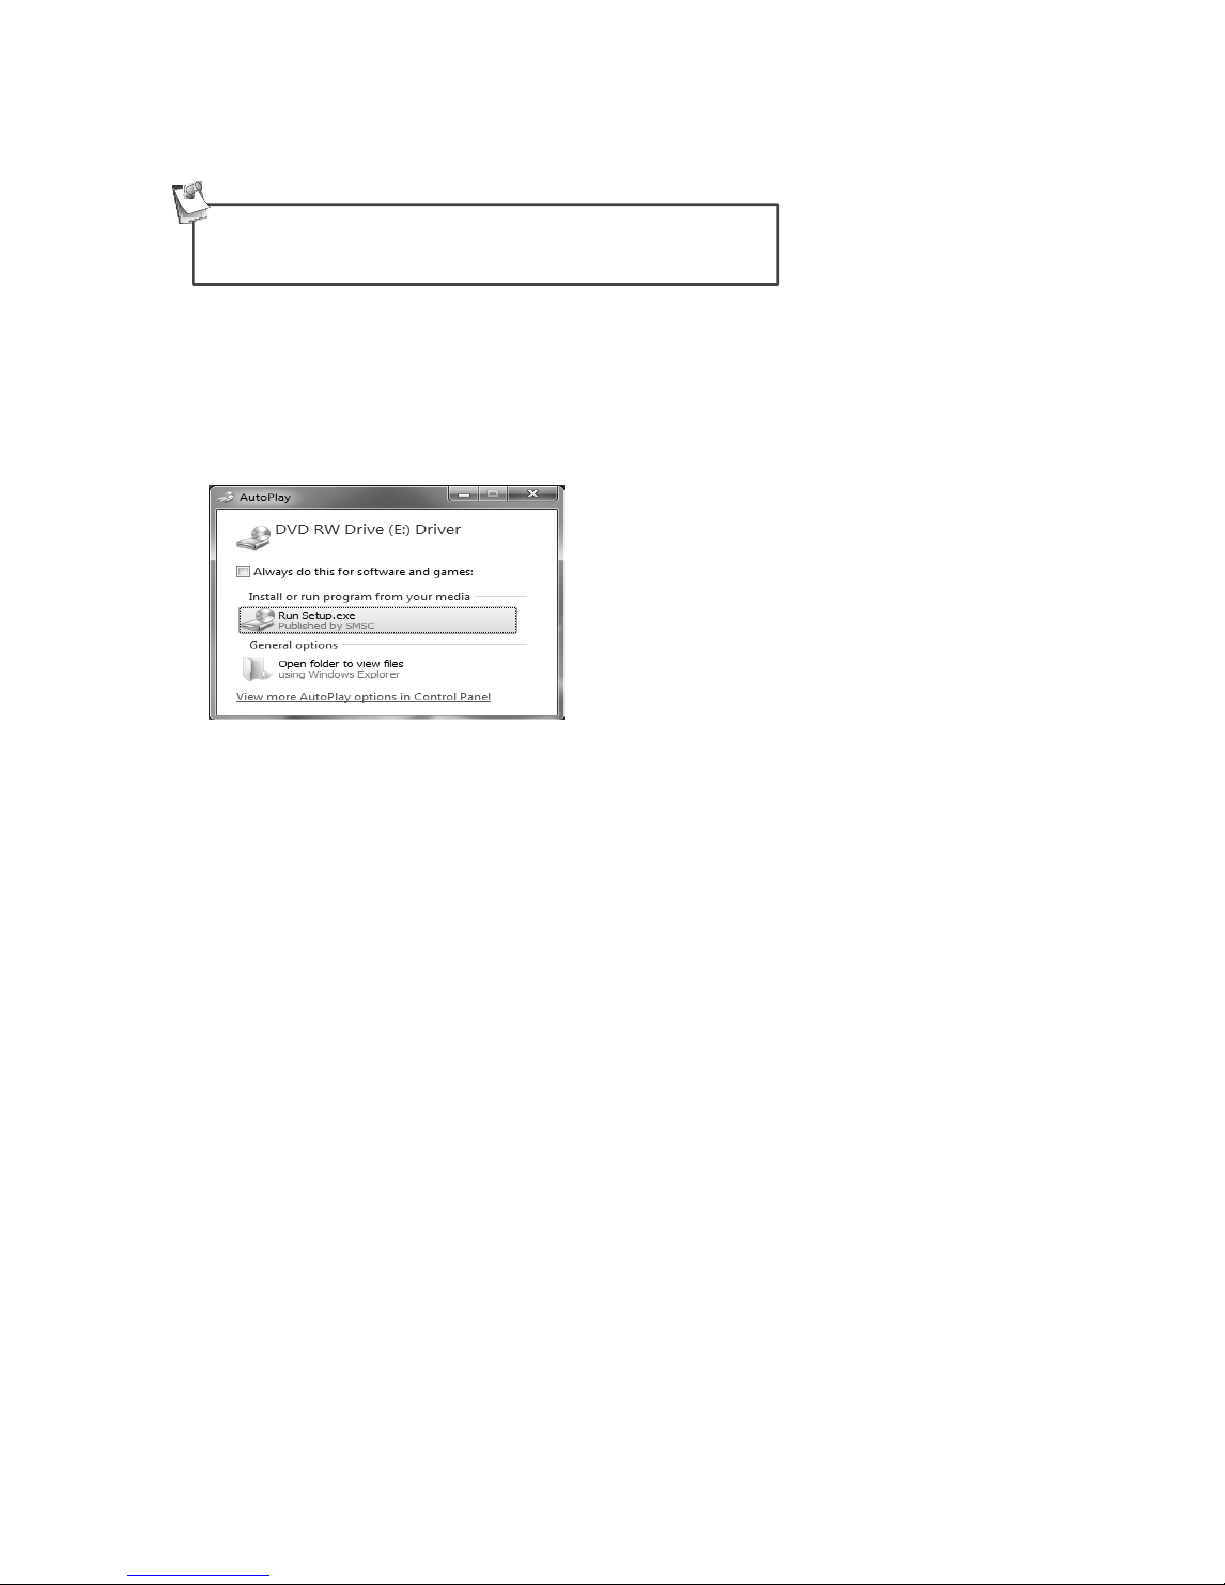
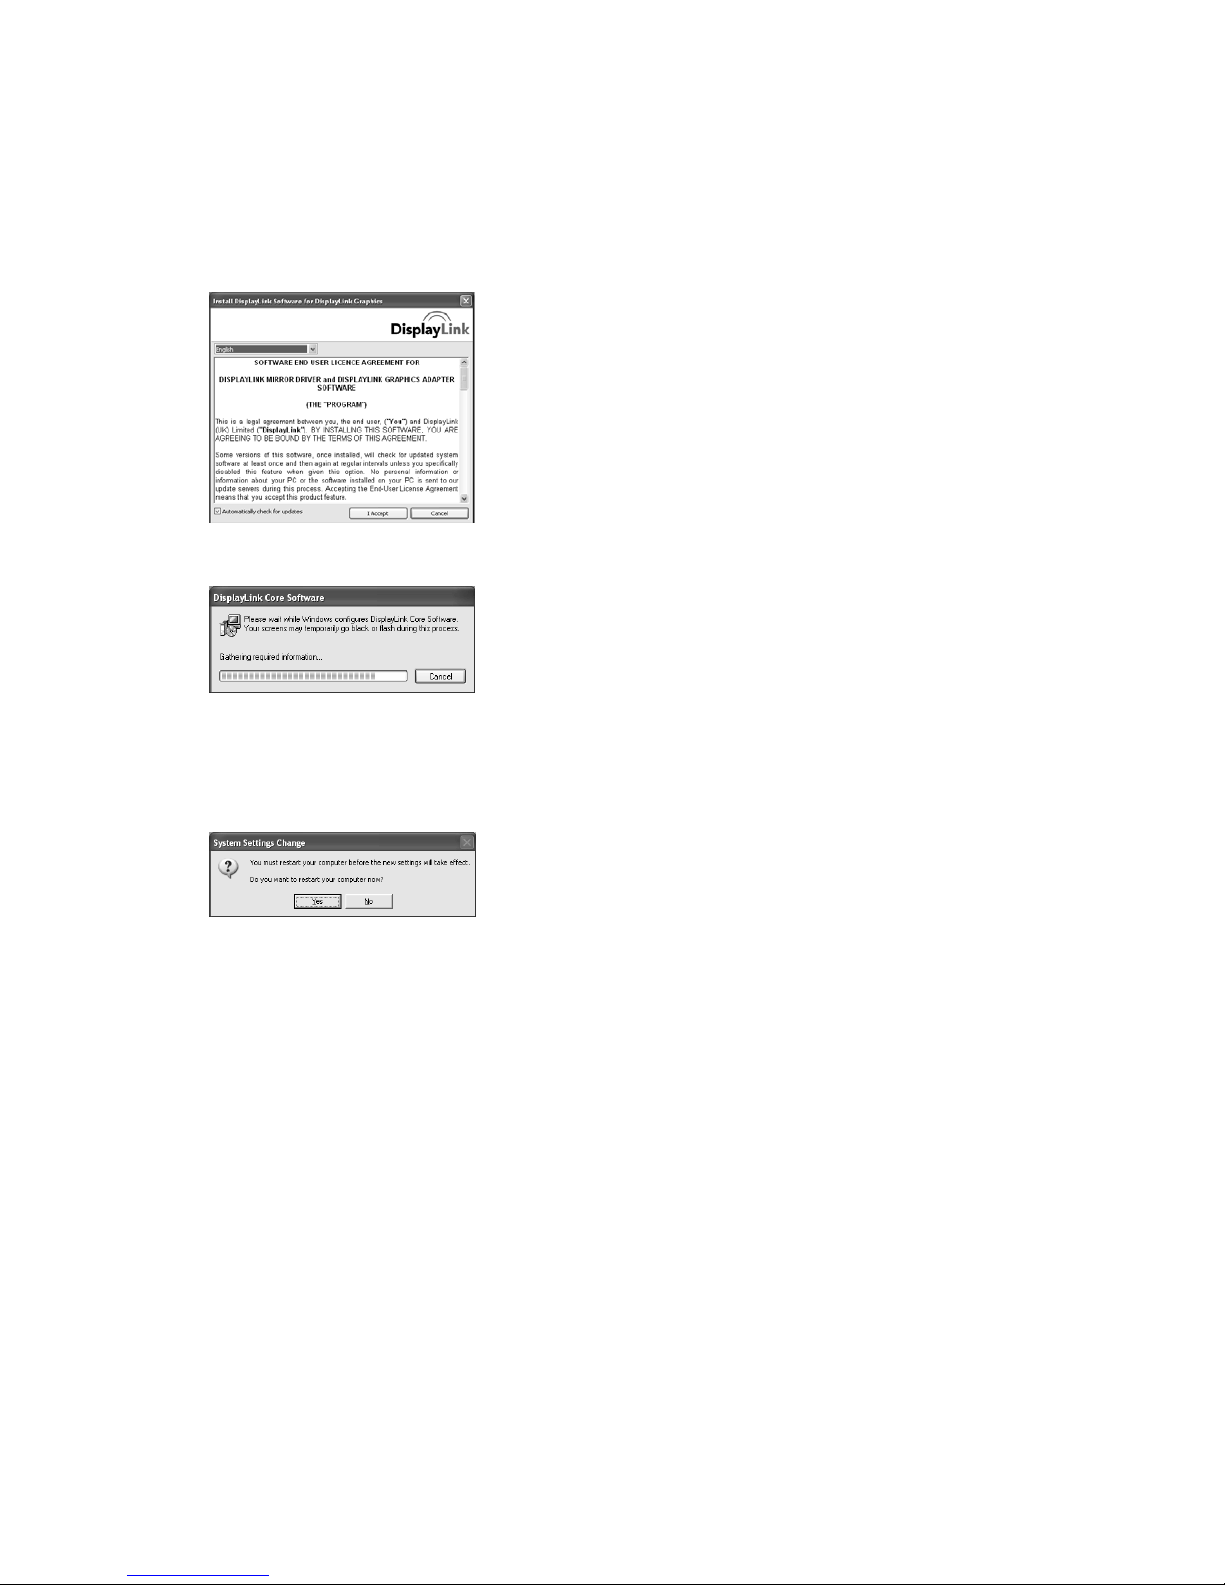
1.Insert the supplied driver CD into a computer's CD/DVD- ROM.
2. Click <Run Setup.exe> to start the installation.
8

Note:
If the AutoPlay does not appear automatically, locate and
double-click on the Setup.exe file in the driver folder to launch
the setup.
Enter the administrator password and then click <Yes> to start
the installation if a User Account Control dialog box appears.
3. Click <I Accept> for the next step.
9

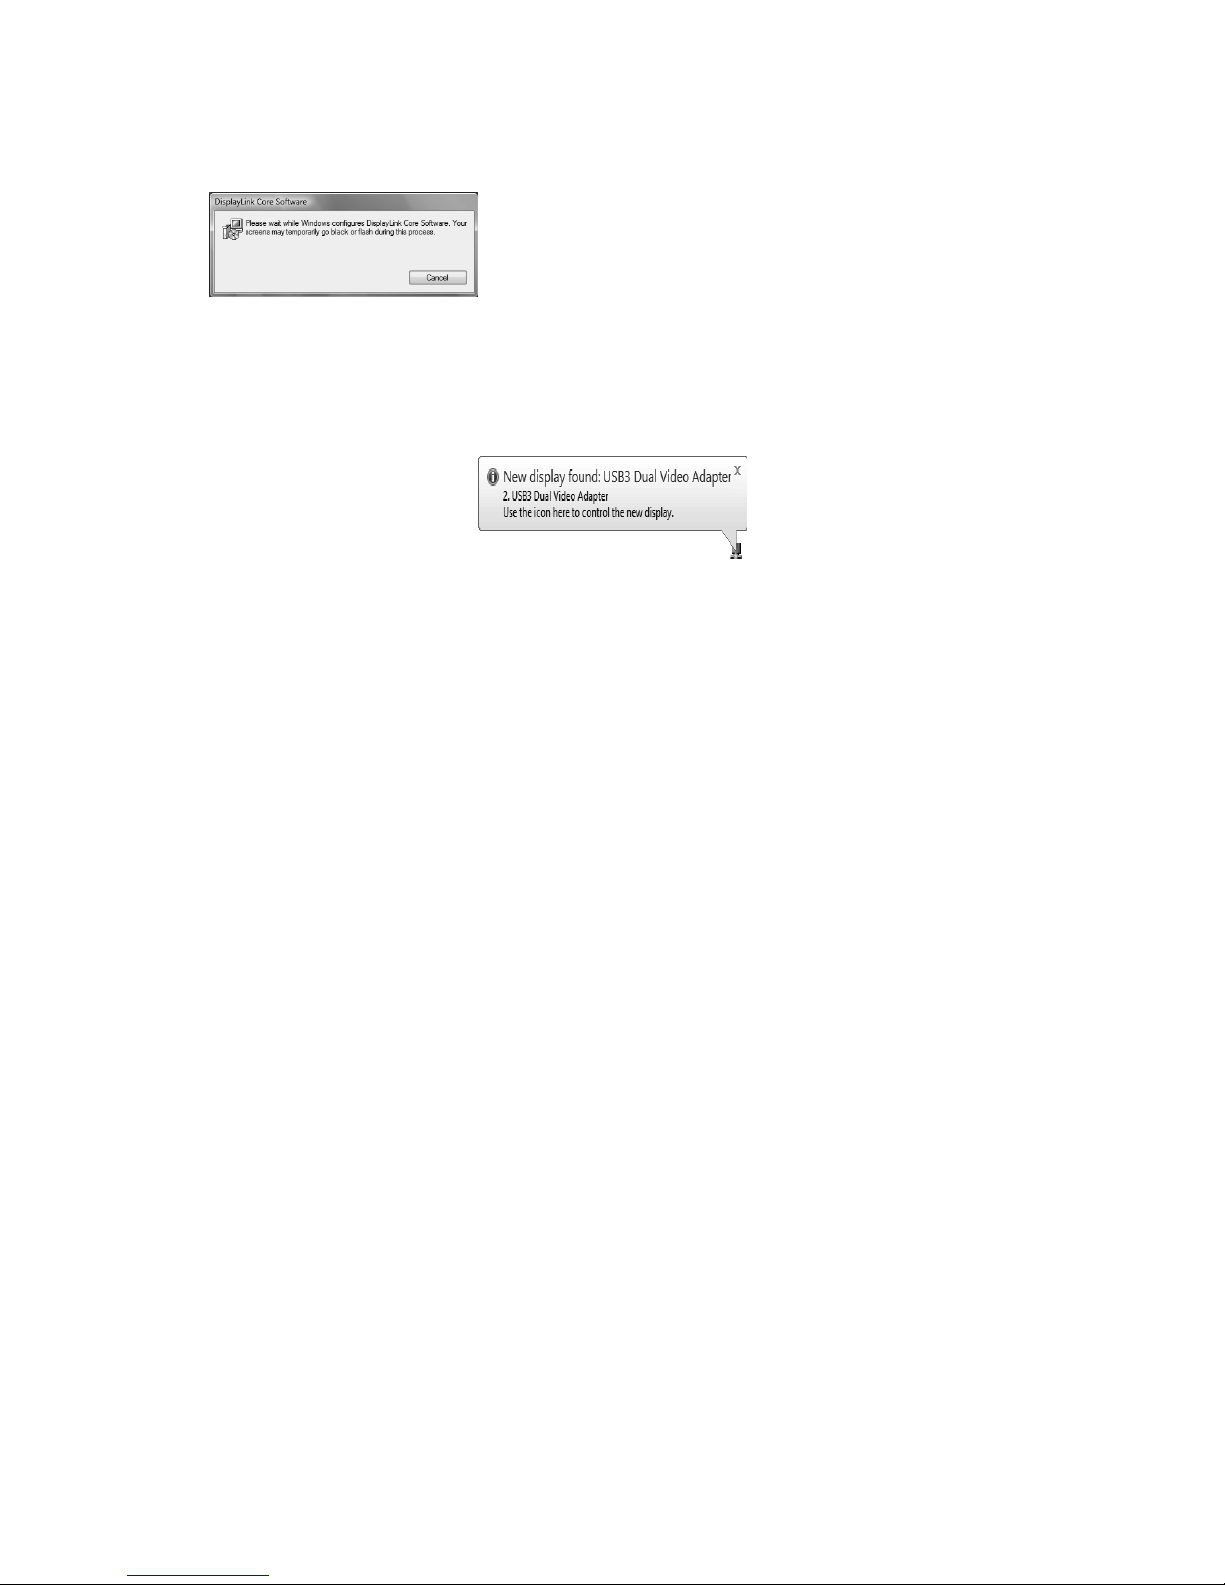
4. Be patient with the installation procedure, it may take a while.
5. Connect the Docking Station to a computer after the driver installation is completed.
For connection details, refer to the chapter of Connection.
6. When the operating system detects the adapter, the reminder message will appear on
the system tray as below.
10
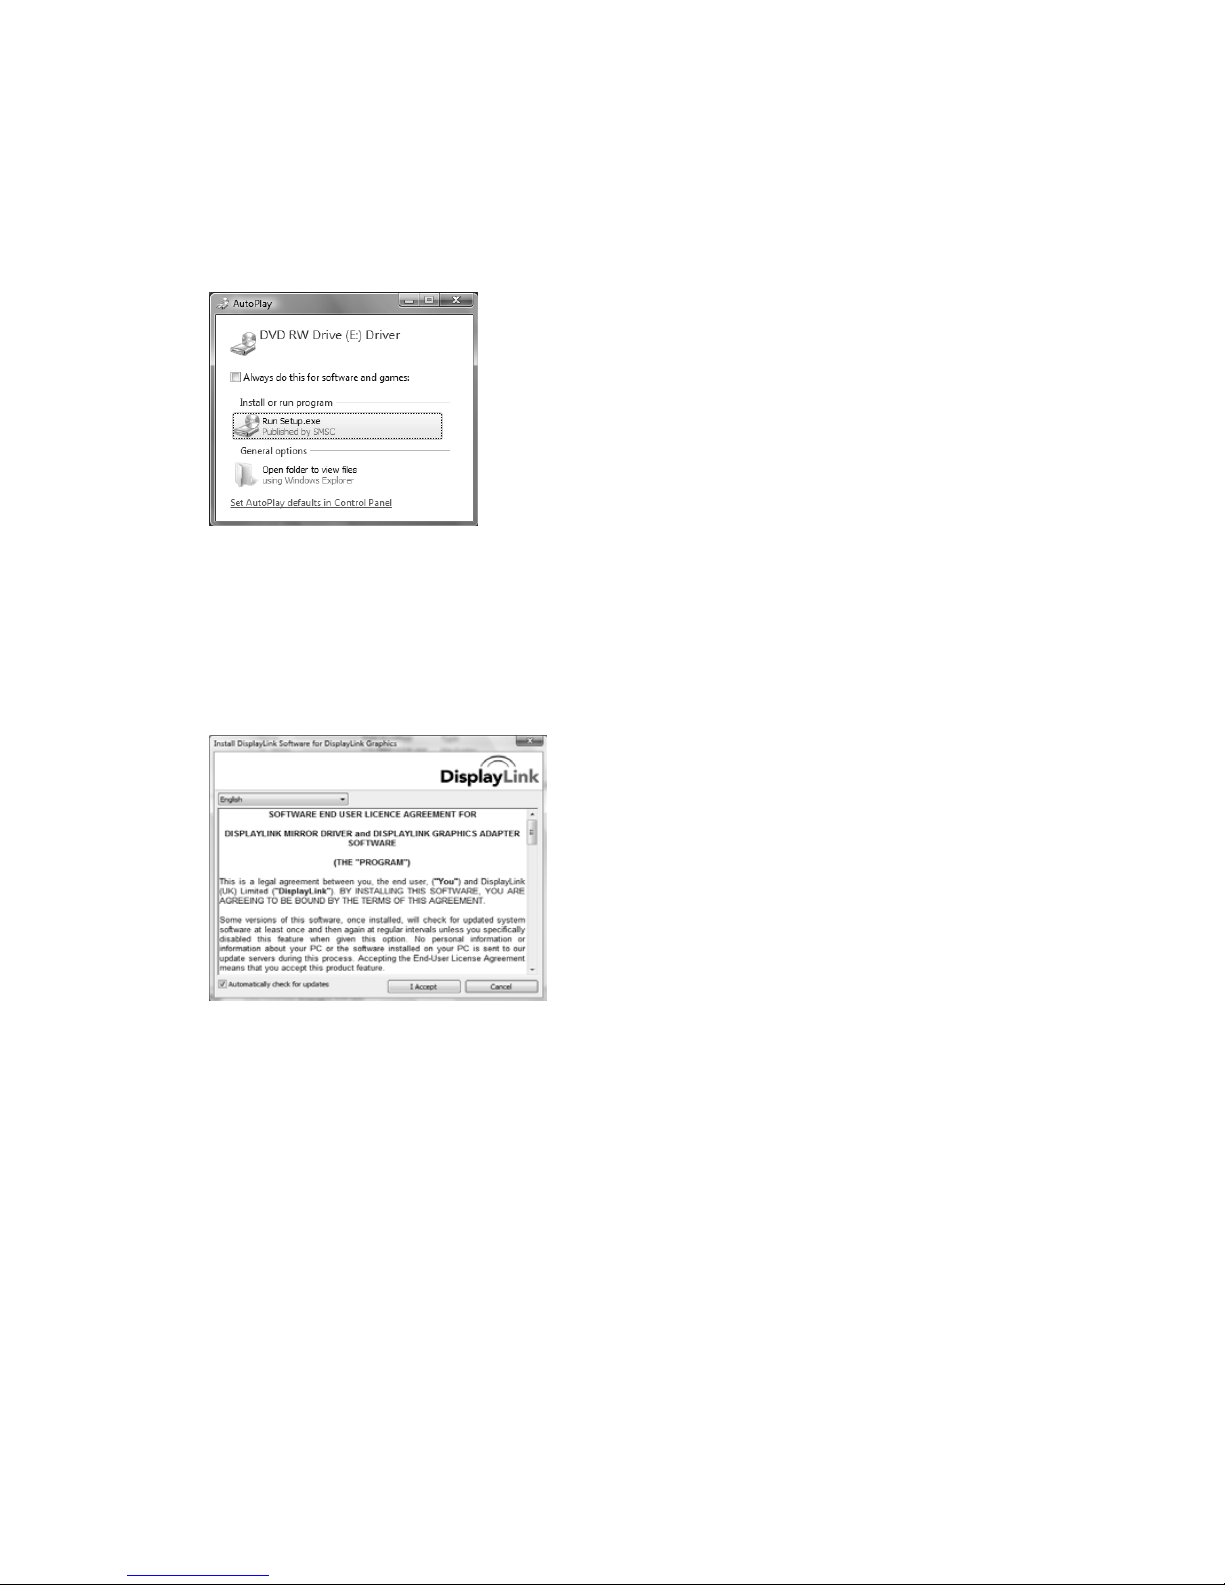
For Windows®Vista user
1. Insert the supplied driver CD into a computer's CD/DVD- ROM.
2. Click <Run Setup.exe> to start the installation.
Note:
● If the AutoPlay does not appear automatically, locate and double-click on the
Setup.exe file in the driver folder to launch the setup.
● Enter the administrator password and then click <Allow> to start the installation if a
User Account Control dialog box appears.
3. Click <I Accept> for the next step.
11
4. Be patient with the installation procedure, it may take a while.
5. Connect the Docking Station to a computer after the driver installation is completed.
For connection details, refer to the chapter of Connection.
6. When the operating system detects the adapter, the reminder message will appear in
the Windows System Tray as below.
12
For Windows®XP user
1. Insert the supplied driver CD into a computer's CD/DVD- ROM.
2. Click <I Accept > for the next step.
3. Be patient with the installation procedure, it may take a while.
Note: Click <Yes> to restart or <No> to manually restart later, if a prompting to restart
computer message appears.
4. Connect the Docking Station to a computer after the driver installation is completed.
For connection details, refer to the chapter of Connection.
13

Verifying the driver
To verify the driver of the adapter, follow the step below to open the Device Manager
on Windows operating system.
1. Following the path as below to open the device manager Windows®7/Windows®8:
Control Panel\System and Security\ System\Device Manager
Windows®Vista: Control Panel\System Maintenance\Device Manager
Windows®XP: Control Panel\System\Hardware\Device Manager
2. A string similar to DisplayLink.. Adapter device should be listed.
Docking Station Dual Head Station
The screen shot above is demonstrated by Windows
® 7 and might be varied slightly for
each operation system.
Note: If there is a (question) or (exclamation) mark next to that item, then the
driver is not properly installed. Please delete the item, unplug the adapter and repeat
the installation steps.
14
Display configuration
Note that the following screen shots in this section are using Windows®7 operating
system. It may not match your operating system but the definitions of buttons, tabs and
menus are the same.
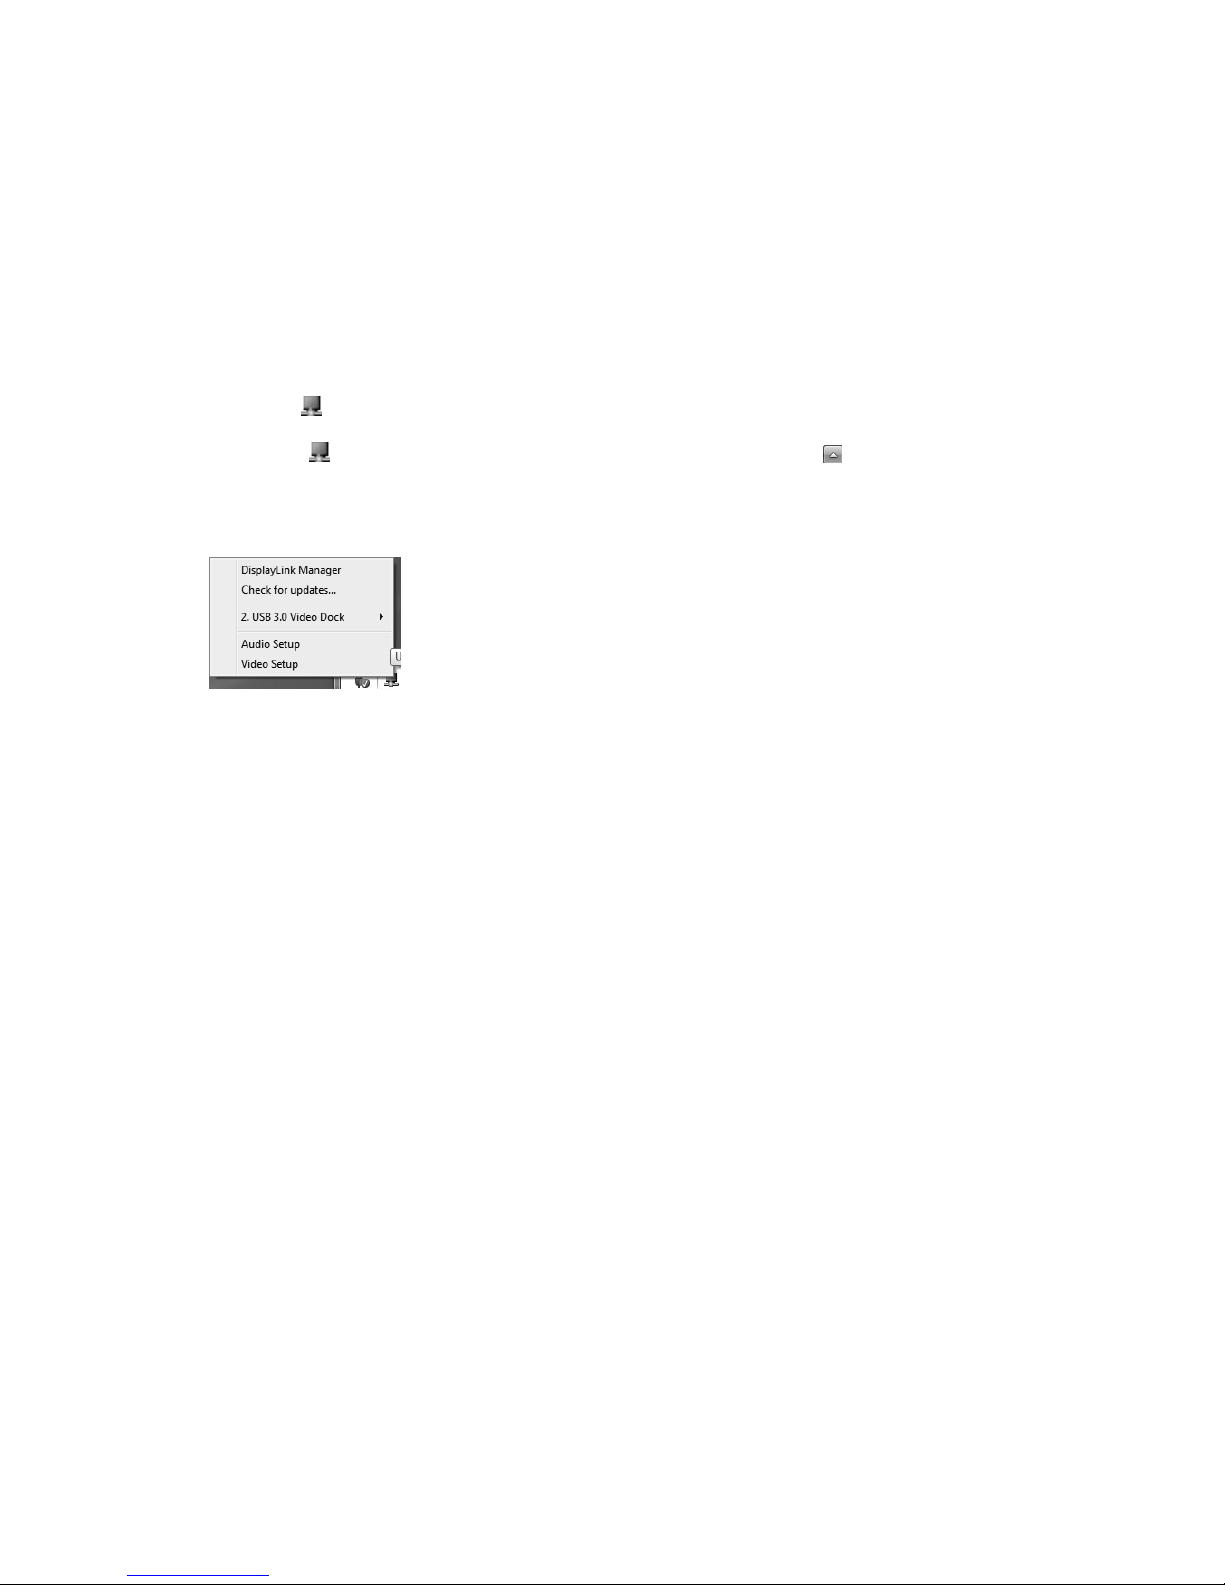
Utility settings
The supplied utility allows configuring the display mode, screen rotation, screen
resolution, and physical arrangement of your monitors.
1. Click < (utility icon) > in the Windows System Tray.
Note: The may be hided in the Windows System Tray. Click < (arrow icon) > to
bring up more icons if it happens.
2. Select a preferred option, and then click it using mouse.
15

Description of the settings
Option Description
Displaylink manager Enable the Windows screen resolution page.
Check for updates Check the latest driver and download if available
USB3.0 Video Dock/Dual Head Video Dock(*The actual item is depending on the
model)
Screen Resolution Click to select an available resolution. Note that this
function is invalid in mirror mode, as the resolution is
defined as the resolution of the primary monitor
Screen Rotation Rotate the screen according to the desired orientation
Extend Extend the screen according to the desired orientation
Extend to The cursor can extend to desired screen via
left/right/above/below way moving
Set as Main Monitor Set this screen to the main screen
Notebook Monitor Off Switch the add-on monitor to the main display and
turn off the screen of the laptop. Note:This function
works only when one add-on monitor is connected.
This option will also only appear on laptop.
Mirror Duplicate the primary monitor to the monitor which
connects with the adapter
Off Turn off the monitor
Optimize for video Optimize the video quality when playing back. Text
may appear less clear when enabling

16

Options Description
USB 3.0 Video Dock/Dual Head Video Dock
(* The actual item is depending on the model)
Fit to TV Adjust the size of Windows Desktop on the TV
Note: This function works only when one add-on monitor is connected.
Besides, this option will also only work in extended
mode. The add-on monitor will change to the extended mode if
selecting this option while in mirror mode.
Audio Setup Enable the Windows audio configuration page.
This function works only in specific models.
Video Setup Enable the Windows screen resolution page.
17
Other manuals for Blazer
1
Table of contents
Popular Docking Station manuals by other brands


Monoprice
Monoprice 11501 user manual

StarTech.com
StarTech.com DK30CHDPD user manual

Gamber Johnson
Gamber Johnson 7160-1084-00 installation instructions

Sensidyne
Sensidyne Gilian FIVE-UNIT POWER STATION instruction manual

Lakeside
Lakeside PWC-50 M4 Assembly & use instructions

HighPoint
HighPoint RocketStor 3112D Quick installation guide