2
FREECOM HARD DRIVE DOCK
EN
Need assistance? Have questions?
In caseyouhaveaquestionaboutthe useofthisproduct,needinformation about
other Freecom productsorneedtechnicalassistance,please contactthe Freecom
Service Center for your country. See www.freecom.com for details.
Freecom offers free unlimited helpdesk support.
Warning !
All rights reserved. The products named in this manual are only used for
identification purposes and may be trademarks or registered trademarks of the
respective companies. This device was designed for home or office use.
Warning! This device is equipment complying with EN55022 class A. This
equipment can cause radio disturbances in a residential area. If this is the case,
theuser has totake appropriatemeasuresandassumeall responsibilityandcosts
for. It may not be used near or with any life-sustaining systems.
Freecom cannotbemade liable for anydamages,loss ofdata ordamagefollowing
thereof -whatsoever (including, without limitation, damages for loss of business
profits, business interruption, loss of business information, or other pecuniary
loss) arising out of the use of or inability to use this Freecom product, even if
Freecom has been advised of the possibility of such damages.
We reserve the right to upgrade our products in keeping with technological
advances.
Dear user,
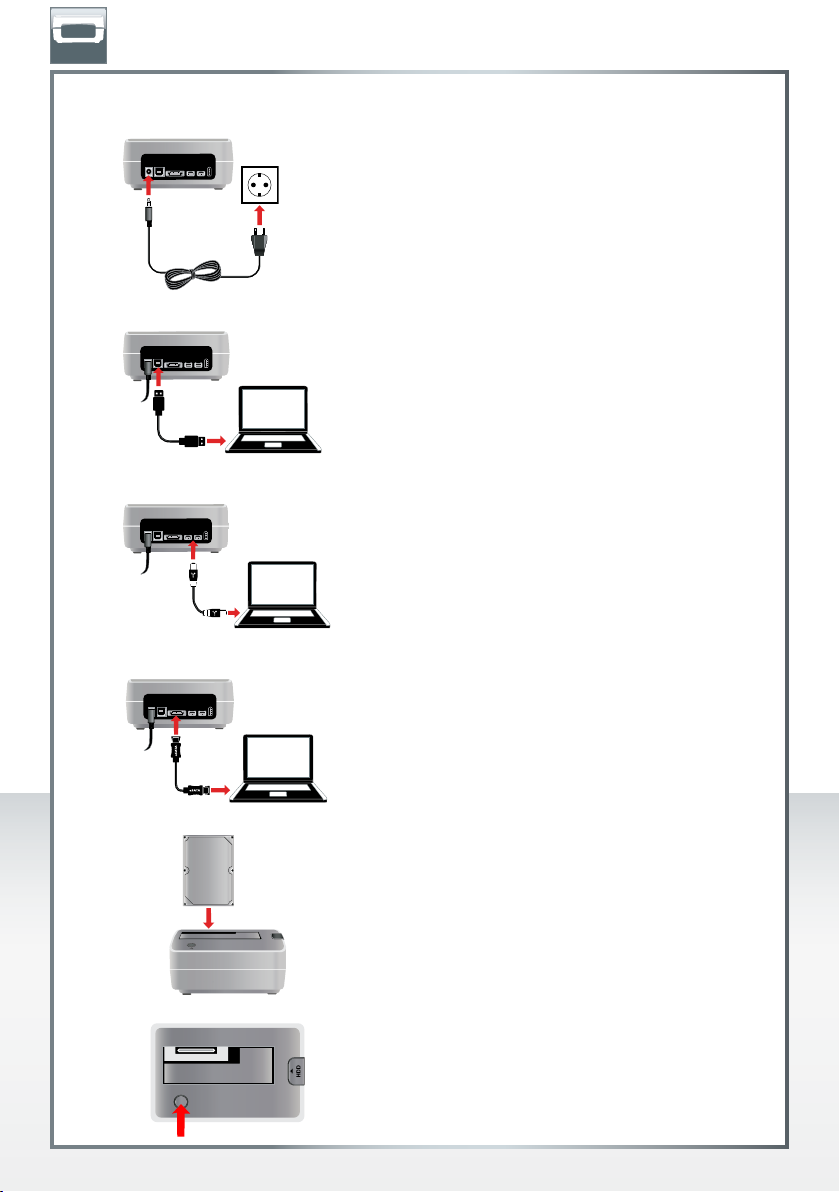
welcome to the installationofyourFreecomHDDock.Beforeinstallingthe drive,please
read through the following points regarding its compatibility with your system.
Please note: this manual is a general manual which is used for several Freecom products.
Product pictures shown in this manual may differ from the device you bought.
Freecom Technologies • Germany
www.freecom.com
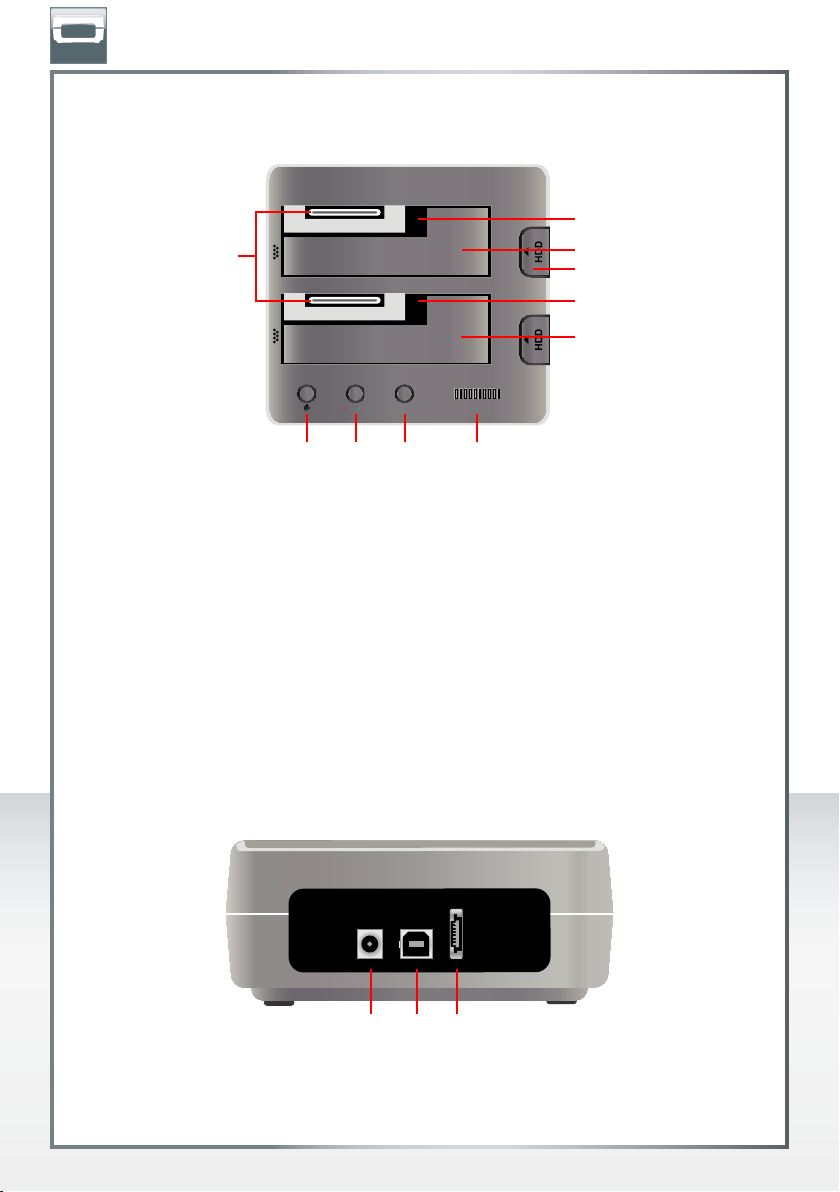
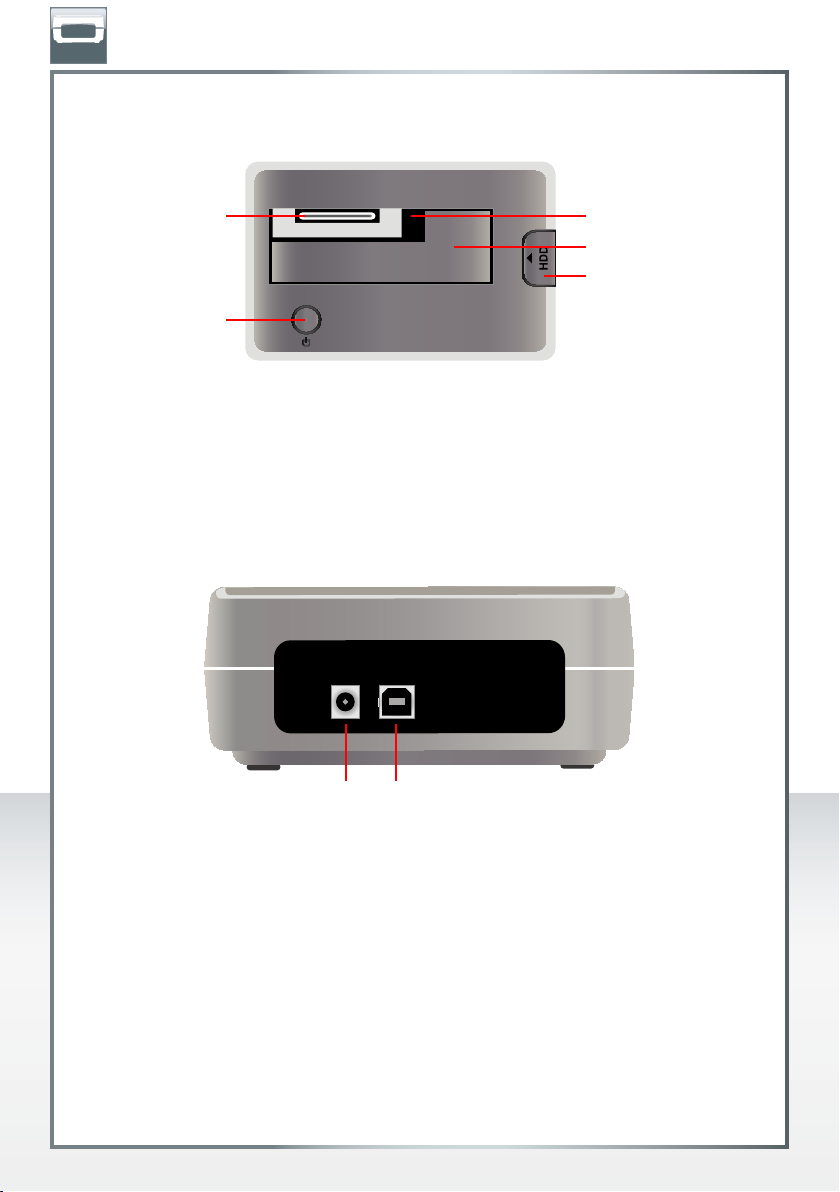
Contents of the box
Please check the contents of the box. All articles included in this box are listed on the
back side of the packaging.