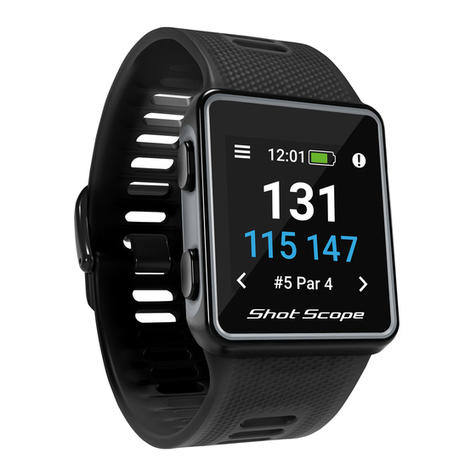
Shot-Scope G5 User manual

User Guide
support.shotscope.com

Contents
Inside your box 02
Build your watch 03
Charging your Shot Scope G5 05
Main menu and navigation 07
Setting up your Shot Scope G5 09
Starting a round 15
During play 20
Terms and conditions 32
Inside your box
Thank you for buying a Shot Scope G5. Before turning
on the device, please read our full user guide to ensure
the correct set up.
1 xShot Scope G5
1 xShot Scope charging cable
2 xQuick release strap sets
Page 2

Build your watch

Build your watch
Your G5 will need to be assembled before you use it on the golf course,
it is simple and easy to assemble your G5 watch.
In your G5 packaging box you will receive:
1 x G5 watch case
2 x colored watch straps of your choice.
Attach your straps by simply sliding the bar on each strap and clipping
the bar into the holes on the legs of the watch case.
Ensure the buckle end of the strap (with the two securing loops)
is attached to the top of the watch face and the other part of the
strap (with the S logo) is attached to the bottom of the watch case.
1x Watch case
2x Watch strap sets
Page 4

Charging your
Shot Scope G5 watch

Charging your
Shot Scope G5 watch
Your G5 can be charged from any USB port or USB compliant wall charger.
Please only use the USB charging cable provided with the G5 for charging.
Plug the charger into the charging port on the back of the watch face; the
screen will show charging has commenced if connected successfully.
Additional chargers can be purchased at:
www.shotscope.com/products/accessories
Page 6

Main menu
and navigation

Main menu and navigation
The G5 watch has four buttons for navigation
Press the top right button to power on the device
and access the main menu.
You will then be shown the following options:
Play Golf = Select a golf mode to play.
Settings = Change settings on your watch such as turning
scoring on/off or changing yards to metres.
Conrm /
Main menu
Navigate up
Back
Navigate down
Page 8

Setting up your
Shot Scope G5

Setting up your Shot Scope G5
The G5 watch is ready to play straight out of the box for quick and simple set up.
All you need to do is charge the watch and skip the connect to app screen
(top left button) to start using your G5 device.
We do however recommend connecting your G5 watch to the Shot Scope app before
you play for the best user experience. This will allow you to update the golf courses you
play to the most recent map data and check for any rmware updates. Running the latest
rmware will ensure you have the best experience using G5.
Shot Scope provides both an Android and iOS app.
To download or install the Shot Scope app, simply search for
Shot Scope on either the App Store or the Google Play Store.
Register
To register an account, open the app and then click on the ‘Register’ button.
Complete all sections and then press ‘Continue’. Your password must contain
at least one letter and one number.
Step 1: Download and install the mobile app
Page 10

Step 3: Connecting the watch to the app
If you have just completed the tutorial the watch will reset, you
then need to reconnect the watch to the mobile app. Ensure
Bluetooth is turned on in your phone settings, log into the app
and then press the ‘Connect’ button at the top of the screen.
The watch screen will then change to show the
connection has been secured.
Step 2: Complete the tutorial on the app
The rst time you enter the Shot Scope app after registering, you will
be taken through a tutorial showing you how to use the watch and app.
During this process, you will turn on your G5 and pair the device with the
app. You will choose the settings for your device and sync the watch to
ensure it has the latest rmware installed.
Page 11

Step 4: Check course maps
We recommend that you check the mapping status of any courses
you intend to play 48 hours before your tee off time. This is to
ensure that the course is in the system and has been mapped.
While most courses will be mapped and already downloaded to
the watch, occasionally there will be a new course that isn’t on the
system or your course may have an update pending.
To view the list of mapped courses on the Shot Scope system,
navigate to the ‘Courses’ section in the app. This is present on the
tab bar of the iOS app and the main menu of the Android app.
Page 12

Step 5: Searching for, subscribing, and adding a course
You can search our course database by entering the name of the course
or using your location to nd nearby courses. Either use the search bar or
the lter at the top right of the screen to nd courses by proximity to your
current location.
To make sure you always have the most up to date course maps,
subscribe to any course that you play frequently to get notications when
the map has been updated. To subscribe, tap on the ‘Subscribe’ button
next to the course name and it will be added on the sync waiting list if
there’s an update available for the course.
If your course is mapped but not yet on the watch, the course will have
an ‘add’ button beside it, tap this and the course will be added to your
ready to sync waiting list.
We may have your course in the database but it has not yet been
mapped. In this situation, the course will have a ‘request’ button beside
it, tap this to request the course be mapped. This will notify the mapping
team who will endeavour to get any course mapped within 48 hours.
Search
Request
Subscribe
If you can’t nd the name of the course,
press the ‘Request’ button at the bottom of
the screen. This will bring up a form that
can be lled out and sent to our mapping
team who will map your course.
Page 13

Step 6: Syncing course changes
If you have any course maps that need to be uploaded to the
watch, or any updates that need to be transferred to the watch,
you should see a red notication at the top of the courses
screen. If you wish to perform a sync then tap on the ‘Ready
to Sync’ button to navigate to the ready to sync waiting list.
On the resulting screen, you will see the list of courses that
require a sync. Press the ‘Tap to Sync’ button next to the course
you want to update and sync will begin. You can sync as many
or as few in this waiting list as you wish.
Page 14

Starting a round

Starting a round
If you do not connect the G5 to the app, the rst time you play it will ask you
to set the time and date. Select the time by adjusting the digits shown on
the screen to the correct time. Follow the same process to set the date.
Enter time
Use the up / down button
to adjust each digit
Move to next digit
Use the select and back button to
navigate through the digits
Conrm time
Press the select button when the tick
appears to conrm your time
Page 16

To start a round
Switch on the watch by pressing the top right button. If lock
is enabled, press the bottom left button to unlock the watch.
Once the watch is unlocked, press the select button (top right)
to enter the main menu where you can select ‘Play Golf’.
The watch will then search for a GPS signal, it should get a x
within a few minutes, but it will be slightly longer the rst time
you use the watch.
We suggest that you start a round just prior to arriving at the
rst tee to allow the watch time to acquire a strong GPS signal.
Power on
Page 17

Selecting a course
The G5 will display any golf courses within 1km of you. The nearest two
courses will be displayed on screen, to view other nearby courses navigate
up and down using the buttons on the left. Once the course you would like to
play is highlighted in white, conrm your selection by pressing select.
Select tees
You will have to conrm which tees you are playing from. Navigate
through the list until you see the correct selection.
Page 18

Keep score
G5 will prompt you to choose whether or not you want to add your
score while playing the round. Scoring can be toggled on / off in
the settings menu - for example if you never want to keep your
score then you can turn this feature off altogether.
Page 19

During play
Table of contents
Other Shot-Scope Watch manuals

