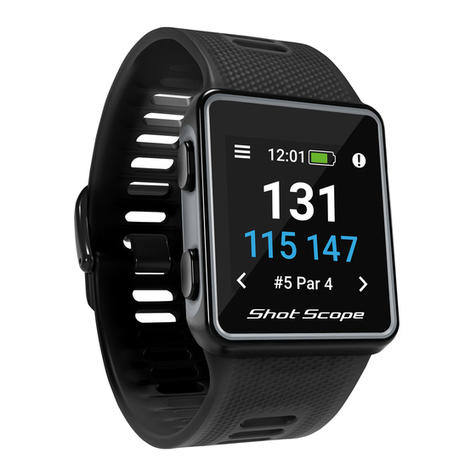
Shot-Scope X5 User manual


Page 2
Contents
Inside your box 02
Navigation - Touchscreen and buttons 03
Setting up your Shot Scope X5 07
The Shot Scope App and Dashboard 13
Before you play 15
At the course 19
Main menu, clockfaces and step tracking 35
Post-round 39
Leaderboards and medals 42
Get the most out of your X5 43
Terms and conditions 44
Inside your box
Thank you for buying a Shot Scope X5. Before turning
on the device, please read our full user guide to ensure
the correct set up.
1 xShot Scope X5
16 xLightweight tags
1 xCharging cable


Touchscreen and buttons
Touchscreen
The responsive touchscreen is the preferred method for
interacting with your X5 watch allowing you to seamlessly
make selections using the screen along with the physical
buttons on the side of the watch.
The touchscreen works like your mobile phone - swiping up
moves up a menu and swiping down moves down a menu.
Swipe down = Screen moves down
Swipe up = Screen moves up
Swipe left = It will reveal the screen to the right
Swipe right = It will reveal the screen to the left
Tap screen = Conrm selection
Press back button (Bottom right) = Back or exit menu
Touchscreen
display

Multi-function crown (top right button)
If you prefer not to use the touchscreen for navigation
you can use the crown and back button.
To use the crown for navigation:
Turn the dial clockwise to scroll up.
Turn the dial anti-clockwise to scroll down.
To conrm a selection press the crown button once (top right).
If you want to go back or exit a menu press the back button
(bottom right).
Note: On PinCollect you will need to use the touchscreen to add
your putts and conrm selection.
Page 5

Power on/off
To power on: Press the crown button to power on the X5.
To power off: Press the crown button and turn the crown anti-clockwise
until you see the Shutdown option and then press the crown button.
Screen and button lock
This feature locks the touchscreen and buttons whilst in play to avoid
accidental operation. The device will lock after 5 seconds of inactivity.
To unlock the X5 swipe up on the clockface from the bottom to the top
of the screen or turn the crown 360° in a clockwise direction.
Hard reset
To reset the X5 watch, hold the crown for 8 seconds to reset. The
watch will start vibrating followed by the start up screen
Note: If you accidentally hold down the crown button during your
round you will be notied by a vibration to release the button.
Page 6


Shot Scope provides both an Android and iOS app.
To download or install the Shot Scope app, simply search for Shot Scope
on either the App Store or the Google Play Store.
Register
To register an account, open the app and then click on the ‘Register’ button.
Complete all sections and then press the ‘Continue’ button. Your password
must contain at least one letter and one number.
Setting up your Shot Scope X5
Step 1: Download and install the mobile app

Step 3: Connecting the watch to the app
If you have just completed the tutorial the watch should remain
connected to the mobile app. If you need to reconnect the watch
to the mobile app, ensure Bluetooth is turned on in your phone
settings, log into the app and then press the ‘Connect’ button at
the top of the screen. The watch screen will then change to show
the connection has been secured.
Step 2: Complete the tutorial on the app
The rst time you enter the Shot Scope app after registering, you will
be taken through a tutorial showing you how to use the watch and app.
During this process, you will turn on your X5 and pair the device with the
app. You will choose the settings for your device and sync the watch
to ensure it has the latest rmware installed. You must complete this
process before using the device.

Page 10
Step 4: Check course maps
We recommend that you check the mapping status of any courses
you intend to play 48 hours before your tee off time. This is to
ensure that the course is in the system and has been mapped.
While most courses will be mapped and already downloaded to
the watch, occasionally there will be a new course that isn’t on the
system or your course may have an update pending.
To view the list of mapped courses on the Shot Scope system,
navigate to the ‘Courses’ section in the app. This is present on the
tab bar of the iOS app and the main menu of the Android app.

Step 5: Searching for, subscribing and adding a course
You can search our course database by entering the name of the course
or using your location to nd nearby courses. Either use the search bar or
the lter at the top right of the screen to nd courses by proximity to your
current location.
To make sure you always have the most up to date course maps,
subscribe to any course that you play frequently to get notications when
the map has been updated. To subscribe, tap on the ‘Subscribe’ button
next to the course name and it will be added on the sync waiting list if
there’s an update available for the course.
If your course is mapped but not yet on the watch, the course will have
an ‘add’ button beside it, tap this and the course will be added to your
ready to sync waiting list.
We may have your course in the database but it has not yet been
mapped. In this situation, the course will have a ‘request’ button beside
it, tap this to request the course be mapped. This will notify the mapping
team who will endeavour to get any course mapped in 48 hours.
Search
Request
Subscribe
If you can’t nd the name of the course,
press the ‘Request’ button at the bottom of
the screen. This will bring up a form that
can be lled out and sent to our mapping
team who will map your course.

Step 6: Syncing course changes
If you have any course maps that need to be uploaded to the
watch, or any updates that need to be transferred to the watch,
you should see a red notication at the top of the courses
screen. If you wish to perform a sync then tap on the ‘Ready to
Sync’ button to navigate to the ready to sync waiting list.
On the resulting screen, you will see the list of courses that
require a sync. Press the ‘Tap to Sync’ next to the course you
want to update and sync will begin. You can sync as many or as
few in this waiting list as you wish.


Download or update your mobile app
As we routinely update our mobile app to
improve useability and add new features, please
make sure you have the most recent version
installed on your iOS or Android device.
To upload rounds you must use the mobile app.
You can still view and edit your round on the
Performance Dashboard (shown on the right)
which can be accessed via web browser on a
computer or tablet.
Shot Scope dashboard
A more detailed analysis of your statistics.
Available to view online at:
https://dashboard.shotscope.com
Shot Scope mobile app
Provides a quick overview of your key
statistics. Used to set up your account, update
rmware, update courses and upload rounds.


Step 1: Charging your Shot Scope X5
Your X5 can be charged from any USB port or USB compliant
wall charger. Please only use the USB charging cable provided
with the X5 for charging.
Plug the charger into the charging port on the back of the
watch face; the screen will show charging has commenced
if connected successfully.
Additional chargers can be purchased at:
www.shotscope.com/products/accessories

Step 2: Installing tags
Your Shot Scope X5 comes with 16 tags, each labelled with an
initial to identify the corresponding club. It is best practice to
match the appropriate tag for each club. For example, the D tag
would screw into your driver.
Tags must be inserted securely into the grips of the clubs
you wish to track. Do this by rotating the tag clockwise whilst
applying a slight downward force.
There are 16 tags that come with the watch, extra tags can be
purchased at: www.shotscope.com/products/accessories
Only the P tag can be used with a putter.
Existing Shot Scope user: The tags from your previous
Shot Scope product will work with the new device, however we
recommend swapping the old tags for the new and improved
2nd generation tags provided for optimal performance.

Step 3: Setting up My Bag
My Bag is a feature on the Shot Scope dashboard and apps which
allows you to create a database of all of the clubs you use and track
their performance.
To access My Bag on mobile it can be found in the ‘more’ section of
the app on iOS and in the drop down menu on Android.
To compliment the Shot Scope app we also have an online web
dashboard https://dashboard.shotscope.com.
You can log into this dashboard using the same email and password
as your mobile app. The My Bag feature can be found in the ‘Account’
tab at the top right corner of the dashboard.
Once you have screwed your tags into their respective clubs, you
should then enter the My Bag feature on either the mobile app or
the online dashboard and create your set of clubs. You can then
assign these clubs to the tag slots in the app so that they match your
physical tag set up.
Please visit the support site for detailed instructions on how
the My Bag feature works: support.shotscope.com


At the course
Step 1: How to wear the watch
In order to provide automatic shot detection, Shot Scope
utilizes both the watch and the tags. The two must be within
a 10cm range of each other at all times when a shot is being
played. If you grip down the club or wear the watch high
on the wrist, the range may become too great for the X5 to
function and the shot may not be recorded. As the tracking
technology is incorporated into the strap itself, having the
strap closer to the tags will improve performance.
You should also not wear any ION bands, metal or other
devices on your wrists as this may affect the performance
of the device.
Right-handed golfer?
The X5 will need to be worn
on your left hand.
Left-handed golfer?
The X5 will need to be worn
on your right hand.
Other Shot-Scope Watch manuals
