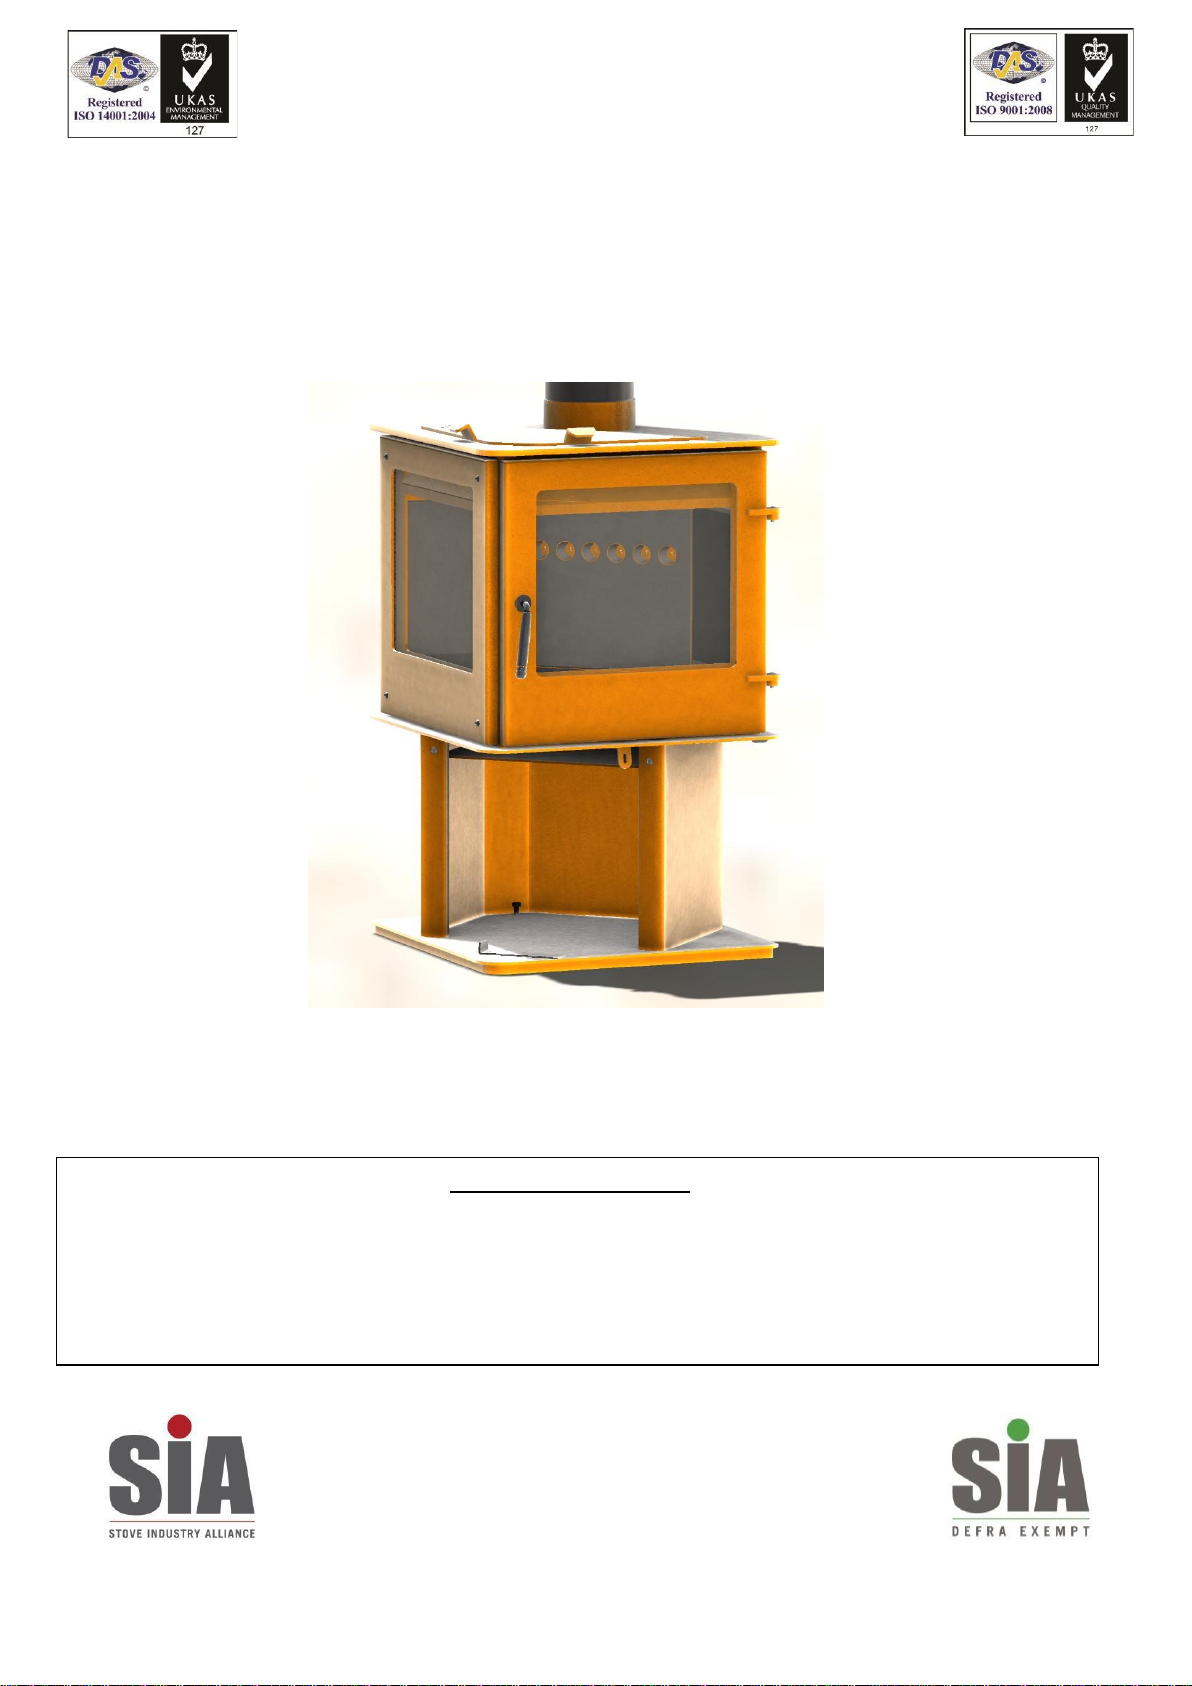
SIA Go-Eco Panofire User manual
Charlton & Jenrick Ltd
Go-Eco Panofire Outdoor Fireplace
Two Side Glass Front with 7kW Nominal Output.
Installation and Operating Instructions
Please hand these instructions to the stove user when set up is complete. Leave the stove ready for
operation and instruct the user in the correct use of the appliance and operation of controls.
Fireline –A division of: Charlton & Jenrick Ltd
Unit D Stafford Park 2, Telford, Shropshire, TF3 3AR
T: 01952 200 444 F: 01952 200 480
www.charltonandjenrick.co.uk
A Charlton and Jenrick Group Company
Clean Air Act Exemption
The C&J Go Eco Panofire Outdoor Fireplace stove only has been exempted under the Clean Air Act
1993 to burn seasoned wood logs in designated smokeless zones inthe UK. This is subject to the correct
fitting of the air control limiter (the part and fitting instructions are packed separately) maintaining the
air control at a minimum opening at all times. Instructions for wood burning MUST be followed in
order to ensure compliance at all times.

2
Go Eco Panofire Outdoor Issue 01 02/22
PLEASE READ ALL THESE INSTRUCTIONS CAREFULLY!
For safety reasons it is essential that your stove is correctly installed and operated. Failure to
observe safety instructions given here may lead to danger of serious injury or even death. C&J
cannot accept responsibility for any fault or consequential problems arising through failure to
read instructions, incorrect installation or operation.
TABLE OF CONTENTS
Section Page No
1.
List of Components 3
2.
Component Identification and Controls 3
3.
Important Safety Information 4
4.
Preparation of Stove for Installation 5
5.
Installation Information 6
5.1 Chimney & Flue 7
5.2 Hearths 7
6.
Cleaning and Chimney Sweeping 7
7.
Fuels 7
8.
Maintenance 7
9.
Technical Data & Declaration of Performance 8
10.
The Clean Air Act 1993 and Smoke Control Areas 9
11.
Air Controls 9
11.1 Single Air Control 9
11.2 Airwash 10
11.3 Tertiary Air 10
12.
Woodburning base 10
13.
De-Ashing 10
14.
Cleaning 10
15.
Fuels 11

3
Go Eco Panofire Outdoor Issue 01 02/22
16.
Important information for woodburning 11
16.1 Refuelling onto Low Firebed 11
16.2 Fuel Overloading 12
16.3 Operation with doors open 12
16.4 Primary Air Left Open 12
16.5 Lighting the Stove 12
16.6 Refuelling 13
17.
Cooking with top Griddle or Grill 13
18.
Shutting Down 13
19.
Basic User Maintenance 14
20.
Maintenance Guide 15
21.
Principal Dimensions 16

4
Go Eco Panofire Outdoor Issue 01 02/22
Fig 1. Operating Tool
May be used to operate single
aircontrol lever and ash pan
removal.
2.0
Fig 2
Panofire Outdoor Stove
Assembly and Components
1.0 List of Components
Description of Parts Qty
Panofire Stove Assembly 1
Operating Tool 1
Flue Spigot Collar (packed) 1
Stove Operating Gloves (pair) 1

5
Go Eco Panofire Outdoor Issue 01 02/22
3.0 Important Safety Information
3.1. WARNINGS AND IMPORTANT SAFETY INFORMATION
3.2. READ THESE INSTRUCTIONS CAREFULLY BEFORE INSTALLATION!
These instructions cover the basic principles to ensure satisfactory installation of the
stove, although detail may need adaptation to suit particular local site conditions.
3.3. THIS APPLIANCE IS FOR OUTDOOR USE ONLY AND IS NOT APPROVED FOR
INSTALLATION INDOORS IN THE UK OR EUROPE
3.4. THIS APPLIANCE IS NOT INTENDED FOR USE IN ENCLOSED SPACES, GARAGES, BUILDINGS,
RECREATIONAL VEHICLES, CARAVANS, PODS, BOATS or any similar areas. Although the
appliance is designed and constructed to be sufficiently airtight in use for smoke control
purposes, if installed incorrectly in enclosed spaces, highly dangerous Carbon monoxide can
accumulate and cause potentially fatal toxic effects.
3.5. CAUTION: ALL surfaces and glass panels get EXTREMELY hot in use and will cause burns if
touched. It is your responsibility to oversee use, and you MUST protect children and
vulnerable individuals from contacting the appliance in operation.
3.6. Always use the provided protective gloves for operation and re-fuelling.
3.7. Do not use near vehicles or fuel sources or storage areas.
3.8. Treat this appliance as if it were an open fire.
3.9. Do not leave unattended particularly in the presence of children, vulnerable individuals and
pets etc.
3.10. Do not use petrol, kerosene, diesel, paraffin, barbecue lighter fluid etc to light or re-light
the fire. Always use solid fuel firelighters, preferably of the wax coated wood wool type.
3.11. Do not use Aerosol sprays near the appliance.
3.12. Keep all materials that could be affected by heat away from the fireplace. This includes
electrical cables, gas cylinders, soft furnishings, plastic or wood furniture etc.
3.13. DO NOT use on timber decking without protecting the surface from accidental spillage of
embers from the fire. Failure to do this correctly may lead to a fire hazard.
3.14. Important Chimney Warning
This stove requires a chimney flue to be connected to work and operate safely. Operating
without the C&J specified flue kit or equivalent 3m length of suitable 5” diameter flue pipe
can be dangerous and invalidates any warranty claims.

6
Go Eco Panofire Outdoor Issue 01 02/22
4.0 Preparation for Use.
Your stove comes fully assembled, checked and packed in a protective plywood crate.
Carefully cut and remove the straps and lift off the top and upper crate. Remove any
plastic packaging, open the door and remove all the contents. See List of Components
section (above) and check contents carefully.
4.1. To complete assembly of the flue collar connecting spigot remove the interior
components of the stove using the following procedure.
4.1.1. Remove the two firebrick side liners by carefully shifting the front edges inwards
towards the centre of the firebox and sliding forwards away from the mitre joint
with the back liner at the rear corners. Take great care not to chip or damage the
surfaces of these ceramic components –support therear liner so that it cannot fall
over and break. Remove the rear firebrick liner.
4.1.2. Remove the baffle plate by supporting the plate with both hands and lifting one
side up and sliding the other side off the other support. Twist one side up higher
than the other so the baffle can be lowered down into the firebox. Once one side is
lowered then the baffle can be removed from the firebox through the door
opening.
4.1.3. If required remove the ashpan by sliding out of the ashpit.
4.1.4. If required remove the grate and firebox base firebricks from the firebox by lifting and
tilting.
4.2. The stove is provided with levelling bolts for uneven surfaces. Set the adjustable feet
of the stove to approximately their required position until the stove stands level in its
intended position. They can be re-adjusted lower later if required.
4.3. The flue spigot collar may now be fitted. Secure tightly with 3 x M6 cap screws in the upper
rear firebox.
4.4. Adjust the stove into its final position using an assistant to help.
4.5. Make the connection to the flue, a minimum of 3m high and internal 5” diameter,
making sure to secure all joints carefully with clamps (if provided) or drilling and
screwing. ALWAYS SCREW THE FIRST LENGTH OF FLUE TO THE FLUE SPIGOT. Do not
leave the flue pipe standing by gravity alone as it can be dangerous and blow down
in high winds –always screw or clamp all joints and support externally by cable or
brackets where required.
4.6. The internal parts of the stove can be re-assembled as the reverse of the previous
removal instructions before testing the stove and installation.
5.0 Installation Information
5.1. Chimney/flue
The chimney height and the position of the chimney terminal should conform to C&J
recommendations of 3m height, 5” (125mm) diameter. The flue kit available from C&J should
be used wherever possible.

7
Go Eco Panofire Outdoor Issue 01 02/22
5.2. Hearths:
These stoves do not normally require a hearth beneath them as they do not cause the floor
temperature to exceed 100 degrees C. However, for stability the floor beneath must be hard,
even and generally level. Grass or dirt is not normally supportive or hard enough. In all
instances a hardened surface should be provided so that the stove can be levelled and support
any possible wind loadings from the 3m flue pipe required for safe operation and use. Steel or
other metal plate(s), toughened glass, bedded ceramic tiles or slab(s) of stone/concrete
materials may fulfil this function well.
In the event that the appliance is used on a timber deck or similar combustible surface, a non-
combustible superimposed hearth extending around the stove pedestal base and forming an
apron of at least 225mm at the front of the stove and 150mm on either side is recommended
to help protect the deck or floor from unintentional/accidental spillage of partially burned fuel
during re-fuelling. Steel or other metal plate(s), toughened glass, ceramic tiles or slab(s) of
stone/concrete materials may fulfil this function well.
The appliance shall be installed on a floor with adequate load-bearing capacity. If the existing
construction does not meet this requirement, suitable measures (e.g. a load distributing plate)should
be provided to achieve it.
6.0 Cleaning and Chimney Sweeping
The appliance, flue & chimney must be cleaned and checked internally and externally
regularly in use and especially after a period of disuse. Inspect above the baffle at least weekly
to check for build-up of soot or debris on the top from the flue pipe. Remove the baffle and
check the flue spigot and connector is fully clear at regular intervals, especially if the fire burns
slower than normal. The chimney and flue connector should be swept at least annually, more
often when used with sooty fuels or damp wood. The chimney or flue can usually be swept
through the firebox if required.
7.0 Fuels
Only use recommended fuels which is seasoned or kiln dried wood logs. The appliance will be
damaged by burning petroleum coke, liquid fuels, charcoal, leaves, garden waste or general
rubbish and this will invalidate any warranty and risk your personal safety. The appliance
must not be used as a rubbish incinerator.
8.0 Maintenance
Annual checking, cleaning and servicing of the appliance and flue by a competent
individual is recommended. Guidance is given for basic maintenance tasks in the
Maintenance section later in these instructions.
8
Go Eco Panofire Outdoor Issue 01 02/22
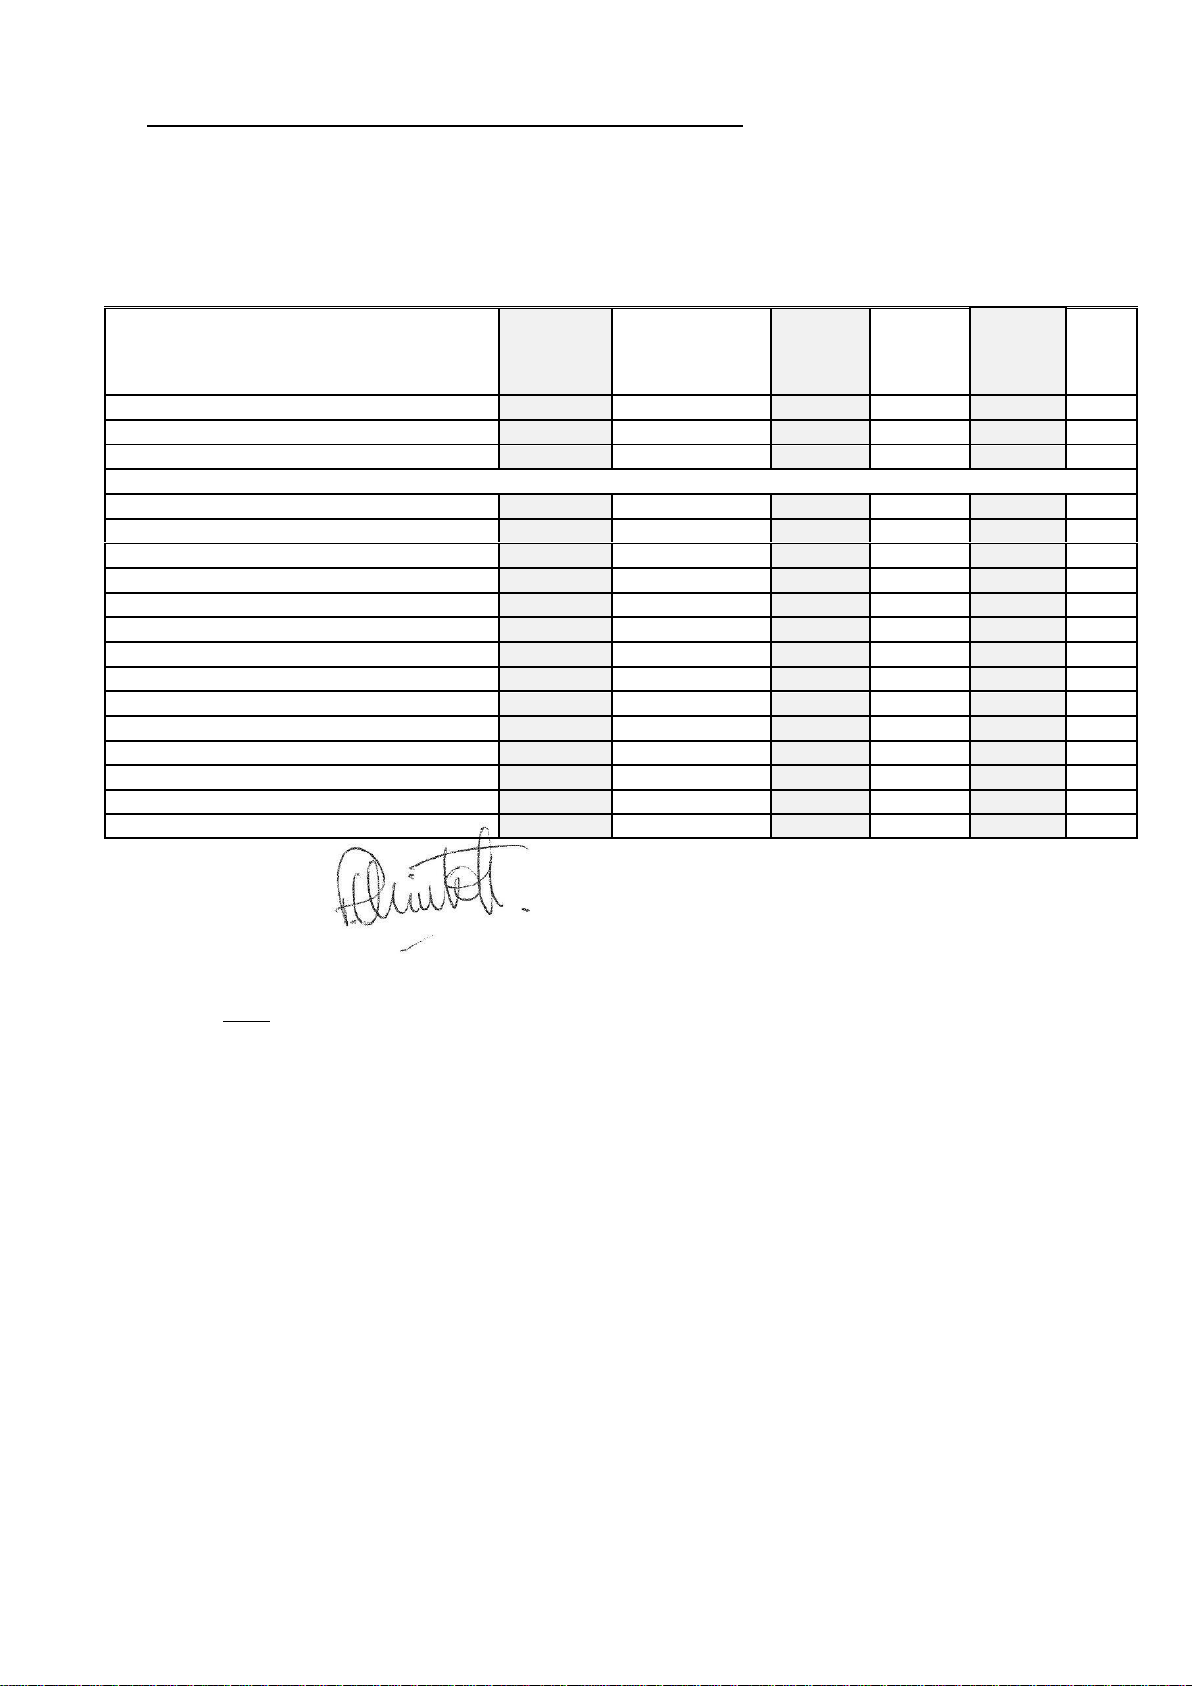
9.0 Technical Data & Declaration of Performance (DoP)
Manufacturer: Charlton & Jenrick Ltd.
Range Designation: Go Eco Panofire Outdoor Fireplace
Models: Panofire Outdoor Fireplace.
Intended Use: Outdoor heating appliances
Independently Performance & Safety tested by: Kiwa Gastec, UKCA NB No: 0558
Constancy of Performance System: ISO9001
Model
Panofire
Outdoor
Fireplace
Notes
Appliance weight (packed/unpacked) (Kg):
119/102
Approximate Output Range: (kW)
5.0-8.0
Particulate Emission Test Standard:
PD6434
Performance Characteristics Using Wood Fuel –average over 3 high output and 3 low output tests
Test Report Issue Date:
02/22
Average Total Efficiency: (%)
79.4
Declared nominal output: (kW)
7.0
Tested nominal Outputs: (kW)
5.2-7.9
Tested wood re-fuelling interval: (h)
0.62-1.0
Average Mean CO emission (@13% O2) : (%)
0.27
PD6434 Particulate Emissions High output: (gh-1)
3.0
Limit 7.6 = Pass
PD6434 Particulate Emissions Low output: (gh-1)
1.7
Limit 6.7 = Pass
Optical Density Time > 0.2 High (Mins)
0
< 6 = Pass
Optical Density Time > 0.2 Low (Mins)
0
< 6 = Pass
Ecodesign PM High using ESP method g/kg dry fuel
1.47
Limit 2.4 = Pass
Ecodesign PM Low using ESP method g/kg dry fuel
1.3
Limit 2.4 = Pass
Mean Flue Temperature range: (Deg C)
172-289
Approximate Max Log Length: (mm)
350
Signed:
Peter Mintoft
Director
Feb 2022
NOTE: Refuelling intervals for testing are chosen according to the standards concerned for performance testing and
are comparative only. They do not relate directly to re-fuelling intervals that may be achieved on an installed
product.

9
Go Eco Panofire Outdoor Issue 01 02/22
10.0 The Clean Air Act 1993 and Smoke Control Areas
Under the Clean Air Act local authorities may declare the whole or part of the district of the
authority to be a smoke control area. It is an offence to emit smoke from a chimney of a
building, from a furnace or from any fixed boiler if located in a designated smoke control area. It
is also an offence to acquire an "unauthorised fuel" for use within a smoke control area unless it
is used in an "exempt" appliance ("exempted" from the controls which generally apply in the
smoke control area).
In England appliances are exempted by publication on a list by the Secretary of State in
accordance with changes made to sections 20 and 21 of the Clean Air Act 1993 by section 15 of
the Deregulation Act 2015. Similarly, in Scotland appliances are exempted by publication on a
list by Scottish Ministers under section 50 of the Regulatory Reform (Scotland) Act 2014. In
Northern Ireland appliances are exempted by publication on a list by the Department of
Agriculture, Environment and Rural Affairs under Section 16 of the Environmental Better
regulation Act (Northern Ireland) 2016. In Wales these are authorised by regulations made by
Welsh Ministers.
The C&J Go Eco Panofire outdoor fireplace has been recommended as suitable for use in
smoke control areas when burning wood logs. This is conditional upon fitting the supplied
secondary air control limiter screw and following the woodburning instructions precisely.
Further information on the requirements of the Clean Air Act can be found here:
https://www.gov.uk/smoke-control-area-rules . Your local authority is responsible for
implementing the Clean Air Act 1993 including designation and supervision of smoke control
areas and you can contact them for details of Clean Air Act requirements.
11.0 Air Controls
Keep air controls and inlets/outlets clean and free from ash or debris at all times.
11.1. Single Air Control Operation
Secondary (air wash) and tertiary air is automatically controlled by the single control lever at the
bottom, underneath the stove door. The stove does not require Primary under grate air as it
only burns wood logs. The fully RIGHT position is the OFF position and closes off combustion air
to the firebox. The off position should only be used if absolutely necessary for very slow burning
and will cause the glass to become blackened, the chimney to gradually become tarred and
smoke to be emitted from the stove.
Wood burning: Slide the air control lever fully LEFT for maximum air to start or revive a wood
fire. Returning the lever towards the centre position will reduce the air supply progressively to
reduce the burn rate. The nominal burn rate is usually achieved when the stove is fully warmed
up (2-3 loads of logs) and burning 2 dry hardwood logs by having the lever very approximately
half way across its range. This is only a rough guide as flue and fuel conditions will vary the
required position. The fire will automatically be supplied with the correct mix of secondary and
tertiary air for complete combustion. The maximum position conveniently provides a boost of
primary air as well to get new fuel burning quickly in order to minimise smoke. It is not
normally necessary to leave on maximum setting unless fuel is poor and the user is monitoring
the fire.

10
Go Eco Panofire Outdoor Issue 01 02/22
11.2. Air Wash
All C&J stoves are provided with a sophisticated “air wash” system to assist in keeping the fire
as visible as possible and reducing cleaning intervals. This secondary air supply to the stove is
controlled through the main single air control. The Clean Air Act air restrictor will deliberately
prevent full closure of this control for Wood side of operation.
The glass will not remain fully clear indefinitely, entirely depending on fuel, flue and operational
settings, and will require cleaning with stove glass cleaner or ceramic hob cleaner from time to
time.
11.3. Tertiary Air
This appliance is also fitted with a patented tertiary air combustion system that burns otherwise
uncombusted gasses in the products of combustion thereby improving efficiency, increasing
heat output and decreasing unwanted atmospheric emissions. The Tertiary air supply to the
stove is controlled automatically by the draught in the flue and firebox and the single air control.
At certain stages of burning you will notice “jets” of swirling flame emerging near the air holes
to the rear of the firebox. This is not always visible depending upon the fuels and burn cycle
stage so there is nothing untoward happening if it cannot be seen.
12.0 Wood burning base
Your stove is fitted with a wood burning firebrick base and grate. This is designed to retain the
charcoal pieces generated as the logs disintegrate and maintain ideal conditions for log
combustion. If the char bed builds up to a point where it is considerably above the front fuel
retainer, then the stove should be operated maximum air opening (fully to the left) for a while
to burn some off. Alternatively, a portion of the char should be carefully removed into a
fireproof receptacle and placed safely away from combustible materials in the outside air.
NEVER retain burning char in an indoor or enclosed space because it gives off toxic carbon
monoxide.
13.0 De-Ashing
Before re-lighting the fire the base of the stove should be partially or completely cleared of the
old ash and fire bed that was present. Simply rake through the grate and into the ashpan.
Empty the ashpan before each burn. If the ashpan is full, burning will be adversely affected.
14.0 Cleaning
Glass: Despite the advanced air wash system provided, the glass will still need cleaning from
time to time depending on the fuel quality and burning rates used. Never clean glass when the
stove is hot. Always use stove glass cleaner or ceramic hob cleaner, which is available from your
stove retailer or supermarket. As an alternative, use a wet cloth with some of the wood ash if
burning wood but be very careful to use very clean ash so as not to scratch the glass. DO NOT
use any coal ash to clean the glass –it will scratch.
Outer body: The stove is made from Corten steel which will for a rusty coloured patina but not
rust away as normal steel does. It will simply need to be dusted off from time to time. DO NOT
use wet cloths as it can spread ash, plaster, cement, fire cement or fire board dust and
subsequently cause the surface to turn grey where it has been wiped. Painting or other
protective finishes are not required and unless high temperature formulation is used, it will
always burn off potentially leaving an unsightly residue. Inner firebox: Brush the inside of the
firebox clean from time to time to check the integrity of the plates and liners etc. See
Maintenance Guide section for instructions on how to remove parts of the stove. Steel and high

11
Go Eco Panofire Outdoor Issue 01 02/22
quality firebrick liners are very resilient firebox materials and will give reliable service without
major cleaning or work on the firebox. The firebrick liners and baffle are very durable but may
require replacement occasionally depending upon fuels and the type of usage experienced.
Firebox linings are not covered by warranty, as they are a wearing consumable part.
Baffle: It is essential to check the top of the baffle for build up of soot and ash regularly when in
use and after a long period of disuse –e.g. summer. From time to time remove the baffle if
necessary to ensure that the flue way entrance is clear. Remove the firebrick firebox liners first.
Lift the front edge of the baffle upwardsand forwards to slide the rear edge off its support.
Lower the rear and side edges and then slide the baffle off its front supports to leave it free for
removal. See maintenance section for further details.
Air Supply: Ensure the air intake chamber visible underneath the ash pit section and above the
log store area is kept free of excessive ash or debris. Ensure the ash-pit section is regularly
emptied as air supply comes through this area to supply the fuel bed.
15.0 Fuels
The appliance has been tested and approved burning dry, well-seasoned logs. This is the
recommended fuel. For other fuels please contact the manufacturer for advice.
Warning!- Petroleum coke fuels or household waste must not be burnt on this appliance.
Should any difficulties arise over fuel quality or suitability, consult your local Woodsure
registered log fuel merchant.
16.0 Important Information for Wood Burning
With a full load of wood and burning near nominal output the stove will need to be refuelled
approximately every 30 mins -1.5 hours. One or two large chunky logs will burn much longer
than a 3+ smaller ones. Care must be taken that logs do not touch the baffle or the glass panel.
Do not stack logs above the level of the tertiary air inlet profiling in the rear ceramic firebox
liners at the back of the stove. This will create excessive smoke
Always make sure that flames are visible above the wood after re-fuelling for cleanest burning.
Burning without flames above the fuel will create unnecessary smoke. After re-fuelling open
the single air control fully to the Left (maximum) side for 3 minutes or until the logs are fully
blackened to achieve full flames above the fuel.
Wood burns well on a bed of ash and it is therefore only necessary to remove surplus ash from
the stove occasionally when it builds up and may restrict air supply.
Burn only dry, well-seasoned wood, which should have been cut, split and stacked - under cover
from rain - for at least 12-24 months with free air movement around the sides of the stack to
enable it to dry out. Burning wet or unseasoned wood will create tar deposits in the stove and
chimney and will not produce a satisfactory heat output. Wood that is not properly dry (‘dry’ is
considered to be less than 20% internal moisture content) uses up energy from the burn
process to evaporate the water inside the wood thus creating very poor conditions for
combustion. The main cause of burning problems with wood stoves is due to excessively damp
wood. Wood can appear perfectly dry on the outside but still contain 40-50% water on the
inside. A moisture meter can be purchased from stove and equipment suppliers if you wish to
check your wood source is correct. Split a log and check the inside as well as the outside.
16.1. Refuelling on to a low fire bed
If there is insufficient burning material in the firebed to light a new fuel charge, excessive smoke
emission can occur. Refuelling must be carried out onto a sufficient quantity of glowing embers

12
Go Eco Panofire Outdoor Issue 01 02/22
and ash so that the new fuel charge will ignite in a reasonable period. If there are too few
embers in the fire bed, add suitable kindling and firelighter if necessary to prevent excessive
smoke.
16.2. Fuel overloading
The maximum amount of fuel specified in this manual should not be exceeded, overloading can
cause excess smoke. Do not load fuel above the centre of the tertiary air profiling in the back
ceramic firebox liner or allow them to touch the glass. All models max log diameter = approx.
150mm. Max length = 300 - 350mm. A typical fuel load is two logs, one log is acceptable ONLY if
loading onto a hot, well established fire bed.
16.3. Operation with door left open
Operation with the door open can cause excess smoke. For smoke control exemption the
appliance must not be operated with the appliance door left open.
16.4. Primary Air left open
The single air control does not provide excessive primary air to the fuel bed and so prevents
inadvertent leaving open of primary air inlets.
16.5. Lighting the Stove
When you first light the stove it and the flue pipes may produce some smoke and vapours from
surfaces as they heat through for the first time. This is normal. During this burning off process
you may notice an unpleasant smell which will clear with burning time.
First, open the single air control fully by sliding fully LEFT. Load the firebox with 4 -6
(depending on size) fully dry small to medium logs in a crossed pattern.
Next add plenty of dry kindling sticks and a firelighter on top of the 4 logs. A crib lattice pattern
with plenty of air space between sticks tends to light rapidly work well.
Light the firelighter(s), leaving the air control fully open and close the door. If condensation
builds up then it can help to leave the door slightly ajar for a minute or two until the glass
warms slightly and condensation no longer forms. It should not benecessary to leave the door
open for long but do not leave the stove unattended if you find it necessary to leave the door
ajar.
The kindling will burn and steadily set light to the logs by radiation and breaking down to
charcoal gradually and with fewer emissions than the traditional logs on top methods. If
the logs fail to light properly it indicates that the logs need further seasoning or drying
and are not as moisture free as expected.
Allow the fuel to reach a steady burn and usually the initial fuel can be left to burn down
to charcoal without much further attention. DO NOT close down the air controls during
the initial ignition burn. If the fire dies before the logs are properly burnt through, add
further kindling or small split logs so that a bright fire can be maintained. Build the fire up
as soon as the flames have died down from the ignition load carefully by adding a couple
of small well split logs at a time. Do not overload the fire bed with more than two to
three logs at a time.

13
Go Eco Panofire Outdoor Issue 01 02/22
Once you have a good fire bed established across the base, further fuel can be added step by
step as required. Don’t be tempted to overload the fire bed with fuel all at once or close down
the air controls until the fire is really well established for some time. Once the ignition period is
completed and the stove is fully hot, gradually reduce the air control opening to establish the
burning intensity you require.
16.6. Re-fuelling
When burning wood, the fire will die down as the fuel is consumed. When the flames disappear
and the remainder is breaking down into glowing embers it is an appropriate time to consider
re-fuelling. NOTE: If the flames disappear and there are still lumps of solid wood left this
indicates excessive internal moisture in the wood, too low a firebox temperature (running too
cool), too small a fuel load or insufficient air supply/flue draught.
NOTE: To eliminate unwanted smoke emission, after loading new logs on to the fire, open the
air wash control up fully for 3 minutes or until the logs are blackened all over to boost the fire
and get flames issuing from the top of the fuel as soon as possible. When flames are well
established, reduce the air wash to the running setting required. Burning without flames above
the fuel will create unnecessary smoke. Do not load fuel above the centre of the tertiary air
inlet hole profiling at the back of the firebox.
Loading 1 or 2 large sized logs weighing 1-2kg DRY will produce a good output with reasonable
burn time. Small logs will burn up quicker producing a high output and more emissions for a
short time, and a large log will take longer to burn and produce less output and less emissions
over a given time. These appliances are approved for intermittent operation on wood (0.75 to
1.5 hour burn cycles) although longer burn times can be achieved by fully loading the firebox,
getting the fuel burning well and then shutting the air control right down (see below). This will
produce a long but smoky/tarry burn. The fire will then need reviving by first opening the air
controls and then using small pieces of wood and plenty of air to get flames issuing from the
wood again. Never load fuel above the rear firebox tertiary air profiling or allow it to spill onto
the glass.
17.0 Cooking using the top griddle or grill.
The stove is provided with a hinged lid on top for heating and cooking food. Always clean the surfaces
with a pan scrubber or similar to remove oxide or dirty build up from the surfaces before bringing food
or cooking oils into contact with them.
•The flat top surface including the hinged lid surface can be used for flat griddle cooking without
any other utensils or as a hot plate for pans, baking trays or kettle.
•The char grill underneath the lift-up lid can be used for searing meat or similar as per a barbecue
type grill. Always allow the fire to die down and open the door slightly to allow air flow whilst
using the open grill. Keeping the door shut may create poor combustion and excessive smoke.
18.0 Shutting Down
The stove will normally shut down by itself as the fuel is consumed so there is no need to close
the air control towards the end of the burn. In order to shut down the stove for other reasons,
close the single air control to the fully right position. If the control is left in this position, the fire
will smoke, smoulder and eventually go out but it will also cause the glass to blacken and tar to
be formed. If you wantto revive the fire it is recommended that the air control is opened fully to
the left initially.

14
Go Eco Panofire Outdoor Issue 01 02/22
Warning! - The stove will remain very hot for a considerable time after the fire has died down
or been extinguished.
18.1. Shut down for prolonged periods
If the stove is to be left unused for a prolonged period of time then it should be given a
thorough clean to remove ash and unburned fuel residues. Doing so will reduce the inevitable
corrosion within the firebox. To enable a good flow of air through the appliance to reduce
condensation and subsequent damage, leave the air controls open. It is important that the flue
connection, any baffles or throat plates and the chimney are swept prior to lighting up after a
prolonged shutdown period.
19.0 Basic User Maintenance
See also the Cleaning section above and Maintenance Guide Section below for further
information.
Inspect the inside of the firebox and above the baffle plate every week during use.
Inspect the inside of the stove and the flue ways and ensure they are 100% clear after a period
of disuse.
Check all rope seals for completeness, wear and that there are no gaps between the ends etc.
Any gaps must be eliminated and ropes must be re-adhered to their grooves with suitable rope
seal cement where required. Worn or missing rope seals will affect appliance operation, control
and smoke emissions output.
Check all air intakes and outlets within the stove for cleanliness and remove any ash or debris
build up by suitable means.
Only use manufacturers recommended replacement parts on the appliance.

15
Go Eco Panofire Outdoor Issue 01 02/22
20.0 Maintenance Guide
8.1. Removing Firebox Liners 1. First bring the front edges of the left and right firebox liners
inwards at the front as you slide them forwards until they disengage from the rear liner. Then
tilt them slightly and remove from the firebox –NOTE: Ensure that the rear firebox liner
does not fall forwards and break 2. Remove the rear firebox liner.
8.2. Removal of or Inspection above Baffle Plate. 1. First remove the firebox liners as above. 2.
lift upwards at one side and at the same time slide the plate forwards. 3. Twist the baffle
slightly so one side can be lowered off its side support bracket into the firebox .Lower fully
and remove from the firebox.
8.3. Removing firebox base components. Remove the firebox liners as above. Gently lift up the
grate and lift it out through the firebox front opening. Lift each of the base firebricks in turn
and remove through the door opening.
8.4. Removing Flue Spigot Collar. Remove the firebox liners and baffle. Unscrew the 4 x M6
securing screws from inside the firebox and remove spigot collar. When re-assembling either
use a suitable fireproof gasket or fire cement to reduce air leaks.
8.5. Smoke Control Air Limiter. If the stove is to be used to burn seasoned wood logs in a Smoke
Control Zone in the UK, the Smoke Control air limiter screw must be fitted. This screw
prevents the air control being completely closed when the stove is used to burn wood.
8.6. Maintenance of air control valve. The main air control valve is mounted underneath the air
plenum chamber which is immediately beneath the firebox base. To access this for thorough
cleaning firstly remove the upper heatshield within the log store space under the firebox.
Remove the two front securing screws and release the heatshield plate from the log store.
The air control arm and aperture can now be accessed.
8.7. Adjusting Door Latch. The handle assembly may be adjusted on the door by removing the
locknuts and roller latch from inside the door with it open. Placing the washers either side of
the roller latch will either tighten or slacken the pressure on the door seal.

Table of contents
Popular Outdoor Fireplace manuals by other brands


The Fireplace
The Fireplace JETMASTER 700 D installation instructions

Superior
Superior VRE4543EN Installation and operation instructions

Napoleon
Napoleon PATIOFLAME GPFN Installation and operation instructions

Endless Summer
Endless Summer Dakota GAD19101ES owner's manual

Vermont Castings
Vermont Castings ODGSR36A Homeowner's installation and operating manual

FEUERHAND
FEUERHAND PYRON user manual