Sierra Flame Lynwood W76 Owner's manual

Installation and Operation Instructions
for the United States and Canada
SIERRA FLAME Lynwood W76
Non-Catalytic Woodstove
Distributed in the United States and
Canada by:
SIERRA FLAME
502-1027 Davie straat
V6E 4L2 Vancouver
British Columbia, Canada
Manufactured by:
BE0437960542
Nijverheidsstraat 18
B-2381 Weelde, Belgium
US Environmental Protection Agency
with 2020 cord wood standard
This solid fuel heater has been tested and
listed according to ULC S627-00 (2016)
and UL 1482-2011 standards by an
accredited laboratory.
This stove is listed to burn solid wood only. Do
not burn any other fuels.
Read this entire manual before you install and
use this appliance.
Read this entire manual before installation and
use of this wood stove. Failure to follow these in-
structions could result in property damage, injury
or even death.
READ AND KEEP THIS MANUAL FOR FUTURE REFERENCE
PFS F19-461
03-28312-00 1/202

Page 2
CAUTION !!
IMPORTANT OPERATING AND MAINTENANCE
INSTRUCTIONS INCLUDED. DO NOT DISCARD.
LEAVE THIS MANUAL WITH THE HOMEOWNER.
Hot while in operation, keep children, clothing and furniture
away. Contact may cause skin burns.
Failure to follow the information in this manual may result in
Read this booklet completely before installing or operating this
appliance.
For use with solid wood fuel only. This appliance has not been
tested for the use of compressed wood logs or bricks.
Do not modify this appliance in any way.
The chimney connector must be in good condition and kept
clean.
liquids in the vicinity of this or any other appliance.
Comply with all minimum clearances to combustibles as
Glass and other surfaces are hot during operation and for
around this appliance. Warn children and adults about high
temperatures. High temperatures may ignite clothing or other
other combustible materials away.
DO NOT OPERATE WITH THE DOOR OPEN AND KEEP ALL SEALS
IN A GOOD CONDITION.
Use of this product may produce smoke which contains chemicals
known to the State of California to cause cancer, birth defects, or other
reproductive harm.
Do not store anything including fuel under the appliance.

Page 3
Table of Contents
1. Introduction....................................................................................................................................................4
2. General Information.......................................................................................................................................5
Performances ................................................................................................................................5
Warnings!..............................................................................................................................................6
3. Installation .....................................................................................................................................................7
Pre Installation Check List ....................................................................................................................7
Floor protection.....................................................................................................................................8
Combustible Wall Clearance for top vent installation ...........................................................................9
Ceiling height clearance .....................................................................................................................10
Alcove clearance ................................................................................................................................10
Clearance to combustibles .................................................................................................................10
Draft Requirements ............................................................................................................................10
Chimney Installation ...........................................................................................................................10
Factory Built Chimney ........................................................................................................................10
Masonry Chimney............................................................................................................................... 11
Factory Chimney Top vent installation................................................................................................12
Rear vent installation ..........................................................................................................................13
Mounting the connector pipe to the stove...........................................................................................13
Combustible Wall Chimney Connector Pass-Throughs......................................................................14
Chimney height requirements.............................................................................................................16
4. Prepare the Stove........................................................................................................................................17
5. Instructions ................................................................................................................................................20
Fire resistant inner plates ...................................................................................................................20
Glass ..................................................................................................................................................20
Smoke & Carbon Monoxide Detectors ..............................................................................................20
Room Ventilation & Combustion Air Supply........................................................................................21
Outside Air .........................................................................................................................................21
Draft Requirements ...........................................................................................................................21
..............................................................................................................................21
6. Operation.....................................................................................................................................................22
Fueling the wood-burning stove .........................................................................................................22
Starting the Stove ...............................................................................................................................22
Advice.................................................................................................................................................24
7. Maintenance ................................................................................................................................................24
Removing the Fire Resistant Plates for Cleaning...............................................................................25
Replacing Door Glass.........................................................................................................................26
Creosote Formation and the Need for Removal.................................................................................26
8. Troubleshooting ...........................................................................................................................................27
9. SIERRA FLAME Limited Warranty ..............................................................................................................28
Dimensioned Drawing .....................................................................................................................................30
Spare Parts......................................................................................................................................................31

1.Introduction
We welcome you as a new owner of a SIERRA FLAME wood-burning stove. This manual will
explain the installation, operation and maintenance of the SIERRA FLAME wood-burning stove.
Please familiarize yourself with the owner’s manual before operating your stove and save the
manual for future reference. ‘This manual describes the installation and operation of the SIERRA
FLAME Lynwood W76 non-catalytic wood heater. This heater meets the US Environmental Pro-
heater has been shown to deliver 5,00 Btu/hr
‘This wood heater has a manufacturer-set minimum low burn rate that must not be altered. It is
against federal regulations to alter this setting or otherwise operate this wood heater in a manner
inconsistent with operating instructions in this manual.
Please read the entire manual carefully before you install and use your new SIERRA
FLAME wood-burning stove. FAILURE TO FOLLOW INSTRUCTIONS MAY RESULT IN
PROPERTY DAMAGE, BODILY INJURY OR LOSS OF LIFE. This manual contains important
user information. Keep this manual with the stove after installation is complete.
Safety and environmental testing
SIERRA FLAME Lynwood W76 has been tested by PFS of Cottage Grove, Wisconsin, to the
Environmental Protection Agency 2020 Cord wood standard and is safety listed by PFS to ULC
card. If you need to contact the factory please refer to this serial number.
-
soned wood having a higher than optimum moisture content, can reduce the amount of energy
transferred to the living area as a result of the energy expended to evaporate the excess fuel
moisture in order for the wood to burn. Operational habits - such as not building a robust
-
to medium-low burn rates.
-
gard to distribution of the heat. For example, a wood heater centrally located in an open living
area, will likely provide better circulation of heat than will a stove located in a room adjacent to the
larger living area.
Items included:
1 instruction and maintenance manual, 1 warranty card, and 1 detachable handle.
Page 4

Page 5
2. General Information
Performances
-
ume, maximum burn time and maximum heat output.
1Maximum Burn Time will vary depending on design of home, climate, wood type and operation
2
3As measured per CSA B415.1-10 stack loss method. The Maximum Heat Output value is representative of
4Higher Heating Value of the fuel is obtained per CSA B415.1-10 test method.
5Lower Heating Value of the fuel is obtained per CSA B415.1-10 test method.
6
7
obtained using EPA Test Method.
8Carbon Monoxide Emissions rate results from Test Method CSA B415.1-10.
Model Lynwood W76
Type Solid Fuel Room Heater
Type of Combustion Non-catalytic
Fuel Type
Main Material Cast Iron
Firebox Isolation Vermiculite
Flue Exit 6” (150 mm) Back and top connector
Recommended Heating Area (sq. ft..) 450 to 2000 ft2(42 to 185 m2)
Nominal Firebox Volume 1.55 ft3(0.044 m3)
Maximum burn Time114 hours
Maximum Heat Output (dry cordwood)25,00 BTU/h (1.1 kW)
Overall Heat Output Rate (min. to max.)2 3 13, BTU/h to 5,6 BTU/
h (4.0 kW to 1.1 kW)
345
6
Average particulate emissions rate71.1 g/h (EPA / CSA B415.1-10)
Average CO8 g/h

Page 6
CONTACT YOUR LOCAL BUILDING OFFICIALS FOR INFORMATION ON
RESTRICTIONS AND INSTALLATION AND PERMIT REQUIREMENTS IN YOUR
AREA.
WARNINGS!
1. KEEP ASH DRAWER CLOSED DURING FIRING IN THIS STOVE. USE A MET-
AL CONTAINER WITH A TIGHT FITTING LID TO DISPOSE OF ASHES.
2. NEVER USE GASOLINE, GASOLINE-TYPE LANTERN FUEL, KERO-
SENE, CHARCOAL LIGHTER FLUID, OR SIMILAR LIQUIDS TO START OR
‘FRESHEN UP’ A FIRE IN THIS STOVE. KEEP ALL SUCH LIQUIDS WELL
AWAY FROM THE STOVE WHILE IT IS IN USE.
3. DO NOT BURN GARBAGE OR FLAMMABLE FLUIDS SUCH AS GASO-
LINE, NAPHTHA OR ENGINE OIL.
4. THE STOVE IS HOT WHILE IN OPERATION. DO NOT TOUCH AND KEEP
CHILDREN, CLOTHING AND FURNITURE AWAY. CONTACT MAY CAUSE
SKIN BURNS. USE GLOVES WHEN STOKING THE FIRE.
5. DO NOT CONNECT THIS STOVE TO A CHIMNEY FLUE CONNECTED TO
ANOTHER STOVE OR APPLIANCE.
6. DO NOT CONNECT TO ANY AIR DISTRIBUTION DUCT OR SYSTEM.
7. DO NOT INSTALL IN A MOBILE HOME.
8. BE SURE TO ALLOW AN ADEQUATE SOURCE OF FRESH AIR INTO THE
ROOM WHERE THE STOVE IS OPERATING .
9. DO NOT OPERATE THE STOVE WITHOUT THE FIREBOX REFRACTORY
PLATES PROPERLY INSTALLED.
10. BUILD FIRES DIRECTLY ON THE BOTTOM OF THE STOVE.
11. DO NOT USE GRATES, IRONS OR ANY OTHER METHOD TO ELEVATE
THE FIRE.
12. THIS WOOD HEATER NEEDS PERIODIC INSPECTION AND REPAIR FOR
PROPER OPERATION. IT IS AGAINST FEDERAL REGULATIONS TO OPERATE
THIS WOOD HEATER IN A MANNER INCONSISTENT WITH OPERATING
INSTRUCTIONS IN THIS MANUAL

Page 7
Get everyone out of the house, including yourself.
save your home. Remember, however, that homes are replaceable, lives are not.
Close the air controls on the stove and the damper on the chimney connector.
the structure.
and repair normally is covered by homeowner insurance policies.
3. Installation
WARNING
IF YOUR SIERRA FLAME WOOD-BURNING STOVE IS NOT PROP-
ERLY INSTALLED, OPERATED AND MAINTAINED, A HOUSE FIRE
MAY RESULT. FOR YOUR SAFETY, FOLLOW ALL INSTALLATION,
OPERATION AND MAINTENANCE DIRECTIONS.
Pre Installation Check List
• Your stove and chimney connector will be far enough from combustible material to meet all
clearance requirements.
•
•
authority for approving your installation as safe and in determining that it meets all local and
state building and safety codes.
The metal label permanently attached to the back of every SIERRA FLAME wood-burning stove
shows that it has been tested to current UL and ULC safety standards, and gives the name of the
testing laboratory. Clearance and installation information is also printed on the label. Local au-
thorities will generally accept the label as evidence that, when the stove is installed according to
the information on the label and in this manual, the installation meets codes and can be approved.
This wood stove must be connected to 1) a chimney complying with the requirements for Type HT
chimneys in the standard for Chimneys, Factory-Built, Residential Type and Building Heating Ap-
For any unresolved questions about installation in the USA, refer to the national Fire Protection
Association’s publication ANSI/NFPA 211 Standard for Chimneys, Fireplaces, Vents and Solid Fuel
Burning Appliances. For installation in Canada, refer to CSA CAN-B365, Installation Code for Solid
Fuel Burning Applications and Equipment. These standards are the basis for many national codes.

Page 8
They are nationally recognized and are accepted by most local authorities. Your local dealer or
WARNING!
CHECK ALL LOCAL BUILDING AND SAFETY CODES BEFORE INSTALLATION.
THE INSTALLATION INSTRUCTIONS AND APPROPRIATE CODE REQUIRE-
MENTS MUST BE FOLLOWED EXACTLY AND WITHOUT COMPROMISE. AL-
TERATIONS TO THE STOVE ARE NOT ALLOWED. DO NOT CONNECT THE
STOVE TO A CHIMNEY SYSTEM SERVING ANOTHER STOVE, APPLIANCE OR
ANY AIR DISTRIBUTION DUCT. FAILURE TO FOLLOW THESE INSTRUCTIONS
WILL VOID THE MANUFACTURERS WARRANTY.
WARNING!
THE PROTECTIVE MATERIAL FOR TRANSPORT IS PLACED INSIDE YOUR
STOVE AND BETWEEN THE PLATES OF THE UPPER BAFFLE, REMOVE IT BE-
FORE INSTALLATION. YOU CAN REACH THEM FROM THE TOP OF THE COLLAR
THROUGH THE FRONT OPENING.
NOTE
If you plan to vent your stove into an existing masonry chimney, have the chimney inspected
You may wish to leave enough room between the stove and the wall to make cleaning easier.
Floor protection
-
tible hearth pad, which extends 8” ( 200 mm measured from the legs) beyond the stove sides
-
tion can be any noncombustible material that has a minimum R- value of 1.0 and listed to UL-
1618.
FRONT
Floor protection for Canada 18” (45 cm)
from unit to frrotector - and
8” (20 cm) to the sides.
Floor Protector must be under connector
pipe and 2” (5 cm) to the side for a through
8”
8”
USA 16
Canada 18”
FLOOR PROTECTOR
8”

Page 9
Combustible Wall Clearance for top vent installation
When installing stove the following clearances to combustible materials must be kept.
Chimney connector pipe ABCDEF
6” single wall 16”
(406 mm)
18”
(457 mm)
16”
(406 mm)
27.5”
(699 mm)
19.5”
(495 mm)
18”
(457 mm)
6” double wall ventilated 16”
(406 mm)
10”
(254 mm)
8”
(203 mm)
27.5”
(699 mm)
11.5”
(292 mm)
10”
(254 mm)
6” single wall and optional
heat shield
16”
(406 mm)
11”
(279 mm)
16”
(406 mm)
27.5”
(699 mm)
14”
(356 mm)
18”
(457 mm)
6” double wall ventilated
and optional heat shield
16”
(406 mm)
5”
(127 mm)
6”
(152 mm)
27.5”
(699 mm)
8”
(203 mm)
8”
(203 mm)
CLEARANCE TO COMBUSTIBLE SURFACES
C
C
F
F
A
B
D
E
ADJACENT WALL
ADJACENT WALL
TOP VENT OPTIONTOP VENT OPTION
BACK WALL
LLAWEDIS
Refer to the chimney connector manufacturer’s instructions concerning installation of listed con-
nector pipe, wall thimble and chimney.

Page 10
Chimney Installation
DO NOT CONNECT THIS UNIT TO A CHIMNEY FLUE SERVING ANOTHER APPLIANCE. DO
NOT CONNECT TO ANY AIR DISTRIBUTION DUCT OR SYSTEM.
SIERRA FLAME Lynwood is listed for installation as a vertically top or rear vented wood-burning
stove using a listed class A (UL103HT) for Canada (CAN/ULC-S629) factory built chimney exiting
through the ceiling/attic/roof.
The inside diameter of the chimney and connector pipe must not be smaller than 6” (152 cm)
diameter. Single wall 24 gauge MSG (0.58 - 0.71 mm) , this may be used in the room where the
stove is installed, follow the chimney manufacturer’s instruction for installation of chimney and
chimney adapter. In Canada, where passage through wall, or partition of combustible construction
is desired, the installation shall conform to CAN/CSA B365.
Factory Built Chimney
When a metal prefabricated chimney is used, the manufacturer’s installation instructions must
be followed. You must also purchase (from the same manufacturer) and install the ceiling sup-
-
mended by the manufacturer. The chimney must be the required height above the roof or other
obstructions for safety and proper draft operation.
Ceiling height clearance
Do not install in a room with a ceiling hight below 6’0” (182 cm).
Alcove clearance
The minimum alcove width is 63” (160 cm)
The minimum alcove height is 63” (160 cm)
Clearance to combustibles
of the stove.
Draft Requirements
SIERRA FLAME Lynwood is only one component of the total system. The venting system is
-
moving unwanted combustion by-products from the appliance. If the venting system’s design does
not promote these ends, the system may not function properly. Poorly functioning venting systems
may create performance problems as well as be a safety hazard (i.e. an oversized chimney may
result in less than optimum performance. Installations into a large, masonry chimney may require
a liner to improve performance). A draft test should read greater than .06” W.C. (Inches Water
Column) and less than 08” W.C. ( 15 Pa - 20 Pa). A stove located in a basement may not gener-
The chimney draft depends on the weather conditions. In stormy weather, you may reduce the
chimney draft by closing the damper in the chimney connector pipe (if a damper has been in-
stalled). If the chimney draft is strong, the combustion air supply should also be reduced.

Page 11
Masonry Chimney
Ensure that a masonry chimney meets the minimum standards of the National Fire Protection As-
sociation (NFPA) by having it inspected by a professional. Make sure there are no cracks, loose
mortar or other signs of deterioration and blockage. Have the chimney cleaned before the stove is
installed and operated. When connecting the stove through a combustible wall to a masonry chim-
ney, special methods are needed. Refer to Combustible Wall Chimney Connector Pass-Throughs
Remove the existing damper and/or any portion of the smoke shelf necessary to accommodate a 6
-
chimney is recommended.
CODE
APPROVED
FIREPLACE
CHIMNEY CONNECTORS
(supplied by others
FIREPLACE DAMPER
REMOVED
FIREPROOF INSULATION BATTS
(supplied by others)

Page 12
Multi-purpose cap
Storm collar
Flashing
Chimney
section
Connector
pipe
Attic insulation
shield
Firestop
assembly
Ceiling
support
Factory Chimney Top vent installation
Chimney cap
Insulated chimney
Storm collar
Chimney connector pipe
Chimney connector adapter
Chimney connector
The chimney connector is a single or walled pipe used to con-
nect the stove to the chimney. For use with the SIERRA FLAME
wood-burning stoves the chimney connector MUST be 6” in
diameter, with a minimum thickness of 24 gauge black steel or 26
gauge blued steel
Aluminum and galvanized steel pipe is not acceptable for use
with the SIERRA FLAME wood-burning stove. These materials
can give off toxic fumes when heated.
DO NOT USE THE CONNECTOR PIPE AS A CHIMNEY
Each chimney connector or stove pipe section must be connected to the
stove. Each adjacent piece of connector must be fastened with 2 screws.
This prevents any condensed or liquid creosote from running down the out-
must be secured with three sheet metal screws to ensure that the sections
do not separate. For the best performance the chimney connector should be
as short and direct as possible, with no more than one 90 degree elbow. The
maximum horizontal run is 36” and a recommended total length of connector
pipe should not exceed 10 feet. Always slope horizontal runs upward ¼” per
foot toward the chimney. No part of the chimney connector may pass through
the chimney connectors must be accessible for cleaning. Where passage through a wall or parti-
tion of combustible construction is desired, the installation must conform with NFPA 211 or CAN/
CSA-B365.

Page 13
Rear vent installation
For venting into a masonry or a back standing steel
chimney through the top vent the top horizontal por-
tion of a single wall connector pipe can be located not
closer than 18” below a combustible ceiling.
Rear venting into a masonry or steel chimney through
here must follow local codes or NFPA 211 or CAN/
CSA_B365 guidelines and methods.
Chimney cap
Insulated chimney
Tee section
Tee support bracket
Chimney connector pipe
Wall thimble
Wall strap
Multi-purpose
cap
Storm collar
Flashing
Support bracket assembly
Chimney section
Pipe end plate
T & branch extension
Wall support with clean-out
Wall face
plate
Wall
thimble
Connector
pipe
Mounting the connector pipe to the
stove
Use two self-tapping screws in the holes provided to secure the connector pipe so that it cannot be
lifted of turned from the stove.

Page 14
Combustible Wall Chimney Connector Pass-Throughs
Method A
Using a minimum thickness 3.5” (89 mm) brick and a 5/8” (15.9 mm) minimum wall thickness clay
-
cation for Clay Fire Linings) or its equivalent. Keep a minimum of 12” (304.8 mm) of brick masonry
between the clay liner and wall combustibles. The clay liner shall run from the brick masonry outer
Method B
Using a 6” (152.4 mm) inside diameter, listed factory-built Solid-Pak chimney section with insula-
tion of 1”(25.4 mm) or more, build a wall pass-through with a minimum 9” (228.6 mm) air space
between the outer wall of the chimney length and wall combustibles. Use sheet metal supports
fastened securely to wall surfaces on all sides, to maintain the 9” (228.6 mm) air space. When
fastening supports to chimney length, do not penetrate the chimney liner (the inside wall of the
cement to also seal to the brick masonry penetration
Minimum
12 in.(304,8 mm)
to combustibles
Minimum chimney clearance to brick
and combustibles 2 in.(50.8 mm)
Minimum clearance
12 in.(304.8 mm)
of brick
Chimney connector
Fire clay liner
Chimney ue
Masony
chimney
-INIMUMCHIMNE YCLEARANCEFROMMASONY
TOSHEETSTEELSUPPORTSANDCOMBUSTIBLES
INMM
-INIMUMCLEARANCE
INMMOFBRIC K
!IRSPACE
-ASONYCHIMNEY
#HIMNEY
FLUE
.ONSOLUBLE
REFRACTORY
CEMENT
#HIMNEYLENGTH
FLUSHWITH
INSIDEOFFLUE
3HEETSTEELSUPPORTS
#HIMNEYCONNECTOR
5SECHIMNEYMFRS
PARTSTOATTACH
CONNECTORSECUREL Y
3OLIDINSULATEDLISTED
FACTORYBUILTCHIMNEY
LENGTH
&ACTORYBUILT
CHIMNEYLENGTH
!IRSPACEIN
MMMIN

Page 15
Method C
Starting with a minimum 24 gage (.024” [.61 mm]) 6” (152.4 mm) metal chimney connector, and a
minimum 24 gage ventilated wall thimble which has two air channels of 1 in. (25.4 mm) each,
construct a wall pass-through. There shall be a minimum 6” (152.4) mm separation area contain-
the wall thimble, and cover its opening with a 24-gage minimum sheet metal support. Maintain the
connector. See that the supports are fastened securely to wall surfaces on all sides. Make sure
Method D
Start with a solid-pak listed factory built chimney section at least 12” (304 mm) long, with insulation
of 1” (25.4 mm) or more, and an inside diameter of 8” (2 inches [51 mm] larger than the 6” [152.4
mm] chimney connector). Use this as a pass-through for a minimum 24-gage single wall steel
chimney connector. Keep solid-pak section concentric with and spaced 1” (25.4 mm) off the chim-
ney connector by way of sheet metal support plates at both ends of chimney section. Cover open-
ing with and support chimney section on both sides with 24 gage minimum sheet metal supports.
See that the supports are fastened securely to wall surfaces on all sides. Make sure fasteners
Notes
1. Connectors to a masonry chimney, excepting method B, shall extend in one
continuous section through the wall pass-through system and the chimney
2. A chimney connector shall not pass through an attic or roof space, closet
-INIMUMCHIMNE YCLEARANCETO
SHEETSTEELSUPPORTSANDCOMBUSTIBLES
INMM
4W OAIRCHANNELS
EACHINMM
#HIMNEYCONNECTOR
-INIMUMINMM
GLASSFIBERINSULATION
3HEETSTEELSUPPORTS
-ASONYCHIMNEY
#HIMNEYFLUE
4W OVENTILATEDAIRCHANNELS
EACHIN MM
#ONSTRUCTIONOFSHEETSTEEL
3HEETSTEEL
SUPPORTS
#HIMNEY
CONNECTOR
#HIMNEY
SECTION
!IRSPACEIN
MM
-INIMUMCHIMNEYCLEARANCETO
SHEETSTEELSUPPORTS ANDCOMBUSTIBLES
INMM -INIMUMCLEARANCE
INMM
INMMAIR
SPACETOCHIMNEYLENGTH
#HIMNEYCONNECTOR
3HEETSTEELSUPPORTS
#HIMNEYLENGTH
-ASONYCHIMNEY

Page 16
Chimney height requirements
The chimney must extend 3 feet above the level of roof penetration and a minimum of 2 feet
requirements for your area.
13’ (4.0 m). Measured from the top of the stove.
10’
2’

Page 17
4. Prepare the Stove
Please check the appliance for damage caused during transport or any other damage or defects
immediately after delivery. The appliance is attached to the pallet with screws at the bottom. If you
detect damage caused during transport or any other damage or defects, do not use the appliance
stove before you start installation. By removing removable parts, it is easier to move the appliance
-
ties in installing the parts in the right place later on. Cast iron inner plates protect the combustion
chamber and dissipate heat to the environment.
WARNING!
TRANSPORT PROTECTION MATERIAL IS PLACED INSIDE YOUR STOVE AND BETWEEN
THE TOP BAFFLE PLATES, REMOVE THESE MATERIALS BEFORE INSTALLATION. YOU CAN
REACH THEM THROUGH THE TOP COLLAR AND THROUGH THE FRONT OPENING.
Ash pan
Log retainer
Top Plate
Fire resistant
plates
Cold handle
Fire resistant
plates
Cast iron inner plate

Page 18
These plates are made from a very heat resistant and highly insulating material made of pro-
cessed vermiculite. This material is capable of service temperatures up to 1150 C (2101 F) It is
however somewhat fragile. Care should be used when handling these pieces and when fueling
the stove. Please remove the lower pieces in numerical order when installing or cleaning the
stove.
1. Loosen the nuts (1)(2) from the front airtube (3), use penetrating oil
2.
3.
4. Loosen the nuts (6)(7) from the mid airtube (8), use penetrating oil
5.
6.
7.
8.
Re-assemble in reverse order
1
2
3
4
5
6

Page 19
2
3
1
4
6
8
9
12
11
10
7
5

Page 20
Cold Handle
The stove is supplied with a cold handle. Assemble the cold handle using the M8x50 screw pro-
vided. When not in uses store the handle in the hole provided at the side of the stove.
5. Instructions
Fire resistant inner plates
Fire resistant inner plates are delivered in this SIERRA FLAME wood-burning stoves. We rec-
ommend that you treat the plates with care because it is a delicate material (not covered by the
limited warranty). Small cracks may arise in the plates from minor water content, especially if the
stove and are not covered by the limited warranty.
Glass
The glass is a heat resistance ceramic glass that can withstand continuous temperatures up to
1390°F (754°C). This temperature is well above the temperatures in which you operate your
-
bined with high temperatures helps keep the glass optimally clean when the air wash air intake
is fully opened. When operating the stove on low for extended periods of time, the glass may
Smoke & Carbon Monoxide Detectors
SIERRA FLAME strongly recommends installing smoke detectors throughout your home. How-
ever, do not install them too close to the stove as the heat can activate them. Poor draft or im-
properly installed stoves and chimney components can allow smoke and carbon monoxide to es-
cape into the home. Operating the stove on low-burn settings can make these problems worse.
Carbon monoxide is a colorless and odorless gas and extremely toxic.
Gaskets
The stoves are equipped with ceramic gaskets to ensure the tightness of the doors and the glass.
These gaskets are wearing parts and must be changed from time to time. Note the position of
and remove worn gaskets. Place the new gasket in the same position as the worn one. Secure
the new gasket in place with wood stove gasket cement. Place a piece of paper or plastic be-
tween the door and the stove until the gasket cement has dried.
Other manuals for Lynwood W76
1
Table of contents
Other Sierra Flame Wood Stove manuals
Popular Wood Stove manuals by other brands

RAIS
RAIS attika NEXO 100 GAS installation guide

WoodPro
WoodPro WS-TS-1500 owner's manual
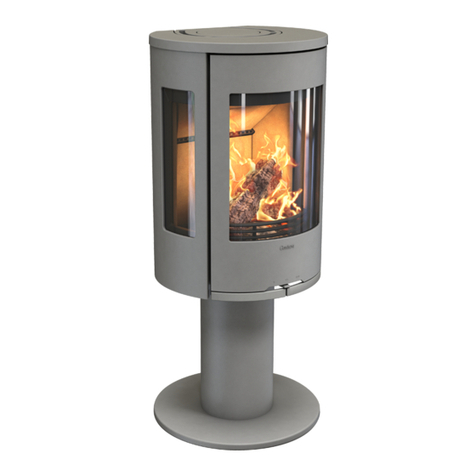
Contura
Contura C 586W installation instructions
Palazzetti
Palazzetti EVA GENERAL INFORMATION - WARNINGS - INSTALLATION - MAINTENANCE

Lopi
Lopi 1250 Republic owner's manual
Panadero
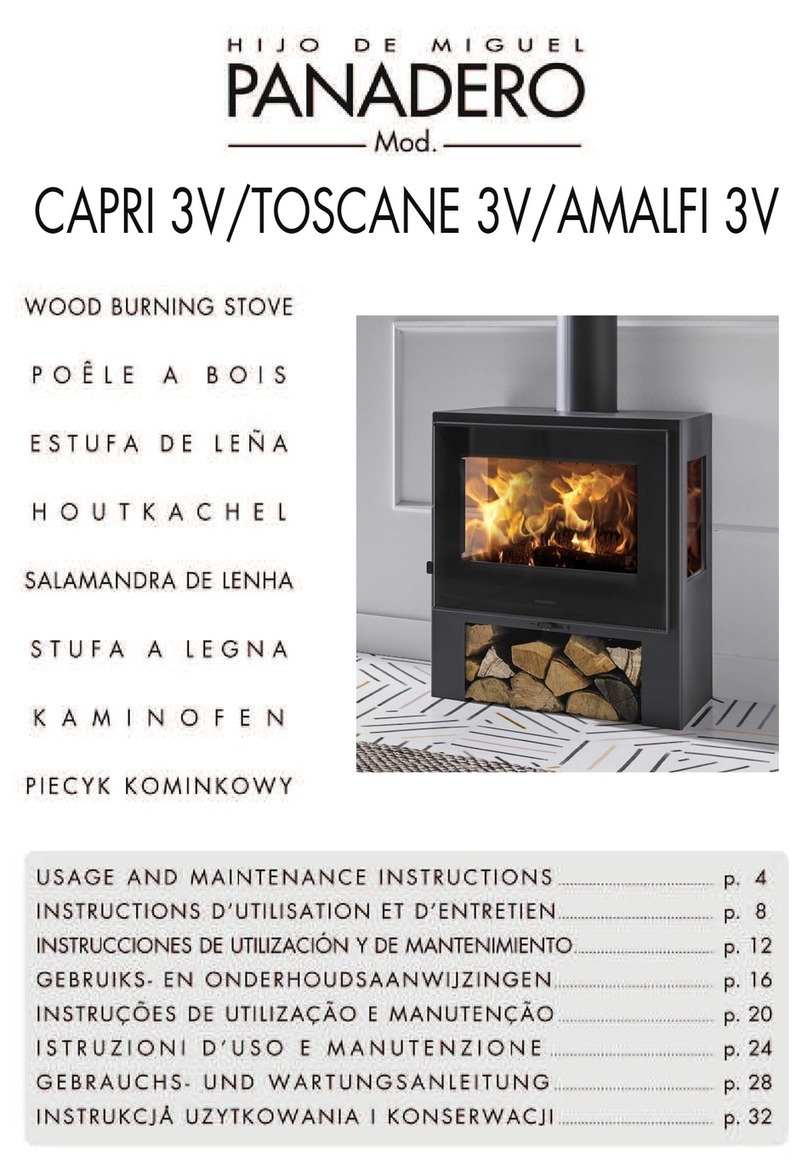
Panadero CAPRI 3V Usage and maintenance instructions
