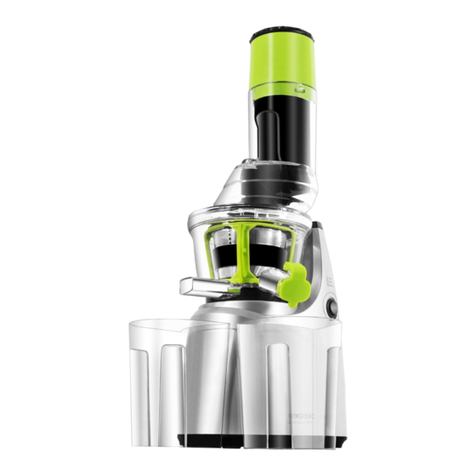
SIFENE SIF-3301 User manual


Thank you for using our Multifunctional Fruit and Vegetable Juicer. To correctly use and maintain this product, we
have specially prepared these instructions. Please carefully read these instructions before using the product and keep it for
further consulting.
This manual is only applicable to the SIF-3301 Multifunctional Fruit and Vegetable Juicer from SiFENE who reserves
the right of final interpretation. All contents in these instructions are used only as references for users when using and
maintaining this product. All users are welcome to consult the Customer Service Department regarding any outstanding
issues. If there are deficiencies in these instructions, all users are welcome to share their opinions with us. We hope that
our products make your life warm, sweet, convenient and healthy.
1.Input voltage of this product is 120V~60Hz, please confirm before use.
2.Disconnect the power supply before dismantling, assembling, or adjusting any part.
3.The product has Y type connection. If the power cable is damaged, contact our customer service department or
have it replaced by a designated service center directly.
4.Before use, please check if the power cord, plug, fine strainer, auger, noodle extruding body, and other parts are
damaged. Please stop using the product if any damage is found and contact our customer service department, or go to
SiFENE designated maintenance shop to repair. Do not disassemble and repair yourself.
5.If product maintenance is necessary after use, contact our customer service department, or have the maintenance
done by a designated service center directly. It is dangerous to dismantle the product by yourself.
6.Before switching on the power, please make sure that the removable parts are fully installed, such as the juicing
body, auger, fine strainer, juicing body cover, etc.
7.During operation, to avoid any damage to the operator or the product, it is strictly forbidden to put fingers or sharp
objects into the material inlet and directly contact the rotating parts such as the auger, etc.; it is strictly forbidden to use
any object to replace the pusher rods. It is strictly forbidden to keep eyes close to the material inlet to avoid injury.
8.The ingredients should be cut into small pieces so that they can be put into the inlet of the juicing body. If there are
fruits and vegetables with kernels, hard seeds, thick skins, or hard shells, remove them before processing.
9.When ingredients are put in, the force to push the ingredients should not be too great.
10.It is normal for the fine strainer, juicing body cover, auger, and other parts to be stained after juicing certain fruits
and vegetables. It does not affect the quality of the food and will not be harmful to eaters' health.
11.The product is equipped with an intelligent protection chip, making it automatically stop after 10 minutes of
continuous work. At this time, please stop the operation for 20-30 minutes, and then continue to use the motor after
cooling. This method is conducive to extending the service life of the product.
12.The product has a current limiting design. When processing harder ingredients, the motor will be locked-rotor and
the current will increase. When the current exceeds 1.9A, the machine will make a “click” sound and the motor will stop
working. This method can effectively protect the motor from over-current and extend the service life of the motor.
13.If the motor stops automatically due to current-limiting protection or stalled rotor during operation, press the
"Reverse" button to withdraw the ingredients, and then press the “ON/OFF ”key button to make the machine
work normally use. If the rotor is still blocked, it is recommended to clean the ingredients in the auger before continuing
to use it. This method is to protect the motor.
14.After use, please wait until the motor and auger stop rotating and make sure that the power is disconnected before
removing the detachable parts of the machine.
15.All parts of this product are not allowed to be disinfected with hot water over 80°C/176°F and microwave ovens to
avoid thermal deformation damage. Parts and materials in contact with food ingredients are, clean, hygienic, reliable, and
in line with food hygiene certifications.
16.Do not put the juicer body into water or other liquids, nor flush it with water or other liquids to avoid any damage to
the machine body.
17.Do not clean the product with steel wool, abrasive cleansers, or corrosive liquids (such as gasoline or acetone).
18.Store the product in a place out of the reach of children. Use or play of the product by persons with disabled limbs,
sensory or mental disorders, or by persons without relevant experience or knowledge (including children) is forbidden.
19.This product is only applicable to individual or home applications.
20.This product is a Class I appliance. The grounding wire of the socket must be well-grounded.
02 03

04 05
Connect the juicer to the body:
1. Align the center position of the feeding port of the juicer body with the
alignment "unlock mark" on the body and put it into the body (the three
buckles of the juicer body will be aligned).
2. Then turn it counterclockwise, when you hear a "click" sound, it means
the connection is in place.
Align the hardware shaft of the screw propeller with the motor shaft on the
body, and push it until the bottom. (When misaligned, it can be easily aligned
by turning the auger slightly)
Insert the large hole of the juice net from the tail of the screw propeller, and
push the positioning ribs of the juice net into the notch in the juice extractor.
Stagger the three buckles on the juicer body cover and the three buckles on
the juicer body, push them in, and then rotate counterclockwise to tighten the
juicer body cover and the juicer body.
1
2
3
4
Button switch operation instructions:
ON/OFFkey : use the key for normal work, and it is also the key to close and
stop
"Reverse" key: when the slag discharge is not smooth or the rotor is blocked,
the key is used. (Tip: When the slag discharge is not smooth or the rotor is
blocked, press the "Reverse" button, the screw propeller will start to reverse,
and the motor will automatically stop reversing after 10 seconds of reverse
rotation; Then resume the forward rotation and continue to work.

06 07
Place the juice cup next to the fuselage, and its opening is aligned below the
juice outlet of the juicer.
Place the pomace cup under the slag outlet of the juice extractor, close to the
juice cup (the high-end side of the pomace cup is closer to the slag outlet,
which is more conducive to receiving the slag.
Plug in the power and get ready to work. (Make sure the switch is off before
turning on the power
Wash the fruits and vegetables, cut them into pieces that can be put into the
feeding port, and place them on the tray for later use.
. Fruits and vegetables with cores, hard seeds, thick skins or hard shells,
please remove them first.
Note: Fruits such as sugar cane, guava, mango cannot be juiced with this
machine
Check whether the juice outlet of the juice extractor is open (you can turn the
lid of the juice outlet)
Press the "switch" key, the product starts to work, and the working time is ≤
10 minutes.
Do not touch the switch button with wet hands to avoid electric shock,
leakage and fire.
5
6
7
8
9
10
11 Put the ingredients into the feeding port of the juicer, and use the push rod to
push the ingredients in.When pushing the ingredients, please do not use
too much force, it is better to just cut the ingredients.(Do not put your
fingers or other objects into the feeding port of the juice extractor! If the
pomace cup or juice cup is full, stop working and use it after cleaning.)
When the ingredients are processed and there is no more juice flowing out of the
juice outlet of the juicer, press the "ON/OFF" button again to disconnect the
power supply. Please wait for the screw propeller to stop rotating completely,
and then turn the juice outlet screw cap (the screw cap turns the juice outlet seal),
and then take the juice cup out of the juice spout. (The freshly squeezed juice
should be consumed right away, its taste and nutritional value can be affected if
it is exposed to the air for a while.)
. Residues can not be stored for a long time.
. Do not touch the switch button with wet hands to avoid electric shock,
leakage and fire.
REV
ON/OFF
12

08
1.Select and use fresh fruits and vegetables, which contain more juice. Particularly suitable fruits include pineapple,
celery sticks, apples, cucumbers, spinach, melons, tomatoes, oranges, grapes, and the like.
2.The thin skin of fruits and vegetables need not be peeled. Tangerine, pineapple, and other fruits and vegetables with
thick skin need to be peeled. The seeds of citrus fruits should also be removed because they make the juice bitter.
3.When squeezing apple juice, the concentration of apple juice depends on the type of apple selected: The juicier the
apple is, the clearer the juice will be, so please choose the apple type according to the concentration of juice you want.
4.Freshly juiced apple juice may quickly turn brown, and you can add a few drops of lemon juice to slow this process.
5.Leaves and leaf stems (such as lettuce) can be juiced with this machine 6.The nutrients of common fruits and
vegetables are as follows:
09

1.Clean the surface of the juicing body
cover;
Continue to boot and squeeze the
ingredients or press the REV button to
transfer the ingredients out of the juice
net;
10
Note:
The above are analysis and resolution of common faults. As for other faults, please contact the Customer
Service Department of this company or come to an appointed maintenance point of this company to change.
Be sure not to take apart or repair by yourself.
Facebook:https://www.facebook.com/sifenefans
Official Website: https://www.sifene.com
Email: support@sifene.com
Other SIFENE Juicer manuals
