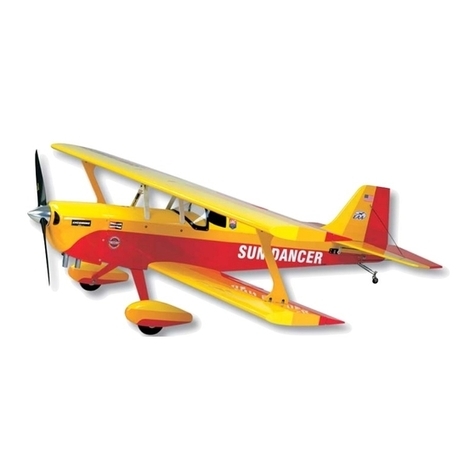
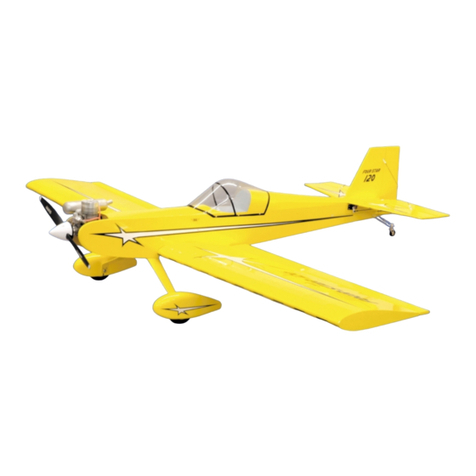
SIG SUN DANCER 50 User manual

to 80 inch/ in ounce range, such as Hitec HS-475HB, HS-545BB,
or HS-635BB or the Airtronics®94731Z, 94738Z or 94743Z servos.
For the rudder servo we have used and can recommend that you
consider using an after-market reinforced plastic servo arm such
as the Du-Bro "Super Strength" products. These output arms are
available to fit any brand of servo. They are quite strong and work
extremely well with this model. The Du-Bro output arms are
molded from considerably stronger material and have held up very
well in our prototypes.
You will also need three 6" servo extensions and one standard
Y-harness cord or 6" double link extension for the ailerons. In
addition, you’ll also need one 12" servo extension for the aft
mounted elevator servo. These after-market items can usually be
obtained from either the manufacturer/distributor of your particular
radio system or from aftermarket suppliers, such as Maxx Products
in Lake Zurich, Illinois.
Last, because the Sun Dancer 50 uses a total of 5 servos, we
suggest that you consider the use a larger capacity airborne
battery pack. A battery pack in the 1000+mAh range will provide
ample time to safely fly at least five or six flights during any given
flying session. This is a reasonable amount of time for most
modelers. Naturally, a larger pack provides more flight time but
remember that larger can also equate too heavier. We also
suggest that you routinely use an Expanded ScaleVoltmeter (ESV)
at the field to check the charge condition of your batteries. This
common piece of field equipment can save your model!
ENGINES & PROPELLERS:
The Sun Dancer 50 has been flown with a variety of engines, both
2 and 4-stroke. As everyone knows, there is no substitute for
power and the engine sizes recommended for this model all
provide good power margins. The practical range runs from
2-stroke engines in the .46 to .53 sizes and 4-stroke engines in the
.56 to .72 displacements. Naturally, the larger engines in this range
make more power and will fly the Sun Dancer 50 with more
authority than the smaller engines. It is simply a matter of how you
want to fly the airplane. You also need to choose a propeller size
that is suitable for your particular engine, based on the
manufacturer’s recommendations. After flying the model and
gaining experience, you can experiment with different propellers to
find the optimum combination for your engine and airplane.
The Sun Dancer 50 was designed from the start for glow engines
and provides ample room inside the cowling to comfortably fit most
of the popular engines that are available in both 2 and 4-stroke
types.
COVERING MATERIAL:
Your Sun Dancer 50 has been professionally covered with SIG
AEROKOTE®. If you live in a drier climate, you may notice that
some wrinkles might develop after removing the covered parts
from their plastic bags. If that is the case, there is no need to be
alarmed. The covering is not defective. This is normal and has and
nothing to do with the covering material or how it was applied.
Balsawood takes on or loses ambient humidity. Your Sun Dancer
50 was manufactured in a relatively humid region of the world. The
wood was therefore holding some humidity at the time the parts
were covered and bagged. When these parts are removed from
their bags and subjected to drier conditions, the wood quickly loses
moisture and the covering may appear loose. This also explains
why most iron-on coverings stay tight in the summer only to loosen
a little in drier winter conditions.
1
INTRODUCTION
Congratulations on the purchase of the SIG Sun Dancer 50 ARF
kit! Properly assembled, powered, and flown, the Sun Dancer 50
will quickly become one of your favorite models. The construction
of this ARF kit has been extremely well engineered, providing an
airframe that is both light and strong. Of course, this translates
to outstanding flight characteristics when powered with the
recommend engine sizes. The Sun Dancer 50 has excellent
take-off and landing characteristics, as well as remarkable
aerobatic capabilities. The airframe has been carefully designed to
provide you with a model that has a true "zeroed out" feel in the air.
This characteristic tends to provide a great deal of confidence
when performing those wild aerobatic maneuvers.
The engine choice for your Sun Dancer 50 is important. The
airplane will fly and fly well on good running .46 ball-bearing
engines. As your choice of engines increases in displacement and
power, obviously the airplane will respond accordingly. The largest
and most powerful engine we have flown in this model is the potent
YS .63 four-stroke. This engine, swinging an APC 12 X 6, provides
the Sun Dancer 50 with an outrageous amount of power, making
it definitely a "throttle management" type model. We do not
recommend engines any larger or more powerful than the YS .63
for this model - it simply is not necessary.
We highly recommend that you follow the following assembly
instructions carefully. We also suggest that you take the time
to inventory the contents of your kit, using the included parts
information. Finally, the Sun Dancer 50 ARF is not recommended
for beginning R/C pilots. If this is your first R/C model, we urge you
to seek and use experienced help in both assembling and flying
this airplane.
Engine Note: Due to the large number of useable engines for this
model, we simply cannot cover every possible engine installation.
However, the large volume of space provided inside the cowling
should make it easy to mount virtually any engine within the
suggested size range.
RADIO EQUIPMENT:
We highly recommend the use of a modern computer radio for this
model. Such radio systems allow you to easily set-up and adjust
each channel and in addition, pre-program flight control functions
to suit your individual flying style. Four channels are required to fly
your Sun Dancer 50 - rudder, elevator, ailerons, and throttle.
The Sun Dancer 50 requires a total of five servos - ailerons (2),
elevator (1), rudder (1), and throttle (1). Standard 40 to 50
inch/ounce servos will work well for this model. However, for
better precision, you can upgrade to ball bearing servos in the 60

Any wrinkles that appear in the covering are easy to remove by
using a hobby-type of heat iron. We suggest covering the iron's
shoe with a thin cotton cloth, such as an old T-shirt to prevent
scratching the film. To shrink AEROKOTE®, set the temperature of
your covering iron at 220OF - 250OF (104OC - 121OC). Start by using
the heated iron to go over all the seams and color joints, making
sure they are firmly sealed and well adhered. Then use the
heated iron to lightly shrink the material - do not press on it. Once
the covering is tight, lightly iron the material back down to the
wood. You can use a hobby type heat gun to re-shrink the
covering, but you must be extra careful around the seams.
For part number reference, your Sun Dancer 50 ARF was covered
with SIG AeroKote®, using the following colors and part numbers:
SIGRC72ARF(P) - Covered w/ AeroKote®#100 White,
#361 Purple and #360 Violet or
SIGRC72ARF(Y) - Covered w/ AeroKote®#330 Bright Yellow,
#321 Bright Orange and #311 Bright Red
REQUIRED TOOLS:
For proper assembly, we suggest you have the following tools and
materials available.
A selection of glues: SIG Thin, Medium and Thick CA
SIG CA Debonder
SIG Kwik-Set 5-Minute Epoxy
SIG Epoxy (slow cure)
Thread locking compound, such as Loctite®Non-Permanent Blue
Screwdriver Assortment
Needle Nose & Flat Nose pliers
Diagonal Wire Cutters
Small Allen Wrench Assortment
Drill and assorted Drill Bits
Pen Vise for Small Diameter Drill bits
Hobby Knife With Sharp #11 Blades
Paper Towels
Rubbing alcohol for clean up
Scissors
Covering Iron and Trim Seal Tool
Masking Tape
Dremel®Tool With Selection of Sanding and Grinding Bits
Felt tip pen
KIT CONTENTS:
The following is a complete list of every part included with your Sun
Dancer 50 kit. Use the check-off blocks (❑) to inventory your kit
before beginning assembly. Note that the CA type hinges for the
ailerons, rudder, and elevators are in place in each of these parts
but are not yet glued in place. Also note that the bolts and nuts
required to mount your engine to the motor mounts are not
included in this kit and must be purchased separately.
Note: Do not remove parts from the plastic bags until they are
needed during assembly. All of the required parts, screws, and
bolts, etc. will be included in the bag to assemble a particular
component of the model.
❑Bag #1: Top Wing, fully assembled & covered with AeroKote®
Holes for mounting cabane struts pre-drilled in hard points
Holes for inter-plane struts (4) pre-drilled in hard points
Ailerons in place with CA hinges - not glued
❑Bag #2: Bottom Wing, fully assembled & covered with AeroKote®
Holes for inter-plane struts (4) pre-drilled in hard points
Wing bolt holes pre-drilled
Wing bolt reinforcement plates pre-drilled and installed
Leading edge wing-mount dowel installed
Aileron servo bays opened up
w/ plywood servo doublers in place
Aileron servo installation strings in place
Ailerons in place with CA hinges - not glued
Aileron servo lead holes pre-drilled at center section
❑Bag #3: Vertical Fin, covered with AeroKote®
Covering removed from bottom for attaching to fuselage
Pre-slotted for the top 2 CA hinges
❑Bag #4: Rudder, covered with AeroKote®
Pre-slotted for 3 CA hinges
CA hinges in place - not glued
❑Bag #5: Horizontal Stabilizer & Elevator covered with AeroKote®
Pre-slotted to accept vertical fin
Covering removed from bottom of stabilizer for gluing
to fuselage
Elevators attached to stabilizer with 4 CA hinges
- not glued
❑Bag #6: Fuselage, covered with AeroKote®
Windshield installed with 3 M2 X 8mm PWA screws
3mm Motor Mount Blind Nuts installed with fuel tank
opening in firewall
Fuel Tank Hatch installed w/ 4 M2 X 6mm PWA screws
Fuselage pre-slotted for cabane struts
Fuselage pre-drilled for cabane strut bolts
w/ 3mm blind nuts installed
Fuselage pre-drilled for landing gear attachment
w/ 4mm blind nuts installed
Hard point for tail wheel mounting
Fuselage slotted at tailpost for bottom rudder CA hinge
Bottom Wing Bolt Tray installed
w/ two 1/4-20 blind nuts installed
Firewall fuel-proofed
2
Modeler'sTip: One of the most common problems associated
with shrinking any covering film is controlling the heat around
the seams. Heat applied close to or directly onto seams
re-heats the covering adhesive and the seams will often "crawl".
This is easy to control. Just tear a few paper towels into strips
and soak them in cool tap water. Lay the wet strips over the
covering seam and use a heat gun or iron as you normally
would. The wet strips keep the seam cool while the covering
immediately next to it shrinks. This tip works great with any
iron-on covering.

3
❑Bag #7: Cowl, fiberglass, painted to match model
Cowl pre-drilled for mounting screws
❑Sub Bag A: 6 each M2.6 X 8mm PWA Cowl
Mounting Screws
❑Bag #8: Wheel Pant Set (1 left, 1 right), painted to match model
2 each 3mm Blind Nuts installed in each wheel pant
❑Bag #9: Main Landing Gear, painted to match model
Pre-drilled mounting holes for fuselage attachment
& wheel axles
❑Sub Bag A: 2 each Main Wheels, 2-1/2" dia.
❑Bag #10: Fuel Tank Assembly (260cc) - Fuel Tank Body with clunk
fuel line inside
❑Sub Bag A: Rubber Tank Stopper
Tank Clunk Fuel Pick-up Weight
Threaded Backplate w/ 3 holes for tubing
Faceplate
w/ 3 holes for tubing
3 lengths of Aluminum Tubing
1 each M3 X 20mm Compression Bolt
❑Bag #11: Cabane Strut Assembly (4), pre-bent, pre-drilled, and
painted white
❑Sub Bag A: 4 each M3 X 9mm PWA Mounting Bolts
❑Bag #12: 5 each Nylon Control Horns & 3 each Backplates
❑Sub Bag A: 12 each M2 X 15mm Bolts
4 each M2 X 20mm Bolts
2 each M2 hex Nuts
❑Sub Bag B: 4 each Nylon Inter-Connect Horns
w/4 each Backplates
❑Bag #13: Motor Mount Assembly (1 left, 1 right)
❑Sub Bag A: 4 each M3 X 20mm Bolts
4 each 3mm Washers
4 each 3mm Lock Washers
❑Bag #14: White Spinner Assembly – 2-1/4 dia. Cone & Backplate
❑Sub Bag A: 2 each 2.6mm X 12mm Screws
1 each
Propeller Shaft Adapter Moldings
❑Bag #15: Tail Wheel Assembly
❑Sub Bag A: 2 each Tail Wheel Centering Springs
❑Sub Bag B: 1 each Rudder "T" Bracket, pre-drilled
2 each M2 X 10mm PWA Screws
3 each M2.6 X 12mm PWA Screws
❑Bag #16: 2 each Interplane Struts (1 left, 1 right), covered with
AeroKote®, pre-drilled with 3mm mounting holes
w/ 3mm Blind Nuts installed
❑Sub Bag A: 10 each Aluminum Strut Attach Fittings
10 each M3 X 10mm PWA Bolts
2 each 3mm Lock Nuts
❑Bag #17:
2 Molded Plastic Aileron Servo Hatch Mounts (1 left, 1 right)
4 each 8mm X 20mm X 20mm Hardwood Servo Mounting
Blocks
❑Sub Bag A: 12 each M2 X 8mm PWA Screws
❑Bag #18: 4 each Pull-Pull Rigging Couplers w/metal R/C links
& knurled stop nuts
2 each
.56mm (.022") X 27-3/4” Braided Steel Pull-Pull Cables
❑Bag #19:
2 each M4 X 40mm Axle Bolts
2 each 4mm Hex Nuts
4 each 4mm Lock Nuts
2 each 4mm X 15mm Landing Gear Attach Bolts
2 each 4mm Washers
2 each 4mm Lock Washers
4 each 3mm X 10mm Wheel Pant Attach Bolts
4 each 3mm Lock Washers
❑
Bag #20: 1 each 5mm OD X 4mm ID X 30-1/2cm (12") Outer Throttle
Linkage Tube
1 each 3mm OD X 2mm ID X 40cm (15-3/4") Inner Throttle
Linkage Tube
1 each 8mm X 12mm X 100mm Fuel Tank Retainer Block -
Balsawood
1 each 2.6mm X 38mm Throttle Tube Retaining Bracket -
Plywood
❑
Sub Bag A: 2 each 1/4-20 X 1-1/2" Nylon Wing Bolts
❑
Sub Bag B: 2 each Nylon R/C Links
2 each 2mm X 22mm Threaded Studs
❑
Sub Bag C: 2 each 2mm X 162mm Aileron Inter-
Connect DriveWires
w/ Z-bend at one end
and threaded metal R/C link at other end
2 each 2mm Threaded Knurled Nuts
2 each 2mm X 36mm Aileron Pushrods
w/ Z-bend on one end and metal R/C link
on the other end
1 each 2mm X 86mm Elevator Pushrod
w/ Z-bend on one end & metal R/C link
on the other end
Miscellaneous Items:
❑
1each Sun Dancer 50 ARF Assembly Manual
❑
1each Sun Dancer 50 ARF Decal Sheet
Note: In addition to the above parts, you will need the following
specific items:
4-Channel R/C System with 5 Servos
Engine
Engine Mounting Bolts, sized for your engine
Fuel Tubing of correct size for your engine
Propeller to fit your engine
Foam Rubber for mounting receiver and battery pack
Clear Silicone RTV Sealer
OPTIONAL:
Some modelers may want to dress up their Sun Dancer 50 by
using trim tape to separate and accent the main colors. Use a
good quality striping tape to cover the seams where the colors
meet. This is easy to do and gives a very nice finished look to the
overall model. We have found that it is easier to apply this trim
before assembling the individual parts.
For a model this size, we suggest using 3/32" or 1/8" wide tapes.
Of course you can choose your own colors, but we would suggest
that for the yellow, orange, and red model, silver or medium blue

fence
centerline of drill
Control Horn Drill Template
10 mm
edge of template
centerline of control horn
10 mm
10 mm
drill through with 3/64" bit
2 places
notches locate center line
fence
construct from 1/8" lite-ply or balsa
cut this out and glue to wood
trim to outline and glue on fence
then drill the two 3/64" holes as shown
edge of control surface
To mark the drill holes, align the template center line
notches on the center line that is drawn on the
control surface. Slide the fence tight against the
edge of the surface and mark the drill locations
though the drilled holes.
Top View Side View
control surface
4
tape. For the purple, violet, and white model, silver or light red trim
looks great. Whatever color you choose, be sure to use good
quality striping tape, applying it smoothly, avoiding wrinkles when
working the tape around the corners. When the trim is complete,
seal it in place with low heat (180O- 200OF). SIG "SUPER
STRIPE" color trim tapes worked very well on our models.
Another detail that dresses up the looks of the Sun Dancer 50
is the windshield frame. Since the windshield is screwed to
the fuselage, it is easy to remove and paint the frame. Use
contrasting color paint or striping tape on the raised "frame"
portions of the windshield to simulate the metal windshield framing
used on full sized aircraft. To assure good adhesion of your
trim,always wash the windshield in warm water and liquid dish
soap. Rinse and dry completely before applying.
While the windshield screws are out, use thin CA and a fine
applicator tip to put a drop or two of glue into each screw hole to
harden the threads. This will help to prevent these screws from
loosening from vibration.
The firewall and tank compartment of your Sun Dancer 50 has
been factory treated with fuel proofing at the factory. However, you
may wish to add additional fuel proofing of your own. We suggest
using thinned epoxy glue or water-soluble polyurethane varnish.
Simply remove the hatch under the tank compartment for access
to the interior of the tank compartment.
MODELER’S TIP: To help locate the drilled holes needed to
mount the nylon control horns and nylon inter-connect horns,
a small template, which is shown below, that can be used to
make a simple jig.

5
TOP WING ASSEMBLY:
❑1) The top wing has no dihedral or servo wells. First you will
need to identify the bottom surface of the wing. The bottom
surface has 6 holes for the attach fittings to thread into. Before
removing the ailerons, identify them with a felt tip pen as shown,
for left and right on the bottom. Also mark the trailing edges of the
ailerons for the nylon inter-connect horns. This location is on a line
through the strut attachment holes to the trailing edge of the
aileron, as shown. Remove the ailerons from wing and using the
hole locator template to locate the holes, drill two 5/64 dia. holes.
Mount the nylon inter-connect horns to the bottoms of the ailerons,
with 2 - M2 x 15mm bolts and backing plates. Before mounting the
horn, remove the pen marks with a little debonder.
❑2) The ailerons are now permanently hinged to the top wing.
Note that three aileron hinges have been factory-installed in each
aileron, but are not yet glued. Remove all the hinges from the
ailerons and wing. Note that the supplied hinges have a die cut
slot in the center that can be used to accurately place and center
the hinge equally into both the wing panel and the aileron. To do
this, cut an old business card into wedges that will fit halfway
through the slot.
Press the three hinges into the wing panel up to the center slot.
Place one of the card wedges into each hinge and press the
aileron in place onto each exposed hinge half. Position the aileron
so there is about 1/32" gap between the end of the aileron and the
wing and push the aileron to the wing until the paper wedges are
snug between the surfaces. Flex the aileron downward to expose
the hinges between the wing and aileron. Hold the ailerons in this
position with a piece of masking tape. The hinges are now in
position to be glued in place.
Remove the card wedge from one of the hinges and carefully apply
four (4) small drops of thin CA glue to the left and right side of the
exposed hinge. Repeat on the other two hinges. Remove the
masking tape, flex aileron in opposite direction, and again use tape
to hold it in this position. Turn wing over and apply four drops of
thin CA glue to each exposed edge of each hinge exactly as
before. Remove the tape and return the aileron to its centered
position. Because it takes a little time for the CA glue to fully wick
through the surface of the hinge and the surrounding wood, allow
at least 10 minutes before flexing the aileron. Repeat this process
on the opposite aileron. Apply four (4) small drops of thin CA glue
to each of the six holes for the attach fittings. Clean up any excess
glue drops, runs, or smears on the covering with SIG CA
DEBONDER and a paper towel.
BOTTOM WING ASSEMBLY:
❑3) The bottom surface of the lower wing has the openings for
the aileron servos. Again, identify the left and right ailerons with
your marker pen and also mark the position for the control horns,
as shown. Remove the ailerons and using the marks just made,
install the control horns on the bottom surfaces of each aileron,
using the marks just made. Temporarily re-install the ailerons back
in place to the wing.
Turn the wing over and mark the tops of each aileron for the nylon
inter-connect horn locations, as previously shown on the top wing.
Drill 5/64" dia. mounting holes for attachment of the nylon
inter-aileron control horns, as shown for the top wing. Using the
Interplane Strut Mount Holes
Centerline Of Aileron Inner-link
Use Template For Hole Location
IMPORTANT NOTE: When installing CA type hinges, more
is not better! Applying excess thin CA glue to this type of
hinge does nothing more than stiffen it, potentially causing the
hinge to break. If you have followed these instructions, each
hinge will have a total of 8 small drops of thin CA glue on each
side. This is the correct amount of adhesive.
4-7/8”
Use Template To Locate Drilled Holes

hatch. Now lay the servo on the cover with the mounting lugs on
the wood blocks and mark through the center of the grommets
where the pilot holes for the mounting screws need to be drilled.
With a #50 bit, drill each pilot hole about 1/2" deep. The servos are
now mounted in place using the screws provided with your servos.
❑5) The completed servo hatch covers, with the servos in place,
are now ready for mounting into the lower wing. Carefully insert
the servo cable into the leading edge of the servo bay ahead of the
spars and lower the hatch into position. If the stick of wood with
the string is in the way, break it loose and lay it in the servo bay for
now. Feel the covering on top surface of the wing above the servo
to make sure the servo is not in contact and causing an unsightly
hump. You may need to slide the hatch towards the leading edge
with some servos to get this clearance. Tape the hatch in place
with small pieces of tape and mark where to drill the pilot holes.
Use the pre-drilled holes in the hatch to locate these holes. Then
use a 1/16" bit to drill the pilot holes. Be careful when drilling not
to run the drill through the top of the wing.
❑6) Remove the hatch and plug one of the 6" servo extensions
in on each servo. Because this connection will be buried in the
wing, secure the connectors with heat shrink tubing or tape. It is
now time to center both servos. Remove the servo arms and set
them aside. Plug the extensions into the "y" harness and the "y"
harness into the aileron socket of your receiver. Two 2mm x 36mm
aileron pushrods with a Z-bend on one end and a metal R/C link
on the other have been provided for the ailerons. Each pushrod is
pre-assembled at the factory. Connect the Z-bend end of the
pushrod to the middle hole of the servo arm and through the exit
hole in the cover before proceeding to the next step. Turn on your
transmitter and center the aileron trim lever. Now turn on the
receiver and let the servos neutralize before adjusting the servo
arms to position them as close to 90Oto the side of the servo case
as possible. With the servo arms now positioned correctly,
re-install the servo output arm screws. Turn off the radio system
and remove the servo leads from the Y-harness.
❑7) The length of string in each wing panel has been factory-
installed to make it easier to pull the servo wires, with their
attached extension cords, through the openings in each wing
provided hardware, mount the nylon inter-connect horns in place
to each aileron. The ailerons are now permanently hinged in
place, using the same procedure used on the top wing.
❑4) Locate the bag with the aileron servo hatch covers, servo
mounting blocks, and screws. Note that there is a left and right
servo hatch cover. These fit into the servo bay with the pushrod
fairing towards the wing tip and the pushrod opening towards the
aileron. The pushrod exit needs to be opened up. Drill through the
angled surface with a 1/4" drill, then finish opening the exit with a
#11 blade and sand paper wrapped around a pencil or dowel.
Lightly sand the inside surface where the servo will sit to break
the glaze on the plastic. Insert the grommets and eyelets in
the mounting holes of your servos as recommended by the
manufacturer. Now lay your servo on the inside of the hatch cover,
centering it from end to end and centering the output arm within
the pushrod fairing. Use a pencil to mark where both ends of the
servo and where the bottom of the grommets are.
These marks are where the servo mounting blocks (8mm x 20mm
x 20mm hardwood) will be glued to the hatch with epoxy. When
the glue cures, use a ruler to find the approximate center of each
block and mark the location on the plastic on the opposite side
from the block. With a 1/16" bit, drill a pilot hole at each mark
about 1/4" deep through the plastic into the wood block. Install a
M2 X 8mm PWA screw into each hole, securing the block to the
6
Centered
In Tunnel
Lines
Lines

The engine is now temporally installed on the mounts to locate the
throttle pushrod.
❑11) For the YS engine you will need to rotate the throttle arm
180Oto clear the motor mount and tank. Check your engine
installation and adjust as needed. Use a pencil to mark the firewall
at the point where the throttle pushrod will be placed.
❑12) Remove the engine from the mounts and use a 13/64" drill
bit to make a hole through the firewall at the mark just made.
Insert the nylon pushrod housing through this hole and pull it
through one of the oval holes in the tank compartment bulkhead,
into the servo area. Note that it will have a slight arc or bend in it
from the firewall to where the servo output arm will be. Use epoxy
or CA glue to mount the throttle housing tube in place with its end
flush with the front of the firewall.
❑13) The throttle servo is now mounted in place in the fuselage.
The servo can be mounted on either the left or right side of the
fuselage, depending upon which side the throttle pushrod housing
is closest to. From parts bag #20, locate the plywood throttle tube
retaining bracket. Slide the bracket over the throttle pushrod
tubing. Trim it's length to position and hold the pushrod housing
tubing in alignment with the throttle servo arm. Glue the bracket to
7
panel. Securely attach the servo bay end of the string to the
connecting plug of the 6" extension. Gently pull on the opposite
end of the string to pull the servo extension through the wing while
feeding them into the servo opening in the wing. Take your time
and do not pull too hard on the string. It is sometimes helpful to
stand the wing vertical when trying to feed the extension through
the openings in each of the wing ribs. When the extension is
through the opening at the center of the wing, tape it in place to
keep it from slipping back into the wing. Screw the hatches in
place using M2 X 8mm PWA screws provided. Plug the servo
leads into the "Y" harness and secure with heat shrink tube or
tape.
❑8) Tape the lower ailerons in the neutral position, turn on the
radio and recheck the servos for neutral. Adjust the length of the
pushrod by turning the R/C links in or out until the connecting pin
matches the outer hole of the control horn. Snap the R/C Link in
place onto the horn. Using the radio, check for correct movement.
Turn off your radio and set the wing aside for now.
Note: Before starting work on the fuselage it is advisable to
temporarily remove the windshield and set it aside for now.
Because you will be working with the fuselage upside down quite
a bit, doing this saves the windshield from damage during
construction.
ENGINE MOUNTING:
❑9) The YS-63S fits with the bolts centered in the slots of the
motor mounts. Move the mounts slightly, if needed, to fit your
engine properly and tighten the bolts using blue Loctite®to keep
them secured.
❑10) With the motor mounts now in place, it is time to locate the
engine on the mounts and drill the mounts for the mounting bolts.
Position the engine on the mounts so that the distance from the
face of the prop drive washer to the firewall is 4-11/16". Make sure
the engine is sitting square in the mounts, and then mark the
mount for drilling the four mounting bolt holes through the mount
arms. These holes should be clearance holes for the bolt size that
is proper for your engine. We prefer to use socket head cap bolts,
aircraft lock nuts, and lock washers on our airplanes for the extra
strength and ease of installation.
4-11/16”
MODELER’S NOTE: With the variety of engines that are
available today, it is not practical to pre-drill the holes in
the firewall for the nylon pushrod housing. Each engine
manufacturer has the carburetor mounted in a different
positions and/or orientations. The following photos show how
we installed our YS engine in the Sun Dancer 50, but these
instructions should be similar for other engines as well.
Flush
Through
Hole

❑16) Insert the clunk fuel pick-up weight into one end of the
silicone fuel line that was inside of the tank. Lower this assembly
into the tank until the clunk touches the back of the tank and mark
this distance. Measure 1/2" towards the clunk from this mark and
cut the tubing off at that point. Slide this tube onto the pickup tube
on the back of the stopper assembly and inset this assembly into
the tank. The clunk should be about 3/8" from touching the back
of the tank, allowing it to swing free within the tank body.
The vent tube should just touch the top of the tank at an angle.
Adjust as needed before tightening the stopper into place, using
the supplied M3 x 20mm compression bolt. Tighten this bolt
sufficiently to compress the rubber stopper, creating a good tank
seal. Attach an 8" length of fuel line to each tube at the front of the
tank and use tape to identify each line as the "vent" and "fuel" line.
Pressure test the tank and fuel line, then repair leaks, (if any). The
fuel tank is now ready to install in the fuselage.
❑17) Working through the wing opening in the bottom of the
fuselage, slide the fuel tank into position while routing the fuel lines
through the firewall. Because of the offset neck, it will only line up
with hole in the firewall one way. When you are satisfied with the
fit, remove the tank and apply a generous bead of clear silicone
RTV around the stopper/neck of the tank, where it will contact the
firewall. Slide the tank and fuel lines back into place, pressing it
firmly to the back of the firewall. The 8mm x 12mm x 100mm balsa
fuel tank retainer is now pressed in place against the back of the
tank. Use a little thin CA glue to glue it in place. To help hold the
tank in place and provide some cushioning from vibration, squeeze
some RTV between the fuel tank and the rear bulkhead and on the
retainer block before installing it behind the tank.
MOUNTING THE COWL:
❑18) Inspect the inside rear edges of the cowl. If needed, use
sandpaper to smooth the inside rear surface, making it free of any
bumps or ragged edges that may scratch or dent the fuselage
when pressed in place. Also, make sure the six mounting holes
in the sides of the cowl are open and free of any debris. For
8
Adjustable
Arm Pushrod
Guide Outer
Tube Z-bend
the inside of the fuselage, about 2" ahead of the throttle servo,
using epoxy or thick CA. Trim the throttle housing tube so that it
only extends about 1/4" past the guide.
❑14) With the outer pushrod housing tube in place, the
inner throttle pushrod is now prepared. Thread the provided
2mm x 36mm Z-bend link into one end of the inner nylon pushrod.
Drill out the hole in the carburetor throttle arm with a #46 drill, to
allow the Z-bend to fit. Insert the Z-bend into the throttle arm, slide
the inner pushrod into the outer housing tube and mount the
engine with 2 bolts to hold it in the proper position. Move the
throttle arm to the closed position and note if this moves the
pushrod in or out of the firewall. Turn on your radio and use the
reversing function to make the throttle servo move in the correct
direction when you pull the throttle down to idle. Adjust the
throttle trim to its lowest setting, making sure the carburetor is at
its lowest idle/cutoff position. Now trim the inner pushrod to make
the end 1-1/2" short of the servo output arm hole you will be using.
Now thread the 2mm x 22mm stud about 1/2 way into the servo
end of the inner pushrod and then thread a nylon R/C link onto the
stud. Adjust until the servo drives the throttle arm to just touch the
idle stop when the trim is full down on the transmitter. Next move
the throttle stick to full throttle and the trim to full up. Adjust the
endpoint in the transmitter until the throttle is fully open. It is
important that the servo should not growl or the pushrod flex at
either end of these throws. If you are using a non-computerized
transmitter, an easy way to adjust the throw is to use the adjustable
servo arm that comes with most servos as shown in the photo.
FUEL TANK ASSEMBLY:
❑15) Locate the parts bag containing the fuel tank assembly. We
use a simple two-line fuel delivery system for this airplane. Note
that the rubber fuel stopper has two holes all the way through it.
Use these two holes for the two aluminum fuel lines.
Two pieces 1/8" aluminum tubing have been provided for venting
the fuel tank. The first piece is 2-3/8" in length and the second
is 2". Holding the front and rear metal compression disks in place
to the front and back side of the rubber stopper, insert the 2" piece
of aluminum tubing into the rubber stopper for the fuel pick up tube,
leaving 1/2" of the tube protruding out the front of the stopper.
Next, make a gentle 60Obend in the middle of the 2-3/8" aluminum
tubing, (making two equal sides), to make the overflow vent tube.
Insert this piece completely through the stopper assembly in the
same orientation as shown in the photo, again leaving a 1/2" of the
tubing protruding from the front face of the stopper.
Note: The neck of the fuel tank is NOT located in the center of the
tank body and is offset to one side. When looking at the front of
the tank, the neck should be offset to the right. The side of the tank
that is up will be top of the tank when mounted in the airplane and
should be marked for reference.

COWL CUTOUT
MUFFLER CUTOUT
TOP OF TEMPLATE 1-3/16 DOWN FROM COLOR TRIM LINE
COWL AND MUFFLER CUTOUT TEMPLATE
3.25"
To bottom of cowl
BOTTOM OF COWL
inverted mounted engines you will need to open up the bottom of
the cowl as shown in the picture to provide cylinder clearance and
cooling air for the engine. Use the provided template above to
mark out the area to be removed.
❑19) Slide the cowl over the mounted engine until the prop drive
washer protrudes through the spinner fairing hole at the front. We
used a 1/16" clearance measurement for the distance between the
back of the spinner backplate and the very front of the cowl. To do
this, tack glue four scrap pieces of 1/16" balsa onto the rear of the
spinner backplate. Mount the spinner backplate onto the engine
and hold it in place by lightly bolting a prop on top of it. Slide the
cowl up to the spacers on the back of the spinner backplate,
center the spinner fairing to the back of the spinner and tape in
place. Now line up the color part lines at the back of the cowl with
the same lines on the fuselage and tape the cowl to the fuselage
in this position. Using the six holes, (3 on each side of the cowl),
as guides, drill six 1/16" dia. pilot holes for the cowl mounting
screws. Drill each hole about 1/4" deep. Remove the cowl from
the fuselage. Apply a couple of small drops of thin CA into these
holes to harden them.
9
Centerline
3-1/4”
TIPS ON CUTTING HOLES IN FIBERGLASS: Always wear
safety glasses and a mask of some kind to avoid inhaling any
fiberglass dust. Use a fine point marker to draw an exact
outline of the area you want to cut out. Then use a Dremel®
Tool with a parting wheel to remove the material just inside the
lines you have drawn, then switch to a drum-sanding tool to
neatly finish the cutout. Work slowly and carefully when
removing the material from the cowl. Check your progress
often and make sure you are not removing too much material.
Finally, use #220 sandpaper by hand to clean up and smooth
any rough or jagged edges. Make sure all edges are free of
any loose glass fibers. Be careful not to sand the paint on the
outside of the cowl. Remove all fiberglass dust from the cowl
with a tack rag or with alcohol on a clean cloth.

Cut a new length of 1/16" music wire about 4" long. Reinstall the
cowl and insert the wire through the cowl and into the hole in the
needle valve and tighten the setscrew. Turn the needle all the way
in and make a mark on the wire, about 1/8" outside the side of the
cowl. Remove the wire from the needle valve and cowl and make
a 90Obend in the wire, at the mark. Trim the excess wire from the
bent end, leaving about 3/8" to grip on. Insert the wire back into
the cowl and needle valve and tighten the setscrew. You now have
a neat looking, perfectly aligned needle valve extension.
❑22) The rudder pull-pull system can now be installed. From the
kit contents, locate the 2 Steel Cables, 4 SwageTubes, 4Threaded
Rigging Couplers, and 4 Metal R/C links.
Mount the rudder servo in place using the screws and hardware
provided by the servo manufacturer. As previously mentioned, we
highly recommend using the Du-Bro super strength servo output
arms for the pull-pull rudder system. Plug the servo into the
rudder outlet in the receiver, turn on your radio system and center
the servo, making sure that the transmitter rudder trim is in the
center position also, and install the servo output arm on the servo.
Turn off the radio system. The pull-pull cables have been
provided in two equal lengths. Insert one of the cables into each
of the pull-pull exits located in the rear of the fuselage. Pass the
cables completely through the rear of the fuselage and up to the
rudder servo location. Keep pulling the cables forward until you
have about eight inches of cable remaining at the rear of the
fuselage. Tape the cables in place at the rear of the fuselage with
small pieces of masking tape to prevent the cable from slipping out
of the pull-pull exit tubes.
❑20) Most engines will require another cut out in the cowl to clear
the exhaust system. The engine, shown in this manual, is the
YS-63S and the photos show how we cut the cowl to clear its
exhaust system. If you are using a different engine, then you will
have to use the same technique to create the required cowl
clearance hole for your particular engine. For most engine
installations, there is more than an adequate amount of openings
provided in the cowling for cooling air to enter and exit. A rule of
thumb is that the exit area must be equal to or larger than cooling
air inlet. There should be at least 1/8" of clearance between the
cowling and any accessory such as muffler and/or carburetor.
❑21) With the cowl now in place, you need to consider the
needle valve. Most engines come with a needle valve that has a
pre-drilled hole in its center and a setscrew. This is used when
attaching a needle valve extension. OurYS 4-stroke has just such
a needle valve assembly and the pre-drilled hole accepts 1/16"
dia.music wire. To locate the required needle valve extension hole
in the cowl, we put a short length of 1/16" dia. music wire into the
hole in the needle valve and tightened the setscrew to hold it
firmly.
The needle is then threaded back in place all the way into the
carburetor. Place a straight edge against the side of the fuselage
at the nose, intersecting the piece of wire and mark this point on
the wire. Remove the wire from the needle valve, cut the wire at
the point you just marked then sharpen the wire to a needlepoint.
Insert the wire back into the needle valve, tighten the setscrew and
install the cowl onto the fuselage. Turn the fuselage upside down
on your work surface and use a pair of needle nose pliers or
hemostats to begin turning the needle out. As the needle rotates
outward, the sharpened end of the wire will come into contact with
the inside surface of the cowl. Hold a scrap piece of wood against
the outside of the cowl, over the pointed wire, and continue
unthreading the needle valve until you get a definite dimple on the
outside of the cowl. When you see this mark, screw the needle
valve back into the carburetor and remove the cowl. Using the
dimple on the cowl for center, use a 3/32" dia. bit to drill through
the side of the cowl. Remove and discard the sharpened piece of
music wire from the needle valve. Make sure the needle valve
setscrew is aligned to allow access to it when the cowl is in place.
10
1-3/16”

fuselage through the servo opening. Mount the elevator servo in
the fuselage at this time using the hardware and screws provided
by the servo manufacturer.
LANDING GEAR AND WHEEL PANTS:
❑24) The landing gear assembly, complete with wheels and
wheel pants is now assembled and mounted to the fuselage. We
suggest you use Loctite®"Blue" non-permanent thread locking
compound on all bolts used in this assembly. From your parts
bags, locate the two 2-1/2" dia. main wheels, the two M4 x 40mm
steel wheel axle bolts, four 4mm axle lock nuts, and two 4mm hex
nuts.
Insert the M4 x 40mm axle bolts into the wheels and thread one of
the 4mm lock nuts onto the bolt until there is about 1/32" side play
for the wheel. Thread the 4mm hex nut down on the lock nut to act
as a spacer, and add a 4mm lock washer. Insert this assembly into
the large hole at the bottom of the aluminum landing gear and
secure with the other 4mm lock nut.
❑25) Note that there is a front and rear edge to the aluminum
landing gear - the legs are tapered. When the landing gear is
placed upside down on a flat surface, gear legs up, the leading
edge (front) is 90Oto the table. The trailing edge (rear) is slightly
angled. Be sure to orient the mounting of the wheel pants to the
On the servo end of the cable, slide one of the copper swage tubes
onto the end of one of the cables.Then insert the end of the cable
through the small hole in the end of a threaded rigging coupler,
giving yourself about 2"-3" of cable to work with. Loop the short
end of the cable back and run it back through the copper swage
tube. Pull the swage tube up to about 1/2" away from the rigging
coupler, and use a pair of pliers or a crimping tool to squeeze the
copper tube tightly over the cable, locking it in place. Cut off the
excess at the short end of the cable and wick one drop of thin CA
into the swage tube to help lock the cable in position. Repeat this
process to make the same connection with the remaining piece of
cable.
Attach the rigging couplers to the servo output arm as shown in the
photo. Make very sure that the rudder cables do not cross over
each other in the rear of the fuselage. Each cable should run
straight from each side of the servo output arm to the exit tubes at
the rear of the fuselage. Pull slack out of the cables and retape
them at the rear of the fuselage. Note that the rudder ends of the
cables will be assembled after the fin and rudder are glued in place
on the fuselage.
❑23) Plug the 12" extension cable to the elevator servo, secure
the plug with heat shrink tube or tape and thread the cable into the
11
4mm
Axle Bolt
4mm
Lock Nut
4mm
Lock Washer 4mm
Hex Nut

Carefully mark this position on the bottom and top of the stabilizer,
then trim the covering to within 1/32" of your pencil marks to allow
maximum surface for gluing.
Re-install the stabilizer, centering it visually and use a pin or two
to hold it in place. Now step back and view the stabilizer in
relationship to the fuselage and bottom wing. It should be square
and aligned, without leaning to one side or the other. If it is, use a
little sandpaper to adjust the stabilizer mounting plate until the
stabilizer sits flat and square.
❑28) Using slow cure epoxy (15 or 30 minute type), apply glue to
the exposed wood on the bottom center of the stabilizer and to the
exposed wood on the top of the stabilizer. Also apply glue to the
top and bottom wood in the fuselage stabilizer slot. Carefully slide
the stabilizer into the slot. The slow cure epoxy allows plenty of
time to now properly align the stabilizer to the fuselage. Again,
measure from the center of the firewall to the tips of the stabilizer.
View the airplane from the top, front and rear to make sure the
stabilizer is square with the fuselage and leveled with the bottom
wing. When satisfied, pin the stabilizer in place and wipe off any
excess epoxy that may have oozed out with a paper towel and
alcohol. Allow the glue to fully cure.
❑29) The elevator control horn is now mounted to the left inboard
elevator half. Measure 9" in from the tip of the elevator on the
bottom left side as shown. Use the Control Horn Drill Template to
mark the mounting holes for the control horn. Drill the two required
horn mounting holes with a 5/64" bit and bolt the control horn and
backing plate in place with two M2 x 15mm screws and nuts.
12
gear and the gear to the fuselage in this configuration. Locate the
two fiberglass wheel pants and use the four M3 x 10mm bolts and
four 3mm lock washers to attach the wheel pants to the landing
gear over the wheels.
❑26) The completed landing gear assembly is now mounted to
the bottom of the fuselage using the two provided M4 x 15mm
bolts and two 4mm washers. Tighten these bolts securely.
HORIZONTAL STABILIZER AND ELEVATOR INSTALLATION:
❑26) For visual reference in these steps, start by first mounting
the lower wing to the fuselage with the two provided 1/4 - 20 nylon
wing bolts. Make sure there are no wires trapped between the
wing and the wing saddle of the fuselage. Place the stabilizer into
the fairing slot at the rear of the fuselage. Note that the covering
has been removed all the way to the trailing edge on the bottom of
the stabilizer.
Carefully center the slot in the stabilizer to the vertical fin cutout in
the top of the fuselage and align the stabilizer to the fuselage by
measuring from the center of the firewall to the tip of the stabilizer
at the hinge line. Make sure that both of these measurements are
equal and pin in place.
Equal Distance
MODELER’STIP: Use a sharpened piece of music wire or an
awl to perforate the mating surfaces of the stabilizer and the
fuselage. These small holes or dimples allow epoxy glue to
migrate into them, acting as small "nails" after the epoxy has
cured.

13
Mount the two opposing nylon rudder control horns with two
M2 x 15mm bolts and nuts. Locate the "T" bracket in the tail wheel
assembly bag and mount it in place to the bottom of the rudder
with two M2 x 10mm screws. Now insert the two remaining rudder
hinges into the leading edge of the rudder and hinge the rudder
permanently in place using the same methods described in the
earlier aileron hinging directions.
TAILWHEEL ASSEMBLY:
❑33) From your kit parts, locate the tail wheel assembly bag
Hold the leaf spring in place onto the bottom rear of the fuselage.
Align the spring along the centerline of the fuselage, with the bend
about 1/8" forward of the rudder hinge line. Use a fine tip marker
pen to mark the locations of the three mounting holes on the
fuselage. Use a 1/16" dia. bit to drill the mounting holes through
the bottom of the fuselage. Mount the leaf spring securely in place
to the bottom of the fuselage, using the three M3 x 15mm PWA
screws.
Note that the two tail wheel centering springs will be mounted in
place after the pull-pull rudder cables are installed and centered in
the following steps.
❑30) The elevator assembly is now hinged to the horizontal
stabilizer, using the same hinging methods earlier used to hinge
the ailerons.
FIN & RUDDER ASSEMBLY:
❑31) Trial-fit the vertical fin into the slot at the top rear of the
fuselage, locating its bottom tab into the slot in the horizontal
stabilizer. Mark the bottom of the fin, where the covering is to be
removed to expose the wood for a good glue joint. Remove the fin
and trim the covering about 1/32" inside these lines. Use slow cure
epoxy to glue the fin into the slot, making sure the fin is 90Oto the
stabilizer and that its trailing edge lines up with the end edge of the
fuselage. Use strips of masking tape to hold the fin in the correct
90Oposition to the horizontal stabilizer and allow the glue to fully
cure.
❑32) Measure up 5/8" from the bottom leading edge of the
rudder and use the Control Horn Drill Template to locate the holes
for the two rudder control horns. Since one of the bolts will pass
through the hinge, insert the lower hinge into the slot before drilling
the 5/64" dia. bolt holes.
9” From Tip
To Centerline
Use Drill
Template
5/8”
From Edge To Centerline

swaging tube towards the rigging coupler. Use pliers or a crimping
tool to squeeze the copper tube tightly over the cable to lock it in
place. Cut off the excess short end of the cable and secure the
joint with a small drop of thin CA glue, wicked into each swaging
tube. Adjust the threaded R/C links until you get both pull-pull
cables to approximately the same mild tension. It is not necessary
to pull the cables extremely tight.
❑35) Remove the tape holding the rudder in place, turn on the
radio system and test the movement direction and centering of the
rudder. Make adjustments if needed. When satisfied with the
operation of the pull-pull system, tighten the knurled stop nut on
each rigging coupler up against the end of the R/C Links to lock
the links in place.
❑36) The two tail wheel centering springs are now installed.
These springs connect the "T" bracket on the bottom of the rudder
to the tail wheel steering arm, just above the tail wheel itself.
These springs are installed and bent to impart just a little tension
on the tail wheel bracket, centering the tail wheel with the rudder.
Install the two springs making sure the tail wheel is centered with
the rudder when it is in the neutral position.
Use needle nose pliers to bend loops in one end of the each spring
and hook these loops into the holes of the metal "T" bracket on the
bottom of the rudder. With the rudder and the tail wheel both in the
neutral position, apply a small amount of tension to one of the
springs and using pliers, make a 90Obend in the wire at the hole
location on the tail wheel steering arm. Insert the wire into the
steering arm and make another 90Obend back toward the center
of the spring, forming a loop. Repeat this procedure with the
remaining spring. Do not over stretch the springs when doing this.
A little bit of tension is all you need. The springs should center the
tail wheel to the rudder when it is at neutral. Turn on your radio
system to check the movement of the rudder and tail wheel. If
there is any binding, correct it. Finally, wrap several turns of the
wire around itself to lock it into place and snip off the excess.
ELEVATOR PUSHROD:
❑37) Using your radio system, center the elevator servo making
sure the trim lever is also centered. Mount the elevator servo
output arm in place at 90Oto the side of the servo, pointed up
toward the bottom of the stabilizer. Use tape to hold the elevators
in the neutral position to the horizontal stabilizer. Attach the
Z-bend end of the pushrod into the servo output arm, using the
second hole from the end of the arm. Adjust the threaded R/C link
to fit into the last hole of the elevator horn. Remove the tape
holding the elevators in neutral and test the movement of the
elevators with your transmitter. Adjust the R/C link as required to
get the elevators exactly at neutral.
ASSEMBLING THE PULL-PULL CABLES:
Note: It is important that the distance between the pull-pull cable
attach points at both the servo and rudder horns are as close to
the same as possible.
❑34) Use tape to hold the rudder in the neutral position. Prepare
the two R/C links and the rigging couplers by first centering the
R/C links in the middle of the threads of the rigging coupler. Then
thread the knurled stop nut up snuggly against the R/C Link. Snap
the R/C links and rigging couplers in place into the proper holes in
each rudder control horn. Turn your radio system on and make
sure the rudder servo arm is centered and that the rudder trim on
the transmitter is also centered. Slip one of the copper swage
tubes onto the end of the cable at the rear of the fuselage. Thread
the end of the cable through the small hole in the end of the rig-
ging coupler and take up the slack in the cable. Loop the end of
the cable back and run it through the copper swaging tube and
slide the swaging tube up to within 1/2" of the rigging coupler. Do
not crimp the swaging tube at this time. Repeat this procedure for
the remaining pull-pull cable. Next, with the rudder still taped in the
neutral position, remove any excess slack from both of the pull-pull
cables by pulling on the short end of the cable and sliding the
14

our Sun Dancer 50 prototypes, we located the battery pack
directly beneath the fuel tank. First wrap the battery pack in foam
rubber and cover it with a small plastic bag before inserting it under
the fuel tank. Use a little extra foam rubber as needed to keep the
pack from shifting.
The receiver should also be wrapped in foam rubber. First make
the required connections for the throttle, rudder, and elevator
servos. Also install the Y-harness connector into the aileron
receptacle. Wrap the receiver in foam rubber and mount it in place
just ahead of the fuselage servo tray, using rubber bands to secure
it. The two connectors from the Y-harness should be free and
easily accessible.
Some radio systems (especially older systems) may be sensitive
to the relationship of the receiver antenna running parallel with the
braided metal cable pull-pull rudder system and/or the elevator
servo extension cable. We, therefore, recommend that the
antenna be routed outside of the fuselage, back to the top of the
vertical fin. A neat way to do this is to use a piece of the inner
throttle pushrod to make the exit mast as shown. The top of the
tube extends about 1" above the fuselage behind the cockpit. The
lower end of this tube extends slightly below the hole in the servo
tray and is secured with a scrap of wood. The antenna is routed
from the receiver to the lower end of the tube, up through the tube
and then back to the top of the fin as shown. The antenna is
attached to the top of the fin, under slight tension, with a rubber
band that is looped around the antenna at one end and a pin in the
fin on the other end.
The on/off switch can be mounted directly into the side of the fuse-
lage or internally, using piece of music wire as the means to acti-
vate the switch. We typically prefer an internally mounted switch
simply because it is cosmetically clean and keeps fuel and dust out
of the switch mechanism. To do this, we made a simple mounting
bracket from scrap 1/8" plywood that was made to fit inside the
fuselage. Our switch was then mounted onto the bracket with a
short length of .045" music wire from the switch lever to the outside
MOUNTING THE CABANE STRUTS:
❑38) From your parts bag, locate the bag containing the four
factory painted aluminum cabane struts and mounting bolts.
Carefully note that these are provided in two different lengths, as
shown.
To achieve the proper incidence for the top wing it is important that
these cabane struts are mounted in place correctly. The two
longer cabane struts are bolted into the rear slot positions in the
fuselage, using the provided M3 x 9mm PWA bolts. The two
shorter cabane struts are mounted into the front fuselage cabane
slots, using the two remaining bolts to secure them.
❑39) With the cabane struts now mounted, the windshield -
removed earlier - is now reinstalled in front of the fuselage cockpit.
RADIO INSTALLATION:
❑40) The airborne battery pack is the single heaviest component
of your radio system and this means that you can shift its final
location as needed to achieve the correct balance point (Center of
Gravity).). For reference, to achieve the correct C. G. location on
15
Lower End Of
Antenna Exit
Strain Relief
Antenna

❑42) Install the bottom wing to the fuselage using the
1/4-20 x 1-1/2" nylon bolts. Take care that the aileron servo wires
are not caught between the wing and the wing saddle of the
fuselage. Attach the top wing to the fuselage by inserting the strut
fittings on the bottom center of the wing into the space between the
cabane struts on the fuselage. Line up the holes in the strut fittings
with the holes in the cabane struts and secure the wing in place
with the provided M3 x 10mm PWA bolts and 3mm lock nuts. Do
not install the interplane struts at this time.
❑43) Because the Sun Dancer 50 is a biplane configuration, the
incidence of the wings is twice as critical and therefore must be
properly set up to achieve its full flight performance potential. The
following steps require the use of an "incidence meter" to properly
align the wings. Do not attempt to set up this model without the
use of a good incidence meter.
a) Place the incidence meter on the lower wing, and then block
up the back of the fuselage until the incidence meter reads
0Oof incidence.
b) Remove the incidence meter and move it up to the center of the
top wing. View the top wing from the front to make sure it is at or
very close to horizontal (level). With the top wing in this position,
16
of the fuselage to turn the system on and off. This is actually quite
simple to do. First drill a small diameter hole in the switch lever to
fit a piece of .045" dia. music wire. Drill an exit hole in the side of
the fuselage, lined up with the switch/wire location. Make a 90O
bend in one end of the wire and insert the short end into the hole
in the switch lever. Insert the wire through the hole in the fuselage
and make another 90Obend in the wire, outside of the fuselage
side, giving you a small "handle" to pull and push when activating
the on/off switch. Besides looking neat, your switch is now
protected from the elements.
FINAL ASSEMBLY:
❑41) Locate the parts bag containing the ten (10) aluminum strut
attach fittings. Two of these fittings are now installed into the two
pre-drilled holes on the bottom center surface of the top wing.
Screw each fitting in place until the bottom of the fitting just
touches the bottom surface of the wing. Now turn the fittings back
out one full turn until their mounting holes squarely face each wing
tip.
The remaining eight (8) aluminum strut fittings are now installed at
the outer pre-drilled holes on the bottom of the top wing (4
required) and the top surface of the bottom wing (4 required). Just
as described, screw these fittings in place until their mounting lugs
contact the surface of the wing and then back them out one full
turn to orient their mounting holes toward the wing tips, parallel to
the wing span.
MODELER’S TIP: To give your model that professional look,
use a rubber powered nose bearing from Peck Polymers (Part
Number 006) as an exit guide for the switch wire, where it
passes through the fuselage side. This gives the whole thing
a very nice, finished look.

17
the incidence meter should read 0Oof incidence. If it does not read
0O, adjust the center aluminum strut fittings - screwing them in or
out - as needed until the incidence meter reads 0O.
❑44) The two outer interplane wing struts are now mounted in
place. Before these struts can be bolted in place, you must first
align their pre-drilled holes in the top and bottom of the struts with
the holes in the aluminum strut fittings. Adjust these fittings in or
out until the interplane strut can be bolted in place without
applying any pressure to the wing or strut to align their holes. In
addition, use a ruler to check and make sure that the top and
bottom wings are the same distance apart at the wing tips. Bolt
the interplane struts in place with the eight (8) provided
M3 x 10mm PWA bolts.
❑45) Use the incidence meter to now measure the incidence of
the four wing panels at the inboard ends of each aileron. Again,
the incidence meter should read 0Oof incidence at each location.
If the meter reads anything other than 0Othen we have to find the
problem before flying the model. The most likely place to start is
by unbolting the interplane struts to see if a warp was induced
when the interplane struts were attached. Highly unlikely but
possible is a warped wing from the factory. The wings are built and
covered in jigs at the factory and checked for warps before they are
packaged and shipped. If a warp is discovered, it can be easily
corrected. Twist the wing panel in the opposite direction of
the warp and carefully re-shrink the covering material on the
appropriate side of the wing panel. Continue holding the opposite
twist in the wing until the covering cools. You may have to repeat
this procedure until the warp is completely removed.
❑46) The two 2mm x 165mm aileron inter-connect drive wires are
now installed to drive the upper ailerons from the lower ailerons.
Use tape to hold the two upper ailerons in the neutral position.
Insert the Z-bend end of the inter-aileron drive wire into the nylon
inter-connect horn on the upper aileron. Turn the radio system on.
Thread the R/C link on the lower end of the rod up or down as
needed to fit easily into the hole in the nylon inter-connect horn on
the lower wing. Once satisfied, tighten the lock nut behind the R/C
link to lock the R/C link in this adjustment position. Repeat this
process on the opposite set of ailerons. Remove the tape holding
the upper ailerons centered and use the transmitter to check for
movement and centering of the now coupled ailerons.
CONTROL MOVEMENTS:
This is an important section of this manual. After flying your SUN
DANCER 50 for a while and getting used to its characteristics, you
may wish to adjust the control throws to better suit your flying style.
But you have to start somewhere and this is where you begin.
These movements provided the SUN DANCER 50 with very
smooth control inputs without the immediate need for exponential.
We suggest starting out with these movements. You can easily
play with more control throw after you become comfortable with
the airplane. In the case of the elevators and rudder, control
movements are always measured at the widest point of the control
surface.
SUGGESTED CONTROL SURFACE THROWS
Ailerons: 3/8" Up – 3/8" Down
Elevators: 5/8" Up – 5/8" Down
Rudder: 3/4" Left – 3/4" Right
IMPORTANT: The control surfaces of your Sun Dancer 50 provide
very positive control response. We strongly recommend you do
not exceed these recommended throws on the first flight.
DECAL APPLICATION:
The decals provided with this kit are typical markings that might be
seen on a full size aerobatic airplane. They are not intended to be
a complete set of markings to duplicate any particular full size
aircraft. However, they look very realistic and believable when in
place. Use the various box art and assembly manual photos to
position the decals in the appropriate locations on your model.
Feel free to use all or only some of the decals in different locations
as you see fit.
These decals are made from adhesive-backed Mylar™- they are
NOT water-activated transfers. These decals are not die-cut and
must be cut from their sheets with a sharp #11 blade or scissors.
Trim as close to the image as possible.
We suggest the following procedure to accurately and neatly apply
the larger decals in this kit. Carefully cut out the decal and lift it off
of the sheet with tweezers. Use a product like SIG Pure Magic
Model Airplane Cleaner or Windex®to spray the general area of
the model that will receive the decal. Then spray the adhesiveside
of the decal as well. Lightly position the decal in place on the
model. The liquid cleaner allows the decal to slide easily into the

18
desired position as long as you don’t press down on it. Once the
decal is in position, hold it lightly in place with your fingertips and
use a paper towel to gently dab the excess liquid away. Use a
small squeegee to now set the decal in place, removing all excess
liquid and any trapped air bubbles from beneath the decal. The
SIG 4" Epoxy Spreader - #SIGSH678 - is perfect for this job.
Remove any excess fluid with a dry paper towel and allow the
decals to set overnight. They will be solidly adhered to the model
without any air bubbles.
CENTER OF GRAVITY:
In terms of the flight characteristics you will realize, this is
probably the single most important step in preparing your SUN
DANCER 50 for flight. The final placement of the longitudinal
Center of Gravity or Balance Point is extremely important and
should be approached with patience and care. Completely
assemble the model, including propeller, spinner, etc. Do not leave
anything off the airplane that will be on it in flight. DO NOT FILL
THE FUEL TANK for balancing purposes.
We have found that the simplest way to check the balance is the
old "fingertips under the top wing" method. First place a strip of
masking tape on the bottom side of the top wing on both sides of
the cabane struts. Measure back from the leading edge and place
marks on the masking tape at the distance shown below.
For initial test flying and familiarization purposes, we suggest
a starting balance point of 3-1/4" behind the leading edge of
the top wing.
Place your fingers on the rear marks on the tape and gently lift the
model up off the workbench. If the model hangs in a tail low
position, the airplane is tail heavy. If the model hangs nose low, it
is nose heavy. If the model hangs level at the 3-1/4" mark, the
model is balanced properly for initial test flights.
If you need to move your balance point fore or aft slightly, the first
method to try is relocating the airborne battery pack. Often times,
moving your battery pack fore or aft is all you need to do to achieve
the desired balance point. If you have a super heavy engine, it’s
not unheard of for the battery pack to end up behind the cockpit
area. Wherever the battery pack ends up, be sure it is
adequately secured to the model structure so it will not move
around in flight. If relocating your battery pack is not enough to
achieve the desired balance point, and more weight is needed,
consider using a larger (and therefore heavier) battery pack. Try to
avoid adding useless weight. If you need more weight in the nose,
try a heavier spinner or replace the light wheels with heavier after-
market wheels. If your model is nose heavy and battery shifting
does not work, you can make significant changes in balance with
stick-on lead weights. These can be used temporarily on the
outside of the model until you've flown the airplane sufficiently to
know exactly where you like the CG and how much weight it takes
to get it there. Once that's done, the lead weights can be placed
inside the fuselage by simply removing the elevator servo and
securing the weights on the inside. With the elevator servo back in
place, the weights are hidden.
After flying for a while you may wish to fine tune the balance point
to match your flying style. As we all know, as the balance point is
moved aft, an airplane will become more responsive in all axis, but
it will be especially noticeable in "pitch" (up and down). We have
flown the SUN DANCER 50 with the C.G.as far back as 3-5/8" and
found it to be manageable, with excellent aerobatic capabilities.
However, we did notice an increase in pitch sensitivity and had to
decrease the elevator throw to compensate. "Softening" elevator
response with a reasonable exponential percentage also works. In
the end, the final balance point and control throws you use will
depend somewhat on how you like to fly. Some pilots like their
models extremely reactive, others strive for more smoothness.
The SUN DANCER 50 is a very capable aerobatic machine and
can be tailored to fit your style. We therefore suggest that you
begin with the suggested C.G. location and experiment from there.
Finally, the aerobatic performance of your SUN DANCER 50 will
benefit greatly if you balance the airplane laterally as well as fore
and aft. In other words, eliminate the "heavy wingtip" syndrome.
Lateral balancing requires that the model be suspended upside
down by two lines (use substantial size chord or fishing line). Loop
one line over the engine propeller shaft and the other line over the
tail wheel bracket. Hang the model from the ceiling or a rafter,
leveling it in side view. With the model secured in this way, observe
the wings. Ideally they should be level, without one wing lower
than the other. If one wing panel is lower, it means that it is
somewhat heavier than the other. When flying the model, this
imbalance can cause the model to "pull" to the heavy side,
especially in loops and up line maneuvers. To make the airplane
track true, the light wing panel needs weight at the tip to balance it
level with the other panel. Again, this can be done with stick-on
weights, which could later be hidden inside the wingtip.
FLYING:
If you have carefully followed this assembly manual, you should
have no real problems in test flying your SUN DANCER 50. Try to
choose a calm day for the first flight. Good conditions will help in
correctly evaluating the flight performance of the model. Begin
your test flight by making sure the engine is properly broken-in,
with a reliable idle, a strong top end, and smooth transition
performance. Set your engine’s high-speed needle valve a little on
the rich side, so that when the airplane noses up the engine will
not be over lean and sag.
Holding up elevator, taxi the model to get a feel for how it handles
on the ground. Make sure you have positive left and right turning
ability. If not, make any adjustments needed to achieve positive
ground control. Once you are satisfied with the taxi tests, line the
model up with the centerline of the runway with the nose into the
wind. Hold a little up elevator and advance the throttle smoothly -
do not throw the throttle open all at once! The airplane should roll
forward smoothly. As speed builds, slowly back off the elevators
and use just a little rudder, only as needed, to maintain a straight
takeoff run. The tail will come up as flying speed is reached and a
little up elevator will lift the SUN DANCER 50 off the ground.
Maintain a straight outbound flight path, climbing at a shallow
angle until a safe maneuvering altitude is reached. If the model
requires trim, fly it to a reasonable altitude first before trimming.
Initially, make your control inputs smooth and avoid jerking the
sticks.
At altitude, make any trim changes needed to achieve hands off,
straight and level flight. From our experience, this will take very
little trim input, if the model was assembled and balanced
properly. Once you're comfortable, make a few circuits around the
field to get the feel of the controls. The airplane should
demonstrate smooth flight characteristics without jumpiness or
over-sensitivity. At altitude, try a roll. Then, try another roll to the
opposite side. Properly trimmed, the SUN DANCER 50 will roll
smoothly and very axially in either direction. Now try a loop. The
SUN DANCER 50 should pull cleanly through loops, without
wandering to either side. Once you're comfortable, try knife-edge
flight. You will quickly find that the SUN DANCER 50 easily

19
maintains altitude with just a little rudder input! You will also
discover that your SUN DANCER 50 has outstanding inverted
flight characteristics. Our prototypes require only the smallest
amount of down elevator to maintain level inverted flight!
Assuming you're comfortable and getting used to the airplane,
take it to a safe altitude and throttle back to get a feel for the slow
flight and stall characteristics. Properly balanced and trimmed,
your SUN DANCER 50 should demonstrate fairly sedate, no fuss
stall characteristics. Once flying speed is bled off and full up
elevator input is reached, the SUN DANCER 50 should just drop
its nose and resume flying as speed picks up. All of this is great
information to have when you are setting up the first landing.
Landing the SUN DANCER 50 is a pleasure. We like to keep a
little power on the engine during final approach, down to a few feet
off the ground. Back completely off the throttle once the airplane
is low to the ground with a good rate of descent established. Flair
the airplane as the ground approaches for a smooth 3-point
SUN DANCER 50 ARF LOG BOOK
Date of first flight:
Comments:
landing and rollout. Hard landings are not necessary, sound
piloting skills are.
The second flight should be even more fun because you have now
inputted any required trim changes learned from the first flight.
Before flying again, check the airplane for anything that may have
come loose, become disconnected, etc. This is good practice and
tends to insure a long life for the model.
As you become more familiar with your SUN DANCER 50, you’ll
discover its ability to perform some very nice aerobatics. The SUN
DANCER 50 is an elegant aerobatic machine with seemingly
endless capabilities.
We hope you will enjoy your SUN DANCER 50 for a long time to
come. Please fly the model safely with constant regard to other
fliers, spectators, and property.
Good Luck and Good Flying!

20
SUN DANCER 50 ARF LOG BOOK
Date of first flight:
Comments:
Table of contents
Other SIG Toy manuals

SIG
SIG KADET LT-25 User manual

SIG
SIG Kadet Senior Sport User manual

SIG
SIG Somethin' EXTRA N477SC User manual

SIG
SIG Antoinette 1909 User manual

SIG
SIG SBACH XA-41 EP ARF User manual

SIG
SIG Four-Star 120 User manual

SIG
SIG Extra 300XS User manual

SIG
SIG KADET LT-40 EG User manual

SIG
SIG Cloud Ranger HHR508 User manual

SIG
SIG Gee Bee R-2 User manual

SIG
SIG Edgetra ARF User manual

SIG
SIG 4-STAR 60 Instruction Manual

SIG
SIG SIGRC80 Rascal C User manual

SIG
SIG RASCAL ARF User manual

SIG
SIG Kougar MARK II SIGRC35 Instruction Manual

SIG
SIG HERR FAIRCHILD 24 User manual

SIG
SIG HUMMER RC-50 Instruction Manual

SIG
SIG Primary Force Control-Line Stunter User manual

SIG
SIG RASCAL EP-49 User manual

SIG
SIG Kadet Senior User manual