Industrial Ethernet Extender
4
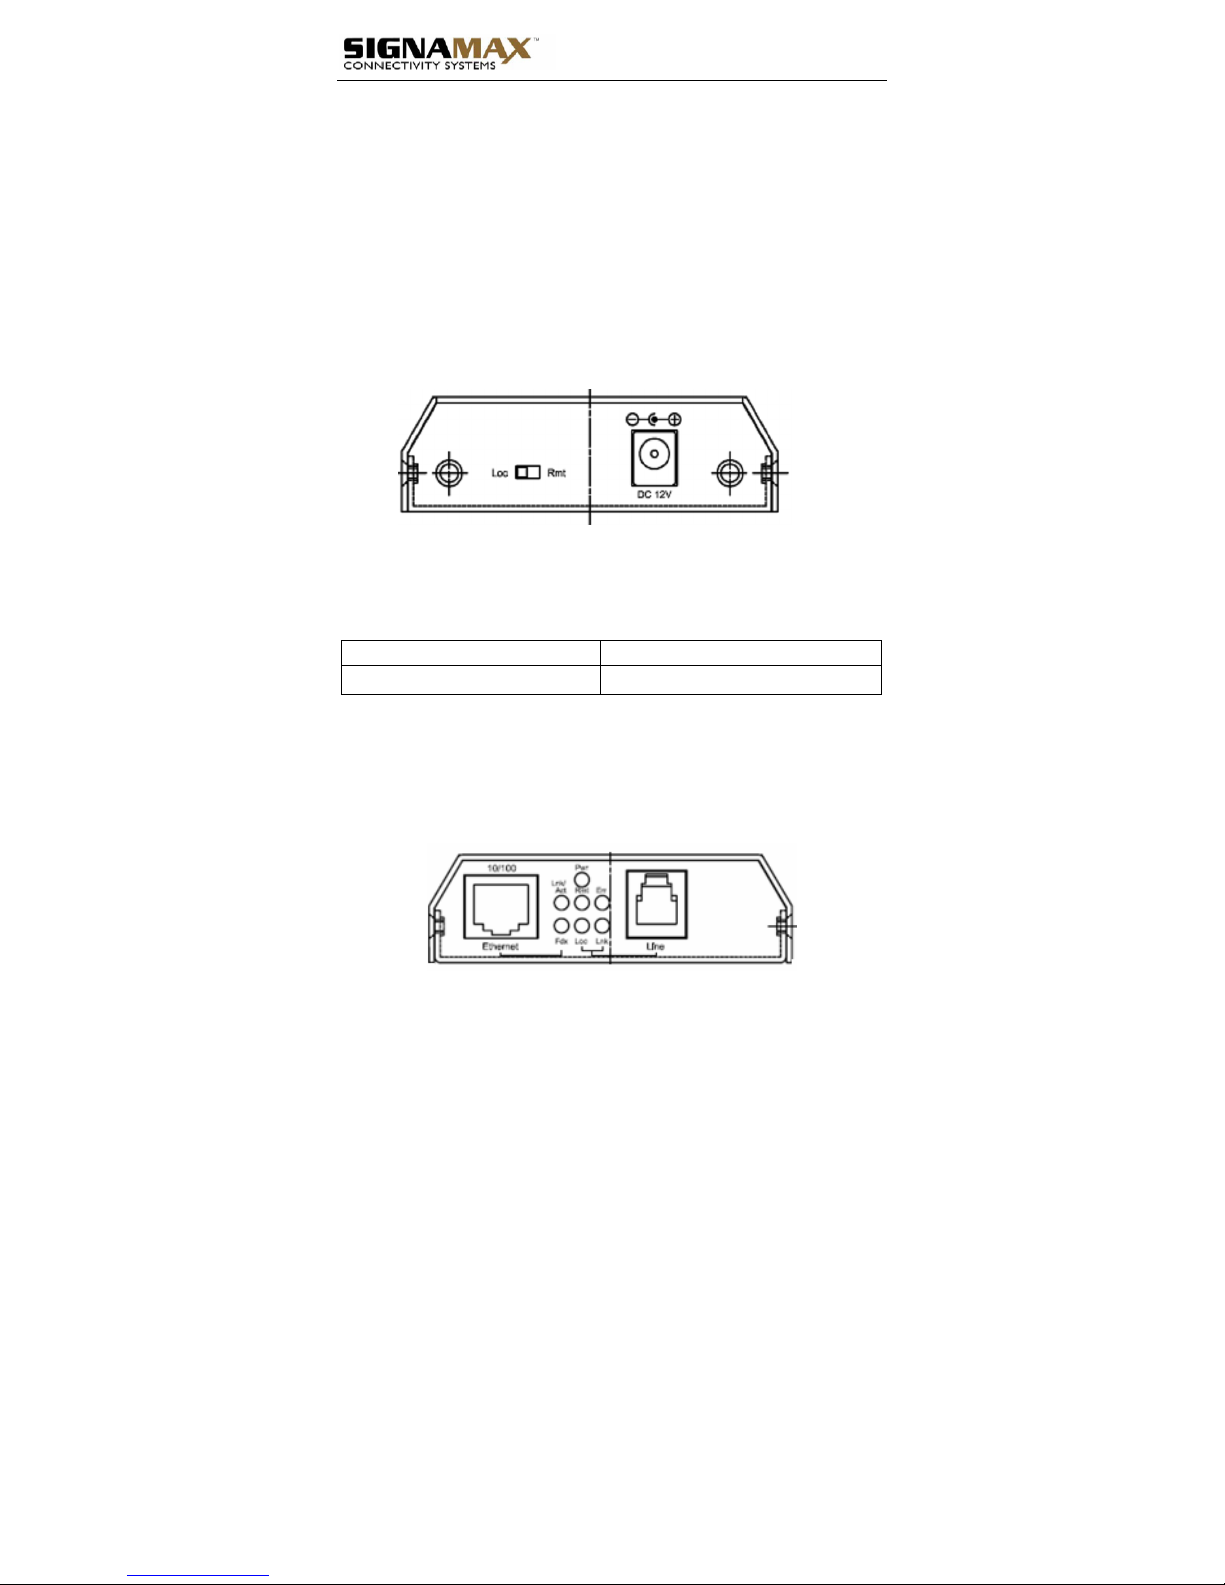
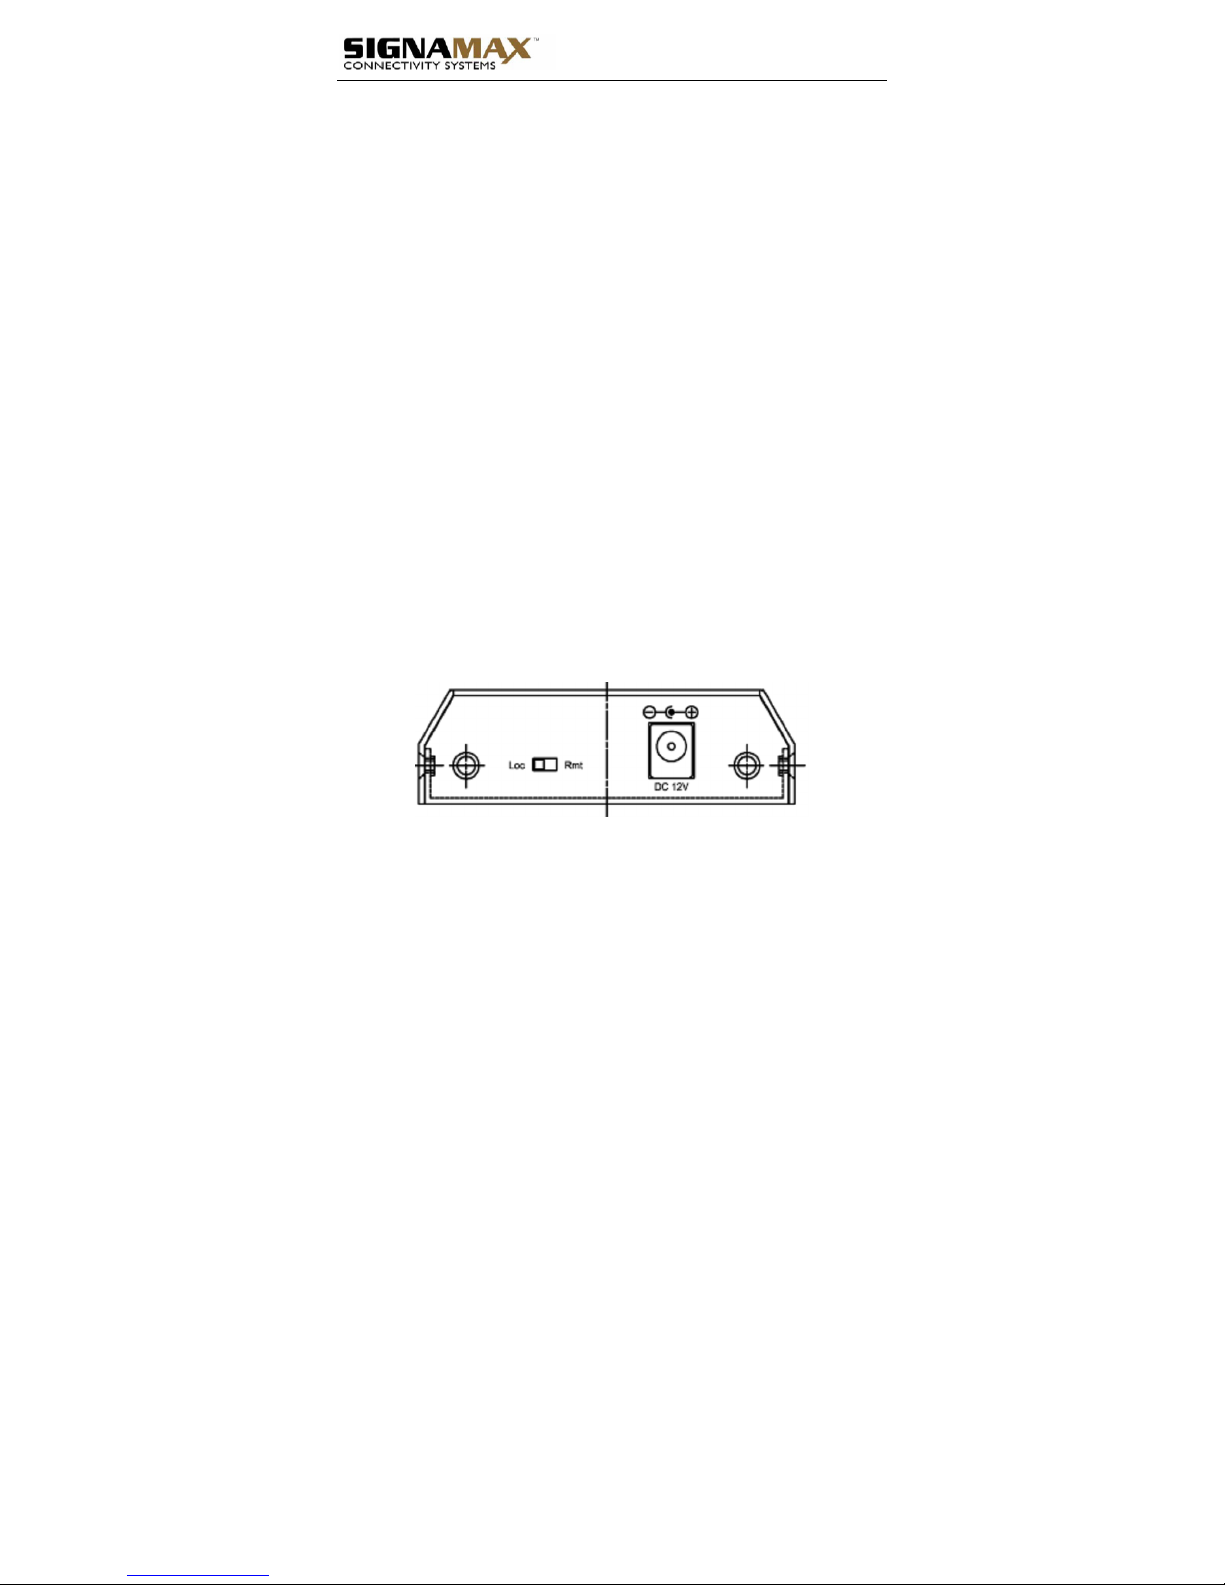
Ethernet Extender Mode Settings
Ethernet Extender mode settings are made very simple by means of a
switch at the rear panel of the Ethernet Extender. The switch has two
positions for Ethernet Extender mode settings. Refer to the table below for
more details. One device must be set to Loc and the other to Rmt when two
devices are connected.
Loc Rmt
The device operates in local mode
The device operates in remote mode
Front Panel & LEDs
The LED indicators give you instant feedback on status of the Ethernet
Extender:
LEDs State Indication
Steady Power on
Pwr stands for POWER
Pwr
Off Power off
Ethernet
Steady A valid Ethernet connection established
Lnk stands for LINK
Flashing Transmitting or receiving Ethernet data
Act stands for ACTIVITY
Lnk/Act
Off
Neither valid Ethernet connection established nor transmitting/receiving
Ethernet data
Steady Ethernet Connection in full duplex mode
Fdx stands for FULL-DUPLEX
Fdx
Off Ethernet Connection in half-duplex mode
Ethernet Extender
Green
The Ethernet Extender port transmitting/receiving at 1Mbps, up to 1900M
1 Amber The Ethernet Extender port transmitting/receiving at 3Mbps, up to 1800M
Green
The Ethernet Extender port transmitting/receiving at 5Mbps, up to
1600M
2
Amber The Ethernet Extender port transmitting/receiving at 10Mbps, up to 1400M
Green
The Ethernet Extender port transmitting/receiving at 15Mbps, up to 1200M
3 Amber The Ethernet Extender port transmitting/receiving at 20Mbps, up to 1000M
Green
The Ethernet Extender port transmitting/receiving at 25Mbps, up to 800M
4 Amber The Ethernet Extender port transmitting/receiving at 30Mbps, up to 700M
4 + 2 Amber The Ethernet Extender port transmitting/receiving at 40Mbps, up to 600M
4 + 3 Amber The Ethernet Extender port transmitting/receiving at 50Mbps, up to 300M
Rmt Steady The device operates in remote mode
Loc Steady The device operates in local mode
Err Steady Error occurred
Lnk Steady A valid connection established
Connecting to Power
This Ethernet Extender is a plug-and-play device. Connect the supplied AC
to DC power adaptor to the receptacle on the rear panel of the Ethernet
Extender, and then attach the plug into a standard AC outlet with a voltage
range from 100 to 240V AC.