SIIG MobileCam/Light Pro User manual

1
MobileCam/Light Pro
Quick Installation Guide
System Requirements
•Pentium-classnotebookordesktopcomputer
with an available USB port
•Windows 98SE/ME/2000/XP/Server 2003
Package Contents
•MobileCam/LightPro
• USBextensioncable(3ft.)
• Driver/UtilityCD
• This quick installation guide
Serial # Sticker
Forfutureproductreturnorexchange,thisserial#is
required. Pleasekeepitforyourreference.
04-0305B

2
Layout
Figure 1. MobileCam/Light Pro Layout
MobileCam/Light Pro Buttons
•On/Off Light Button: Press the button on the
back of the MobileCam/Light Pro to activate/
deactivatethelight.
•SnapshotButton: Pressthebuttonontheside
of the MobileCam/Light Pro to take a snapshot.
Snapshot
Button
On/Off Light
Button
(on the back) Light
Lens
(turn to focus)
ToUSB
Port

3
SoftwareInstallation
Important: Make sure the driver is installed before
connecting the MobileCam/LightProto the USB port.
Driver Installation
1. BootuptoWindowsandinsertthedriverCD.
2. ClickStart,Run.TypeD:\Setup.exe,clickOK.
(ChangeD:tomatchyourCD-ROMdriveletter)
For Windows 98SE/ME/2000: At the USB PC
Camerawindow,clickNext,selectComplete,
clickNext,thenclickFinish.
For Windows XP/Server 2003: At the USB PC
Camerawindow,clickNext,clickNextagain,
selectComplete,thenclickNext. ClickContinue
Anyway,thenclickFinish. Ourdriverhasbeen
thoroughly tested in Windows for stability.
3. Restart Windows to complete the driver
installation.
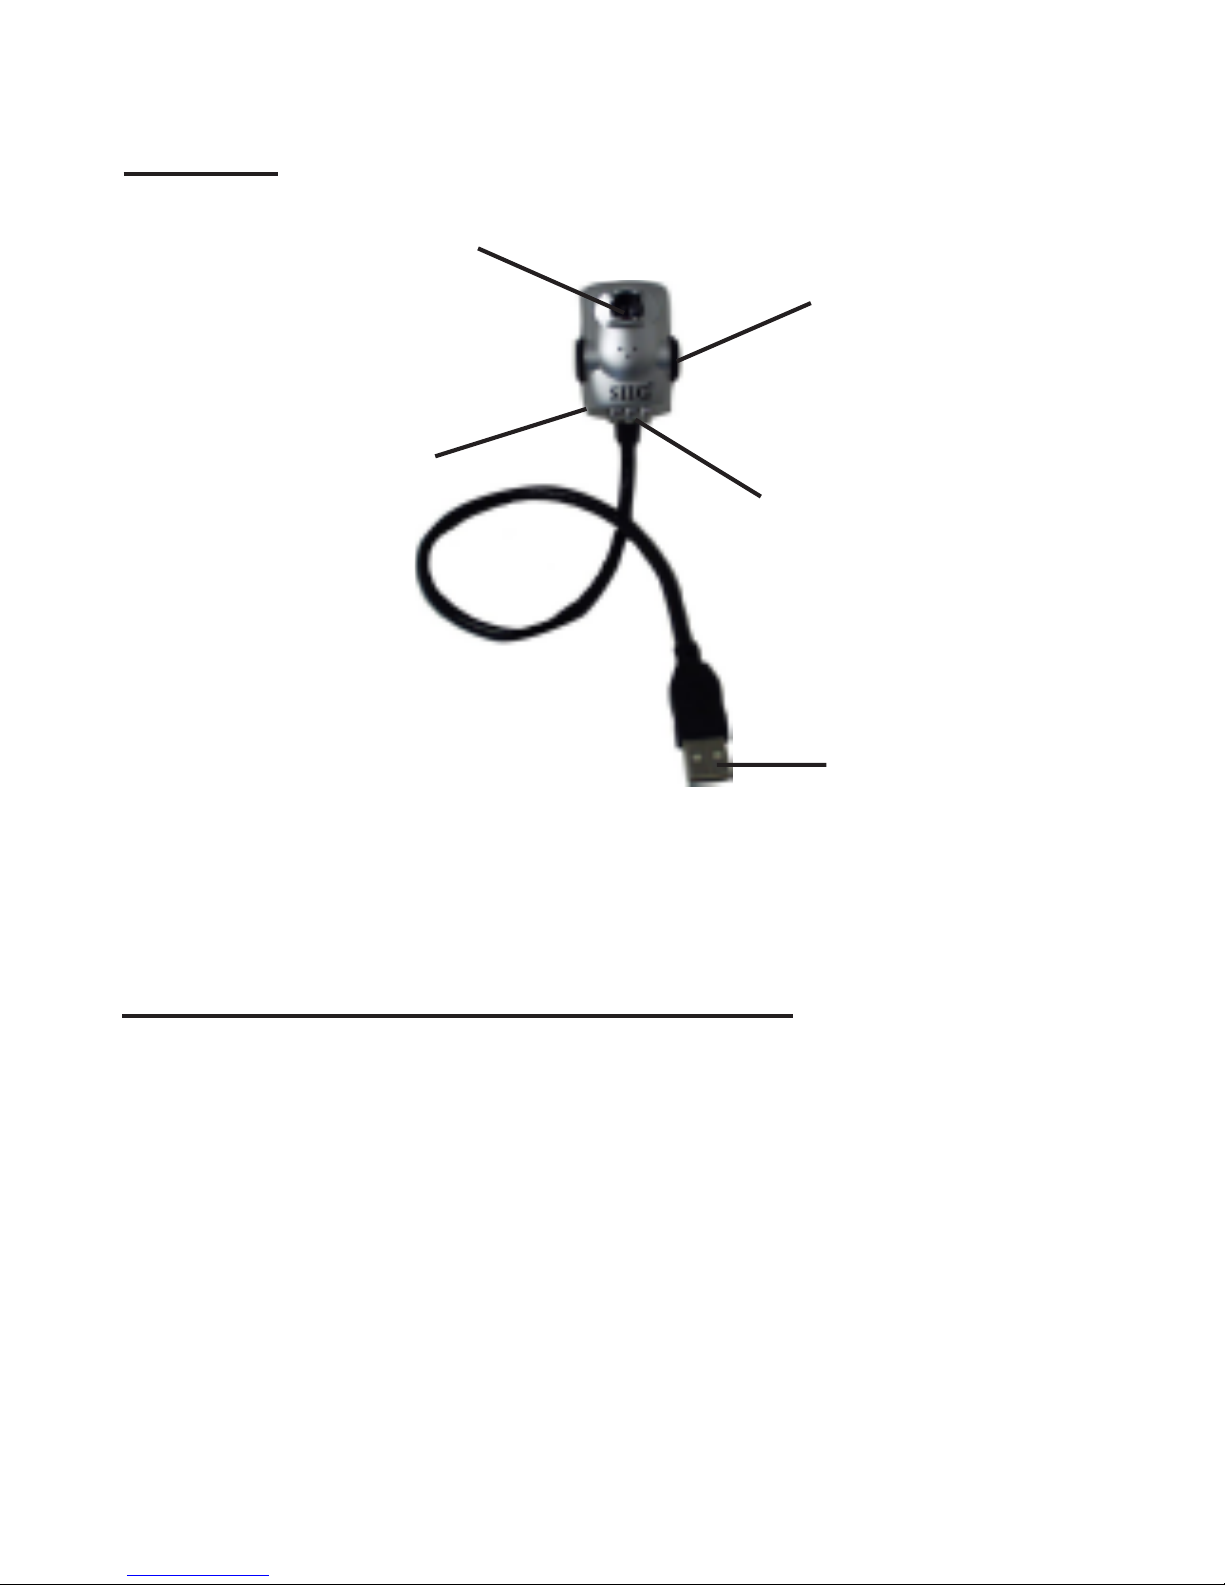
Connecting the MobileCam/Light Pro
Important: Make sure the driver is installed before
connectingtheMobileCam/LightProtoyoursystem.
Note: After the MobileCam/Light Pro has been
connected,turnthelenstoimprovefocusifneeded.

4
Windows 98SE
1. PlugtheMobileCam/LightProintoanavailable
USBport.
2. Ifprompted,clickYestokeepthenewerfiles.
3. RestartWindows to complete the installation.
Windows ME
1. PlugtheMobileCam/LightProintoanavailable
USBport.
2. ClickOKtorebootWindows.
3. WhenMEresumes,attheAddNewHardware
Wizard, select Automatic search for a better
driver(Recommended), click Next,thenclick
Finish.
4. RestartWindows to complete the installation.
Windows 2000
Windows 2000 will automatically detect and install
thecorrectdriverfortheMobileCam/LightPro. Restart
Windowsifprompted.

5
Windows XP/Server 2003
1. PlugtheMobileCam/LightProintoanavailable
USBport.
2. At the FoundNewHardwareWizard.
ForXP: SelectInstallthesoftwareautomatically
(Recommended), then click Next.
ForXPwSP1orlater/Server2003: SelectNo,not
this time, then click Next. Select Install the
softwareautomatically(Recommended),then
clickNext.
3. If prompted, at the Hardware Installation
window, click Continue Anyway, then click
Finish. Our driver has been thoroughly tested in
Windowsforstability.
4. Click Yestorestart Windows.
To verify successful installation
1. Check Device Manager to verify successful
installation.
Windows 98SE/ME: From the main desktop,
rightclickMyComputer,thenclickProperties.
ClickDeviceManagertab.

6
Windows 2000/XP/Server 2003: Right click My
Computer, then click Manage. Click Device
Manager.
2. Double click Imaging Device(s) option and
USB PC Camera with Mic... should be
displayed.
Sound
The MobileCam/Light Pro comes with a built-in
microphone. If you need this function, use the
directionsinthissectiontoconfigurethemicrophone's
recordinglevel.
Windows98SE
1. InControlPanel,doubleclickMultimedia,then
clickAudiotab.
2. InRecording,selectUSBAudio(Microphone)
asthepreferreddevice.
3. Clickthemicrophoneicon,movethesliderbar
uptoincreasetherecordinglevel.
4. Close the open windows when finished.
WindowsME/2000
1. In Control Panel, double click Sounds and
Multimedia,thenclickAudiotab.

7
2. InSoundRecording,selectUSBAudioDevice
asthepreferreddevice.
3. ClickVolume,movethesliderbaruptoincrease
therecordinglevel.
4. Close the open windows when finished.
Windows XP/Server 2003
1. In Control Panel, double click Sounds and
AudioDevices,thenclickAudiotab.
2. In Sound recording, select PC Camera as the
preferreddevice.
3. ClickVolume,movethesliderbaruptoincrease
therecordinglevel.
4. Close the open windows when finished.
AMCAP
Usethisutilitytoeasilycapturevideoandsnapshots.
Video capture
Windows 98SE/ME/2000
1. Click Start, Programs, USB PC Camera Plus,
thenAMCAP.

8
Important: Onyourveryfirsttimecapturing
video, click File, select Set capture file...,
typeinafilenamewith.aviextension,click
Open, then click OK. An example for this
filenameistest.avi. Youonlyhavetodothis
once.
2. ClickDevices.
For98SE: CheckUSBAudio(Microphone).
For ME/2000: Check USBAudio Device.
3. Waitforanimagetoappear,clickCapture,then
Start Capture. In the drop down box, make sure
CaptureAudioischecked.
4. ClickOK.
5. Toendcapture,clickCapture,thenStopCapture
orsimplypresstheESCkey.
6. To save the captured video, click File, Save
CapturedVideoAs...,typeinaname,thenclick
Open.

9
Windows XP/Server 2003
1. ClicktheSnapshotbuttontostartAMCAP.
Important: Onyourveryfirsttimecapturing
video, click File, select Set capture file...,
typeinafilenamewith.aviextension,click
Open, then click OK. An example for this
filenameistest.avi. Youonlyhavetodothis
once.
2. Click Devices, check USB Camera.
3. Waitforanimagetoappear,clickCapture,then
Start Capture.In the drop down box, make sure
CaptureAudioischecked.
4. ClickOK.
5. Toendcapture,clickCapture,thenStopCapture
orsimplypresstheESCkey.
6. To save the captured video, click File, Save
CapturedVideoAs...,typeinaname,thenclick
Open.

10
Snapshot capture
Windows 98SE/ME/2000
1. Click Start, Programs, USB PC Camera Plus,
thenAMCAP.
2. Wait for an image to appear then click the
Snapshotbutton.
3. IntheUSBPCCamerawithMicwindow,click
File, SaveAs, type in a name, then click Save.
Windows XP/Server 2003
1. ClicktheSnapshotbuttontostartAMCAP.
2. Wait for an image to appear, then click the
Snapshotbutton.
3. IntheUSBPCCamerawindow,clickFile,Save
As, type in a name, then click Save.
1280x960 snapshot capture (AMCAP)
1. FromthemainAMCAPwindow,clickOptions,
thenclickVideoCaptureFilter.
2. IntheVGAbox,movetheslidertoSXGA, then
clickOK.
3. ClickOptions,thenclickVideoCapturePin.

11
4. ClickthedownarrownexttotheOutputSize
box, and select 640 X 480, click OK.
Ulead Photo Explorer 7.0 SE Platinum
UleadPhotoExplorercombineseasytousetoolsfor
acquiring, viewing, organizing, adjusting, and
sharingdigitalimages. FormoredetailaboutUlead
PhotoExplorer,pleaserefertothePDFmanuallocated
inCD-ROM:\UleadPhotoExplorer7.0SEPlatinum
\Document\ManualfolderofthesoftwareCD.
Pleasenotethatthisutilityisoptionalandnotneeded
fortheMobileCam/LightProtooperate.
1. BootuptoWindowsandinsertthedriverCD.
2. ClickStart,Run.TypeinD:\Ulead\setup.exe,
then click OK. (Change D: to match your
CD-ROMdriveletter)
3. Followtheon-screeninstructionstoinstallthe
software.
4. Whenprompted,entertheUleadserialnumber
foundonthedriverCDsleevetocompletethe
installation.

Technical Support
QUESTIONS? SIIG’s Online Support has the answers!
Simply visit our web site at www.siig.com and click on
Support. Our online support database is updated daily
with new drivers and solutions. The answers to your
problems could be just a few clicks away.
PRODUCT NAME
MobileCam/Light Pro
FCC RULES: TESTED TO COMPLY WITH FCC PART
15, CLASS B OPERATING ENVIRONMENT: FOR
HOME OR OFFICE USE
FCCCOMPLIANCESTATEMENT:
This device complies with part 15 of the FCC Rules.
Operation is subject to the following two conditions: (1) This
device may not cause harmful interference, and (2) this device
must accept any interference received, including interference
that may cause undesired operation.
THE PARTY RESPONSIBLE FOR
PRODUCT COMPLIANCE
SIIG, Inc.
6078 Stewart Ave.
Fremont, CA 94538-3152
MobileCam/Light Pro is a trademark of SIIG, Inc. All other names
used in this publication are for identification only and may be
trademarks of their respective companies.
June, 2006 Copyright ©2006 by SIIG, Inc.
Table of contents