Siku 4502L User manual

Page 1von 6
Instruction Manual
Wall-mounted Heater
Model : SIKU 4502L
PLEASE READALL INSTRUCTIONS BEFORE USING
Type
Specification
Voltage
Frequency
Power
SIKU 4502L
Remote control
220-240V~
50/60Hz
2000W
IMPORTANT SAFEGUARDS
Thank you for buying our product. Please read this instruction carefully
before operating the heater. Keep this operating instruction for future
reference.

Page 2von 6
1. The heater should be hung on the wall and make the wind outlet
down or be placed on flat appliance. You must not place it
precipitately or tipsily.
2. Please do not use the heater in the place where full of combustible or
explosive gas. Don’t cover the wind outlet.
3. If the supply cord is damaged, it must be replaced by the
manufacturer or its service agent or a similarly qualified person in
order to avoid a hazard.
4. The heater must not be located immediately below an electrical
socket. The electrical socket must be equipped with earth wire. Its
capacity should be 250V~10A or exceed 250V~10A. The socket and
the power plug should be in good connecting condition.
5. If nobody is in using or you are repairing the heater, please pull off
the plug.
6. Please don’t touch the heater by the wet hand or other conductor.
7. If motor is not working properly, please stop it immediately.
8. During using the heater, please do not open the door or window
continually otherwise it will influence the heating effect.
9. If want to shut off the heater, press the on/off switch to off, then the
heater will keep the fan working 30 seconds until it blowing out cool
wind, then the heater will stop working, and you may pull off the
plug.
10. Do not use this heater in bathroom.
11. Timer sets the heater working time.
12. Remote control, please use 2 batteries.
13. The battery must be removed from the appliance before it is
scrapped.
14. The battery is to be disposed of safely.
15. The heater must be installed at least 2 m above the floor.
16. If the heater needs repair, please ask for special person or our
company authorized maintenance department.
17. This appliance can be used by children aged from 8 years and above
and persons with reduced physical, sensory or mental capabilities or

Page 3von 6
lack of experience and knowledge if they have been given
supervision or instruction concerning use of the appliance in a safe
way and understand the hazards involved. Children shall not play
with the appliance. Cleaning and user maintenance shall not be made
by children without supervision.
18. Children of less than 3 years should be kept away unless
continuously supervised.
19. Children aged from 3 years and less than 8 years shall only switch
on/off the appliance provided that it has been placed or installed in its
intended normal operating position and they have been given
supervision or instruction concerning use of the appliance in a safe
way and understand the hazards involved. Children aged from 3 years
and less than 8 years shall not plug in, regulate and clean the
appliance or perform user maintenance.
20. CAUTION —some parts of this product can become very hot and
cause burns. Particular attention has to be given where children and
vulnerable people are present.
INSTALLATION OF THE APPLIANCE
Get two holes on the wall 2 meters above the floor and near the corner
more 20 mm, be sure to make the diameter just as same as the expanding
pipe. Fix two screws on the expanding pipe, keep the tips of the screws
out for 10mm, and hang up the machine after the screws are fixed
enough.

Page 4von 6
OPERATING INSTRUCTIONS
1. The heater was made of high quality plastic shell, firmness and
durable. PTC ceramic heater elements, high efficiency heating,
noiseless, odor-free, no pollution, no flame and no need oxygen.
2. Plug into any 220-240V, 50Hz, AC source. The heater is standby,
LED will display room temperature; then please use remote control
or button on control panel to set power and time.
3. Turn on the heater by press the “ ” button on control panel, will be
into “FAN” mode, and blow the natural wind.
4. Turn on the heater by Press the “Mode” button, will set the heater
into low heat mode.
5. Press the “Mode” button again, will set the heater into high heat
mode.
6. Press the “TIMER” button to set the timer as follows: 1H, 2H.....8H.
7. When turn off the heater, press “ ” button once again. Fan keeps
working for 30 seconds to blow the natural wind and cool down the
heater inside (after heating).
TIMER FUNCTION
This function will work in any mode. The time function allows you to set
the time of operation from 1 hour to 8 hours. Press the time button in the
control panel, press one time will increase the time of operation by 1 hour,
the most 8 hours.
Page 5von 6
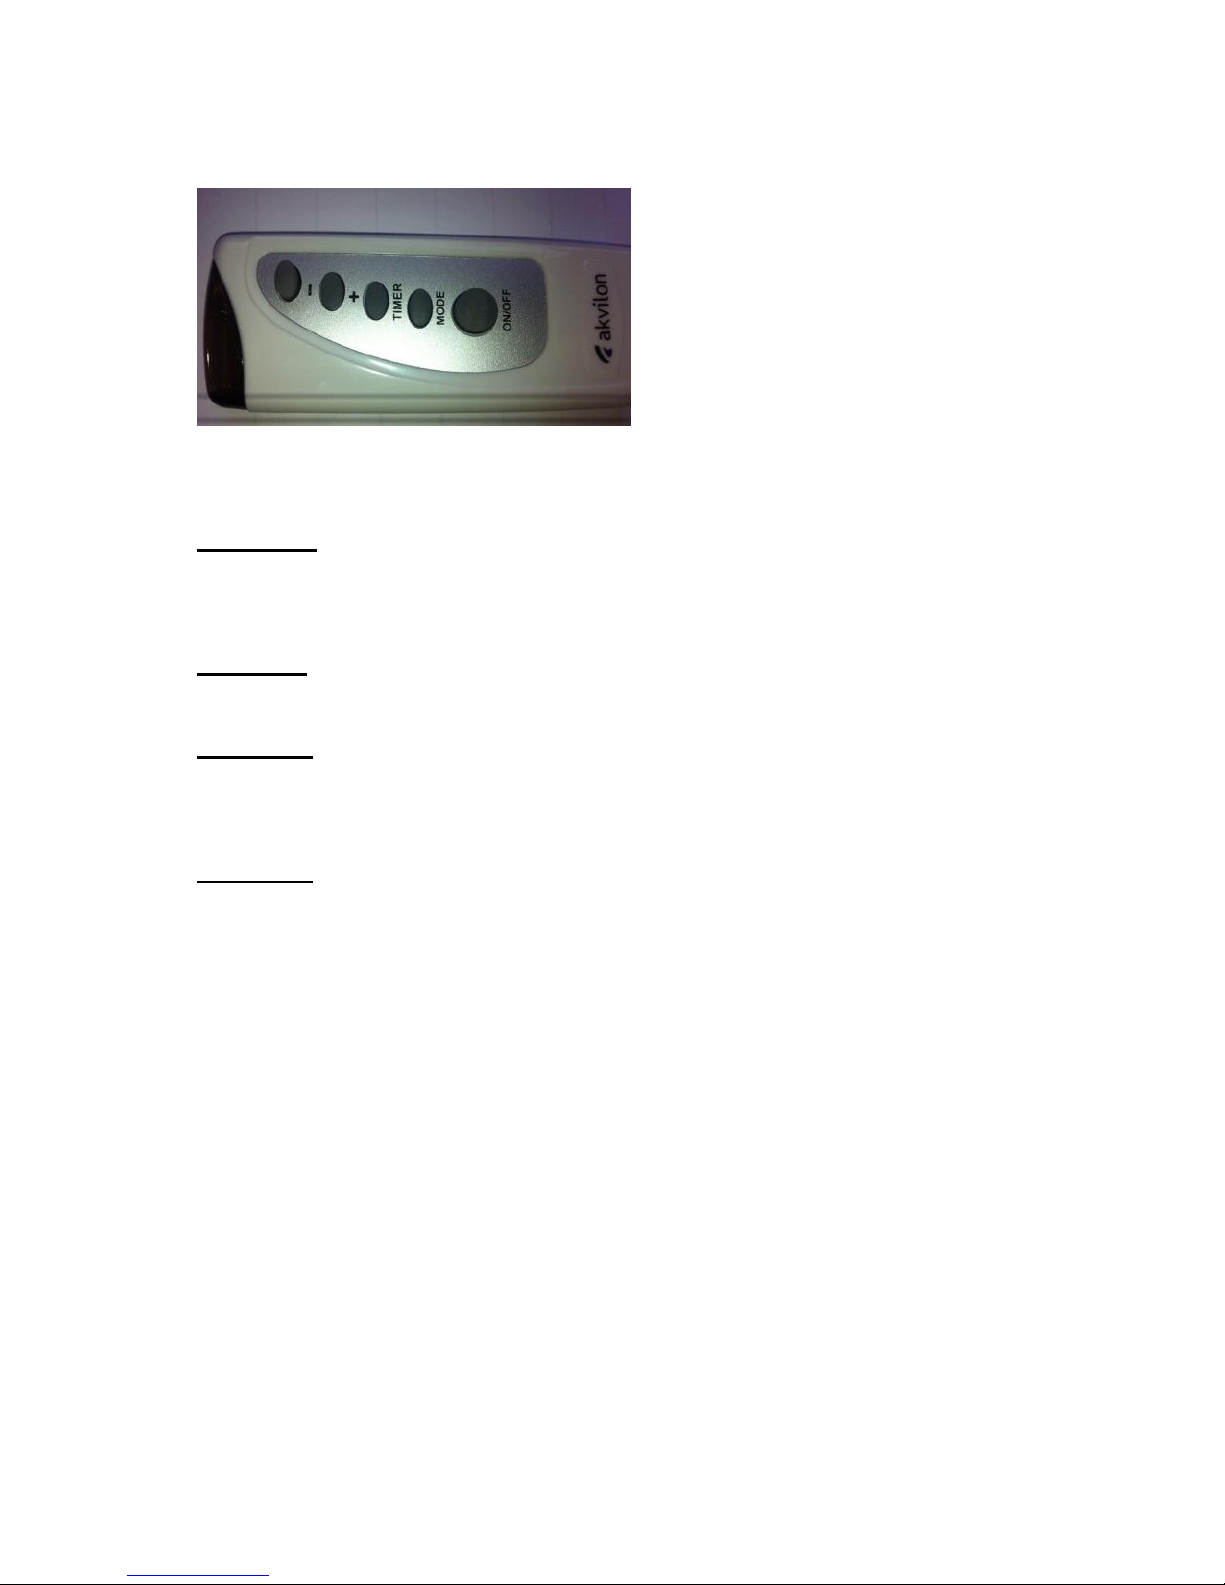
REMOTE CONTRAL INSTRUCTION
OPERATION STEPS
“On/off”
Press the button, the power is on and the appliance blows out natural wind.
Press again, the power is off.
“Mode”
You can select 2 powers 1000W/2000W through this button.
“Timer”
Press the “Timer” button to set the timer as follows: 1H, 2H.....8H; it can
be shown by the indicator lamp.
“+”, “-”Temperature setting:
Temperature range :15-35 ℃, this function needs to operate on the
remote control;
Press “-”, set temperature is equal to or lower than room temperature,
appliance will stop heating.
Press “+”, set temperature is 1-2℃higher than room temperature,
appliance will stop heating, set temperature is higher or equal 3℃to
room temperature, appliance will start heating.
OVERHEAT PROTECTION
The heater is protected with an overheat protector that switches off the
heater automatically in case of overheat. e.g. due to the total or partial
obstruction of the grids. In this case, unplug the appliance, wait about 30
minutes for it to cool and remove the object which is obstructing the grids.
Then switch it back on as described above.

Page 6von 6
CLEANINGAND MAINTENANCE
1. If you don’t use the heater for a long time, please wipe the surface
and put it into the box. Lay the carton on the ventilated and dry place.
Humidity and force press was prohibited.
2. Wait for the machine being cool and pull out the plug, then clean it.
Wipe it clean with wet washcloth or cleaner. Never directly wash
with water; do not drop the water into the machine. Never clean it
with acids, chemical thinner, gasoline, benzene etc.
3. Before you use it again, please check it and make sure that the outlet
ventilation has not any sundries.
Correct Disposal of this product
This marking indicates that this product should not be
disposed with other household wastes throughout the
EU. To prevent possible harm to the environment or
human health from uncontrolled waste disposal, recycle
it responsibly to promote the sustainable reuse of
material resources. To return your used device, please
use the return and collection systems or contact the
retailer where the product was purchased. They can
take this product for environmental safe recycling.
Table of contents
Other Siku Heater manuals


Popular Heater manuals by other brands

Generac Mobile
Generac Mobile MFH500 owner's manual

Royal Sovereign
Royal Sovereign HFN-02 owner's manual

UNITED
UNITED UHC-827 User instructions

DèLonghi
DèLonghi TCH 8093 instructions

Dimplex
Dimplex Studio 842 Installation and operating instructions

Rointe
Rointe Napoli aqua instruction & installation guide

Siemens
Siemens DE 1113415 Installation and operating instructions

Somogyi Elektronic
Somogyi Elektronic FK 430 WIFI instruction manual

Dimplex
Dimplex Quantum series installation manual

Juliana
Juliana Maxi manual

Serene
Serene S2022 Operating instructions manual

Heatilator
Heatilator GBI25 Series Installation & operating instructions


