Silent Gliss SG 10302 User manual

Hand-held radio transmitter SG 10302
867 MHz
868 MHz
915 MHz
0682
Operating instructions (translation)
18122.2701/0811 DE/EN/FR/IT

2
Contents
Safety instructions . . . . . . . . . . . . . . . . . . . . . . . . . . . 3
Safety instructions for radio operation . . . . . . . . . . . 4
Intended use . . . . . . . . . . . . . . . . . . . . . . . . . . . . . . . . 4
Exclusion of liability . . . . . . . . . . . . . . . . . . . . . . . . . . 5
Scope of supply. . . . . . . . . . . . . . . . . . . . . . . . . . . . . . 5
Technical data . . . . . . . . . . . . . . . . . . . . . . . . . . . . . . . 5
Mounting of wall bracket . . . . . . . . . . . . . . . . . . . . . . 6
Device explanation . . . . . . . . . . . . . . . . . . . . . . . . . . . 7
Explanation of functions. . . . . . . . . . . . . . . . . . . . . . . 8
Bidirectional radio system. . . . . . . . . . . . . . . . . . . . . 8
Unidirectional radio system. . . . . . . . . . . . . . . . . . . . 8
Initial operation . . . . . . . . . . . . . . . . . . . . . . . . . . . . . 8
Programming the transmitter . . . . . . . . . . . . . . . . . 11
Programming additional transmitters . . . . . . . . . . . 12
Stopping programming mode (bidirectional) in the
transmitter. . . . . . . . . . . . . . . . . . . . . . . . . . . . . . . . 13
Approaching end positions . . . . . . . . . . . . . . . . . . . 13
Battery replacement . . . . . . . . . . . . . . . . . . . . . . . . . 16
Cleaning . . . . . . . . . . . . . . . . . . . . . . . . . . . . . . . . . . . 17
Disposal . . . . . . . . . . . . . . . . . . . . . . . . . . . . . . . . . . . 17
Troubleshooting . . . . . . . . . . . . . . . . . . . . . . . . . . . . 17
Repair . . . . . . . . . . . . . . . . . . . . . . . . . . . . . . . . . . . . . 17
EC Declaration of conformity. . . . . . . . . . . . . . . . . . 18
Silent Gliss International . . . . . . . . . . . . . . . . . . . . . 19
Contents

3
Safety instructions
The instructions shall be observed to ensure that
the product can be operated smoothly and safely
and that its features can be correctly used.
• The operator/user must have read and understood the
instructions fully.
• The operator must ensure that the instructions are available to
the user in a legible form.
• The operator must ensure that all safety measures are observed
and complied with.
• The following safety and assembly instructions apply to the unit
and not to the accessories or drive.
CAUTION!
Failure to observe these instructions can lead to
injury.
Observe all safety instructions.
• Never install or operate damaged units.
• Only use unmodified and compatible original parts.
• There is a risk of personal injury or damage if the unit is opened
without permission or used in an improper manner, or if it is
incorrectly installed or operated.
• The unit contains small parts which can be swallowed.
Transport
• You must not use a unit that you have received in a damaged
condition despite proper packaging. Complain about any damage
to the transport company immediately.
Installation
• Observe all regulations during installation.
Safet
y
instructions

4
Operation
• Use only in dry rooms.
• The operating range of the system must remain visible during
operation if one or more transmitters are used for controlling the
system.
• Keep control systems out of the reach of children and the disabled.
• Dispose of used batteries properly.
Safety instructions for radio operation
Observe all safety instructions for radio operation.
Only use radio systems which are approved and can be operated
without interference.
• Radio systems must not be operated in areas where there is an
increased risk of interference (e.g. hospitals, airports).
• The remote control is only approved for units and systems for
which any malfunction of the transmitter or receiver would not
result in a risk for persons, animals or property, or if such a risk is
covered by other safety equipment.
• The operator has no protection whatsoever against interference
by other telecommunication installations and local terminals (e.g.
also from radio installations which are operated properly in the
same frequency range).
• The range of the radio signal is limited by legislation and the
structural conditions.
Intended use
The SG 10302 hand-held radio transmitter is a multi-channel
transmitter. It can be used unidirectionally or bidirectionally.
The hand-held transmitter must only be used for the control
of Silent Gliss shading systems which are equipped with the
Safet
y
instructions for radio operation

5
corresponding radio receivers. Other use, or use going beyond this
is not considered to be use for the intended purpose.
The hand-held transmitter is referred to in these instructions as the
"unit".
Exclusion of liability
Silent Gliss assumes no liability for personal injuries, property
damage and financial losses which arise from use other than
mentioned above, modifications to the unit, improper use and failure
to observe the operating instructions. Liability for material defects is
excluded in such cases.
Scope of supply
SG 10302 hand-held radio transmitter (batteries included in the
unit), wall bracket, 2 wall plugs, 2 screws.
Technical data
Name of unit SG 10302 hand-held radio
transmitter
Operating voltage 3 V DC
Battery type 2 x LR06 (AA mignon)
IP Code IP 20
Temperature range 0 to +55 °C
Radio frequency 867/868 MHz frequency band
Dimensions in mm (hand-held
transmitter)
L 120 x W 51 x H 26
Weight in grams (including batteries). 120
There are different regulations for the USA, Canada, Australia and
some countries in South America.
Radio frequency 915 MHz frequency band
E
xclusion of liabilit
y

6
Mounting of wall bracket
• The wall bracket must be fixed so
that the holes drilled avoid any
electrical cables.
• Before installing the unit in the
required position, check that
the transmitter and receiver are
functioning perfectly.
• Attach the bracket to the wall
with the wall plugs and screws
provided.
The top part of the wall bracket can be
moved.
M
ountin
g
of wall bracke
t

7
Device explanation
Front of unit
1 Channel indicator
2 Operating mode indicator
3 OPEN button
4 STOP button
5 Status indicator
6 CLOSE button
7 Select button
Rear of unit
8
8 Learn button P
D
evice ex
p
lanation

8
Explanation of functions
Bidirectional radio system
A bidirectional radio system transmits radio signals to a radio
receiver and enables feedback from the radio receiver to the
transmitter. The radio signal can be sent directly to the target
receiver. If this is not possible then the radio signal is forwarded via
other bidirectional participants until the signal reaches the target
receiver. The target receiver carries out the command and sends a
confirmation back to the transmitter.
Bidirectional radio operation is only possible if all participants are
bidirectional. Otherwise, the system is only unidirectional.
Unidirectional radio system
A unidirectional radio system transmits radio signals to radio
receivers. However, unlike the bidirectional radio system, the
radio receivers cannot send back a reply to the transmitter. The
transmission of radio signals from radio receiver to radio receiver is
also not possible.
Initial operation
Press a button to switch on the hand-held transmitter and illuminate
the status display and operating mode display. The hand-held
transmitter is in automatic mode during initial operation.
Note
Do not press the Pbutton until the receivers are in
programming mode. The active channel for a radio system
is decided during programming. If the receiver is not in
teach-in mode, the channel from the transmitter changes to
unidirectional mode. Press and hold the STOP and Pbuttons
simultaneously for 6 seconds until the status display lights up.
E
x
p
lanation of functions

9
Status display
A radio signal is displayed by the status display (LED ring around
the STOP button) lighting up. The various colours of the status
display mean:
Status display Meaning
Flashing orange Channel (transmitter) not programmed in any
receiver
Rapidly flashing
orange
Channel (transmitter) in bidirectional program-
ming mode. Operation of receivers already
programmed not possible.
Every 3 seconds in group programming mode
(also without a button being pressed)
Orange then green Channel (transmitter) is operating bidirection-
ally and receiver has received the signal
Orange then flashing
red
Channel (transmitter) is operating bidirection-
ally and one of the receivers has not received
the signal
Red then green Channel (transmitter) is operating bidirection-
ally and receiver has received the signal,
batteries weak
Red then flashing red Channel (transmitter) is operating bidirection-
ally and one of the receivers has not received
the signal, batteries weak
Green with repetition,
then red (unidirec-
tional)
Channel (transmitter) has been deleted
Green Channel (transmitter) is operating unidirection-
ally: Transmit signal is being sent
Orange and green
(or red) alternating,
then red (bidirec-
tional)
Channel (transmitter) has been deleted
Flashing red Batteries weak

10
The transmitting power or the radio range will be reduced by
the reduction in the performance of the battery. If the voltage
drops below 2 V, functions are no longer executed and nothing is
displayed.
Group control unit
A group is understood to mean the control of several receivers
at the same time. The selected group is controlled by a travel
command. All 5 channels (transmitter) can be used for the group
control.
Any number of receivers can be programmed and controlled in each
channel.
Selection button
Pressing the selection button briefly allows you to select from 5
channels. The various channels are indicated by the LEDs in the
channel indicator lighting up.
An additional channel is reserved for the central channel to which
all the individual channels are assigned automatically. When
the central channel is selected, this controls all radio channels
simultaneously. This is indicated by all five LEDs lighting up.
Pressing the selection button briefly allows you to query the
current status (automatic/manual) of the programmed receivers
(bidirectional receivers only) and the hand-held transmitter.
Pressing the selection button for longer (approximately 1 second)
switches off automatic mode of the current bidirectional channel or
all unidirectional channels. The operating mode indicator lights up
red. →The receiver now only carries out manual travel commands
and does not respond to automatic travel commands.
Note
Upward travel of the receiver is initiated when the automatic
system is activated.
Pressing the selection button for longer (approximately 1 second)
switches on automatic mode of the bidirectional channel or all
unidirectional channels. The operating mode indicator lights up
E
x
p
lanation of functions

11
green. →The receiver now executes automatic and manual travel
commands.
Pressing the selection button in the central channel for longer
(approximately 1 second) changes the Auto or Manual operating
mode for all the individual channels. A different operating mode
for individual channels (auto and manual) is set on switching for all
channels to Auto operating mode.
Programming the transmitter
Requirement
The receiver is installed. Check whether the channel has been
deleted or in the correct mode according to the status display.
Stand in front of the blind to be programmed while programming.
1. With receivers which have already been installed, switch the
circuit breaker off and on again after a few seconds.
The receiver is now in programming mode for about 5 minutes.
2. Press the programming button Pon the back of the unit briefly
(approximately 1 second) until the status display lights for a
short time. The blind moves up and down for approximately two
minutes, showing that the receiver is in programming mode.
3. Press the OPEN button as soon as the blind starts moving in
Open direction (within 1 second at the most). The status display
lights briefly.
The blind stops briefly, starts moving again, stops and then
moves in the Close direction.
4. Immediately (within no more than 1 second) after close travel
has started, press the CLOSE button. The status display lights
briefly. The blind stops. The transmitter channel is programmed.
Note
The blind must be programmed again if it does not stop.
A bidirectional programming process in the hand-held
transmitter can be cancelled by pressing the STOP button for
6 seconds.
E
x
p
lanation of functions

12
Programming additional transmitters
Note
If several receivers are connected to the same supply
line, then all are simultaneously in programming mode for
approximately 5 minutes after the mains power is switched on.
If the Pbutton on the transmitter is now pressed, all the
receivers start programming mode at the same time
(open/close movements). Randomly different intervals between
open/close movements cause the receivers to become offset
against one another. The longer programming is delayed, the
greater the offset will be.
The short open/close movements can be stopped by pressing
the STOP button briefly on a transmitter which has already
been programmed. The programming mode in the receiver is
interrupted.
The transmitter can now be assigned without having to
disconnect individual receivers. If the blind moves in the wrong
direction, delete the transmitter and program it again.
(→see Deletion of transmitter)
For programming additional transmitters to one receiver:
1. Press the OPEN, CLOSE buttons and the programming button
P(rear of unit) simultaneously (for 3 seconds) on a transmitter
which has already been programmed to the receiver. The status
display lights briefly. The receiver is now in programming mode.
2. Press the programming button Pon the transmitter to be
programmed until the status display lights briefly. The receiver is
now in programming mode (open/close movements).
3. Press the OPEN button as soon as the blind starts moving in
Open direction (within 1 second at the most). The status display
lights briefly. The blind stops briefly, starts moving again and
then moves downwards.
4. Immediately (within no more than 1 second) after close travel
has started, press the CLOSE button. The status display lights
briefly. The blind stops. The transmitter channel is programmed.

13
If more than 10 bidirectional receivers are being programmed at the
same time, the transmitter channel in programming mode switches
to group mode. The group mode is indicated by fast flashing with
pauses.
Programming in group mode is completed after a 2-minute pause or
pressing the STOP button for 6 seconds.
5. Press the CLOSE button and the Pprogramming button (rear of
unit) simultaneously (for 3 seconds) on a transmitter which has
already been programmed to the receiver. The status display
flashes. The receivers are now in programming mode.
6. For bidirectional operation only: press the programming button
Pon the transmitter to be programmed until the status display
lights briefly. The receivers are now in programming mode
(open/close movements).
7. Press the OPEN button as soon as the blind starts moving
in Open direction (within no more than 1 second). The status
display lights briefly. The blinds stop briefly, start moving again,
stop and then move downwards.
8. Immediately (within no more than 1 second) after close travel
has started, press the CLOSE button. The status display lights
briefly. The blinds stop moving. The transmitter channel is
programmed.
Stopping programming mode (bidirectional) in the
transmitter
Press the STOP button for at least 6 seconds until the status display
lights orange.
Approaching end positions
Requirement
The transmitter/transmitter channel is programmed. The end
positions of the drive have been set.
E
x
p
lanation of functions

14
Approaching "Closed" end position
Press the CLOSE button briefly. The blind closes completely.
Approaching "Open" end position
Press the OPEN button briefly. The blind opens.
Programming the intermediate position 1 in the receiver
Requirement
The transmitter/transmitter channel is programmed. The end
positions of the drive have been set. The blind is in the open end
position.
1. Move the blind to the required position using the CLOSE button.
In doing so, keep the CLOSE button pressed.
Option: Press and hold the STOP and the CLOSE buttons
for 3 seconds to change to the slow travel mode “20 series
867/868/915”. The drive remains in the slow travel mode until
teaching in of intermediate position 1 is concluded.
2. Also press the STOP button. The blind stops. The status display
lights briefly.
The intermediate position1 is programmed.
Programming the intermediate position 2 in the receiver
Requirement
The transmitter/transmitter channel is programmed. The end
positions of the drive have been set. The blind is at its "closed" end
position.
1. Move the blind to the required position using the OPEN button.
Keep the OPEN button pressed during the movement.
Option: Press and hold the STOP and then also the OPEN
buttons for 3 seconds to change to the slow travel mode “20
series 867/868/915”. The drive remains in the slow travel mode
until teaching in of intermediate position 2 is concluded.
E
x
p
lanation of functions

15
2. Also press the STOP button. The blind stops. The status display
lights briefly.
The intermediate position 2 is programmed.
Approaching intermediate position 1
Requirement
The transmitter/transmitter channel is programmed. The blind is at
its upper end position.
1. Press the CLOSE button twice briefly. The status display lights
briefly.
2. The blind travels to the stored intermediate position. If no
intermediate position is programmed, the blind drives to the
“closed” end position.
Approaching intermediate position 2
Requirement
The transmitter/transmitter channel is programmed. The blind is at
its lower end position.
1. Press the OPEN button twice briefly. The status display lights
briefly.
2. The blind moves to the stored intermediate position 2. If no
intermediate position 2 has been programmed, the blind moves
to the "Open" end position.
Deleting the intermediate position 1 in the receiver
1. Press both the STOP and CLOSE buttons.
2. Hold down this button combination for approximately 3 seconds.
The status display lights briefly.
Deleting the intermediate position 2 in the receiver
1. Press both the STOP button and the OPEN button.
2. Hold down this button combination for approximately 3 seconds.
The status display lights briefly.
E
x
p
lanation of functions
16
Deleting the transmitter channel in the receiver
1. Press both the STOP button and the programming button P(on
the rear of the unit).
2. Keep this button combination pressed for approximately 6
seconds until the status display lights orange briefly and then
lights red. In unidirectional radio operation, the status display
lights for 6 seconds: first green briefly twice and then red.
The channel in the transmitter is also deleted.
Deleting all the transmitters in the receiver
1. Press the STOP button and also the programming button P(on
the rear of the unit) + OPEN button + CLOSE button.
2. Hold down this button combination for approximately 6 seconds.
The status display lights up orange-green briefly twice, followed
by red (bidirectional).
The channel in the transmitter is also deleted.
In unidirectional radio operation, the status display lights for
6 seconds: first green briefly twice and then red.
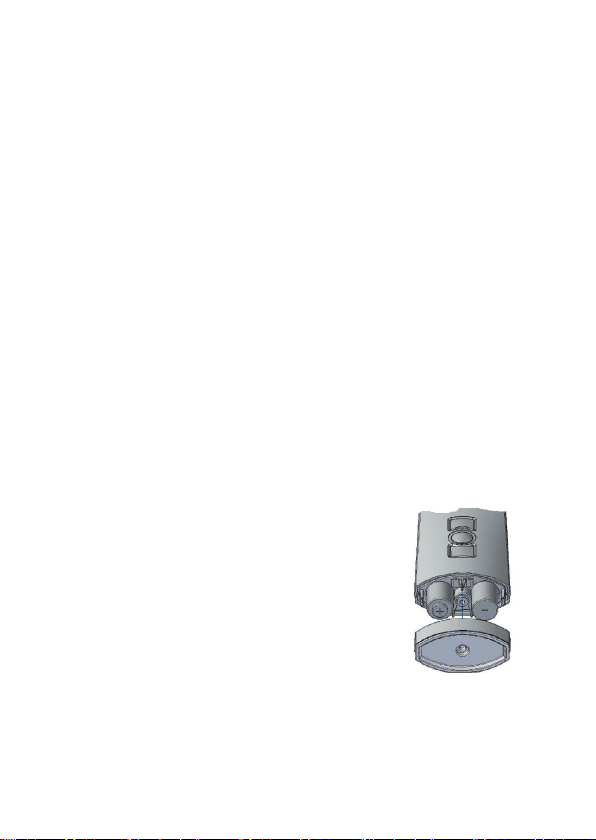
Battery replacement
Note
Replace batteries only with batteries of the
identical type.
1. Unscrew the underside of the unit and open
the housing.
2. Remove the batteries.
3. Insert the new batteries in the correct
position.
4. Put the unit back together again.
Dispose of used batteries properly.
Batter
y
replacemen
t

17
Cleaning
Clean the unit with a damp cloth. Do not use a detergent. This may
attack the plastic.
Disposal
After the end of its service life, dispose of the unit in accordance
with the relevant regulations.
Troubleshooting
Fault Cause Remedy
System does not run,
status display does
not light
1. Batteries are low
2. Batteries are incor-
rectly installed
1. Insert new batteries
2. Insert batteries
correctly
System does not run,
status display lights
red or flashes orange
Unidirectional: Status
display lights green
1. The receiver is
outside the transmit-
ting range.
2. Receiver out of
order or faulty
3. Receiver not yet
programmed
1. Reduce distance to
the receiver
2. Switch on or
replace receiver
3. Program receiver
System operates in
the wrong direction
Directions are incor-
rectly allocated
Delete transmitter and
reprogram
Required system
does not run
Incorrect channel
selected
Select correct channel
Repair
Please contact your dealer if you have any questions.
Please always provide the following information:
• Item number and name on the type plate
• Type of fault
• Unusual events occurring prior to fault
• Accompanying conditions
• Own suspicion
Cleanin
g

18
EC Declaration of conformity
We hereby declare that the following mentioned product/s meet/s the standards of the European
Community.
Product name: Silent Gliss handheld radio transmitter
•Handheld radio transmitter SG 10300 (-867 / -868 / -915)
•Handheld radio transmitter SG 10301 (-867 / -868 / -915)
•Handheld radio transmitter SG 10302 (-867 / -868 / -915)
•Handheld radio transmitter SG 10303 (-867 / -868 / -915)
Description: Handheld radio transmitter for bidirectional and unidirectional communication
between transmitter and receiver for controlling interior shading
The conformity of the indicated product(s) with the most important safety requirements is verified by
the conformation to the following guidelines and standards:
•EMC Directive 2004/108/EC
EN 61000-6-2:2005, EN 61000-6-3:2001
EN 60730-1:2000, EN 60730-2-7:1991
•R&TTE-Directives 1999/5/EC
ETSI EN 301 489-3 V1.4.1
ETSI EN 300 220-2 V2.1.2
•RoHS Directive 2002/95/EC
Gümligen 30/12/2010
Bernhard Bratschi, Worbstrasse 210; CH-3073 Gümligen,
Managing Director Silent Gliss International
E
C Declaration of conformit
y
Other manuals for SG 10302
1
Table of contents


