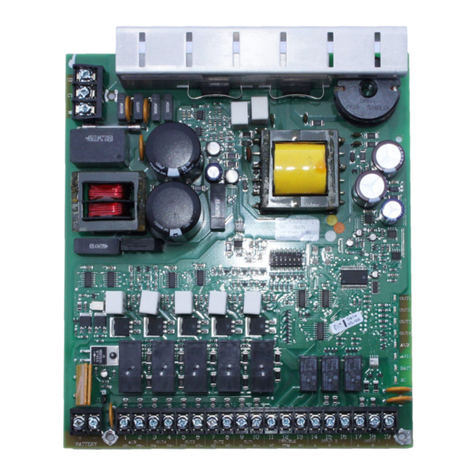
SILENT KNIGHT 5895XL User manual

Installation and
Operations Manual
MODEL
5895XL
Intelligent Power Module
for the 5820XL System
ECN: 11-0317
Document 151142-L8
Rev: J
151142-L8:J 15-0644


151142 i
Content
Section 1
Overview ...................................................................................................................................................... 1-1
1.1 5895XL Description ..................................................................................................................1-1
1.1.1 Maximum Number of SBUS Modules ................................................................................1-2
1.2 Agency Requirements ..............................................................................................................1-5
1.3 About This Manual ...................................................................................................................1-5
1.4 How to Contact Silent Knight ....................................................................................................1-5
Section 2
Before You Begin Installing ......................................................................................2-1
2.1 What’s in the Box? ...................................................................................................................2-1
2.2 Environmental Specifications ...................................................................................................2-1
2.3 Preventing Water Damage .......................................................................................................2-1
2.4 5895XL Board and Terminal Strip Description .........................................................................2-2
2.5 Earth Fault Resistance .............................................................................................................2-4
2.6 Calculating Current Draw and Standby Battery ........................................................................2-5
2.6.1 Worksheet Requirements ..................................................................................................2-5
Filling in the Current Draw Worksheet, Table 2-4 (Section 2.6.2) ..................................2-5
2.6.1.1 Maximum Battery Standby Load ..............................................................................2-5
2.6.2 Current Draw Worksheet ...................................................................................................2-6
2.7 Wiring Specifications ................................................................................................................2-7
2.7.1 Length Limitations ..............................................................................................................2-7
2.7.2 Calculating Wiring distance for SBUS modules .................................................................2-7
Wiring Distance calculation example: .............................................................................2-9
2.7.3 Wire Routing ....................................................................................................................2-10
Section 3
Hardware Installation .................................................................................................................. 3-1
3.1 AC Power .................................................................................................................................3-1
3.2 Battery Connection ...................................................................................................................3-2
3.3 Connecting the 5895XL to the FACP .......................................................................................3-3
3.3.1 Setting the Device ID .........................................................................................................3-5
3.4 Connecting SBUS Modules to the 5895XL ..............................................................................3-6
3.5 Flexputs™ I/O Circuits .............................................................................................................3-7
3.5.1 Conventional Notification Appliance ..................................................................................3-7
3.5.2 Releasing Operations ........................................................................................................3-7
3.5.2.1 Class B Notification Wiring .......................................................................................3-7
3.5.2.2 Class A Notification Wiring .......................................................................................3-8
3.5.3 Conventional Initiation Circuits ...........................................................................................3-9
3.5.3.1 ................................................................................................................................. 3-9
3.5.3.2 Class A Inputs ..........................................................................................................3-9

Model 5895XL Intelligent Power Module Installation and Operation Manual
ii 151142
3.5.4 Installing 2-Wire Smoke Detectors ...................................................................................3-10
Class B Installation .......................................................................................................3-10
2-Wire Class A Smoke Detector Installation .................................................................3-11
3.5.5 Installing 4-Wire Smoke Detectors ...................................................................................3-12
Installing a Class B 4-Wire Smoke Detector .................................................................3-12
Installing 4-Wire Class A Smoke Detectors ..................................................................3-13
3.5.6 Auxiliary Power Configuration ..........................................................................................3-13
3.5.6.1 Door Holder Power .................................................................................................3-14
3.5.6.2 Constant Power ......................................................................................................3-14
3.5.6.3 Resettable Power ...................................................................................................3-14
3.6 Conventional Relay Installation ..............................................................................................3-14
Appendix A
Compatible Devices ..................................................................................................................... A-1
A.1 Notification Appliances ............................................................................................................ A-1
A.2 Door Holder Device ............................................................................................................... A-12
A.3 Two-Wire Smoke Detectors .................................................................................................. A-12
A.4 Four-Wire Smoke Detectors ..................................................................................................A-15
Silent Knight Fire Product Warranty and Return Policy
Manufacturer Warranties and Limitation of Liability

151142 1-1
Section 1
Overview
1.1 5895XL Description
The Model 5895XL Intelligent Power Module provides additional power and circuits to
the IntelliKnight 5820XL FACPs. The 5895XL can power all IntelliKnight compatible
modules, including SLC devices (via a Model 5815XL SLC Expander), remote
annunciators (Model 5860); notification appliances, auxiliary power modules, and all
other compatible modules.
Note: The 5808 does not use 5815XL SLC expanders.
The 5895XL has six Flexputs™ and two programmable relays. Outputs are rated 3.0
A (6.0 A total for each 5895XL). Relays are Form C rated at 2.5 A @ 24 VDC.
Outputs and relays are fully programmable.
The 5895XL is optically isolated, providing ground loop isolation and transient
protection. It functions as an SBUS repeater which conditions the RS-485 signal and
allows the module to drive up to 6,000 feet of additional SBUS wiring.
The 5895XL is housed in a metal cabinet that is identical in size to the IntelliKnight
5820XL FACP cabinet. This cabinet is large enough to house two 17 AH batteries.
Like the 5820XL cabinets, the 5895XL cabinet provides mounting studs for two Model
5815XL SLC Expander modules.
The 5895XL communicates to the main IntelliKnight FACP via the SBUS. Each
5895XL provides an additional 6,000 feet of SBUS wiring length to the main panel. As
the drawings on the next pages illustrate, this allows you to distribute modules, SLC
devices, and outputs throughout an extremely large facility.
As well as expanding the wiring length capabilities of IntelliKnight, the 5895XL also
expands IntelliKnight’s power capabilities by an additional 6.0 A of current.

Model 5895XL Intelligent Power Module Installation and Operation Manual
1-2 151142
1.1.1 Maximum Number of SBUS Modules
The chart below shows the maximum number of compatible modules that can be
used in an IntelliKnight installation. Modules can be distributed among the main panel
SBUS and each additional 5895XL SBUS in virtually any combination.
Module or Device Maximum Number
5895XL Intelligent Power Module 8 per IntelliKnight installation
5860 Remote Annunciator 8 per IntelliKnight installation
5815XL SLC Expander 2 per IntelliKnight installation
5824 Serial/Parallel Modules 8 per IntelliKnight installation
Outputs 6 per 5820XL / 5895XL
Conventional Relays 2 per 5820XL / 5895XL

Overview
151142 1-3
Figure 1-1 Example 5895XL Installation Overview

Model 5895XL Intelligent Power Module Installation and Operation Manual
1-4 151142
Figure 1-2 Example 5895XL Installation Overview (Details Added)

Overview
151142 1-5
1.2 Agency Requirements
The 5895XL has the same requirements as the main control panel. These
requirements are listed in the IntelliKnight 5820XL Installation Manual (P/N 151209).
1.3 About This Manual
This manual covers installation of 5895XL hardware. Software configuration
information is contained in the IntelliKnight 5820XL Installation Manual (P/N 151209).
1.4 How to Contact Silent Knight
If you have a question or encounter a problem not covered in this manual, contact
Silent Knight Technical Support at 800-446-6444.
To order parts, contact Silent Knight Sales at 800-328-0103 (or 203-484-7161).

151142 2-1
Section 2
Before You Begin Installing
2.1 What’s in the Box?
The Model 5895XL ships with the following hardware:
• A cabinet with all hardware assembled
• Two keys for the front door
• Ten 4.7K ohm end-of-line resistors
Note: For UL installations Model 7628 4.7kend-of-line resistor (ordered separately) must be used.
• A battery cable for batteries wired in series
2.2 Environmental Specifications
It is important to protect the 5895XL control panel from water. To prevent water
damage, the following precautions should be FOLLOWED when installing the units:
• Do not mount directly on exterior walls, especially masonry walls (condensation)
• Do not mount directly on exterior walls below grade (condensation)
• Protect from plumbing leaks
• Protect from splash caused by sprinkler system inspection ports
• Do not mount in areas with humidity-generating equipment (such as dryers, pro-
duction machinery)
When selecting a location to mount the 5895XL, the unit should be mounted where it
will NOT be exposed to temperatures outside the range of 0°C-49°C (32°F-120°F) or
humidity outside the range of 10%-93% at 30°C (86°F) non-condensing.
2.3 Preventing Water Damage
Water damage to the fire system can be caused by moisture entering the cabinet
through the conduits. Conduits that are installed to enter the top of the cabinet are
most likely to cause water problems. Installers should take reasonable precautions to
prevent water from entering the cabinet. Water damage is not covered under
warranty.

Model 5895XL Intelligent Power Module Installation and Operation Manual
2-2 151142
2.4 5895XL Board and Terminal Strip Description
Figure 2-1 shows the 5895XL circuit board including location of terminals, the DIP
switch for setting module ID, and the LED.
Figure 2-1 The 5895XL Board Layout

Before You Begin Installing
151142 2-3
* Regulated/special application when used for releasing.
Table 2-1: Terminal Strip Description and Electrical Ratings
Terminal # and Label Description Rating
Voltage Current
1 L AC input (hot) 120/240 VAC,
50/60 Hz 2.7 A
1.4 A
2 G Earth ground N/A N/A
3 N AC input (neutral) 120/240 VAC,
50/60 Hz 2.7 A
1.4 A
4XI/O 6* Flexput™ Circuit 24 VDC 3.0 A Notification Circuits
5 O 100 mA Initiation Circuits
6 X I/O 5* Flexput™ Circuit 24 VDC 3.0 A Notification Circuits
7 O 100 mA Initiation Circuits
8XI/O 4* Flexput™ Circuit 24 VDC 3.0 A Notification Circuits
9O 100 mA
Initiation Circuits
10 XI/O 3* Flexput™ Circuit 24 VDC 3.0 A Notification Circuits
11 O100 mA Initiation Circuits
12 X I/O 2* Flexput™ Circuit 24 VDC 3.0 A Notification Circuits
13 O 100 mA Initiation Circuits
14 XI/O 1* Flexput™ Circuit 24 VDC 3.0 A Notification Circuits
15 O100 mA Initiation Circuits
16 B
SBUS OUT SBUS communication 5 VDC 100 mA
17 A
18 + SBUS power 24 VDC 1.0 A
19 -
20 B
SBUS IN Used for Class A installations
21 A
22 +
23 -
24 N.C. RELAY 2 General Purpose Relay 2 24 VDC 2.5 A25 C
26 N.O.
27 N.C. RELAY 1 General Purpose Relay 1 24 VDC 2.5 A28 C
29 N.O.
30 B SBUS IN/
OUT
5895XL communication with
main panel or to controlling
5895XL if daisy-chained 5 VDC 100 mA
31 A
32 + MAIN 5895XL SBUS power (from
5820XL) 24 VDC 10 mA
33 -

Model 5895XL Intelligent Power Module Installation and Operation Manual
2-4 151142
2.5 Earth Fault Resistance
Table 2-2 lists the earth fault resistance detection for each applicable terminal on the
FACP.
Table 2-2: Earth Fault Resistance Values by Terminal
Function Terminal
Number
Terminal Label Low Biased High Biased
(Values in kohms) High
Trip High
Restore Low
Trip Low
Restore
Flexput™
Notification
Circuits
4XI/O 6 --00
5O 00--
6XI/O 5 --00
7O 00--
8XI/O 4 --00
9O 00--
10 X I/O 3 --00
11 O 0 0 - -
12 X I/O 2 --00
13 O 0 0 - -
14 X I/O 1 --00
15 O 0 0 - -
SBUS
Communication 16 B
SBUS
OUT
--00
17 A - - 0 0
SBUS Power 18 + 0 0 - -
19 - - - 0 0
Used for Class
A Installations
20 B
SBUS IN
--00
21 A - - 0 0
22 + 0 0 - -
23 - - - 0 0

Before You Begin Installing
151142 2-5
2.6 Calculating Current Draw and Standby Battery
This section is for helping you determine the current draw and standby battery needs
for your installation.
2.6.1 Worksheet Requirements
The following steps must be taken when determining 5895XL current draw and
standby battery requirements.
Filling in the Current Draw Worksheet, Table 2-4 (Section 2.6.2)
1. For the 5895XL, the worst case current draw is listed for the panel, addressable
devices, and SLC expanders. Fill in the number of addressable devices and
expanders that will be used in the system and compute the current draw require-
ments for alarm and standby. Record this information in Table 2-4 at Line A.
2. Add up the current draw for all auxiliary devices and record in the table at Line B.
3. Add up all notification appliance loads and record in the table at Line C.
4. For notification appliances and auxiliary devices not mentioned in the manual,
refer to the device manual for the current ratings.
5. Make sure that the total alarm current you calculated, including current for the
panel itself, does not exceed 6.0 A. This is the maximum alarm current allowable.
6. Complete the remaining instructions in Table 2-4 for determining battery size
requirements.
2.6.1.1 Maximum Battery Standby Load
Table 2-3 shows the maximum battery standby load for the 5895XL based on 24 and
60 hours of standby. The standby load calculations of line G in the Current Draw
Calculation Worksheet (Table 2-4) must be less than the number shown in Table 2-3
for the battery size used and standby hours required.
Note:33AH max battery size for FM (Factory Mutual) installations
Table 2-3: Maximum Battery Standby Load
Rechargeable
Battery Size Max. Load for 24 hrs. Standby,
5 mins. Alarm *Max. Load for 60 hrs. Standby, 5
mins. Alarm
7 AH 270 mA 105 mA
12 AH 475 mA 190 mA
17 AH 685 mA 270 mA
33 AH 1370 mA 540 mA
* Required for NFPA 72 Auxiliary Protected Fire Alarm systems for Fire Alarm Service (City Box)
and Remote Station Protected Fire Alarm systems (Polarity Reversal) and Digital Alarm Com-
municator/Transmitter (DACT).

Model 5895XL Intelligent Power Module Installation and Operation Manual
2-6 151142
2.6.2 Current Draw Worksheet
For *each 5895XL in the installation, use this worksheet to determine current
requirements during alarm/battery standby operation. (Copy this page if additional
space is required.) Table 2-4: Current Draw Calculations
Device Number of
Devices Current per Device Standby
Current Alarm Current
For each device use this formula: This column X This column = Current per number of
devices.
5895XL Intelligent Power Module
(Current draw from battery) 1* Standby: 40 mA 40
mA
Alarm: 160 mA 160
mA
Additional 5895XL
(Daisy-chained to this module) (7 max.) Standby: 10 mA
Alarm: 10 mA
Addressable Devices (381 max.) Standby: 0.55 mA
Alarm: 0.55 mA
5815XL SLC Expander (2 max.) Standby: 55 mA mA
Alarm: 55 mA mA
5860 Remote Fire Alarm Annunciator (8 max.) Standby: 20 mA mA
Alarm: 25 mA mA
5824 Serial / Parallel Module (2 max.) Standby: 45 mA mA
Alarm: 45 mA mA
5865-4 LED Annunciator
(with reset and silence switches)
(8 max.)
Standby: 35 mA mA
Alarm: 145 mA mA
5865-3 LED Annunciator Standby: 35 mA mA
Alarm: 145 mA mA
5880 Generic LED Driver Module Standby: 35 mA mA
Alarm: 200 mA mA
ATotal System Current
**Auxiliary Devices Refer to devices manual for current rating.
Alarm/Standby: mA mA mA
Alarm/Standby: mA mA mA
Alarm/Standby: mA mA mA
Alarm/Standby: mA mA mA
BAuxiliary Devices Current
Alarm: mA mA
Alarm: mA mA
Alarm: mA mA
Alarm: mA mA
CNotification Appliances Current mA
D Total current ratings of all devices in system (line A + line B + C) mA mA
E Total current ratings converted to amperes (line D x .001): A A
F Number of standby hours (24 or 60 for NFPA 72, chapter 1, 1-5.2.5): H
G Multiply lines E and F. Total standby AH AH
H Alarm sounding period in hours. (For example, 5 minutes = .0833 hours) H
I Multiply lines E and H. Total alarm AH AH
J ***Add lines G and I. Total ampere hours required AH

Before You Begin Installing
151142 2-7
* Use a separate worksheet for each 5895XL.
** If you are using door holders, you do not need to consider door holder current for alarm/battery standby, because
power is removed during that time. However, during normal operation, door holders draw current and must be
included in the 6.0 A total current that can be drawn from the panel.
*** Use next size battery with capacity greater than required.
2.7 Wiring Specifications
2.7.1 Length Limitations
This section contains information on calculating SBUS wire distances and the types
of wiring configurations (Class A and B).
2.7.2 Calculating Wiring distance for SBUS modules
The following instructions will guide you in determining the type of wire and the
maximum wiring distance that can be used with SBUS accessory modules.
To calculate the wire gauge that must be used to connect SBUS modules to the
panel, it is necessary to calculate the total worst case current draw for all modules on
a single 4-conductor bus. The total worst case current draw is calculated by adding
the individual worst case currents for each module. The individual worst case values
are shown in the table below.
Note: Total worst case current draw on a single SBUS cannot exceed 1 amp. If a large number of
accessory modules are required, and the worst case current draw will exceed the 1 amp limit,
then the current draw must be distributed using 5895XL Power Expanders. Each 5895XL Power
Expander provides an additional SBUS, with an additional 1 amp of SBUS current. Wiring
distance calculations are done separately for each 5895XL, and separately for the panel itself.
After calculating the total worst case current draw, Table 2-5 specifies the maximum
distance the modules can be located from the panel on a single wire run. The table
insures 6.0 volts of line drop maximum. In general, the wire length is limited by
resistance, but for heavier wire gauges, capacitance is the limiting factor.
Model Number Worst Case Current Draw
5860 Fire Annunciator .100 amps
5824 Parallel/Serial Interface .040 amps
5880 LED IO Expander .250 amps
5865 LED Fire Annunciator .200 amps
5895XL Intelligent Power Supply .010 amps
5496 Intelligent Power Module .010 amps

Model 5895XL Intelligent Power Module Installation and Operation Manual
2-8 151142
These cases are marked in the chart with an asterisk (*). Maximum length can never
be more than 6,000 feet, regardless of gauge used. (The formula used to generate
this chart is shown in the note below).
Note: The following formulas were used to generate the wire distance chart:
Table 2-5: Wire Distances Per Wire Gauge
Wiring Distance: SBUS Modules to Panel
Total Worst Case
Current Draw (amps) 22 Gauge 18 Gauge 16 Gauge 14 Gauge
0.100 1852 ft. 4688 ft. * 6000 ft. * 6000 ft.
0.200 926 ft. 2344 ft. 3731 ft. 5906 ft.
0.300 617 ft. 1563 ft. 2488 ft. 3937 ft.
0.400 463 ft. 1172 ft. 1866 ft. 2953 ft.
0.500 370 ft. 938 ft. 1493 ft. 2362 ft.
0.600 309 ft. 781 ft. 1244 ft. 1969 ft.
0.700 265 ft. 670 ft. 1066 ft. 1687 ft.
0.800 231 ft. 586 ft. 933 ft. 1476 ft.
0.900 206 ft. 521 ft. 829 ft. 1312 ft.
1.000 (Max) 185 ft. 469 ft. 746 ft. 1181 ft.
Maximum Resistance (Ohms) = 6.0 Volts
Total Worst Case Current Draw (amps)
Maximum Wire Length (Feet) =
(6000 feet maximum) Maximum Resistance (Ohms) * 500
Rpu
where: Rpu = Ohms per 1000 feet for various Wire Gauges (see table below)
Table 2-6: Typical Wire Resistance Per 1000 ft.
Wire Gauge Ohms per 1000 feet (Rpu)
22 16.2
18 6.4
16 4.02
14 2.54

Before You Begin Installing
151142 2-9
Wiring Distance calculation example:
Suppose a system is configured with the following SBUS modules:
2 - Module 5860 Fire Annunciator
1 - 5895XL Intelligent Power Expander
1 - 5865 LED Fire Annunciator
1 - 5824 Parallel/Serial Interface
The total worst case current is calculated as follows:
Using this value, and referring to the Wiring Distance table, it can be found that the
available options are:
370 feet maximum using 22 Gauge wire
938 feet maximum using 18 Gauge wire
1493 feet maximum using 16 Gauge wire
2362 feet maximum using 14 Gauge wire
5860 Current Draw = 2 x .100 amps = .200 amps
5895XL Current Draw = 1 x .010 amps = .010 amps
5865 Current Draw = 1 x .200 amps = .200 amps
5824 Current Draw = 1 x .040 amps = .040 amps
Total Worst Case Current Draw = .450 amps

Model 5895XL Intelligent Power Module Installation and Operation Manual
2-10 151142
2.7.3 Wire Routing
You must follow power-limited wiring techniques, which includes maintaining
one-quarter inch spacing between power-limited and nonpower-limited circuits and
separating high and low voltage circuits.
Figure 2-2 Wire Routing Example
5895XL Board

151142 3-1
Section 3
Hardware Installation
5895XL installation involves the following steps:
• AC power (Section 3.1) and backup battery connection (Section 3.2).
• Physical connection to the IntelliKnight 5820XL FACP or to the controlling 5895XL
(see Section 3.3).
• Setting an ID for the 5895XL (Section 3.3.1).
• Physical connection of SBUS modules that will be powered by this 5895XL
(Section 3.4).
• Physical connection of any outputs (conventional relays, notification appliances,
auxiliary power modules, and so on) that will be powered by this 5895XL. See
Section 3.5.1 for notification appliance wiring information. Refer to the IntelliKnight
5820XL Installation Manual (P/N 151209), for software configuration information
and other information about installing outputs.
3.1 AC Power
At installation, connect the AC terminals to 120 VAC source as shown in Figure 3-1. It
may be necessary for a professional electrician to make this connection.
The AC terminals are rated as 120 VAC, 50 or 60 Hz, 2.7 A.
Figure 3-1 AC Power Connection
To 120 VAC
Power Source
Green
White
Black
Table of contents
Other SILENT KNIGHT Power Supply manuals
Popular Power Supply manuals by other brands
EnerSys
EnerSys alpha APX3 Series Installation and operation manual

VigorPool
VigorPool LAKE 300 user manual
FuG Elektronik
FuG Elektronik MCA Series operating instructions

Xantrex
Xantrex XKW 600-1.7 operating manual

Pulsar
Pulsar PSCLB13810 quick start guide
Altronix
Altronix ALTV2432 Series installation guide
