Silony Medical VERTICALE Navigation User manual

VERTICALE
®
Navigation
INSTRUMENTATION GUIDE
MADE IN GERMANY
MADE IN GERMANY

TABLE OF CONTENTS
Introduction / Preface .................................................................................................................................................... 3
Indications / Contraindications ................................................................................................................................. 3
Preparation of Navigation system and instrumentation................................................................................. 4
Prerequisites on Navigation system and tracker ......................................................................................... 4
Assembly of instruments ....................................................................................................................................... 5
Assembly of Navigated shaft instruments ..................................................................................................... 6
Instrument registration instructions .............................................................................................................. 7
Instrumentation / surgical steps ............................................................................................................................... 8
General Notes on use of Navigation instruments ....................................................................................... 8
Position and approach ........................................................................................................................................... 9
Opening the cortex of the pedicle ..................................................................................................................... 9
Open the pedicle canal with a probe ............................................................................................................... 9
Tapping (optional) .................................................................................................................................................... 9
Selection of screw ................................................................................................................................................... 10
Screw loading onto Navigated Screw Driver ................................................................................................ 10
Screw insertion .......................................................................................................................................................... 11
Further surgical steps ............................................................................................................................................. 11
PRODUCT INFORMATION .................................................................................................................................... PI 01
Instruments ................................................................................................................................................................ PI 02
NOTE: The following guide is intended to familiarize you with the surgical procedure and use of the
VERTICALE® Navigation Instrumentation. This instrumentation guide supplements the guides for the
VERTICALE® Screw Rod System. Instruments from Silony Medical are processed, serviced, and cared
for in accordance with the information given in the instructions for use. Please read this guide and
the instructions for use accompanying the implants carefully before using the implant, and also pay
particular attention to the information appended to this guide. This guide does not replace brieng by
a surgeon experienced in the instrumentation used in spinal surgery. We would be happy to assist you
in nding a hospital that provides an opportunity to observe surgical procedures.
NOTE: Silony Medical is not a manufacturer of navigation systems or equipment. Please refer to the
navigation company’s software and user guides for instructions for use and training prerequisites
on the navigation system. Instructions for use and handling of any third-party navigation systems in
combination with Silony instruments are the responsibility of the hospital and navigation company.
The navigation system should be set up per the manufacturer’s instructions.

VERTICALE NAVIGATION 3
Navigation Instruments for Silony Medical VERTICALE® Screw Rod Systems
The Navigation Instruments for VERTICALE® are designed for compatibility with
• the Medtronic StealthStation® Navigation System and the Medtronic NavLock™ tracker,
• the Brainlab Navigation System and the Brainlab Universal Instrument Adapters (StarLink™).
For general instructions on use, indications, contraindications and warnings please refer to the following manuals
and guides:
VERTICALE® OPEN and MultiLocking Screw Rod System Instrumentation Guide
Instructions for Use VERTICALE implants
Instructions for Use Silony surgical instruments
Medtronic’s current navigation system software and user guides (StealthStation®, NavLock™)
Brainlab’s current navigation system software and user guides (StarLink™)
Physicians and operators of the system, instruments and software should read all related (Silony Medical and
third-party) user guides carefully before handling the equipment and have access to the user guides at all times.
Prior to using the VERTICALE® Navigated Instruments for VERTICALE® Screw Rod Systems, the physicians and
operators should review the Silony Medical VERTICALE® System guides for their indications for use.
Silony Medical navigation instruments for VERTICALE® Screw Rod Systems are NOT compatible with the implants
from other manufacturers. The VERTICALE® Navigation Instruments are intended for use with Silony Medical
VERTICALE® implants only:
• VERTICALE® Pedicle screws with short & reduction head
- VERTICALE® Polyaxial screw
- VERTICALE® Monoaxial screw
- VERTICALE® Uniplanar screw
- VERTICALE® Revision / Iliac screw
- VERTICALE® MultiLocking screw
Indications / Contraindications
Please refer to the supplemental VERTICALE® system guides and Instructions for Use for general procedural
instructions, indications, contraindications and warnings.
Please consider the following additional information for Navigation use:
Additional Indications for Navigation use
Silony Medical Navigation Instruments are intended to be used during the preparation and placement of
VERTICALE® pedicle screws during spinal surgery to assist the surgeon in precisely locating anatomical structures in
open procedures. These instruments are designed for use with third-party stereotactic navigation systems, which
are indicated for any medical condition in which the use of stereotactic surgery may be appropriate, and where
reference to a rigid anatomical structure, such as vertebra, can be identied relative to a CT or MR based model,
uoroscopy images, or digitized landmarks of the anatomy.
Additional Contraindications for Navigation use
Medical conditions which contraindicate the use of a computer-assisted surgery system and its associated
applications with Silony Medical VERTICALE® system include any medical conditions which may contraindicate the
medical procedure itself.
INTRODUCTION / PREFACE
NOTE: Please also note the Instructions for Use provided with each product. They may include additional advice that leads to
exclusion of the implant procedure.
All instrumentation guides and Instructions for Use can be found on our eLabeling portal (https://elabeling.silony-medical.com/)

Navigation System Respective Instrument tracker / Array
Medtronic StealthStation® System S8* Medtronic NavLock™ tracker
Brainlab Brainlab Universal Instrument Adapters (StarLink™)
PREPARATION
OF NAVIGATION
SYSTEM AND
INSTRUMENTATION
Prerequisites on Navigation System and tracker
Note: For navigated instrumentation with Medtronic StealthStation®, the hospital’s Medtronic
navigation instrument set must include the Medtronic NavLock™ trackers. For navigated
instrumentation with Brainlab Navigation System, the hospital’s instrument set must include
the Brainlab universal instrument adapters (StarLink™). Silony Navigation Instruments require
following the instructions for use for the respective third-party navigation system and its navigation
instruments, which are provided by the navigation system manufacturer. If the respective third-
party navigation instrument set is not available at the hospital, the VERTICALE® Navigation
Instruments cannot be navigated. In the event that the respective third-party navigation instrument
set is unavailable, a non-navigated technique using uoroscopy and respective Silony Medical
instrumentation may be adopted as per Silony Medical Instrumentation guides.
*Note: Position verication was performed with Medtronic StealthStation® System S8 and Software Version 1.2.0.

VERTICALE NAVIGATION 5
Medtronic: Follow the instructions for NavLock™ tracker.
Brainlab: Follow the instructions for universal instrument
adapter clamps and arrays (StarLink™) for manual
calibration of third-party instruments.
Pre-assembly of navigation tracker using third-party
universal adapter clamps and arrays (e.g. Brainlab).
1) Assemble the third-party universal instrument adapter
clamps and arrays according to the respective navigation
manufacturer’s instructions.
2) Rigidly connect the clamp of the third-party universal
adapter to the prismatic interface of the VERTICALE® Nav
Adapter VI-7030 according to the respective navigation
manufacturer’s instructions. Always make sure that the
clamp-array-assembly is fully seated on the prismatic
interface and the array is oriented in line with VERTICALE®
Nav adapter’s axis such that the array is pointing down to
the instrument’s working end when assembled in the next
step.
Both the VERTICALE® Navigation Adapter with connected
third-party universal clamps or the NavLock™ tracker are
further denoted by ‘navigation tracker’ (short ‘tracker’).
Assembly of instruments
Note: For selection on tracker type, clamp or array
size please refer to the third-party’s user guides. It is
recommended to use the largest array size feasible for
the instrument.
Fig. 1 VERTICALE® Nav Adapter with prismatic interface for
universal clamps.
6 SILONY MEDICAL – Instrumentation Guide
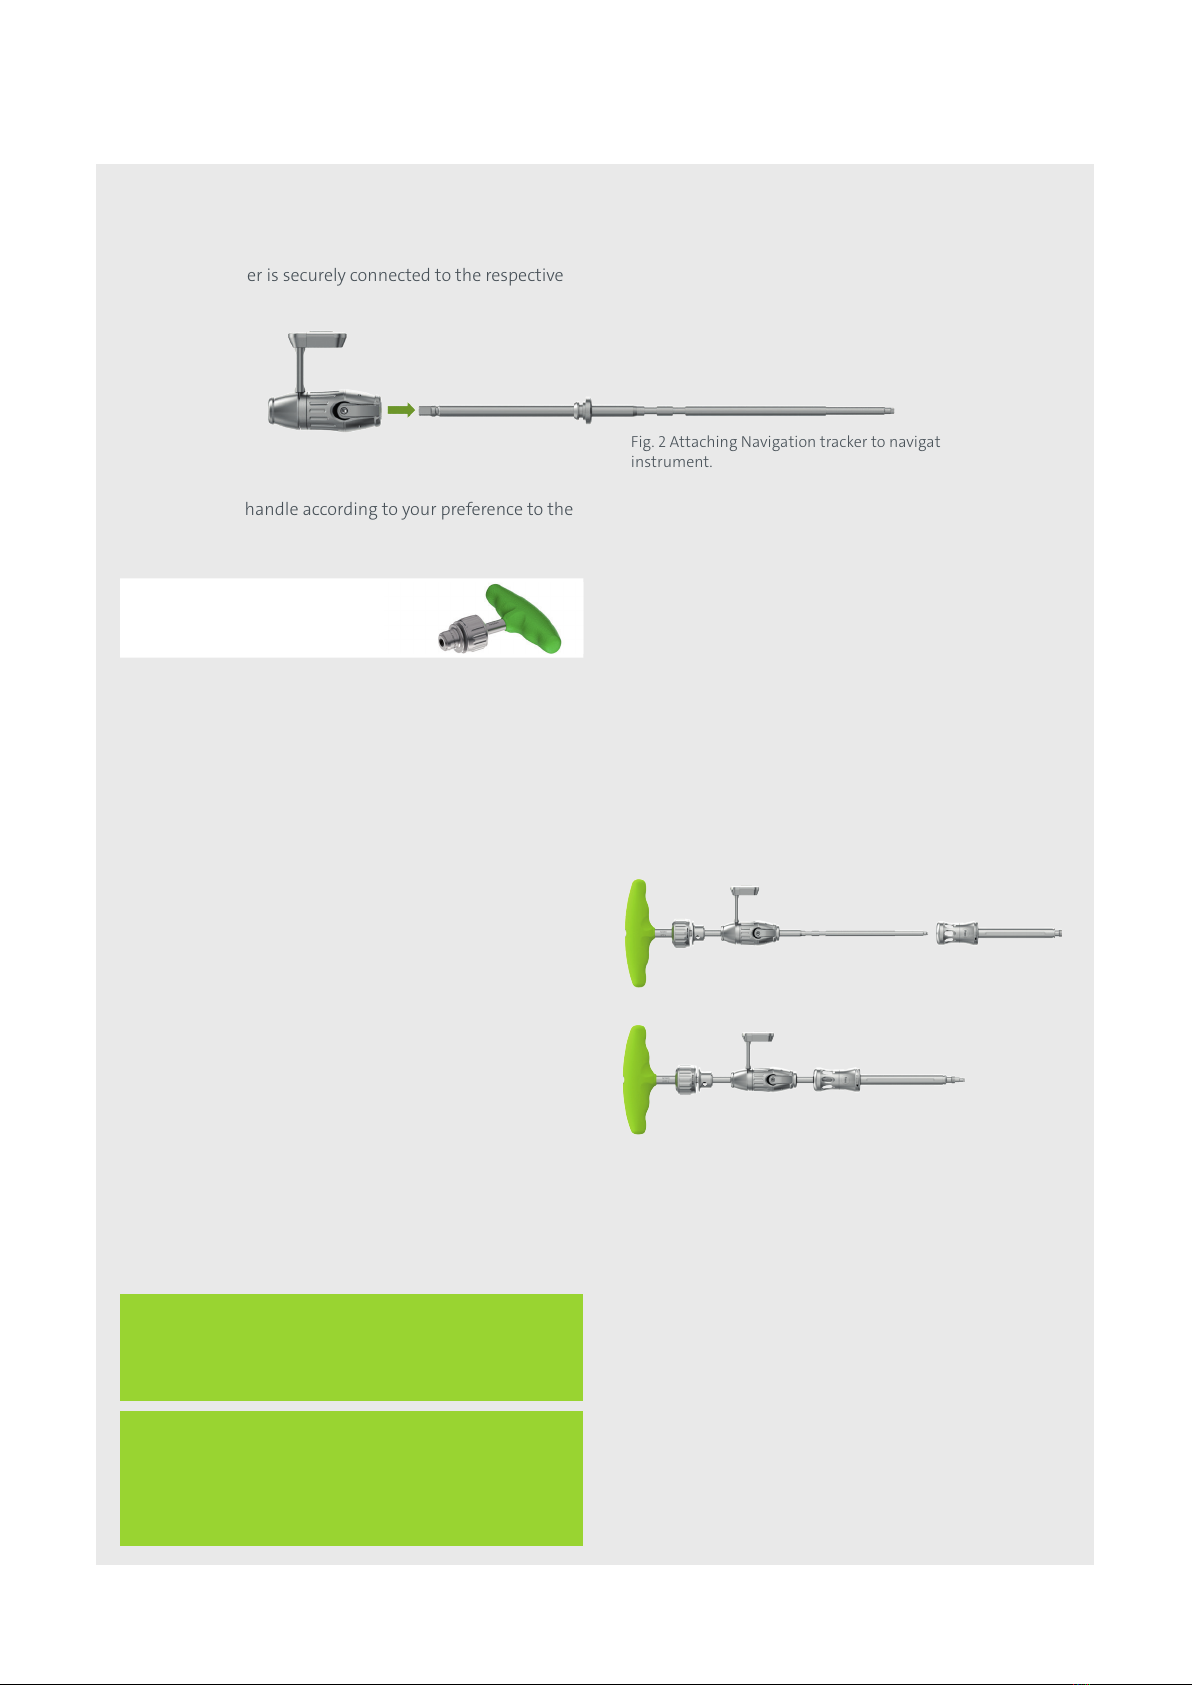
Assembly of Navigated Shaft Instruments
1) Attach the corresponding Navigation tracker to the
respective Navigation Instrument (awl, probe, tap or SD
Inner Shaft)* until it snaps into place, make sure that the
Navigation tracker is securely connected to the respective
instrument.
2) Attach Silony handle according to your preference to the
proximal interface of the instrument shaft*.
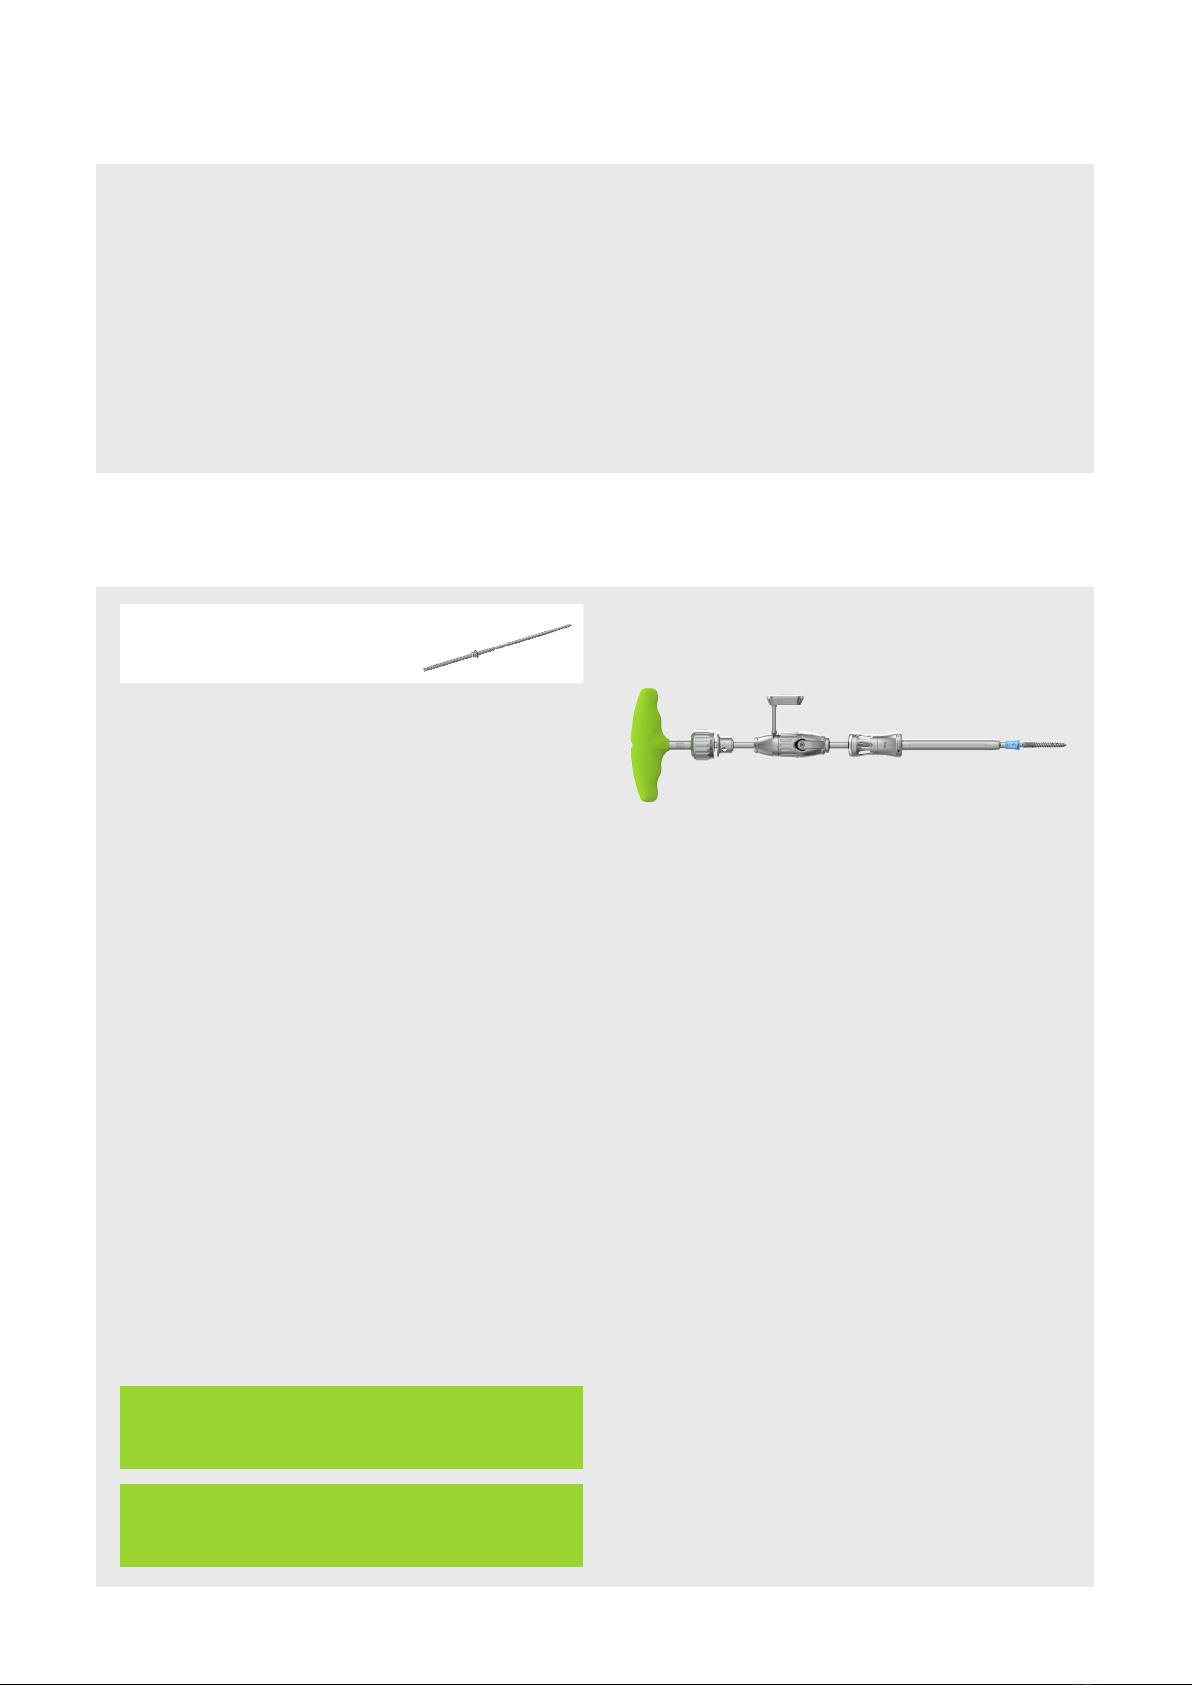
3) Additional steps for Navigated Screw Driver
The Navigated screw driver consists of a navigated
driver shaft in combination with modular components
of the VERTICALE® Screw driver VI-1130. Please refer to
the instrument list section at the end of this guide for
combination options, e.g. with SI-0024. For further (dis-)
assembly instructions of the modular screw driver VI-1130
or SI-0024, please refer to the supplemental information
provided with the instruments.
3.1) Attach your desired outer sleeve option onto
the Basic Core.
3.2) Instead of a non-navigated driver shaft, insert
the VI-7130 SD Inner Shaft into the respective
Screw driver Basic Core options.
* Further instrument options can be found in the instrument list
section at the end of this guide
** Further handle options can be found in the instrument list
section at the end of this guide
NOTE: Do not use the same tracker type/array size on
two dierent instruments without new registration
procedure. For registration instructions, please refer to
the registration section.
Fig. 2 Attaching Navigation tracker to navigated shaft
instrument.
GI3111
Ratchet T-Handle**
Fig. 3 Assembling Navigated screwdriver shaft with Basic Core
of e.g. VI-1130.
NOTE: If the tracker or any other component cannot be
rigidly connected to the respective Silony Navigation
Instrument, utilize Silony standard non-navigated
surgical technique as described in the VERTICALE®
system guides.

VERTICALE NAVIGATION 7
Instrument Registration Instructions
Refer to the navigation manufacturer’s current navigation software and user guides for patient referencing and
instrument registration.
Medtronic: Follow the instructions for StealthStation® and NavLock™ tracker.
For each instrument to be navigated with Medtronic StealthStation®, assign the appropriate instrument tool card and
NavLock™ tracker type/geometry (and screw size when using screw driver) in the navigation software that has been
attached to the respective instrument.
Upon successful registration, the trajectory and location of the distal tip of the instrument or screw are visually
represented within the software by the third-party instrument or screw selected from the corresponding tool cards.
If you desire to change the tip of the virtual representation to reect the diameter and length of the screw, follow the
instructions of the chosen navigation system.
Brainlab: Follow the instructions for universal instrument adapter clamps and arrays (StarLink™) and manual calibration
of third-party instruments with ICM4.
Using the VERTICALE® Navigation shaft instruments with the VERTICALE® Navigation adapter, requires manual
registration and calibration. This means the respective Silony navigation instrument dimensions need to be acquired
by the Navigation Software through a manual calibration process. VERTICALE® Navigation Instruments can be used for
manual calibration by using the respective navigation system manufacturer’s clamps and arrays for general instrument
calibration and following their instructions for use.
For each instrument to be navigated with Navigation Systems based on a manual calibration process, assign the
appropriate generic instrument tool card and perform manual calibration according to the navigation manufacturer’s
instructions. For the screw driver always manually calibrate the instrument with each attached screw and re-calibrate
after any change to the calibrated instrumentation assembly.
Upon successful manual calibration, the trajectory and location of the distal tip of the instrument or screw are visually
represented within the software by the chosen generic instrument or screw selected from the corresponding tool cards.
If you desire to change the tip of the virtual representation to reect the diameter and length of the screw, follow the
instructions of the chosen navigation system.

8 SILONY MEDICAL – Instrumentation Guide
Instrumentation / Surgical Steps
General Notes on use of Navigation instruments
The following section describes only the specic steps for the use of VERTICALE® Navigation instruments. For the general
instrumentation steps of the VERTICALE system for an open appraoch, we ask you to study the instrumentation guide for
the VERTICALE® OPEN Screw Rod system.
Please review the following notes prior to using VERTICALE® Navigation instruments.
• Prior to navigation, always conrm that accuracy of the instrument tip or tip of screw driver with rigidly connected
screw is in an acceptable range for the intended use by positioning the navigated tip on an identiable anatomical
landmark and comparing the actual tip location to that displayed by the system.
• Assess navigational accuracy repeatedly throughout a procedure.
• After each change to the navigated instrumentation assembly in use (e.g. for each new screw; after
re-attachment of tracker including array and spherical markers) when using a surgical navigation system, the
navigated instrumentation assembly must be re-veried for accuracy. For manually calibrated systems, the
calibrated instrumentation assembly in use must always be re-calibrated after each change to the assembly
(e.g. for each new screw; after re-attachment of tracker including adapter, clamp, array and spherical markers).
• Discontinue use if inaccuracy is suspected.
• If the stereotactic navigation system does not appear to be accurate or registration of Silony instruments fails
despite troubleshooting (e.g. resetting the system), do not rely on the navigation system. A non-navigated
technique using uoroscopy and respective Silony Medical instrumentation should be used as per Silony Medical
Instrumentation guides.
• If the desired virtual screw or instrument diameter is not available in the software, use the next larger available
size in diameter (e.g. Ø 5.2 mm screws Software: select Ø 5.5 mm screw projection).
• At all times during use, ensure the navigation tracker is visible to the camera of the respective navigation system
in use.
• For probes, taps and the screw driver, the navigation tracker will rotate around the instrument shaft. Please
hold the tracker with the hand for permanent camera visibility of the array markers while using the
instrument.
• For inserting taps and screws rotate proximal instrument handle clockwise, for removal rotate
anti-clockwise.
• Some instruments are equipped with an anti-rotation pin. For these instruments, the navigation tracker will
not rotate around the instrument shaft during use (only back and forth rotation allowed for permanent
camera visibility).
• Care should be taken to avoid bending forces on registered instruments during navigation procedure as deection
can inuence navigation accuracy.
• If instruments drop or may otherwise be damaged, re-verify them with respect to anatomical landmarks or use
another instrument. Do not use any instrument if verication of anatomical landmarks fails. Omission to
do so may lead to serious injury to the patient.
• Do not use the tracker and/or Silony Navigation instruments if any components appear to be loose, bent or
otherwise damaged.
• Cannulated instruments (taps, screw driver) are available for using guide wires
• The guide wires are not navigated instruments.
• Ensure that the length of the guide wire exceeds the length of implant, instrument and additional handle.
• Push the instrument over the placed guide wire
• Ensure the guide wire remains securely in position throughout the entire duration of the procedure.
• Remove the guide wire after screw insertion and conrming nal screw position.

VI7010
VERTICALE Nav Awl with Stop*
Assemble and register respective probe as described in
assembly and registration section. Please refer to general
notes section prior to navigation.
Please refer to the VERTICALE® OPEN Instrumentation
Guide for information on opening up the cancellous bone of
the vertebral body with a probe.
* Further instrument options at the end of this guide.
Open the pedicle canal with a probe
Assemble and register respective tap as described in
assembly and registration section. Please refer to general
notes section prior to navigation.
Please refer to the VERTICALE® OPEN Instrumentation Guide
for information on tapping with solid taps or cannulated taps
in combination with guide wires for guided insertion.
* Further instrument options at the end of this guide.
Tapping (optional)
VI7045
VERTICALE Nav Tap
4.5 + 5.2 mm*
VI7067
VERTICALE Nav Tap
6.2 + 7.2 mm*
VERTICALE NAVIGATION 9
Position and approach
Assemble and register respective awl as described in
assembly and registration section. Please refer to general
notes section prior to navigation.
Please refer to the VERTICALE® OPEN Instrumentation Guide
for information on opening the pedicle with an awl.
* Further instrument options at the end of this guide.
VI7024
VERTICALE Nav Thoracic Probe*
VI7025
VERTICALE Nav Lumbar Probe*
Please refer to the VERTICALE® OPEN Instrumentation Guide for information on patient position and approach.
Opening the cortex of the pedicle
10 SILONY MEDICAL – Instrumentation Guide
Selection of screw
Select the VERTICALE® pedicle screw type and size (length
and diameter) based on pre-operative planning and
uoroscopic imaging. VERTICALE® Pedicle screws with
short & reduction head are compatible with VERTICALE®
Navigation Instruments:
• VERTICALE® Polyaxial screw
• VERTICALE® Monoaxial screw
• VERTICALE® Uniplanar screw
• VERTICALE® Revision / Iliac screw
• VERTICALE® MultiLocking screw
VI7130
VERTICALE Nav SD Inner Shaft
Fig. 4 Navigated screw driver with loaded screw.
NOTE: Please ensure the screw driver tip is fully seated
in the screw drive feature and the connection is rigid
after tightening
Screw loading onto Navigated Screw Driver
1) Assemble and register screw driver shaft as described in
assembly and registration section.
2) Adjust for short or long head screws, in analogy to
VI-1130, by pressing the button on the middle part of the
handle of the Screw driver basic core and pulling or pushing
the driver shaft into its dedicated position.
3) Loading screw, in analogy to VI-1130
The VERTICALE® pedicle screw driver tip is rst inserted
deeply into the inner drive feature of the screw shaft. After
that, the internal thread of the screw head is connected to
the external thread of the instrument by rotating clockwise
and applying gentle downward force with the instrument
shaft.
NOTE: For full instructions please refer to the VERTICALE®
OPEN Instrumentation Guide and supplemental
information provided with the instrument.

Please refer to the VERTICALE® system instrumentation
guides for information on further surgical steps after screw
placement or the implant removal procedure to complete
surgery.
Further surgical steps
VERTICALE NAVIGATION 11
Screw insertion
Please refer to the VERTICALE® OPEN Instrumentation
Guide for information on inserting the pedicle screw and
disengaging the screw driver.
For insertion of additional screws, follow the previous steps
for the remaining screws.
NOTE: The tip position of the navigated instrument
with loaded screw must be veried for accuracy prior
to use when using a navigation system. Please refer to
general notes section prior navigation.
NOTE: Do not hold the middle handle of the screw driver
basic core until disengaging the screw driver from the
screw.
NOTE: If the screw is changed, the tip position of the
navigated instrument with loaded new screw must
be re-veried for accuracy prior to use. Please refer to
general notes section.

VERTICALE
®
NAVIGATION
PRODUCT INFORMATION
The following section gives an overview on compatible instruments of the VERTICALE® Screw Rod System.
VERTICALE® Navigation Instruments
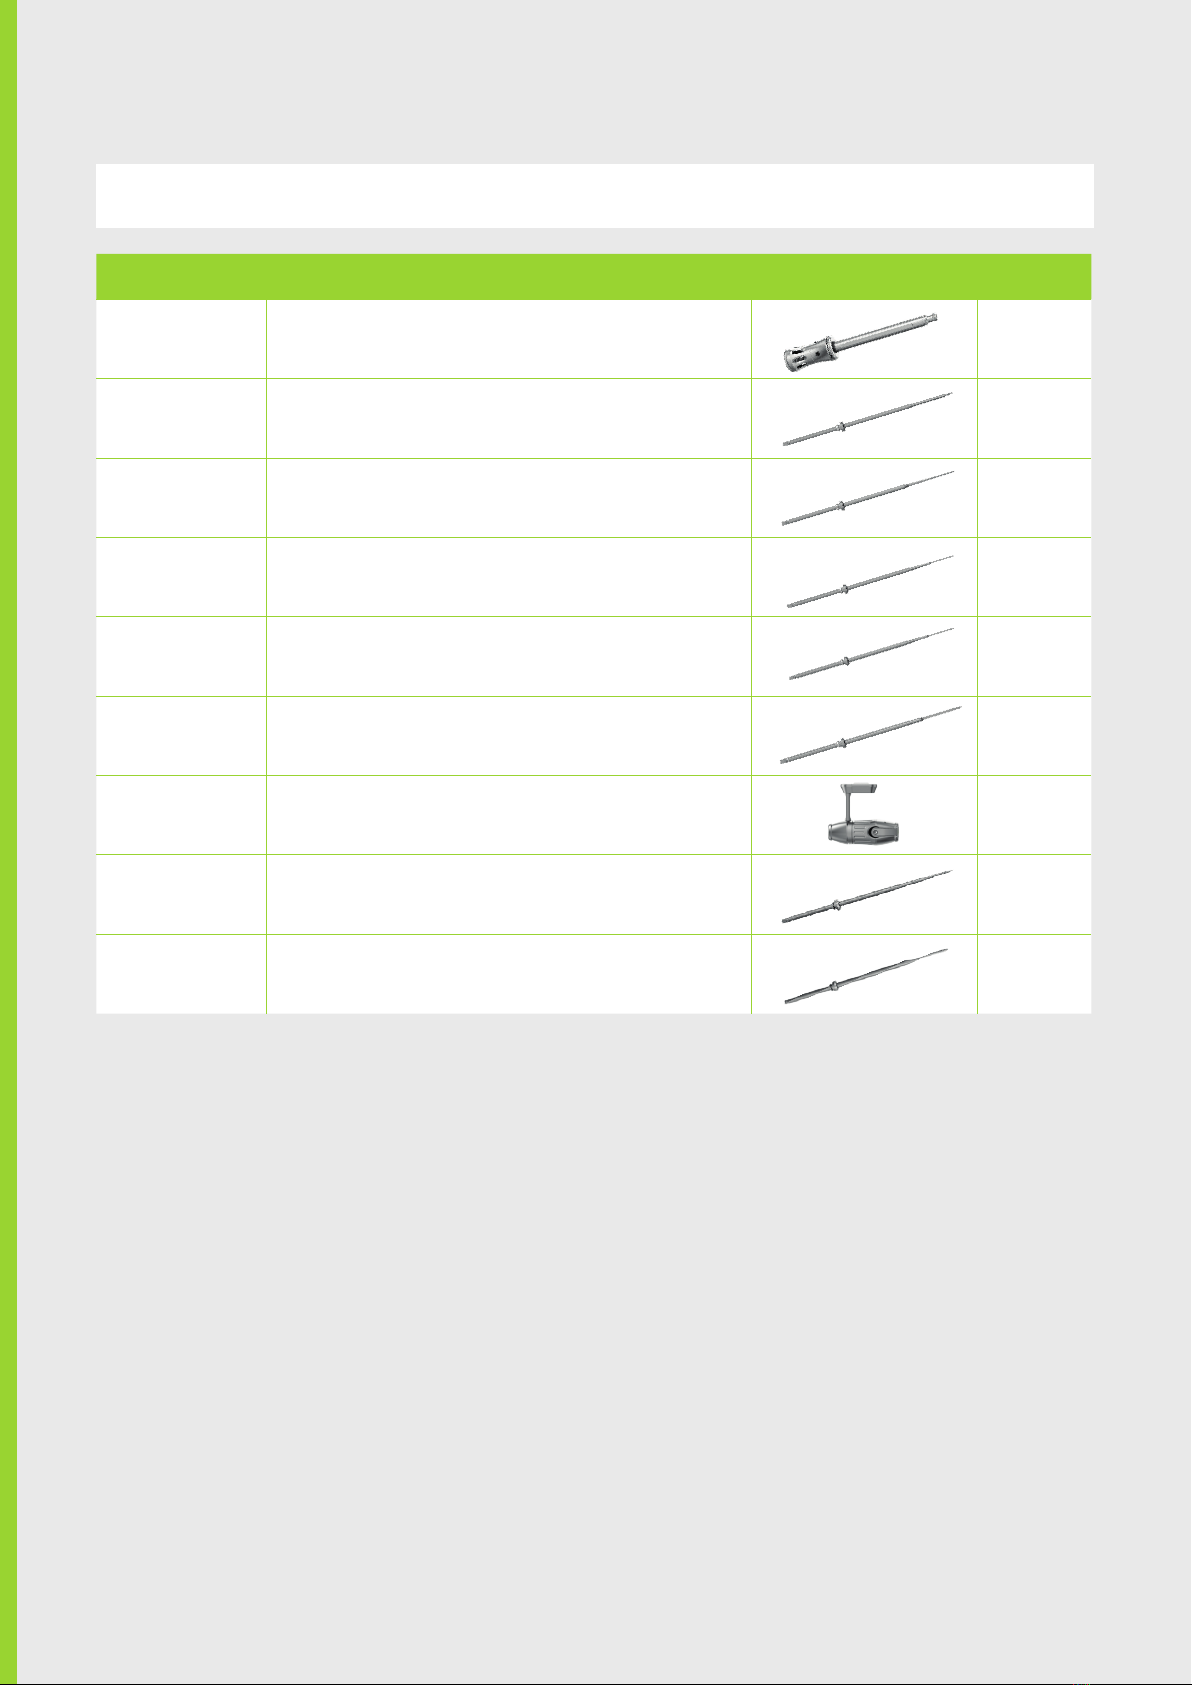
Article number Description Illustration Page
VI-1130* VERTICALE Screw Driver T25 6, 10
VI-7010 VERTICALE Nav Awl with stop 9
VI-7020 VERTICALE Nav Awl Starter 9
VI-7024 VERTICALE Nav Thoracic Probe 9
VI-7025 VERTICALE Nav Lumbar Probe 9
VI-7028 VERTICALE Nav Iliac Probe 9
VI-7030 VERTICALE Nav Adapter 5, 6, 10
VI-7034 VERTICALE Nav Awl Tap 4.5 mm 9
VI-7045 VERTICALE Nav Tap 4.5 + 5.2 mm 9
Product classication: All instruments listed here correspond to class I (CE) as dened by the Medical Device Directive
(MDD93/42/EEC) unless otherwise explicitly indicated.
VERTICALE
®
NAVIGATION
PRODUCT INFORMATION
VERTICALE NAVIGATION PI 02

VERTICALE® Navigation Instruments
Article number Description Illustration Page
VI-7067 VERTICALE Nav Tap 6.2 + 7.2 mm 9
VI-7089 VERTICALE Nav Tap 8.2 + 9.2 mm 9
VI-7102 VERTICALE Nav Tap 10.2 mm 9
VI-7124** VERTICALE Nav Thoracic Probe, short 9
VI-7125** VERTICALE Nav Lumbar Probe, short 9
VI-7128** VERTICALE Nav Iliac Probe, short 9
VI-7130 VERTICALE Nav SD Inner Shaft 6, 10
VI-7145 VERTICALE Nav Tap 4.5 + 5.2 mm, can 9
VI-7167 VERTICALE Nav Tap 6.2 + 7.2 mm, can 9
VI-7189 VERTICALE Nav Tap 8.2 + 9.2 mm, can 9
VI-7202 VERTICALE Nav Tap 10.2 mm, can 9
Product classication: All instruments listed here correspond to class I (CE) as dened by the Medical Device Directive
(MDD93/42/EEC) unless otherwise explicitly indicated.
* Note: VERTICALE Screw driver options
• Basic Core VI-1130.1 or VI-1131.1 or SI-0024.1 with
a) Outer Sleeve VI-1130.2 or
b) Outer Sleeve SI-0024.2
** Note: Short instrument versions are only designed for use with Navigation Systems based on manual calibration of navigated
instruments and are NOT compatible with Medtronic StealthStation® using NavLock™ tracker which is based on a proprietary
instrument length.
PI 03 SILONY MEDICAL – Instrumentation Guide


D30229.a.EN 13.12.2021
www.silony-medical.com
elabeling.silony-medical.com/contactSilony Medical GmbH
Leinfelder Straße 60
70771 Leinfelden-Echterdingen
Germany
Tel +49 711 78 25 25 0
Fax +49 711 78 25 25 11
Other manuals for VERTICALE Navigation
1
Table of contents
Other Silony Medical Tools manuals

Popular Tools manuals by other brands


Cerrowire
Cerrowire ReelRover User's manual and operating instructions

TE Connectivity
TE Connectivity HT11K operating instructions

Neilsen
Neilsen CT2737 instructions

SAMCHULLY
SAMCHULLY SC instruction manual

Campbell Hausfeld
Campbell Hausfeld TL053700AV operating instructions

RIDGID
RIDGID HKO-186 Operator's manual