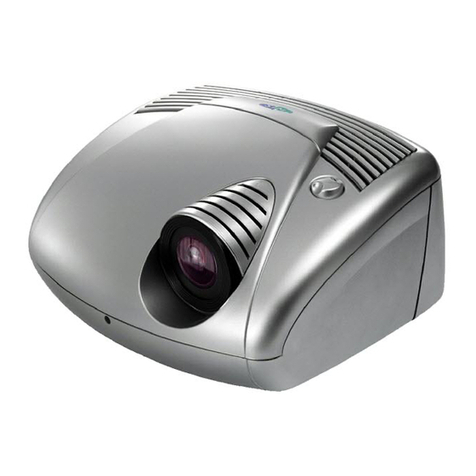
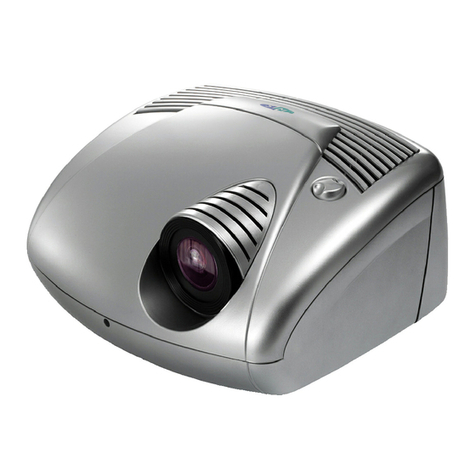
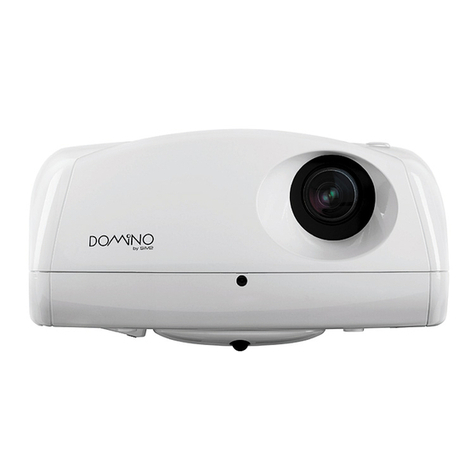
Sim2 DOMINO DTV S User manual

RSAG2. 025. 7895SS A
SIM2 MULTIMEDIA S.R.L.
Bar code here,
for material number reference only.

Instructions for Laser Projector Use
(DTV S)

I
Warm Tips
Please carefully read the instructions before using the product and keep it properly.
The company disclaims any responsibility for accidents caused by violating the safety
precautions and instructions in this manual.
Users are not allowed to open the casing without authorization because of high voltage in
this product. Non-professional maintenance personnel shall not repair the product, replace parts or
open the internal optical machine without authorization for the sake of avoiding electric shock and
fire accidents.
Energy Saving Tips:
When the machine is not in use, please select AC shutdown after standby (unplug the power plug)
to reduce energy consumption.
Warning: This product is a Class I device and does not need to be grounded.

II
Laser safety parameters of the whole device:
Laser safety standard: Class I laser product, meeting the safety standard of GB 7247.1.2012
Radiation parameters:
Maximum output of laser radiation: ≤ 66mW
Emission wavelength: Blue ray: 459-471nm
Green ray: 519-531nm
Red ray: 635-651nm
Class 1 laser product do not stare into beam. The bright light may result in permanent
eye damage when the projector is on
Warning and explanation label

III
Symbol Descriptions
This triangle pattern with lightning-shaped arrow is a
warning symbol to remind you that the voltage inside
the product is dangerous.
· Matters needing attention
This triangle pattern with exclamation mark is a
warning symbol to remind you of important
instructions related to the product.
Next step

IV
Important Notes
Please read the following carefully before using this product:
1. Safety Warnings
In case of thunderstorm, please unplug the power plug and the network cable to avoid damage
to the machine.
This product uses the power plug as the power disconnecting device. The socket should be
installed near the product for easy access and sundries cannot be stacked around the socket for the
sake of convenient use.
If you do not use this product for a long time, please unplug the power plug. Do not pull the
power cord when unplugging the power plug.
If you find any abnormal sound or smell, or find that there is only sound but no image on the
machine, please turn off the power immediately, unplug the power plug from the socket, and
contact the after-sales personnel as soon as possible.
Please do not have any object on the power cord and signal wire.
Please do not overload the power socket and ensure that the socket you use is a qualified
product passing national safety certification.
Do not place exposed flame sources (such as lighted candles) on the machine, and keep the
machine away from high-temperature and heating objects.
Do not expose this machine to water droplets or splashes, or place objects filled with liquids,
such as vases, cosmetics or liquid medicines on the machine.
If foreign objects or liquids fall into the machine, please pull out the power plug immediately
and contact the after-sales personnel as soon as possible.
Beware of children standing on or climbing on the machine.
Condensation may occur to the machine after it is moved from a low-temperature area to a
warm area. In order to make the condensation fully dry inside the machine, it should be
powered on after 24 hours.
Do not look directly at the lens after the machine is powered on because the strong light
emitted by the lens may hurt your eyes.
Please do not expose the battery to sunlight, fire and other overheated environment,
otherwise there will be explosion risk.
2. Precautions for Installation and Placement
The product shall be installed by professionals from the manufacturer. The company
disclaims any responsibility for installation errors, product damage or personal accidents
caused by installation by unqualified personnel.
V
The machine should be placed in a flat and stable place, instead of somewhere prone to
shaking.
Please do not place the machine in high-temperature places where there is direct sunlight or
heating devices, places where water, oil and smoke can easily enter the machine, or places
where there is much dust and is moist.
Please do not place the machine in a poorly ventilated or enclosed place.
When the cabinet surface is sprayed with paint or other substances with organic solvent and
grease, the rubber pad of the base may have a slight chemical reaction with it, resulting in
slight corrosion on the cabinet surface. Therefore, we recommend that the user put protective
materials (such as cardboard or glass plate) on the cabinet first before placing the machine.
We recommend that two or more people load, unload and move the machine. When moving it,
please avoid shocks, and especially protect its light-emitting lens.
The engineering plastics, insulating varnish on the internal transformer and rubber parts used
for the shell of the newly purchased product will emit certain smell like newly purchased
furniture, and it becomes stronger when the temperature rises. The smell is determined by the
composition of materials. The material solutions we use fully meet national regulations on
environmental protection, so consumers can use them at ease. The smell will gradually
decrease and eventually disappear during the use of machine. Please keep the environment
ventilated.
The wired network antenna connected to the machine must be isolated from the protective
grounding; otherwise, it may cause fire and other accidents.
Do not block vents or place sundries on the machine to ensure good heat dissipation effect.
Do not place the machine in a narrow and enclosed space that is not conducive to air
circulation.
The installation is as shown in the figure. Leave a space around the machine for ventilation.
Top view
At a minimum, leave the amount of space shown in the diagram
below for this device to have proper ventilation.

VI
Do not install the machine as shown in the figure below.
Insufficient ventilation space may cause this device to overheat or become damaged or even fired.
Laser beam
Confined space (only the
light outlet outward)

VII
3. Precautions for Use
Please do not try to disassemble or repair any part of this device by yourself, which may cause
damage to it and personal injury, and invalidate your product warranty.
If this device gets dirty, please unplug its power plug and wipe it with a semi dried soft cloth
dipped with a small amount of diluted neutral detergent, but do not wipe it repeatedly to avoid
scratching. Do not use alcohol, gasoline, acid, alkali, detergent, volatile oil, diluent and other
solvents to wipe this device because these solvents may deteriorate the materials or damage the
painted surface. If rubber or vinyl products are exposed to this device for a long time, stains may
be caused.
Please do not directly wipe light-emitting lens with your hands, ordinary cleaning paper or
cleaning cloth. For oil stains and fingerprints, please ask professionals to wipe them carefully with
cleaning cloth for optical use, lens wiping paper or professional cleaning solution for the sake of
avoiding damaging the optical coating and affecting the image quality.
Please do not touch the signal connector or reach into the heat dissipation hole with sharp
objects or metal, so as to avoid damage to the product or electric shock caused by short circuit.
Please do not cover this device with articles such as newspapers, tablecloths and curtains, so
as not to hinder ventilation and affect heat dissipation. Otherwise, it may affect the service life of
this device and even cause safety accidents such as fire.
When this device is working or after it is powered off, do not touch the air vent and upper
cover if they are still touched hot.
Please do not cut off the power directly when this device is working. If you need to shut
down this device, please press the standby button on the remote control.
Watch from an appropriate distance. The best distance is 1.5 times the diagonal length of the
screen.
The volume should be kept appropriate, so as not to disturb the neighbors, especially at night.

VIII
4. Laser
Laser safety parameters of the whole device:
Laser safety standard: Class I laser product, meeting the safety standard of GB 7247.1
Radiation parameters:
Maximum output of laser radiation: ≤ 66mW
Emission wavelength: Blue ray: 459-471nm
Green ray: 519-531nm
Red ray: 635-651nm
Safety warnings:
This product bears a laser module. Do not disassemble or modify this device in a way not
specified in the user manual, otherwise personal injury may be caused.
Please do not look directly at the laser beam as this is a Class I laser product. If there is a
need to repair it, please wear a laser protective eye mask with OD ≥ 4 and wavelength
ranging from 459 to 651nm
Laser beam
Screen Watching direction

1
Table of Contents
Device Accessories ............................................................................................................................................. 2
Feet Adjustment to Calibrate the Display Screen ............................................................................................... 3
Settings Adjustment ............................................................................................................................................ 9
Remote Control ................................................................................................................................................. 10
Control Panel .................................................................................................................................................... 13
Introduction to Terminals .................................................................................................................................. 15
Connection Description..................................................................................................................................... 16
First Start ........................................................................................................................................................... 18
OSD menu ......................................................................................................................................................... 19
Miscellaneous ................................................................................................................................................... 25
Specifications .................................................................................................................................................... 28
Ceiling installation……………………………………………………………………………………….……29
Appendices ........................................................................................................................................................ 33

2
Device Accessories
User Manual * 1 Remote control * 1 Power cord * 1
User
Manual

3
Feet Adjustment to Calibrate the Display Screen
Fit the Image to the Screen
[Note] Feet rotation of this device is described from an overlooking view.
1. If the image is wider than the
screen, move the projector
forward.
Front foot 1
2. If the image is narrower than
the screen, move the projector
backward.
Front foot 2
Back foot 1
3. If the image shifts to the left
side, move the projector to the
right.
4. If the image shifts to the right
side, move the projector to the
left.
Back foot 2

4
Adjust Length of the Left and Right Side of the Image
Parallel the Bottom of the Image with the Screen
1. If the right side of the image is
shorter than the left side, please
rotate the projector clockwise.
2. If the left side of the image is
shorter than the right side, please
rotate the projector
counterclockwise.
5. If the image shifts to the upper
side, rotate the feet of the
projector clockwise.
6. If the image shifts to the lower
side, rotate the feet of the
projector counterclockwise.
1. If the bottom of the image is
lower on the left and higher on the
right, please rotate the front foot 2
and back foot 2 clockwise and the
front foot 1 and back foot 1
counterclockwise.
2. If the bottom of the image is
lower on the right and higher on the
left, please rotate the front foot 2 and
back foot 2 counterclockwise and
the front foot 1 and back foot 1
clockwise.

5
Adjust Length of the Top and Bottom of the Image
Enlarge the Image (Rectangle) to Fit the Screen
If the image is narrower than the screen, move the projector backward.
Move the Image (Rectangle) to the Left Move the Image (Rectangle) to the Right
Lock
If the image shifts to the right side, move the
projector to the left.
If the image shifts to the left side, move
the projector to the right.
1. If the image is longer at the top and
shorter at the bottom, please rotate the back
foot 1 / back foot 2 clockwise or rotate the
front foot 1 / front foot 2 counterclockwise.
2. If the image is shorter at the top and longer
at the bottom, rotate the back foot 1 / back
foot 2 counterclockwise or rotate the front
foot 1 / front foot 2 clockwise.
After fitting the image to the screen, please
keep the projector still to avoid collision.

6
Adjust the image bottom to the same length of the
screen bottom (opening on the inner side of the
frame) and parallel with the screen bottom
Typical Approaches to Geometric Distortion Adjustment
Adjust the Upper-left Corner of the Image
1. If the top of the image is higher on the left and lower on the right, please raise the back foot 1
and the front foot 1 by the same height.
2. Rotate the projector clockwise to make image parallel with the screen.
3. If the situation remains after adjustment, please follow the above steps to further raise the back
foot 1 and front foot 1 and rotate the projector clockwise to make image parallel with the screen.
4. If the upper-left corner is inside the screen after adjusting, it means that feet are raised too high.
It is necessary to lower the back foot 1 and the front foot 1 by the same height and rotate the
projector counterclockwise to make image parallel with the screen.
The bottom of the image is slightly
Raise left feet of the
projector
The situation gets worse after raising left feet

7
Adjust the Upper-right Corner of the Image
1. If the top of the image is higher on the right and lower on the left, please raise the back foot 2
and the front foot 2 by the same height.
2. Rotate the projector counterclockwise to make image parallel with the screen.
3. If the situation still exists after adjustment, please follow the above steps to further raise the
back foot 2 and front foot 2 and rotate the projector counterclockwise to make image parallel with
the screen.
4. If the upper-right corner is inside the screen after adjusting, it means that feet are raised too high.
It is necessary to lower the back foot 2 and the front foot 2 by the same height and rotate the
projector clockwise to make image parallel with the screen.
The bottom of the image is slightly upward
Raise right feet of the
projector
Adjust the image bottom to the same length
of the screen bottom (opening on the inner
side of the frame) and parallel with the
screen bottom
The situation gets worse after raising right feet

8
Display Size 100inch 110inch 120inch
H(mm) 352 377 402
D(mm) 245 295 346
* Display size is the diagonal screen
* Due to mechanical tolerances the above numbers could change of ±5%; please consider this
while designing your installation.
H: The “H” is the distance from the bottom of the DTV-S to the lower edge of the screen
W: The “D” is the distance from rear of the DTV-S to the surface of the screen.
In case of ceiling installation refer to page 29.

9
Settings Adjustment
Focus adjustment:
Settings - Optical Machine - Focus, adjust it by pressing Up / Down buttons on the remote control.
Keystone correction:
Settings - Optical Machine - Keystone Correction, select a point for adjustment using Up / Down /
Left / Right buttons.
Press to adjust the selected point
Reset
ok

10
Remote Control
Pairing Steps
When using the remote control for the first time, press the Home Main Menu button to access the
pairing interface, and then press any key other than Standby of the remote control to start pairing.
[Note]
Pair the remote control with the projector within 3m from the projector when the projector is
powered on.
Generally, the first pairing of the remote control with the projector will be handled by the
service personnel when they come to install the projector for you.
If an unknown error occurs to the remote control, it may be caused by interference. Try to
Mute
Volume +/-
Display Mode
Media
Settings
On / Off button
Return/Back
OK/ENTER
Info Menu
Audio Settings
Home Main Menu
Screen Shot
Signal Resource
Table of contents
Other Sim2 Projector manuals

Sim2
Sim2 LUMIS 3D-S User manual

Sim2
Sim2 C3X1080 Operating manual

Sim2
Sim2 DLP Video Projector C3X Link User manual

Sim2
Sim2 Grand Cinema HT500 E-LINK User manual

Sim2
Sim2 GRAND CINEMA HT5000 User manual

Sim2
Sim2 CRYSTALCUBE User manual

Sim2
Sim2 SUPERLUMISEC User manual

Sim2
Sim2 HT500 link User manual

Sim2
Sim2 SuperCube User manual

Sim2
Sim2 PRO5000 User manual

Sim2
Sim2 DLP RS-232C User manual

Sim2
Sim2 Lumis HOST C3X Operating manual

Sim2
Sim2 LUMIS20TH User manual

Sim2
Sim2 Mico 40-50-ST Operating manual

Sim2
Sim2 Domino 35 User manual

Sim2
Sim2 DLINE D35 User manual

Sim2
Sim2 Grand Cinema HT305 Operating manual

Sim2
Sim2 C3X Lumis Operating manual

Sim2
Sim2 HT3000E Operating manual

Sim2
Sim2 M.150 User manual