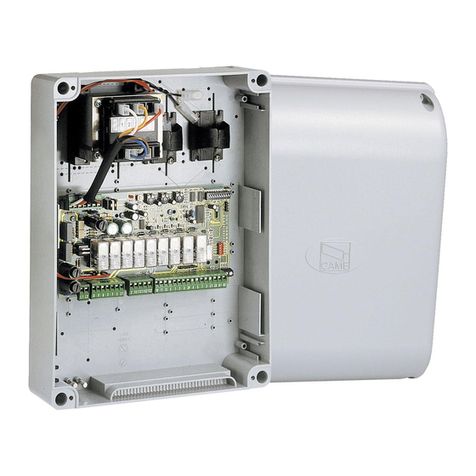
SIMON PROtec SHEV-3 User manual

KA_SHEV-3-6(-AP)_EN_10 www.simon-protec.com Date: 30.08.2018
Issue: 1.0/08.2018 [email protected]
KA SHEV-3 /-6 (-AP) EN 1.0
Copyright by SIMON PROtec Systems GmbH
Subject to technical changes and errors. All figures are exemplary.
Quick Guide
SHEV-3/-6(-AP)
Only valid in combination with the attached sheet
„Safety instructions and warranty conditions“!
Valid for following part numbers:
ST4 3140 (SHEV-3)
ST4 3141 (SHEV-6)
ST4 3146 (SHEV-3-AP)
ST4 3151 (SHEV-6-AP)
For further information, please visit
our product website:
short.simon-protec.com/sheven

Page 2
Table of contents
1. General ......................................................................................................................................3
1.1 Foreword to this quick guide .................................................................................................3
1.2 Use for the intended purpose ...............................................................................................3
2. Functional description .............................................................................................................3
2.1 Power supply (Tested according to EN 12101-10) ...............................................................3
2.2 Emergency power supply .....................................................................................................3
2.3 Control electronics (Tested according to prEN 12101-9) ......................................................3
2.4 Operating status indicators (OK, FAULT and ALARM) .........................................................3
3. Functions ...................................................................................................................................4
3.1 Ventilation function ...............................................................................................................4
3.2 Gap ventilation ......................................................................................................................5
3.3 Automatic ventilation CLOSED
(time-dependent) ........................................................................................................................5
3.4 Wind/rain detector (WTS) .....................................................................................................5
3.5 Reset function of the SHEV-emergency switch ..................................................................5
3.6 External output of messages ................................................................................................5
4. Mounting ....................................................................................................................................5
4.1 Mounting plastic housing ......................................................................................................5
4.2 Mounting steel-sheet housing ...............................................................................................6
4.3 Electrical connection .............................................................................................................7
4.4 FAS Auto-RESET function ....................................................................................................8
4.5 Wire lengths ..........................................................................................................................8
4.6 Motor cable monitoring by DD-100 .......................................................................................8
5. Commissioning ......................................................................................................................... 9
5.1 Commissioning SHEV 3/6 plastic housing ...........................................................................9
5.2 Commissioning SHEV 3-AP/6-AP steel-sheet housing ........................................................9
5.3 Troubleshooting ..................................................................................................................10
6. Technical data ........................................................................................................................11
7. Appendix .................................................................................................................................14
7.1 Manufacturer‘s declaration .................................................................................................14
7.2 EC manufacturer‘s declaration (distributor) ........................................................................14
7.3 General Conditions of Business and Terms of Delivery .....................................................14
7.4 Company addresses ...........................................................................................................14
7.4.1 System manufacturer .................................................................................................. 14
7.4.2 Germany ..................................................................................................................... 14
7.4.3 Switzerland ................................................................................................................. 14
7.4.4 Hungary ...................................................................................................................... 14

General
Page 3
1. General
1.1 Foreword to this quick guide
This quick guide serves as a fast introduction for
the installation by trained, experienced specialist
personnel (e.g. mechatronics technician or electri-
cian) and/or specialist personnel with knowledge
involving the installation of electrical devices.
The complete operating manual can be found on
our product website:
short.simon-protec.com/sheven
Please precisely observe the connection assign-
ment, the minimum and maximum performance
data (see chapter 6. „Technical data“ on page 11)
and the supplementary sheet „Safety instructions
and warranty conditions“.
1.2 Use for the intended purpose
The electric control panels SHEV 3/6 are compact
devices in steel-sheet or plastic housing (optional
variants are shown in the product catalogue) con-
taining power supply, emergency power supply and
the total operating and control electronics for the
operation of 24 VDC-actuators for windows and
smoke exhaust flaps.
SHEV 3/6 control the connected actuators in case
of fire, as well as for daily ventilation. During a pow-
er failure, the emergency power supply ensures the
function of the SHEV-equipment for at least 72
hours. The connection lines for SHEV-emergency
switch, smoke detector, Fire Alarm System (FAS)
and actuators are monitored.
2. Functional description
SHEV 3/6 (Smoke and Heat Exhaust Ventilation)
represent the compact control panel system, main-
ly used in staircases for smoke extraction and daily
ventilation.
It allows the direct connection of following devices
such as:
• smoke detector,
• SHEV-emergency switch,
• fire alarm-signal
and the control of actuators.
The SHEV 3/6 essentially consist of three compo-
nents:
1. power supply
2. emergency power supply
3. control electronics
2.1 Power supply (Tested according to
EN 12101-10)
If the SHEV 3/6 is connected to the mains, it pro-
vides the maximum output via the power supply
(mains-operation).
2.2 Emergency power supply
The emergency power supply of the SHEV 3/6 is
ensured by two 12 V lead batteries.
2.3 Control electronics (Tested according
to prEN 12101-9)
The complete control of the SHEV 3/6 is taken
over by a microcontroller.
2.4 Operating status indicators (OK,
FAULT and ALARM)
The SHEV 3/6 have three operational status indi-
cators on the control board to display the actual op-
eration mode.
• The green LED indicates mains operation.
• The yellow LED serves as status or fault
indicator.
• The red LED indicates alarm.

Page 4
Functions
3. Functions
3.1 Ventilation function
In order to use the SHEV 3/6 for ventilation, venti-
lation OPEN/CLOSE switches can be connected.
Pressing both switches (OPEN/CLOSE) simulta-
neously causes the function STOP. The ventilation
function can only be controlled during mains
operation.
Kon-
fig.
SW1
– 1
SW1
– 2
SW1
– 3
SW1
– 4
Configuration ventilation switch Remarks
Many different action behaviors can be allocated to
the switches. Therefore see table 1 underneath.
Figure 1: DIP switch SW1
Table 1: Matrix ventilation switch
1 OFF OFF OFF OFF Continuous OPEN/CLOSED Delivery state
2 ON OFF OFF OFF OPEN and CLOSED with dead man
function
Dead man function – the actuator
will run as long as the vent button
is pressed in OPEN or CLOSE.
3 OFF ON OFF OFF OPEN with dead man function/
CLOSED without
4 ON ON OFF OFF OPEN without dead man function/
CLOSED with
5 OFF OFF ON OFF Gap ventilation In case of ventilation, the actuators
open for the programmed time.
6 ON OFF ON OFF Automatic ventilation CLOSED The system closes automatically
after the expiration of the time.
7 OFF ON ON OFF Gap ventilation with automatic
ventilation CLOSED
Combination of configuration 5
and 6.
8 OFF OFF ON ON Programming mode for gap
ventilation
9 ON OFF ON ON Programming mode for
automatic ventilation closed
10 ON ON ON ON Ventilation switch closed Ventilation disabled

Mounting
Page 5
3.2 Gap ventilation
Gap ventilation can be activated by setting DIP-
switch SW1 –3to ON. This function is time con-
trolled and factory-set to 3 seconds.
3.3 Automatic ventilation CLOSED
(time-dependent)
The automatic close function of the actuators after
ventilation can be activated by setting DIP-switch
SW1 –1 and SW1 –3 to ON. This function is time
controlled and factory-set to 10 minutes.
3.4 Wind/rain detector (WTS)
if a wind /rain detector is installed, the SHEV 3/6
receives in case of rainfall or strong winds (>5 Bft)
a signal from the wind /rain detector and triggers
the connected actuators automatically in closing
direction.
3.5 Reset function of the SHEV-
emergency switch
Any ALARM-signal can be reseted by the SHEV-
emergency switch. By pressing the RESET push-
button for the first time, the ALARM-signal will be
reseted.
By pressing the RESET push-button a second
time, the actuators will be triggered in closing
direction.
3.6 External output of messages
For redirection of fault or other messages the
SHEV 3/6 is equipped with two volt-free relays or
contacts.
In the factory setting contact 1 indicates „ALARM“
and contact 2 indicates „OK".
4. Mounting
4.1 Mounting plastic housing
Figure 2: Mounting points plastic housing
SHEV 3
ATTENTION
The dead man function in the OPEN direction is in-
active during limited ventilation.
INFORMATION
Further information on the functions described here
in chapter 3 can be found in the operating instruc-
tions for download at
short.simon-protec.com/sheven.
Danger
Mounting shall be carried out only by pro-
fessional personnel (qualified electrician)!
ATTENTION
The openings of the battery cells (round lids on top
of the batteries) must not point downwards, because
this would lead to a leak out of the battery!
ATTENTION
Do NOT connect the battery during installation!
Mounting points housing
Mounting points batteries
Battery port

Page 6
Mounting
Figure 3: Mounting points plastic housing
SHEV 6
4.2 Mounting steel-sheet housing
Figure 4: Mounting points steel-sheet housing
SHEV 3-AP
Figure 5: Mounting points steel-sheet housing
SHEV 6-AP
Figure 6: Connecting cable
Mounting points housing
Battery port
Cable tie

Mounting
Page 7
4.3 Electrical connection
Figure 7: Wiring diagram total (simplified illustration)
DANGER
Disconnect the power supply cord for all poles from the mains. The connection of the SHEV 3/6 (-AP) must be
done volt-free!
1363534333231302928
27
2625
24
23
2221
20
234567 8910 11 12 13 14 15 16 17 18 19
NO NCCNO NCCRARA
–
B3
B2
AZE
Contact 2Contact 1FASSmoke DetectorVent Switch
Motor 1 Motor 2
Motor fuses:
SHEV 3 – T3,15A
SHEV 6 – T6,3A
Wind/Rain
Emergency Button
SW 1
ON OFF
1
2
3
4
5
6
7
8
9
10
Reset
Alarm
LED OK
LED Alarm
LED Fault
L1
NPE
+
–
––
S OGIG OSOOSS
–
ELZOK YM RZ B1
RA
L1
NPE
+
–
+
–
Battery
Battery
27kΩ
1
2
1
2
27kΩ
+–
+–
–
–
AZ
E
AZ
E
DD-100
SGO
OS
OS
51 2
3 4
OK
Y
M
B1
RA
RZ
GND
M
B1
RA
RZ
GND
HE 081/
HE 086
HE 080/
HE 082/
HE 087
FAS
RM 3000
Vent
Switch
Actuator 2Actuator 1
WTS
Battery Connection
DD-100
SGO
27kΩ
Mains Connection
all-pole disconnecting mains switch
provided by client (L1, N)
LED indications are only visualized
during mains operation.

Page 8
Mounting
Figure 8: Wiring diagram smoke detector
Figure 9: Wiring diagram thermostat
4.4 FAS Auto-RESET function
Generally, all SHEV-alarms must be reseted man-
ually by pressing the RESET button (onboard /
EOS). For the detection line 3 (FAS / fire alarm sys-
tem), the Auto-RESET function can be activated
which will reset the SHEV and power the relays into
CLOSE direction after the FAS has been reseted.
Setting: DIP switch SW1–10 set to ON.
4.5 Wire lengths
4.6 Motor cable monitoring by DD-100
The EOL diode terminators DD-100 are for the
cable monitoring of the motor outputs. They need
to be installed in the junction box of the last
actuator.
INFORMATION
The use of shielded cables is recommended for the
detection lines.
RM 2860 / TH 4860
(max. 6)
RM 3000
(max. 8)
L1i
L1oL2
L1i
L1oL2
Smoke Detector Smoke Detector
27kΩ 27kΩ
AZE
Ventilation Button
AZ
E
AZ
E
Ventilation Button
LZE
–
Wind / Rain
521
WTS
43
THM 200
(not part of delivery)
AZ –
green
blue
black
Thermostat
(2 Channel)
white
grey
ϑ
SHEV 3/6
1098 242322
INFORMATION
Dimension indications (rule of thumb):
Wire cross-section [mm2] = wire length [m]
x number of motors
x power input per motor [A]
/ 73.
The national regulations continue to apply.

Commissioning
Page 9
5. Commissioning
5.1 Commissioning SHEV 3/6 plastic
housing
Connect battery plug to port “Battery backup”
(see fig. 2 /3 on page 5/6).
Fasten the battery with 4 screws M4 x8 mm
(screws are included in the scope of delivery).
Figure 10: Mounting points battery
SHEV 3 plastic housing
Figure 11: Mounting-points battery
SHEV 6 plastic housing
5.2 Commissioning SHEV 3-AP/6-AP
steel-sheet housing
Place the battery pack on the bottom panel of
the housing.
Connect battery plug to port "Battery backup"
(see fig. 4 /5 on page 6).
Figure 12: Battery Connection SHEV 3-AP
steel-sheet housing
Figure 13: Battery Connection SHEV 6-AP
steel-sheet housing
ATTENTION
Only after the SHEV 3/6(-AP) has been commis-
sioned successfully and the permanent on-site
mains power supply is ensured, the battery may be
installed and connected.
INFORMATION
An error message if the battery is disconnected may
appear at least after 8 minutes (green LED flashes,
yellow LED lights up).
ATTENTION
Only batteries approved by the panel manufacturer
are allowed for connection. The control panel loses
the relevant certifications if any other battery is
used, warranty expires.
Mounting points battery
Anschluss „Akku“ X5

Page 10
Commissioning
Connect the PE cable to the PE-connection on
the lid.
Figure 14: PE-connection
Place the cover and fasten it with the two
screws on the side.
Figure 15: Close the housing
5.3 Troubleshooting
ATTENTION
After connecting the battery pack, the RESET but-
ton must be pressed for 5 seconds to initialize the
SHEV!
PE-connection
Fixing screws
ATTENTION
Due to the low loop current, the insulation resistance
of the monitored wires (B1, B2 and B3) must be
checked!
The insulation resistance must be >20 MΩ/km
(manufacturer information), otherwise wire
interruptions will no longer be detected reliably .
INFORMATION
The operating states of SHEV 3/6 (-AP) can option-
ally be visualized with SIMON-LINK (only during
mains operation).
For more information visit
short.simon-protec.com/slen

Technical data
Page 11
6. Technical data
Power supply Information
Nominal voltage 230 VAC
Acceptable voltage range 195 VAC to 264 VAC
Power consumption10.56 A (SHEV 3)
1.20 A (SHEV 6)
Min. series fuse (on site) C 16 A
Connected load 103 VA (SHEV 3)
206 VA (SHEV 6)
Inrush current approx. 10 A (SHEV 3)
approx. 20 A (SHEV 6)
Frequency range 47 Hz to 63 Hz
Mains fuse (internal) Fuse characteristic: Type T 1.25 A
Clamp format 0.5 mm² – 2.5 mm²
Output information motor channels
Duty cycle (D) 30 %
Output voltage mains operation (nominal) 24 VDC
Voltage range (mains operation) 23.0 VDC to 24.5 VDC
Output voltage (battery operation (nominal) 24 VDC
Voltage range (battery operation) 21 VDC to 28.6 VDC
Output current (Iout) (short-term operation)
(Iout = Imot1 + Imot2)
3 A (SHEV 3)
6 A (SHEV 6)
Power output (non-stop operation) 50 W (SHEV 3)
100 W (SHEV 6)
Power output (short-term operation) 73.5 W (SHEV 3)
145 W (SHEV 6)
Output fuse for actuators Fuse characteristic:
Type T 3.15 A (SHEV 3)
Type T 6.3 A (SHEV 6)
Ripple of the output voltage
(0 A < Iout < 3 A resp. 0 A < Iout < 6 A)
500 mVpp
Power outage bridge-over time 10 ms
Clamp format 0.5 mm² – 2.5 mm²
1. Power consumption at maximum load of the supply system

Page 12
Technical data
Connection data of the emergency switches (HE 080 / HE 082 / HE 087 & HE 081 / HE 086)
Maximum number of main emergency switches
(e.g. HE 080 / HE 082 / HE 087) 1
Maximum number of the off site emergency switches
(e.g. HE 081 / HE 086) 7
Output voltage range (B1) Clamp 7 17.5 VDC to 18 VDC
Connection information fire alarm system (FAS)
Output voltage range (B3) Clamp 28 17.5 VDC to 18 VDC
Reset time after SHEV-reset
(by disconnecting from mains B3) Clamp 28 3 sec
Connection information smoke detector (RM 3000 / RM 2860)
Maximum number 8 x RM 3000
6 x RM 2860
Output voltage range (B2) Clamp 25 17.5 VDC to 18 VDC
Connection information wind-/ rain detector (WTS)
Maximum number 1
The connection of the wind and rain detector (WTS) is deactivated in emergency power operation
Output voltage range (E) Clamp 9 23.0 VDC to 24.5 VDC
Current carrying capacity (E) Clamp 9 max.150 mA
Connection information ventilation switch
Output voltage range (E) Clamp 22 23.0 VDC to 24.5 VDC
Connection information free input
Input voltage range (I) Clamp 16 DO NOT USE!
Connection information volt free contacts (NO–C–NC)
Voltage and current rating of the switching
contacts 1 and 2
Clamp 32 on 31/33
Clamp 35 on 34/36
max. 30 VDC,
2ADC (60 W / 62.5 VA)
Mechanical features — plastic housing
Size SHEV 3 (w x h x d) 254 x 180 x 111 mm
Size SHEV 6 (w x h x d) 361 x 254 x 111 mm
Weight (incl. battery) 4.40 kg (SHEV 3)
6.40 kg (SHEV 6)
Protection type IP661according to EN 60 529
Housing Polystyrol Halogen-free
Mechanical features — steel-sheet housing
Size SHEV 3 AP (w x h x d) 301 x 323 x 85 mm
Size SHEV 6 AP ( w x h x d) 301 x 444 x 85 mm
Weight (incl. battery) 4.80 kg (SHEV 3 AP)
8.30 kg (SHEV 6 AP)
Protection type IP20 according to EN 60529
Housing steel-sheet (powder-coated)
Colour RAL 9010
Protection class I2

Technical data
Page 13
Connection and operation
Connection see chapter Figure 7: „Wiring diagram total (simplified illustra-
tion)“ on page 7
Terminal clamps Tension spring clamps 0.5 mm² – 2.5 mm²
Deadlock according to prEN 12101-9 Option, factory setting: Yes
Maximum wire length between control unit and
actuator
see chapter 4.5 „Wire lengths“ on page 8
Pause time during direction change 200 ms
Maintenance See supplement „Safety instructions and warranty conditions“
Installation and environmental requirements
Operating temperature
-5 to 40°C3
Storage temperature
Suitable for outdoor installation No
Registrations and certificates
EN compliant As per EMC-directive 2004/108/EC
and the low-voltage directive 2006/95/EC
Additional registrations, certificates ISO 21927-9
prEN 12101-9
EN 12101-10
EPD acc. ISO 14025 and EN 15804
Classification as per prEN 12101- 9 Class D
Classification as per EN 12101-10 Class A
Environmental Class as per EN 12101-10 1
Control time of analog-/digital-input
Input digital (RZ, RA, LZ, Z, A) 500 ms
Input analog (B1, B2, B3) during mains operation 500 ms
Input analog (B1, B2, B3) during emergency power
operation
2500 ms
Technical information lead battery
Maintenance-free lead battery
Size (w x d x h) 178 x 34 x 64 mm
Weight 2 x 0,95 kg
VdS registration G101139
Output voltage per battery 10.5 VDC to 14.1 V DC
Output voltage total (series connection) 21.0 VDC to 28.2 VDC
Rated capacity (total) 2.3 Ah
Service life approx. 4 years
1. With respective use of IP66 cable lead-through
2. The protective conductor is used as a functional conductor for a higher EMC immunity and should therefore be connected.
3. This temperature range applies to all components of the SHEV 3 / 6 system (including the battery).

Page 14
Appendix
7. Appendix
7.1 Manufacturer‘s declaration
We hereby declare the conformity of
the product with the applicable guide-
lines. The declaration of conformity
can be viewed in the company and will be delivered
upon request. This declaration certifies conformity
with the directives mentioned, but gives no guaran-
tee of characteristics. This declaration becomes in-
valid following a change that has been made with-
out our consent.
7.2 EC manufacturer‘s declaration
(distributor)
The installer is responsible for the proper mounting
or commissioning and the preparation of the decla-
ration of conformity in accordance with the EU di-
rectives.
7.3 General Conditions of Business and
Terms of Delivery
The currently valid conditions for products and ser-
vices of the electrical and electronics industry
(green delivery terms) apply for deliveries and ser-
vices, including the supplementary clause “Extend-
ed retention of title”. These are published by ZVEI
Frankfurt. If you are not familiar with these, we
would be happy to send them to you.
The agreements are also available for download at
short.simon-protec.com/agben
Passau is the established legal venue.
7.4 Company addresses
7.4.1. System manufacturer
SIMON PROtec Systems GmbH
Medienstraße 8
D ದ94036 Passau
Tel.: +49 (0)851 98870-0
Fax: +49 (0)851 98870-70
Internet: www.simon-protec.com
7.4.2. Germany
SIMON PROtec Deutschland GmbH
Medienstraße 8
D ದ94036 Passau
Tel.: +49 (0)851 379368-0
Fax: +49 (0)851 379368-70
SIMON PROtec Deutschland GmbH
Ammerseestraße 75
D ದ82061 Neuried
Tel.: +49 (0)89 78170-0
Fax: +49 (0)89 7917972
Internet: www.simon-protec.de
7.4.3. Switzerland
SIMON PROtec Systems AG
Allmendstrasse 38
CH ದ8320 Fehraltorf
Tel.: +41 (0)44 9565030
Fax: +41 (0)44 9565040
Internet: www.simon-protec.ch
7.4.4. Hungary
SIMON RWA Rendszer Kft.
Sodrás utca 1. fszt. 1
H ದ1026 Budapest
Tel.: +36 (0)30 5520424
Internet: www.simon-protec.hu
This manual suits for next models
3
Table of contents
Popular Control Panel manuals by other brands
Alderon Industries
Alderon Industries Check It Panel Operation, maintenance & installation manual
ESAB
ESAB Caddy TA34 AC/DC instruction manual
DSC
DSC PowerSeries Neo user manual
Pulsar
Pulsar 17/40/DSPR/L/PUSTA Assembly instruction

Vital Home Systems
Vital Home Systems VHS-1060 manual

Telenot
Telenot hiplex 8400H BT 800 user manual
