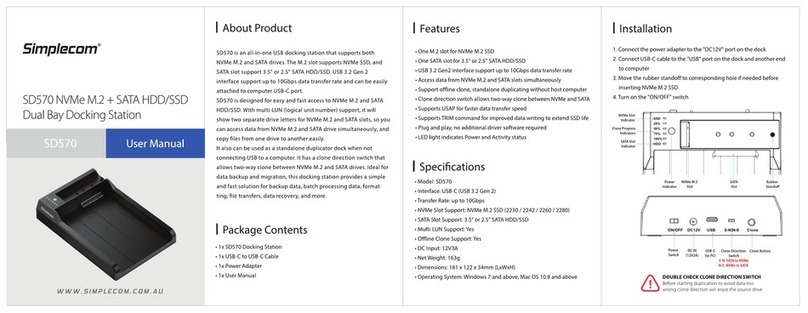
Simplecom SD422 User manual

Simplecam®
SD422
1'ual
Bay
USB
3.0
Docking
Station
for
2.5
"
and
3.5"
SATA
Hard
Drive
Vl
User
Manual
www.s
imp
lecom.com.au
ww
w.simplecom.com.au
© Simplecom Australia All Rights Reserved. Simplecom isa registered
trademark
of
Simplecom
Au
stralia Pty Ltd. All other
tr
ademarks are property
of
their
re
spective owner. Specifications and external app
ea
ran
ce
a
re
sub
ject
to
change w
ithout
notice.Warran
ty
and technical
support
covering
th
is
product
are only
va
lid in
th
e country or region
of
purcha
se
.
~
www.
si
mplecom.com
.au
~
s
uppo
rt
@s
i
mp
lecom.
co
m.au

I
Introduction
SD422
is
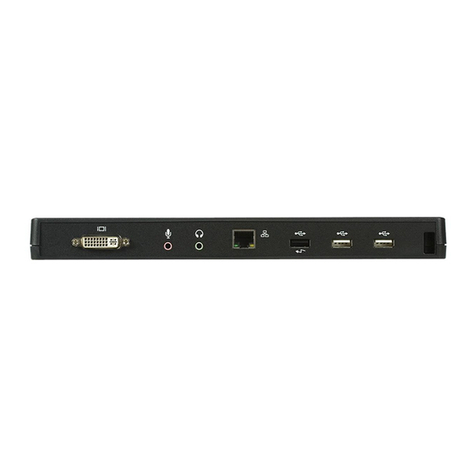
a dual bay
SATA
docking
station designed
to
support
two
2.5" or 3.5"
SATA
drives simultaneously. It provides a simple, fast and
efficient solution
for
data recovery, drive imaging, and service
centers,
or
any
home
and
work
environment
that
requir
es
fast access
to
uninstalled/archived
SATA
drives.With
USB
3.2 Gen 1 (formerly
known
as
USB
3.0) interface, you can take advantage
of
super speed
data transfer rate
up
to
SGbps.
SD422 can be connected
to
a
computer
via
USB
for
use
as
an
external hard drive dock,
with
Multi-LUN Support, 2
SATA
slots
wi
ll
show
separate drive letters, so you can access data
from
2
SATA
slots
simultaneously, you can also
copy
files
from
one
drive
to
another
drive
eaosily.
It
also can be also used
as
a standalone
duplicator
dock
when
not
connecting
USB
to
a
computer
and lets you clone
an
existing hard drive
without
the
use of a host computer.
I
Installation
1. Connect
the
power
adapter
to
the
Hard Drive Dock
2.
Connect
the
USB
3.0 Cable
to
Computer
USB
port
3. Insert 2.5"
or
3.5
"
SATA
Drive
into
the
SATA
slot
4.
Switch
on
the
Hard Drive Dockand
it
is
ready
to
use
f:'
(
3.5
•
HOO
2.5•
HDD
4lli
I
Features
• Designed
for
direct
insertion
of
two
2.5 inch
or
3.5
inch
SATA
drives
•
USB
3.2 Gen 1
(USB
3.0)
Interface,transfer rates
up
to
SGbps
• Backwards
compatible
with
USB
2.
0,
transfer rates
up
to
480Mbps
• Multi-LUN
Support
, separate drive letters
for
2
SATA
slots
•
LED
light
indicates Power and
Activity
status
• Hot-swappable,
plug
and play, no drivers needed
•
Support
UASP
(USB
Attached
SCSI
Protocol)
•
Support
offline clone, standalone
duplicating
without
host
computer
I
Specifications
• Model:SD422
• Interface:
USB
3.2 Gen 1
(USB
3.0)
up
to
5Gbps
• Material:
ABS
Plastic
•
SATA
SlotsSupport:
two
2.5" or 3.5"
SATA
HDD
or
SSD
•Offline Clone Support:
Yes
• Multi-LUN
Support
:
Yes
(separate drive letters
for
2
SATA
slots)
•
DC
Input: 12V3A
• Dimension: 152x109x62mm (LxWxH)
•Operating System Support:Windows XPand above, Mac
OS
10.4
and above
I
Package
Contents
• 1x
USB
3.0 Dual
Bay
SATA
Docking Station
• 1x
USB
3.0 Cable
• 1x Power Adapter
•
lx
User Manual

I
System
Requirement
•Available
USB
3.0 for Superspeed data transfer
•Operating Systems: Windows
XP
and above (32/64-bit), Mac
OS
Xl
0.4 and above, Linux
I
Product
• Front
Po
w
er
i
ndic
a
tor
HDDl
Indicator
Clone
Progress
Indi
cator
HDD2
Indicator
Clone
Button
• Interface
(
2.5/3.SSA
T
AHDD
,SS
D)
r
=======
'==---
{__j
__
HDDl
{Sourc
e)
(2
.5/3
.5
SATA
HOO,SSD
]
f---+--
HDD
2
(Tilrget)
2.s•
HDIO
U
SB3.0
12V
DC
Powe
r
Switch
I
Offline
Clone
a)
Switch
off
the
dock,
unplug
the
USB
cable
from
computer
b)
In
se
rt
the
HDDs
to
"HDD-1 "&"HDD-2''. HDD-1
is
the
source HDD
to
be cloned, HDD-2
is
the
target
HDD
to
cloning
c) Switch on
the
dock, press
the
Clone Button 2 times, Clone will
start and Clone Progress Indicators will start blinking
from
25
%
d)
Clone in progress: 25%, 50%,
or
75% Indicators will
blink
according clone progress
e) Clone finished when 100% Indicator
is
constant on
f) Switch
off
the
power
afterclone finished,
then
you can take
out
HDDs,
pl
ease
be careful
the
hot
surface
of
HDDs due
to
long
time
cloning process
Important Note
1.
Please
backup any
important
data before cloning process
2.
Target HDD (HDD-2) capacity must be equal
or
larger than
Source HDD (HDD
-1
)
3.
USB
cable must be
unplugged
when clone in progress
4. Plea
se
do
not
move HDDs
or
disconnect
power
when clone in
progress
5.
Press
the
clone
button
for 3 seconds enter clone
mode
6. Cloning
time
depends on
the
HDD size (Not Data
Size)
7.
Please
be careful
the
hot
surface
of
HDDs after clone finished
8.
Pl
ease
note
offline clone
is
hardware level copy, and
no
matter
data size on
the
source HDD,
it
will
copy
from
first sector
to
last
sector
of
entire hard drive. (e.g. 80GB HDD will take around 30
mins,
500GB
HDD will take around 3 hours and
no
matter
how
much data on source HDD)

I
Troubleshooting
Unable
to
startcloning.
Please
check whetherthe actual capacity
of
HDD-2 disk
is
larger
than
HDD-1
disk (HDD-2 must be equal
or
larger than
HDD-1
),
otherwise
it
won
't
wor
kwhen HDD-1disk actual capacity
is
larger
than HDD-2 disk.
Indicator
light
stops
flashing
up
during
offllne
duplicating.
It
might
because
of
disk bad sectors
so
that
data couldn't be cloned
as
usual.
You
have
to
change agood disk.
Where
is
rest
capacity
of
HDD-2
disk
after
cloning?
Aftercloning, the rest capacity
of
HDD-2 disk
is
showed and
operated via Windows "Disk management'; which located at
"AdministrativeTools"
in
Control Panel, Disk Management located
on the left-hand side
of
the
Computer Management window, under
the Storage heading.
Please
backup
any
important
date
on
HDD
-2
befo
re
cloning
.
Because once you startcloning, HDD-2 hard di
sk
partition methods
and data are completely cloned
as
a hard disk.Our company does
NOT
undertake any responsibility
for
data
or
economy
loss
which
could bring by damaged data.
2TB
or
larger
hard
disk
couldn't
be
identified
by
USB
under
windows
XP.
Because
the
ma
x
imum
capaci
ty
of
hard disk which Windows
XP
can
support
is
2TB
and couldn't be identified by system
if
over
2TB
.
It
only
supports after upgrading
the
operating system WindowsVista
or
above and we suggest changing hard disk i
nto
a
GPT
disk
partition.
I
Note
•Ane
w hard drive needs
to
be initialized and partitioned before
appear in Windows Explorer
or
Mac Desktop.
•Do
not
remove the hard drive while
it
is
in
use
. Doing
so
may
corruptthe data on the hard drive
or
cause damaged
to
the
hardware.
•Simplecom takes diligent care
of
all goods, however Simplecom will
not
be responsible for any loss
of
data,and
that
it
is
the responsibility
of
the customer
to
backup any data
that
he/
she
believes
to
be
important, valuable,
or
irreplaceable.
I W
ar
ra
n
ty
1
Year
limited Warranty.Ourgoods come
with
guarantees
that
cannot
be excluded under the Australian Consumer
Law.
You
are
entitled
to
a
replacement
or
refund
for
a majorfailure and for compensation for
any
other
reasonably foreseeable
loss
or
damage.
You
are
also entitled
to
have
the
goods repaired
or
replaced
if
the goodsfail
to
be
of
acceptable quality and thefailure does
not
amount
to a majorfailure.
For
our
assistance
with
regards
to
warranty please email
to
support@simplecom.com.au
or
create a
support
ticket at
http:
//
www.simplecom.com.
au
Other Simplecom Docking Station manuals
