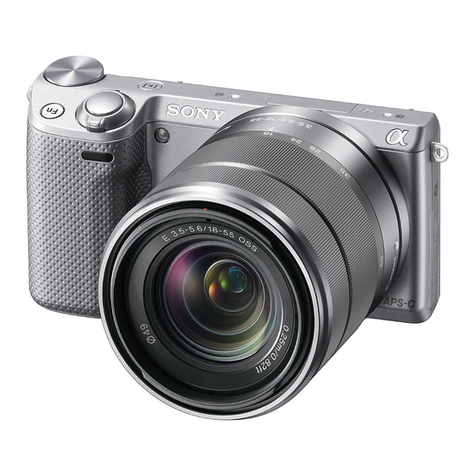
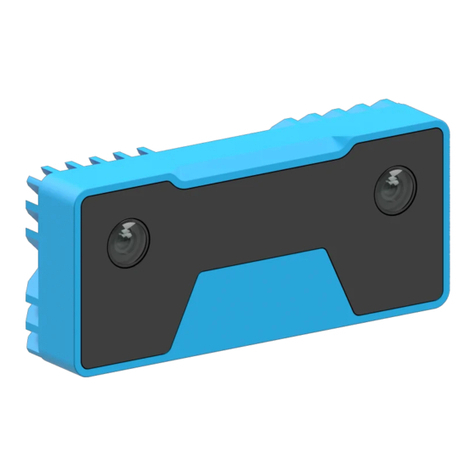
Sinarcam Multipurpose Digital Camera User manual

Sinarcam1UsersGuideE.rtf Date: 14.03.00 14:22
Contents
What’s new in this Version
Sinarcam Installation Instruction
1. Hardware Installation
2. Software Installation
3. Tips and Tricks
Sinarcam Users Guide
1. Overview
2. Important Safeguards and Precaution
3. Limitation
4. About the Sinarcam stand alone system
5. About the Sinarcam mounted on a p2
6. About the Leaf DCB-II LV
7. About the Sinaron Digital Lenses
8. Sinar Lensboards
9. Setup the Sinarcam as a stand alone camera
10. Setup the Sinarcam on a sinar p2 view camera
11. Dust on the LCD shutter / color filters
12. What to do if dust is on the CCD or on the filter
13. How to clean the color filters
14. Live mode
15. Sinarcam Shift Adapter
16. Trouble Shooting
Sinarcam Components and Configuration
1. Components from Sinar
2. Additional components from Sinar when mounted on a Sinar p2
3. Additional components from Leaf
4. Additional components
5. Configuration Sinarcam / Stand alone

Sinarcam1UsersGuideE.rtf Date: 14.03.00 14:22
What’s new in this version
(see also the file “Read-me” on the floppy disk containing the Sinarcam software)
Version Remarks
1.4.0
12-Jan-98 Bug removed: If film mode is selected at start-
up, the filter mode is now set as
displayed. New startup pics. New Sinar Digital Lenses added: Sinaron digital 35
mm, Sinaron digital 120 mm.
1.3.3
13-Jun-97 Automatic lens boards are supported and new lens codes for such boards
added; Aperture range of sinaron 45 mm lens corrected
1.3.2
26-Feb-97
Bug removed: Single color mode does not change after changing aperture or
exposure time. Color mode remains the same after reset of shutter
1.3.1
04-Feb-97 New lensboard codes added to the lens database
1.3
15-Jan-97 Cleaning dialog added (select Menu Setting -
> Clean Filter) Bug removed: The
aperture is now always set after start of application
1.2
14-Nov-96 Supports tri-color exposures when film mode is selected
1.1
01-Nov-96 Release Viscomm 96: selection of serial port
1.0
16-Sept-96 First release Photokina 96

Sinarcam1UsersGuideE.rtf Date: 14.03.00 14:22
Sinarcam Installation Instruction
1. Hardware Installation
•Connect the serial cable to the modem or printer
port of the Macintosh computer and to the Sinar
power supply.
•Connect the Sinarcam cable (4 m long) to the Sinar
power supply.
•Connect the synchro cord to the Sinar power
supply.
•Connect the Leaf DCB LV to the Macintosh
computer (see Leaf installation manual)
•Turn on the Sinar power supply and the Macintosh
computer.
2 Software Installation
•Insert the Sinarcam floppy disk in your
Macintosh computer and double click the
Sinarcam floppy icon.
•Double click the read-me icon to see the latest
information about the software.
•If you have a Power Macintosh computer with System Software
7.5.2 or earlier, drag the DMA-extension onto the system folder to
install the extension automatically to the right place. In this case,
you need to restart the computer. You don't need to install the
extension with System Software 7.5.3 and higher. To find out the
version of your System Software, select the menu entry "About
this Macintosh” in the Apple-menu.
•To start the Sinarcam software, double click the Sinarcam icon.
•During startup of the software, you have
a chance to select the serial port to which the sinarcam is
connected. The software automatically continues after some
seconds if you don’tchange the serial port.
Synchro cord
connector
Sinarcam
cable
connector
Serial cable
connector

Sinarcam1UsersGuideE.rtf Date: 14.03.00 14:22
•You cannot use the printer port when AppleTalk is active. To turn off AppleTalk, switch to the
Finder application and select Chooser from the File menu. Click the “Inactive” radio button at the
bottom of the Chooser window and close the window. Start now the Sinarcam software.
•If the Sinarcam software gets no answer from the sinarcam body the following error message
appears:
•The sinarcam software supports CCD-backs and film holders. Click the appropriate radio button to
display either the color modes or the command buttons for taking the picture.
•To remotely set the aperture, you must connect the Aperture unit to the camera. Restart the
application. Note that the aperture slider will become active and displays the aperture range of the
selected lens. Note also that the “stop up” and “stop down” buttons are available when the aperture
unit is connected.

Sinarcam1UsersGuideE.rtf Date: 14.03.00 14:22
•If the software gets stuck once e.g. by mistakenly turning off the Sinar power supply when the
program is still running, you need to force-quit the application. Hold down the ALT-key, the option
key and the apple key simultanously and press the ESC key.
•If you now restart the application, a message may appear informing you that the serial port is still
in use. Try to close the port by clicking on the close button and continue.
•If the filterwheel or the shutter blade gets jammed by any reason or if another hardware problem
occurs (bad lens code, wrong aperture), the software displays the following error message: Try to
reset the sinarcam
and continue. See also the trouble shooting table below.

Sinarcam1UsersGuideE.rtf Date: 14.03.00 14:22
•A warning message will appear if you connect an Expolux shutter or any other camera which is not
compatible with this software. You must use a Sinarcam with this Mac-Software or for example the
Expolux shutter with the Expolux software.
•Select “About Sinarcam” in the Apple menu to display the serial number, the version of the
microprocessor inside the sinarcam and other data. You may need this values when getting in
touch with your local sinar dealer in case of upgrading or checking the unit.
3 Tips and Tricks
•You can test the proper working of the sinarcam even when no computer is connected. After
turning on the Sinar power supply, the sinarcam must reset. After turning on the Leaf power
supply, the sinarcam must close. If you connect a manual release cable to the Sinar power supply,
you are able to make tricolor exposure with preset exposure time 1/8 sec and preset f-stop 8.
•Normally the digital back generates the exposing signal when the software is in CCD mode. There
is however another way to manually control the camera for mainly testing purposes: press cfor
closing, xfor exposing and ofor opening the camera. Note however that the hardware signals
from the digital back have always priority, e.g. if the digital back makes the camera close, you
cannot open it by the key command.
•If you have to interrupt a tricolor-exposure in the Leaf-software by any reason, the sinarcam
filterwheel stops at its last position and does not go to its home position by itself. Klick again into
the “Tri-Shot”-radio button to reset the filter wheel for the next tricolor-exposure.

Sinarcam1UsersGuideE.rtf Date: 14.03.00 14:22
Sinarcam Version 1.4 Users Guide
1. Overview
The Sinarcam is a new multipurpose digital camera that can be used as a stand alone system or in
conjunction with a sinar view camera. Various accessories can be combined in numerous
configurations thus continuing the famous modular system of sinar. You can even use the sinarcam to
take chemical pictures. But in contrast to other cameras that were mainly built for chemical film and
adapted for digital imaging, the sinarcam is truly designed as a digital camera that can be extended in
many different ways. With the sinarcam system you are able to assemble exactly the camera that is
optimally tailored to the assignment at hand.
2. Important Safeguards and Precautions
Handle the equipment as you would any valuable camera. Treat the system as you would your best
lens. Do not drop, expose the camera to extremly low or high temperature, to water and moisture or
to dust and smoke.
Mishandling can damage the system resulting in an expensive repair. Be careful especially when
cleaning the CCD-sensor or the color filters and follow exactly the instruction by Leaf or by Sinar later
in this manual.
3. Limitation
All CCD sensors have certain pixel-errors which normaly are invisible in a digital image due to
software corrections applied to the pixel error. It is however possible that certain pixel errors become
visible when zooming into the image if the surrounding pixels have some certain structure. Especially

Sinarcam1UsersGuideE.rtf Date: 14.03.00 14:22
the live video image may show single pixel errors by occasion due to reduced pixel correction which
results in a higher frame rate of the live To be able to do the pixel correction the software needs some
correction files (Blemish-and Gain-files) which must reside in the same folder as your main
application. Normally the Leaf software installation routine will automatically install all the files at the
right place on your computer harddisk.
4. About the Sinarcam stand alone system:
•compact camera, easy setup
•straight forward use and handling
•reasonable prized starting system
•able to be combined with other sinar view cameras at any time
•use of existing SLR lenses (Olympus, Nikon, Canon) or medium
format lens (Hasselblad, Mamiya)
•Shift lenses or shift lens boards available
5. About the Sinarcam mounted on a p2:
•full use of all view camera features
•easy sharpness compensation by use of asymmetrical swing and
tilt axis
•use of highest quality digital lenses in various focal lengths
•aperture is automatically opened or closed when switching
between taking picture and focussing
6. About the Leaf-DCB-II LV
•three shot digital back (RGB) producing superior color fidelity
•live image on computer screen during focussing
•2k x 2k pixel CCD yielding 4 Mio pixels, 14 bit per pixel resolution
•24 MByte High resolution color files, 12 MByte Tiff-Export files
•proven software with many add ons
•well established standard in digital photography

Sinarcam1UsersGuideE.rtf Date: 14.03.00 14:22
7. About the Sinaron digital lenses
To permit creative interiour photographs several lenses with different focal length with zoom and with
shifting capabilities are available.By means of different lens board adapters you can use existing
lenses for medium format cameras and 35 mm cameras. Because the medium format lenses have a
wide image circle the corresponding adapter board is also available with shift capability which allows
you to further improve your digital images.
LENS TYPE FOCAL
LENGTH SHIFT X
DIRECTION SHIFT Y
DIRECTION APERTURE
Sinaron digital
Zoom 35-80 35 -80 mm n.a. n.a. 2.8 -22
Sinaron digital
Shift 35 35 mm + / -15 mm + / -18 mm 2.8 -22
Sinaron digital
Shift 24 24 mm + / -8 mm + / -10 mm 3.5 -22

Sinarcam1UsersGuideE.rtf Date: 14.03.00 14:22
8. Sinar Lensboards
For optimal focussing the aperture should always be fully open to allow best depth of field. With so
called manual lensboards, it is required to switch from the working aperture to fully open manually.
Automatic-lensboards for Sinaron digital-and Nikon-lenses allow you to control the aperture
automatically: By working with the Sinarcam compact in the live-video-mode, the lens will
automaticaly open up, to guarantee a optimal focussing with fully open aperture. By leaving the live-
mode to take a picture, the automatic-board will close down the aperture to the previous chosen
working aperture.
556.63.010 Sinaron Bayonet Board dig man
556.63.011 Sinaron Bayonet Board dig aut
556.63.018 Sinaron Bajonetplatte spec man
556.63.019 Sinaron Bayonet Board spec aut
556.63.020 Nikon Bayonet Board dig man
556.63.021 Nikon Bayonet Board dig aut
556.63.028 Nikon Bayonet Board spec man
556.63.029 Nikon Bayonet Board spec aut
556.64.051 Hasselblad Shift Board dig man
556.64.058 Hasselblad Shift Board spec man
dig = digital This lens-board is dedicated for the use of the Sinarcam compact unit,
when no slide-adapter 551.33.022 and no film is being used.
spec = special This lens-board is dedicated for the use with the Sinarcam slide-adapter
551.33.022 or by using film with the Sinarcam compact unit.
man = manual With this lens-board you are required to open up the lens aperture
manually while working in the live-video-mode of the Sinarcam compact
unit. By leaving the live-video-mode, you will have to manually stop down
the aperture back to the working aperture.
aut = automatic With this lens-board all the above described “man” operations will be
automatically set and controlled from the Sinarcam compact unit.
•To control these lens-boards with auto aperture function, the Sinarcam is requiring the hardware-
version 1.4 and higher and the software-version 1.4 or higher.
•New, or with this funktion already updated Sinarcams are to identify by a dot on the left side of the
serial-no.
•The version of existing Sinarcams can easy be checked by starting the Sinarcam software and
opening the menu “Apel” and “about Sinarcam”.
•Sinarcams with the soft-and hardware-version 1.4 are available at December 97.
•Existing Sinarcams can be updated at Sinar for no charge, by ordering of a automatic-board,
(excl.shippment)

Sinarcam1UsersGuideE.rtf Date: 14.03.00 14:22
8. Setup the Sinarcam as a stand alone camera
To setup the stand alone sinarcam, do the following:
nIf you have the DCB deposit accessory (see figure beside), mount
the deposit on top of your studio stand or your tripod.
nAdd the DCB holder to the deposit bar and tight all screws with the
wrench that is attached at the rear of the deposit. Note that this
device will hold the DCB later when it is not attached to the
sinarcam, so make sure the DCB cannot turn the deposit and slip
out!
nMount the Sinarcam stand to the DCB deposit or directly on a studio
stand or tripod.
nMount the Sinarcam body to the Sinarcam
stand. Please protect the LCD and color
filters of the Sinarcam by always using the
front and back covers of the body when
handling the Sinarcam!
nAdd the lensboard to the sinarcam body
and attach a lens to the lensboard.
nFinally mount the Leaf DCB to the Sinarcam body and connect
the Leaf taxi cable and the Sinarcam cable to the camera.
nAim the camera to your subject. Now your are ready to take
your first digital picture

Sinarcam1UsersGuideE.rtf Date: 14.03.00 14:22
9. Setup the Sinarcam on a sinar p2 view camera
To setup the camera, do the following:
•Attach the sinarcam body on a p2 bearer
•Set all movements on the bearer into its click stops
•Mount the Remote Aperture Control unit 551.33.003 to the front
standard
•Mount the Sinaron Digital Lens to the front standard. To allow
the sinarcam software to automatically recognize the lens and
its aperture range, sinar recommends to use lens codes for all
of your lenses.
•Add a bellow lens hood and a bellow hood mask
to the camera to reduce stray light
•Move the vertical and horizontal shift of the front standard 24
mm to the right and 24 mm down in order to put the lens axis
exactly to the center of the CCD-sensor.

Sinarcam1UsersGuideE.rtf Date: 14.03.00 14:22
10. Dust on the LCD shutter / color filters
The digital camera back and the Sinarcam body are very delicate devices that need special handling
and care. Dust and dirt can lessen the quality of the digital image and may cause expensive
retouching work. Do whatever you can to avoid dust around the camera and keep always in mind that
the unit does act as film and should be treated as your most precious negative.
Dust on the CCD are visible as tiny black spots. By opening the aperture, the spot gets larger and
becomes faintly visible. By closing the aperture, the spot gets smaller and gets sharper outline.
Sinaron digital 135 mm, size of area approx. 3 x 3 mm ( 1/100 of the entire CCD)
f-stop 45 f-stop 32 f-stop 22 f-stop 16
Dust on the color filters are visible as tiny color spots. Yellow spots are caused by dust on the blue
filter, magenta spots by dust on the green filter and cyan spots by dust on the red filter.
Sinaron digital 135 mm, f-stop 45, same region as above.
Dust on the red filter: the spot is only visible in the red color channel, whereas dust on the CCD is
visible in all color channels. Again: High f-stop settings make the spots in the digital image more
visible than low f-stop settings.

Sinarcam1UsersGuideE.rtf Date: 14.03.00 14:22
11. What to do if dust is on the CCD or on the filter
Even with perfectly cleaned CCD and color filters there are always tiny specks of dust in the air and
on the surface of the filters. As long as they remain tiny there is no need to something against them.
Blowing them away by a jet of air may just swirl the dust to some other region or let come some
additional dust laying on the surface of the CCD or of the color filters.To avoid any visible effects
from dust on the filters and on the CCD covering glass, try to do the following
•Do not stop down the lens if not necessary. Use the best f-stop range of each lens which is about 2
or 3 stops down from completly open.
•Do not use extremly steep toning curves in the leaf software
•Avoid changing belows and do not remove the DCB from the sinarcam body if not necessary
•Never leave the sinarcam body without a lens or the lens cover plate.
•When removing the DCB unit for some time always mount a protecting cover to the sinarcam.
If you find however spots in your image that are too disturbing, find out if the spots are on the CCD
(black spots) or on the color filters (yellow, cyan or magenta spots).
To clean the surface of the CCD follow these steps:
•Close the shutter of the sinarcam to protect the LCD-shutter and the color filters from dust. (If the
leaf software is running, stop the live video. If only the sinarcam software is running, press the “c”
key to close the blade).
•Remove the DCB-unit from the sinarcam body.
•Clean the surface of the CCD as described in the Leaf instruction manual.
•Check also the inside of the adapter plate and remove any dust if necessary.
•Mount carefully the DCB unit to the sinarcam body.

Sinarcam1UsersGuideE.rtf Date: 14.03.00 14:22
12. How to clean the color filters
•Select the menu item Clean Filter from the Setting Menu or press z-c. The Clean filter dialog will
appear (note that all commands in the sinarcam window will be disabled until you close the
cleaning dialog window again):
•Click into one of the color filters to move this filter into cleaning position
•Clean the filter by following the instruction in the cleaning window
•Localize the dust spot on the filter and blow it away with a jet of air. (Be careful not to touch the
surface of the filter with the tip of the device)
•Move to another filter by clicking the desired filter icon.
•Quit the Cleaning filter window by clicking the close box or clicking the command button.

Sinarcam1UsersGuideE.rtf Date: 14.03.00 14:22
13. Live mode
To display the live video window, follow these steps:
•Start the Leaf Software application by double
clicking its icon (see also the Leaf manual)
•In the Leaf Camera menu, select the menu entry “Settings” and
select “Sinarcam” from the Camera Type selection box. Set the
exposure time to “1/15 sec or faster”. Refer to the Leaf manual for
the other selection elements in this window.
•Set the color mode in the Leaf software to color
or to black and white.
•Run the Sinarcam application and move the Sinarcam
window to the lower right corner of your Macintosh screen.
•Set the Sinarcam to CCD-mode and set the flashmode
and the aperture. According to the settings in the Leaf application, set the
exposure time and the color mode
(color = Tri-Shot, black&white = One-Shot).
•Start the live video function by clicking the live video
icon in the Leaf icon bar.
•Set the brightness in the live video image by moving the
slider and / or changing the toning curve of the Toning Window.
•If your Sinarcam is mounted on a p2, click on this icon to
display the assymetrical axis. Note the red dotted lines in
the live video window which show you where the swing and
tilt axis of the p2 standard lay in your image.
•Focus one point on the swing or tilt axis. Click with the mouse
once on the focus point to display the built in lupe window. Focus
other points by using the fine drive knop of the swing or tilt on the
standard.
Note that the first point and the entire axis remains in perfect
sharpness while you swing or tilt the standard. If necessary, the
inclination obtained in this manner can be transformed to the front
standard to retain the same perspective.

Sinarcam1UsersGuideE.rtf Date: 14.03.00 14:22
14. Sinarcam Shift Adapter
It is possible to attach a shift adapter to the sinarcam which allows you to quickly switch between
taking digital pictures and viewing or taking chemical pictures: The ground screen and a movable lupe
enables you to see a bright image even when the standards are tilted or shifted.
The shifting adapter has the following features:
•easy viewing of a ground screen without removing the digital back from the camera
•bright ground screen, movable lupe with magnification factor 4
•allows to insert any rollfilm-or sheetfilm holder (even scanner devices!)
•exchanging the ground screen with a hasselblad rollfilm adapter allows you to immediatly shoot
chemical and digital pictures one after the other (for example as a backup or for the archive etc.)
•due to mechanical restrictions the swing and tilt axis are about 12 mm in front of the ground glass
or the CCD plane
•if the shift adapter is used on the stand alone camera the special lens boards must be used which
compensates the shift of the focal plane of this adapter. No changes apply to lenses and other
accessories.
To setup the sinarcam shifting adapter follow these steps:
•Attach the sinar interface plate with 4 screws to the Leaf DCB body. Be extremely careful not to
touch the CCD with your fingers or with the tool.
•Select the type of Leaf DCB that you are going to attach to the shift adapter. Use a pinball writer to
move the tiny switch beneath the cables either to the left (DCB Live) or to the right (DCB II). If this
switch is not set correctly, the Sinarcam will not function correctly (for example the shutter blade
may remain closed during live mode!).
•Attach the Leaf DCB with the 4 screws to the adapter plate. You must move the adapter into the
“digital taking position” for this operation. Again: be very careful not to drop a screw on the CCD or
to touch the CCD with the tool or your finger. After tightening all screws move the adapter back
into “viewing position”.
•Depending on the type of DCB that is attached to the shift adapter connect the cables of the shift
adapter to the DCB. Note that not all cables can be connected! The DCB II (on the left) only needs
the middle cable which plugs into the blue connector (see image). The DCB Live needs the other
cables which are plugged into the blue and the green connector. Do not try to connect the
remaining cable into the connectors of the DCB! The number of pins do not match and will
damage the DCB in case you force the cable into the connector. Hide the cables as shown in the
following pictures:
Leaf DCB II connection Leaf DCB Live connection

Sinarcam1UsersGuideE.rtf Date: 14.03.00 14:22
•If not already done, attach the focusing screen (551.33.123) to the shifting adapter. Remember
where the rollfilmholder has to be inserted to find the correct position. Attach also the movable or
fixed lupe to the focusing screen. Note the exchangable format mask on the ground glas which
corresponds with the CCD format.
•Finally mount the sinarcam shift adapter to the sinarcam. Press the release lock on the top left of
the shift adapter to move the slider from one position to the other. Make sure the slider locks in
each position.
Press the release lock and shift the adapter from
viewing position (left) to taking position (right)
•To take a chemical picture on a roll film holder or a sheet film holder, lift the ground glass with the
lever and insert the film holder from the left. Note that the shutter blade automatically closes when
the film holder is fully inserted. By the way: the focus frame can also be used directly on the
sinarcam thus enabling to shoot chemical pictures also without a sliding adapter. To mount the
focus frame to the sinarcam directly you need however the holder for the focusing frame (461.36).

Sinarcam1UsersGuideE.rtf Date: 14.03.00 14:22
15. Trouble Shooting
Trouble Possible Cause Suggested Solution
Can not connect
to sinarcam
Connected to wrong
serial port or port
already in use.
Check cables and plugs. Turn on power supply to reset
the sinarcam. If no reset occurs in the sinarcam even
when no computer is connected, get in contact with your
local sinar dealer.
Try to use the other serial port and check the selected
port in the sinarcam software. If you use the printer port,
make sure AppleTalk is not active.
First flash does
not fire Live mode not stopped
when taking picture
Flash does not
fire Flash mode set to
NoFlash, synchro cord
not connected
Select Early Flash or Late Flash
Check your synchro cord by the following simple test:
Unplug it and trigger the flash manually by pressing a
metal object onto the plug pin and the outer tube. Closing
the circuit will fire the flash, if it does not fire, check the
power unit and/or the flash heads
Only one flash
fires Sync electronic does
not correspond with
power unit
Change from sync cord to IR-transmitter or vice versa.
Disconnect and reconnect sync cord of the power unit.
Connect the sync cord to the other sync connector of the
Sinar power unit (only available with newer power supply
units)
Aperture does
not open Sinarcam is in taking
position You can manually stop down and stop up the aperture if
an aperture unit is connected and if the sinarcam is in
viewing position. Remeber however that the DCB has
always priority regarding manual settings, e.g. if the
sinarcam is ready for taking pictures, you cannot open
the aperture by pressing the stop-up button.
Serial port can
not be
remembered
Sinarcam preference
file damaged or old During startup of the sinarcam software, you can choose
the serial port to which the sinarcam power supply is
connected. If the serial port setting is not the same when
you again start the software, delete the sinarcam
preference file in the preference folder and try again. A
new sinarcam preference file will be created containing
you current settings.
Wrong colors in
the picture Wrong filter position If you interrupt a tricolor exposure after the green or the
red exposure, the filter wheel will start the next exposure
with the wrong filter. Reset the sinarcam or click into the
“Tri-Shot” radio button to set the filter wheel to its home
position.
Filterwheel is not
in home position
Shutdown in taking
position
Klick into Sinarcam window, call settings menu, select
reset (or press z-r)
If above does not help, reset the sinarcam simply by
turning off and on the power supply. Do not turn off the
power supply if the software is still running. Quit the
sinarcam application properly and then turn off the power
supplies.
WARNING: Do not touch the filters or the shutter blade
and do not attempt to turn the blades by hand. Improper
attempts may result in damage to the filters or the blade.
Offset of RGB
images (too big
to be registered)
Wrong Shutter Timing,
Live mode not stopped Always stop live image before taking the image.
Retake the image
Color spots in
the picture
Dust on the filters Loose dust particles on the filter surfaces do affect the
quality of the photograph! Normally they can safely be
removed with a jet of dry air.

Sinarcam1UsersGuideE.rtf Date: 14.03.00 14:22
To clean the filters with a jet of dry air, choose Film
mode, Tricolor mode and set the exposure time to 4 sec.
Make some exposures.
Take special care to store the sinarcam in a dust-free
environment, and never leave it for a long time with one
of the filters in the visible position.
Fingerprints on
the filters
Filterwheel was not in
home position
Gently wipe the filter. For wiping you should use a non-
scratching, clean, dry and lint-free cleaning tissue or a
cleaning cloth for eyeglasses. Special precautions should
be taken for the tissue or cloth to have no grease (from
sweaty palms, hand creams, etc.), which could
inadvertently be transferred to the surfaces of the filters.
The wiping should be performed in only one direction,
and only with very gentle pressure. It should furthermore
be restricted just to the tarnished area.
Please note that the humidity in one’s breath can cause
dust particles to adhere to the surfaces of the filters.
To clean the filters with a cleaning cloth, turn off the
power supply and manually turn the filter wheel. Avoid
any contact with the filters itself and try to touch only the
wheel.
WARNING: Frequent cleaning by wiping can lead to
reduced filter effectiveness (surface dulling)
Table of contents
