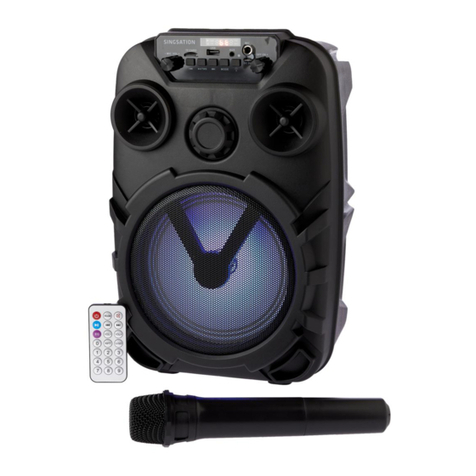
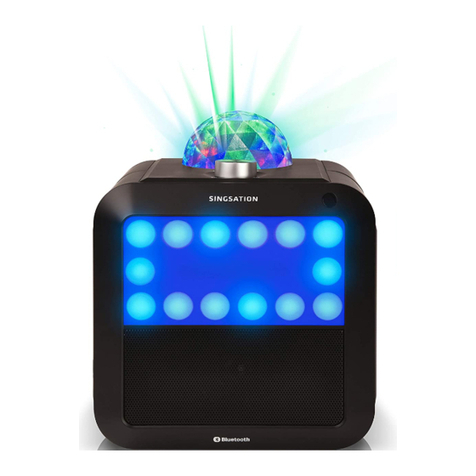
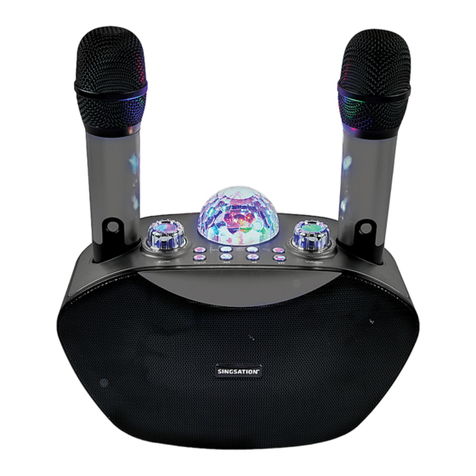
Singsation Classic User manual

QUICK START
GUIDE
Instructions en français.......................................9
Instrucciones en español....................................17
SI
NG
SAT
IO
N™
CLASSIC
l<ARAOl<E
SYSTEM
+ WIRELESS SPEAKER

2
Press and hold the POWER button
on the front of the Singsation Classic to
turn it on. The Singsation Classic plays
its startup sound and the BLUETOOTH
indicator starts blinking slowly.
Note: If you didn’t hear the startup sound, make sure the
MASTER VOLUME knob is turned up!
Step 2: Plug in
Step 3: Turn on
Step 1: Unpack
Make sure the following items came in this package:
• Singsation Classic Karaoke System + Wireless Speaker
• Microphone
• AC Adapter
Attach one end of the AC adapter to the DC IN
jack on the back of the Singsation Classic.
Plug the other end of the adapter into a working
outlet or surge protector.
Front
After 15–30 seconds, the Singsation Classic
announces “Pairing” and goes to Bluetooth
pairing mode to set up with your Bluetooth
device. The BLUETOOTH indicator starts blinking
faster.

3
Enable Bluetooth on your smartphone or other
Bluetooth device.
Step 4: Pair + Connect
Wi-Fi
Bluetooth
Bluetooth Settings
VPN Settings
Wi-Fi Settings
8:45PM
Make sure the BLUTOOTH indicator on the front
of the Singsation Classic is blinking rapidly.
(If it isn’t, give a short double-press on the
BLUETOOTH button. The Singsation Classic
announces “Pairing.”)
Front
If you’ve previously paired your phone or other Bluetooth device with
the Singsation Classic, it will automatically attempt to reconnect to
that device when you switch it on. If you want to pair to a new device,
give a short double-press to the BLUETOOTH button. The Singsation
Classic announces “Pairing” and the BLUETOOTH indicator starts
blinking.
Choose Singsation Classic from the pairing
options on your Bluetooth device. (If it’s not
in the list, choose “Scan” from your device’s
Bluetooth menu.)
The Singsation Classic announces “Device Connected” when it’s finished
pairing and connecting to your Bluetooth device. The BLUETOOTH
indicator turns solid blue.
Note: The process of enabling Bluetooth and connecting varies from device to device. See your device’s
owners manual for more information and specific instructions.
Bluetooth Wireless Connection Tips
• Make sure the Bluetooth capability of your device is turned on.
• Make sure there’s nothing plugged into the Singsation Classic’s AUX IN jack when
you’re trying to use Bluetooth.
• The Bluetooth wireless connection works up to a range of roughly 33 feet (10 meters).
This range may vary, however, based on other factors, such as room layout, wall
material, obstacles, your device’s Bluetooth performance, etc. If you’re having problems
connecting to the speaker, move closer to it.
• If your device asks you for a password to connect, use “0000”.

4
Step 5: Sing along!
The Singsation Classic comes with a microphone you can use to sing along
or make announcements!
To sing along: Plug the provided microphone into the MIC 1 IN jack on
the front of the Singsation Classic. Start playing music on your Bluetooth
device and start singing!
Front To adjust the volume of your
voice: Use the MIC 1 volume
knob on the Singsation
Classic.
To adjust the volume of
your music: Use the volume
controls on your Bluetooth
device.
To adjust the volume
of everything: Use the
MASTER VOLUME knob on
the Singsation Classic.
To use a second mic: Plug a second mic (not included) into the MIC 2 IN
jack on the front of the Singsation Classic. Use the MIC 2 volume knob to
control its volume.
Fun with Voice Eects
To change voice eects: Press the VOICE FX button. Keep pressing to try
all the eects!
To adjust the level of the current voice eect: Press the LEVEL button
just below the VOICE FX button. It cycles through six levels for the current
eect. Note: Eect number 4 (baby voice) does not have levels.

5
Using EQ
The Singsation Classic has an EQ button that lets you select one of the
preset equalization settings (Rock and Voice) that automatically adjust
the equalization to enhance the sound for each situation.
To use one of the preset EQ settings: Press the EQ button to cycle
through the presets until you reach the setting you want to use.
Using Dynamic Lighting
The LIGHTING button on front of the Singsation Classic gives you control
over the Classic’s built-in dynamic lighting. Press the LIGHTING button to
cycle through the multiple lighting modes:
Party 1 and 2: The light changes colors
to the beat of the music (1) or mic (2).
Dance 1 and 2: The light pulses and
changes color to the beat of your
music (1) or mic (2).
Chill: The light gradually intensifies
and diminishes and changes color.
Breathe: The light gradually intensifies
and diminishes on a single color. Press
the COLOR button to change colors.
Still: The light stays on. Press the
COLOR button to select a color.
Disco: The light slowly goes through all
the colors.
Rave: The light goes through the colors
at lightning speed. Press the COLOR
button to change colors.
O: Turns the lighting o.
Front

6
Tour of the Singsation Classic
POWER
BLUETOOTH -
SOURCE--
i',;.
::_,,_
(6;
\cc/
sJl;R
VCJL,u
~~
/
'1t
/
~\
'
MUSICEQ
/------,
(
t+t.
'---
j
_/
PLAY/
PAUSE
_/_
..
---,,
(►
II\
\,..__
_____
/
/
MAX
SINGSATION
VOICE
FX
(D>l)\)
\ LEVEL
/.--------...,_
·-
D>l))
,_
/
LIGHTING
/
.'---
'"
Q)
-,
______
/
COLOR
'\I/
\
Q
__
/(cj\
-
-
-
MIN
\\.<""""=-
~>>/
MAX

7
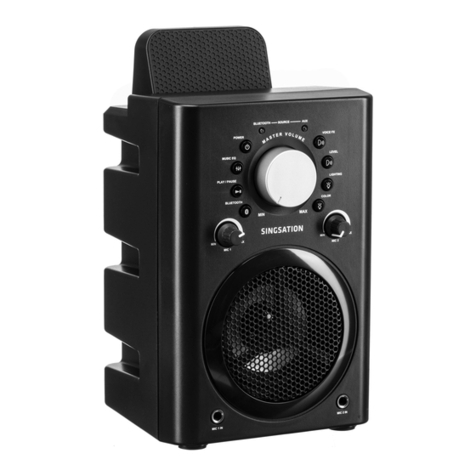
BLUETOOTH indicator shows the Bluetooth status of the Singsation Classic
(solid is connected; fast flashing means pairing, and slow flashing means not
connected).
AUX indicator illuminates when an audio source is plugged into the auxiliary
input on the back of the Singsation Classic.
POWER button turns the speaker on and o.
MASTER VOLUME dial adjusts the Singsation Classic’s volume.
VOICE FX button cycles through the available voice eects.
MUSIC EQ button cycles through the preset equalization settings (Rock and
Voice)to enhance the sound for each situation.
LEVEL button cycles through the levels for the current voice eect.
PLAY/PAUSE button starts or pauses playback of Bluetooth audio.
LIGHTING button controls the speaker’s multi-mode lighting. Press to cycle
through the light modes.
BLUETOOTH button re-connects to the last Bluetooth source (single press) or
starts the Bluetooth pairing process (double press).
COLOR button changes the color of the light in light modes where you can select
color.
MIC 1 and MIC 2 volume dials adjust the volume of the MIC 1 and MIC 2 IN
microphones.
MIC 1 and MIC 2 IN jacks let you connect up to two microphones (including the
provided mic) to use with the speaker, for karaoke or announcements.
AUX IN jack (back, not shown) lets you connect to an external audio device with
a 3.5mm audio cable. The speaker switches automatically to this input when you
insert the cable.

8
90-Day Limited Warranty
Voxx Accessories Corporation (the “Company”) warrants to the original retail purchaser of this product that
should this product or any part thereof, under normal use and conditions, be proven defective in material or
workmanship within 90 days from the date of original purchase, such defect(s) will be repaired or replaced with new
or reconditioned product (at the Company’s option) without charge for parts and repair labor. To obtain repair or
replacement within the terms of the warranty, the product is to be delivered with proof of warranty coverage (e.g.
dated bill of sale), specification of defect(s), transportation prepaid, to an approved warranty station. For the location
of the nearest warranty station to you, call toll-free to our control oce:
1-800-645-4994.
This Warranty is not transferable and does not cover product purchased, serviced or used outside the United States or
Canada. The warranty does not extend to the elimination of externally generated static or noise, to costs incurred for
the installation, removal or reinstallation of the product. The warranty does not apply to any product or part thereof
which, in the opinion of the company, has suered or been damaged through alteration, improper installation,
mishandling, misuse, neglect, accident or exposure to moisture. This warranty does not apply to damage caused by
an AC adapter not provided with the product, or by leaving non-rechargeable batteries in the product while plugged
into an AC outlet.
THE EXTENT OF THE COMPANY’S LIABILITY UNDER THIS WARRANTY IS LIMITED TO THE REPAIR OR
REPLACEMENT PROVIDED ABOVE AND, IN NO EVENT, SHALL THE COMPANY’S LIABILITY EXCEED THE PURCHASE
PRICE PAID BY PURCHASER FOR THE PRODUCT.
This Warranty is in lieu of all other express warranties or liabilities. ANY IMPLIED WARRANTIES, INCLUDING ANY
IMPLIED WARRANTY OF MERCHANTABILITY OR FITNESS FOR A PARTICULAR PURPOSE, SHALL BE LIMITED
TO DURATION OF THIS WARRANTY. ANY ACTION FOR BREACH OF ANY WARRANTY HEREUNDER, INCLUDING
ANY IMPLIED WARRANTY, MUST BE BROUGHT WITHIN A PERIOD OF 24 MONTHS FROM THE DATE OF ORIGINAL
PURCHASE. IN NO CASE SHALL THE COMPANY BE LIABLE FOR ANY CONSEQUENTIAL OR INCIDENTAL DAMAGES
WHATSOEVER. No person or representative is authorized to assume for the Company any liability other than
expressed herein in connection with the sale of this product.
Some states/provinces do not allow limitations on how long an implied warranty lasts or the exclusion or limitation
of incidental or consequential damage so the above limitations or exclusions may not apply to you. This Warranty
gives you specific legal rights and you may also have other rights which vary from state/province to state/province.

lmp
·ortant
Information
forSin~sation
ModelSPKA30
IMPORTANT
SAFETY
INSTRUCTIONS
PLEASE
READ
AND
SAVE
FOR
FUTURE
REFERENCE
A
THE
LIGHTNING
F
__
....,;.....,....,...,__
_.
THEEXCLAMATION
AND
ARROWHEAD
wmt1N
THE
TRIANGLE
IS
A
WARNINC
SIGN
A1.ERT1NG
YOU
OF
"DANGEROUS
VOLTAGE"
INSIDE
THE
PRODUCT
.
CAUTION
:
TO
REDUCE
THE
RISK
OF
ELECTRIC
SHOCK,
DO
NOT
REMOVE
COVER
(OR
BACK).
NO
USER.sERVICEABLE
PARTS
INSIDE.
REFER
SERVICING
TO
QUAUFIED
SERVICE
PERSONNEL
POINT
WITHIN
THE
TRIANGLE
IS
A
WARNING
SIGN
ALERTING
YOU
OF
IMPORTANT
INSTRUCTIONS
ACCOMPANYING
SEE MARKING ON
BOTTOM/
BACK OF PRODUCT
WARNING:
TOPREVENTFIREOR
ELECTRICAL
SHOCK
HAZARD,
DO
NOT
EXPOSE
THIS
PRODUCT
TO
RAIN
OR
MOISTURE.
Important Safety Instructions
1.
Read
these instructions.
2.
Keep
these instructions.
3.
Heed all warnings.
4.
Follow all instructions.
5.
Do
not
use
this apparatus near water.
6. Clean only with
dry
~loth.
7.
Do
not
block any ventilation openings. Install in
accordance with the manufacturer's instructions.
8.
Do
not install near any heat sources such as radiators,
heat registers, stoves,
or
other
apparatus (including
amplifiers)
that
produce heat.
9.
Do
not defeat the safety purpose
of
the polarized
or
grounding-type plug. A polarized plug has
two
blades
with one wider than
the
other
. A grounding type plug
has two blades and a third grounding prong. The wide
blade
or
the
third
prong are provided
for
your
safety.
If
the
provided plug does not fit into your outlet, consult
an electrician
for
replacement
of
the obsolete outlet.
10
.Protect the power cord
from
being walked on
or
pinched particularly
at
plugs, convenience receptacles,
and
the
point wh~re they exit from the apparatus.
The apparatus shall not be exposed
to
dripping
or
splashing.
No
objects filled with liquids, such as vases,
shall be placed on
the
apparatus.
No naked flame sources, such
as
lighted candles, should
be placed on the apparatus.
WARNING
:The mains plug/appliance coupler
is
used
as
disconnect device,
the
disconnect device shall remain
readily operable.
Do
not install this equipment in a confined space such as
a book case
or
similar unit. The ventilation should not be
impeded by covering
the
ventilation openings with Items
such as newspaper, table-cloths, curtains etc.
Care is required with the use
of
this apparatus in
moderate climates.
See
marking on
the
back
of
the
product.
11.
WARNING
:Only
use
attachments/accessories specified
by
the
manufacturer.
12.
Use
only with the cart, stand,
tripod, bracket,
or
table specified
by the manufacturer,
or
sold with
the
apparatus. When a
cart
is used,
use
caution when moving
the
cart/
apparatus combination
to
avoid injury
from
tip
-over.
13.
Unplug this apparatus during lightning storms
or
when
unused
for
long periods
of
time.
14.
Refer all servicing
to
qualified service personnel.
Servicing is required.when
the
apparatus has been
damaged in any
way,
such as power-supply cord
or
' plug is damaged, liquid has been spilled
or
objects
have fallen into
the
apparatus,
the
apparatus has
been exposed
to
rain
or
moisture, does
not
operate
normally,
or
has been dropped.
This is class
II
equipment designed with double
or
reinforced insulation
so
it
does not require a safety
connection to electrical earth
(US
:ground).
Pluqqlnq
In
for
power
AC
OUTLET
POWER
SUPPLY
:100-240 V ~
50/60
Hz
CAUTION:
These servicing instructions are
for
use
by qualified service personnel only.
To
reduce the risk
of
electric
shock, do not perform any servicing
other
than
that
contained in
the
operating instructions unless you are qualified
to
do
so
.
Care and Maintenance
• Always use a
soft
cloth
to
clean
the
speaker and transmitter. Never use any product containing alcohol
or
other
solvents
as
they may damage
the
surface.
•
Use
caution when plugging the power transformers in an
AC
outlet
to avoid
the
risk
of
electric shock.
•
If
the speaker is used outside on a deck
or
patio, make sure you take
it
indoors in
the
event
of
a rainstorm
to
prevent
possible damage.

FCC
Statement
This device complies with Part
15
of
the
FCC
Rules. Operation is subject
to
the following two conditions:
1)
This device may
not
cause harmful interference, and 2) This device must accept any interference received, including
interference
that
may cause undesired operation.
Note:This equipment has been tested and found
to
comply wi
th
the
limits
for
a Class B digital device, pursuant to
part
15
of
the
FCC
Rules. These limits are designed to provide reasonable protection against harmful interference in a
residential installation. This equipment generates, uses,and can radiate radio frequency energy and,
if
not installed and
used in accordance with
the
instructions, may cause harmful interference to radio communication. However, there
is
no
guarantee
that
interference will
not
occur
in
a particular installation.
If
this equipment does cause harmful interference
to
radio
or
television reception, which can be determined by turning
the
equipment
off
and on, the user
is
encouraged
to
try
to
correct the interference by one
or
more
of
the
following measures:
Reorient
or
relocate the receiving antenna.
Increase the separation between
the
equipment and receiver.
Connect
the
equipment into an outlet on a circuit different from
that
to
which
the
receiver is connected.
Co
nsult
the
deal
er
or
an expe.rienced radio/TV technician
for
help.
Caution: Changes
or
modifications
not
expressly approved by
VOXX
Accessories Corporation could void the user's
authority
to
operate the equipment.
FCC
Radiation Exposure Statement
This equipment complies wi
th
FCC
radiation exposure limits set
forth
for
an
uncontrolled environment. This equipment
.should be installed and operated with minimum distance 20cm between
the
radiator & your body.
Industry Canada Regulatory Information
This device complies with Industry Canada's licence-exempt
RSSs.
Operation is subject to
the
following two conditions:
1)
this device may
not
cause interference and 2) this device must accept any interference, including interference
that
may cause undesired operation
of
the
device.
Industry Canada Requlatory Information
CAN
ICES-3
(B)/NMB-3 (B) Avis d'lndustrle Canada
CAN
ICES-3
(B)/NMB-3 (B)
IC
Radiation Exposure Statement: This equipment compli
es
with
IC
radiation exposure limits set
forth
for
an
uncontrolled environment.
The Bluetooth® word markand logos are registered trademarks owned by Bluetooth
SIG
, Inc. and any use
of
such
marks by
VOXX
Accessories Corporation
is
under license. Other trademarks and trade names are those
of
their
respective owners.
Product Information
Keep
your sales receipt
to
obtain warranty
pa
'
rts
and service and
for
proof of purchase. Attach it here and record
the
serial and model numbers in case you need them. These numbers are located
on
the
product.
Model
No.:------------------------------------
Purchase Da
te
:
_________________________________
_
Dealer/Address/Phone:
_____________
_
__
_______________
_
Other manuals for Classic
2
Table of contents
Other Singsation Karaoke System manuals

Singsation
Singsation SPKA15 User manual

Singsation
Singsation Party SPKA08 User manual

Singsation
Singsation 5-in-One! DELUXE User manual

Singsation
Singsation ARIA User manual

Singsation
Singsation TEMPO User manual

Singsation
Singsation CENTER STAGE FREESTYLE User manual

Singsation
Singsation SPKA05 User manual

Singsation
Singsation Party Vibe User manual

Singsation
Singsation SPKAW10SP Operating manual

Singsation
Singsation Freestyle User manual