Sirocco S16810 User manual

7 Parts List
8 Warranty
USER'S GUIDE
MODEL: S16810
TYPE: SRB006
1 Safety Instructions
2 Product View
3-4 Operations
5 Maintenance and Care
6 Troubleshooting
6-Quart Backpack Vacuum
IROCCO
IROCCO
1
When using an electrical appliance, basic precautions should be
observed, including the following:
READ ALL INSTRUCTIONS BEFORE
USING THE APPLIANCE
Always connect to a polarized outlet (left slot is wider than right).
Unplug from outlet when not in use and before conducting maintenance.
WARNING:
To reduce the risk of re,
electric shock, or injury:
■Do not modify the polarized plug to t a non-polarized outlet or
extension cord.
■Do not leave vacuum cleaner unattended when it is plugged in.
■.gnicivreserofebdnaesunitonnehwteltuomorfgulpnU
■Do not use outdoors or on wet surfaces.
■Do not allow children to operate vacuum
cleaner or use as a toy.
■Close attention is necessary when used by or near children.
■Do not use for any purpose other than described in this
user’s guide.
■Use only manufacturer’s recommended attachments.
■Do not use with damaged cord or plug.
■If appliance is not working as it should, has been dropped,
damaged, left outdoors, or dropped into water, have it repaired
at an authorized service center.
■Do not pull or carry by cord, use cord as a handle, close a door
on cord, or pull cord around sharp edges or corners. Do not run
appliance over cord. Keep cord away from heated surfaces.
■,gulpehtpsarg,gulpnuoT.drocnognillupybgulpnutonoDnot the cord.
■.sdnahtewhtiwgulprorenaelcmuucaveldnahtonoD
■ynahtiwesutonoD.sgninepootnitcejboynatuptonoDopening blocked; keep openings free of dust, lint, hair, and
anything that may reduce air ow.
■yawaydobfostraplladna,sregnif,gnihtolcesool,riahpeeKfrom openings and moving parts.
■.renaelcmuucavgniggulpnurogniggulperofebslortnocllaffonruT
■.sriatsgninaelcnehweracartxeesU
■,enilosag,diulfrethgil(slairetamelbammalfpukciptonoDkerosene, etc.) or use in the presence of explosive liquids or
vapors.
■niard,ainomma,hcaelbenirolhc(lairetamcixotpukciptonoDcleaner, etc.).
■htiwdellifecapsdesolcnenanirenaelcmuucavesutonoDvapors given off by oil base paint, paint thinner, some moth
proong substances, ammable dust, or other explosive or
toxic vapors.
■,slian,ssalgsahcusstcejboprahsrodrahpukciptonoDscrews, coins, etc.
■sahcus,gnikomsrogninrubsitahtgnihtynapukciptonoDcigarettes, matches, or hot ashes.
■.ecalpnisretliftuohtiwesutonoD
■.secafrusroodni,yrdnoylnoesU
■.ecafruslevelanoecnailppapeeK
■.gninnursitielihwrenaelcmuucavehtyrractonoD
■eot-nepogniraewnehwroteeferabnirenaelcetarepotonoDshoes or sandals.
■dnagabekahS.ecalpnipuctridrogabtsudtuohtiwesutonoDempty dirt cup frequently when picking up very ne materials
such as powder.
SAVE THESE
INSTRUCTIONS.
THIS MODEL IS FOR COMMERCIAL USE.
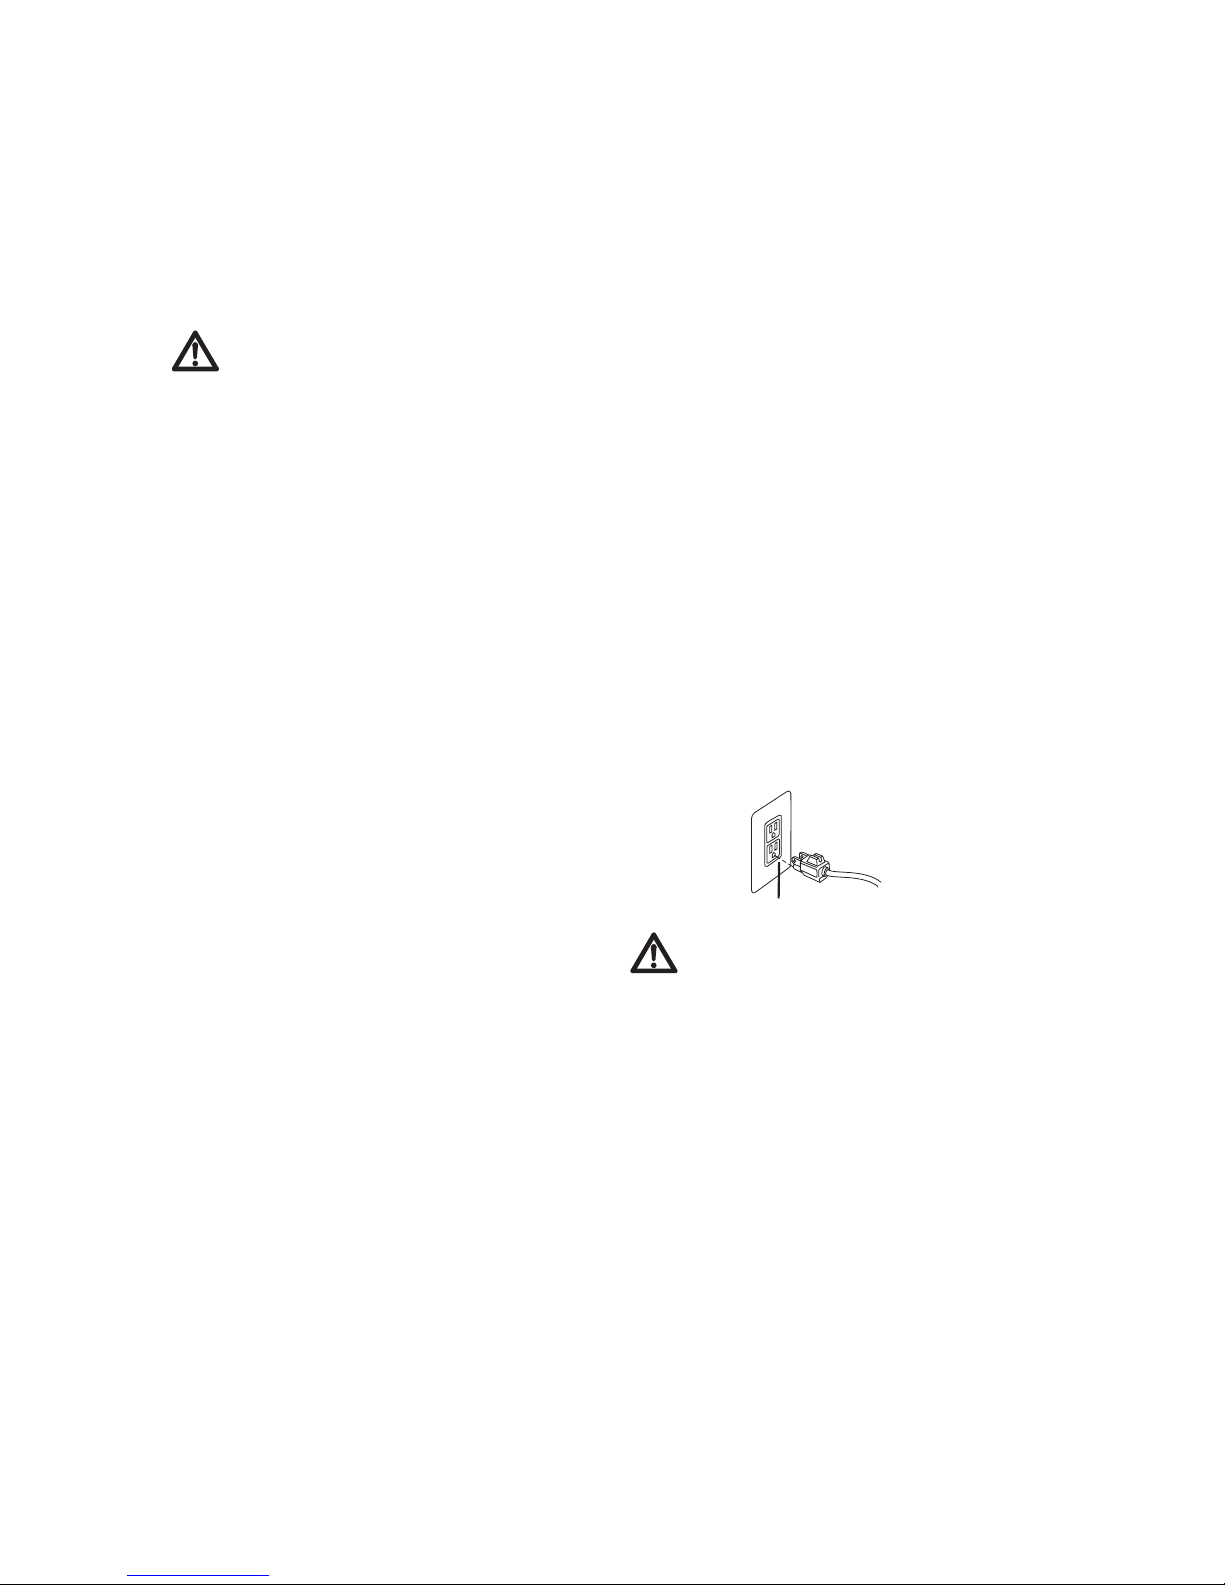
GROUNDING
INSTRUCTIONS
This appliance must be connected to a
grounded wiring system. If it should malfunc-
tion or break down, grounding provides a
safe path of least resistance for electrical cur-
rent, reducing the risk of electrical shock. The
cord for this appliance has an equipment-
grounding conductor and a grounding plug.
It must only be plugged into an outlet that is
properly installed and grounded in accor-
dance with all local codes and ordinances.
WARNING:
Improper connection of the equipment-ground-
ing conductor can result in a risk of electrical
shock. Check with a qualied electrician or
service person if you aren’t sure if the outlet is
properly grounded. DO NOT MODIFY THE
PLUG. If it will not t the outlet, have a proper
outlet installed by a qualied electrician. This
appliance is designed for use on a nominal
120-volt circuit, and has a grounding attach-
ment plug that looks like the plug in the draw-
ing above. Make certain that the appliance is
connected to an outlet having the same congu-
ration as the plug. No plug adapter should be
used with this appliance.
IMPORTANT SAFETY INSTRUCTIONS
Grounded
Outlets
Grounding Pin

2
Product view
Cord
Hose
Wand
Shoulder
Lid latch
Strap
Shoulder
Strap
Switch Box
Adjustable Waist Belt
Rug Tool
Lid
IROCCO
Operations
3
1. Release the two latches and lift off the
lid to ensure that the micro lter cloth bag
and the disposable bag are inside.
Once checked
replace the lid back
2. Both the micro lter cloth bag and dispos-
able bag, lter the air while holding all
debris. The micro lter cloth bag with its
rubber top provides the seal for the vacuum
while also ltering the air. Replace or empty
each as necessary.
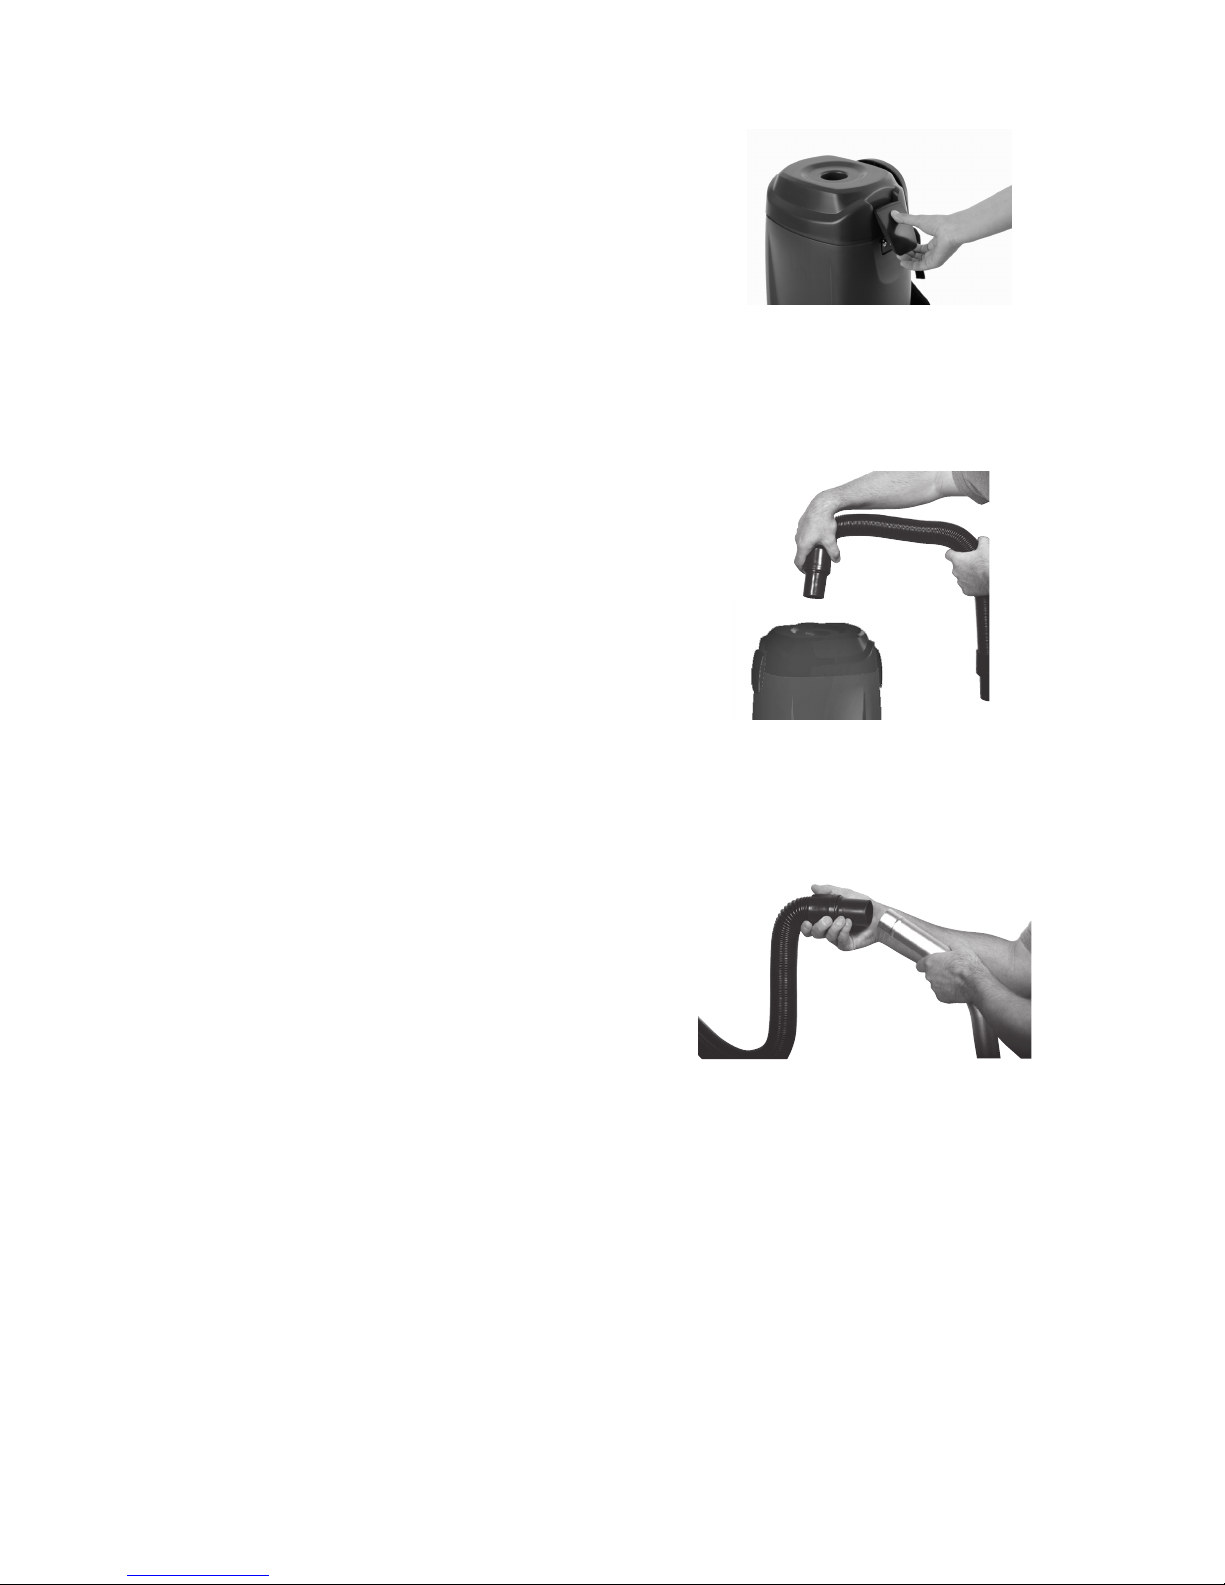
3. Make sure lid is locked on the
vacuum. Take the vacuum hose and push it
into round opening on top of lid.
4.
Put backpack on and adjust sholder straps
and waist belt until backpack is comfort-
able. The harness is made for a custom t.
6.
5.
Attach hose to commercial wand. Attach
desired tool to bottom of wand by loosen-
ing nut and pushing in tool. Tighten nut until
tool is in place. Tool will swivel when using
side to side motion.
NOTE: Never take nut off wand or
risk losing metal ring inside nut.
The metal ring holds tool in place in
its slotted groove.
7.
8.
Press the power switch located on the switch box
to "ON" or "OFF" position to operate.
The receptacle on the switch box can be used
with the optional powerhead for deep cleaning.
Connect the extension cord to the power cord
located by the switch box.
1.
3.
7.
9.
Plug the extension cord into a properly installed
outlet.
and lock the latches.
Operations
4
10. When vacuuming, use a forward and
backward motion.
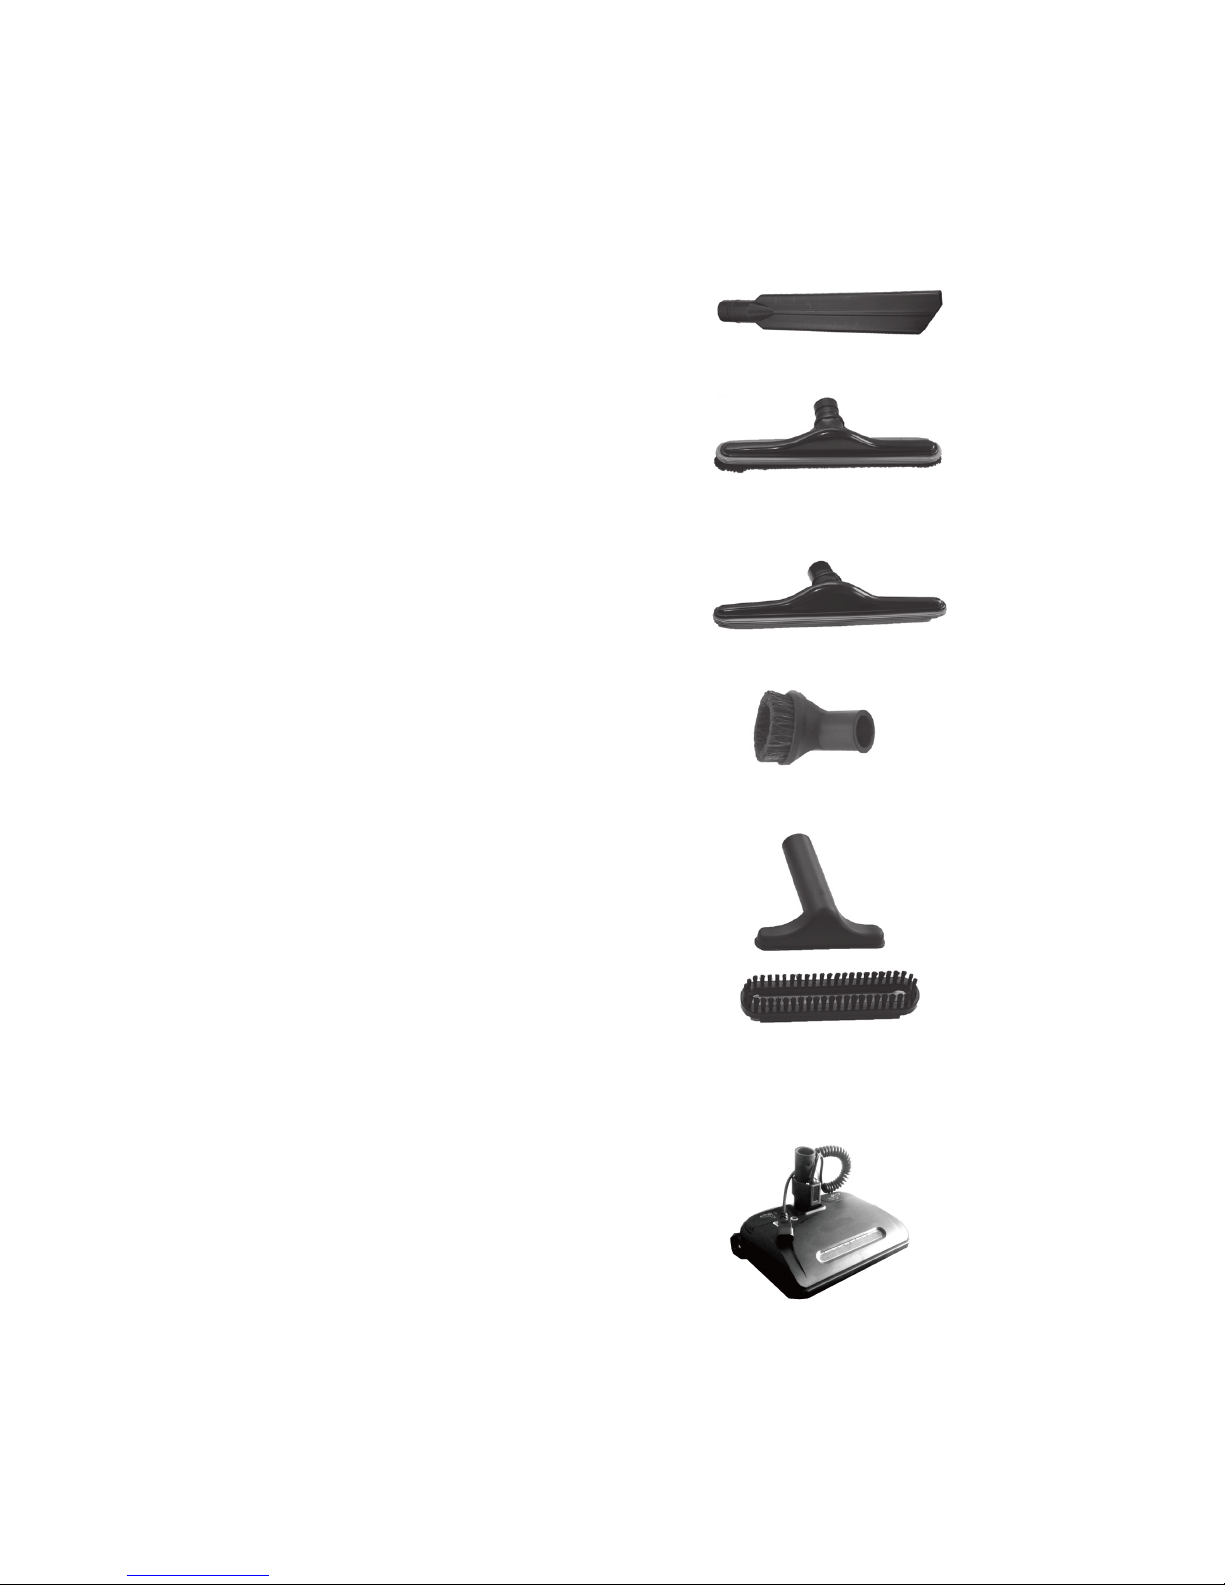
11. The Commercial
vacuum comes with many different tools:
A.
B.
Crevice tool – to clean tight spot
areas.
C.
Bare oor tool – to clean oors,
walls and ceilings.
D.
Rug tool – to clean rugs
E.
Dusting brush –
for dusting and cleaning walls.
Upholstery tool with slide on brush –
to clean furniture.
F.
Optional Powerhead
.
5
Maintenance and care
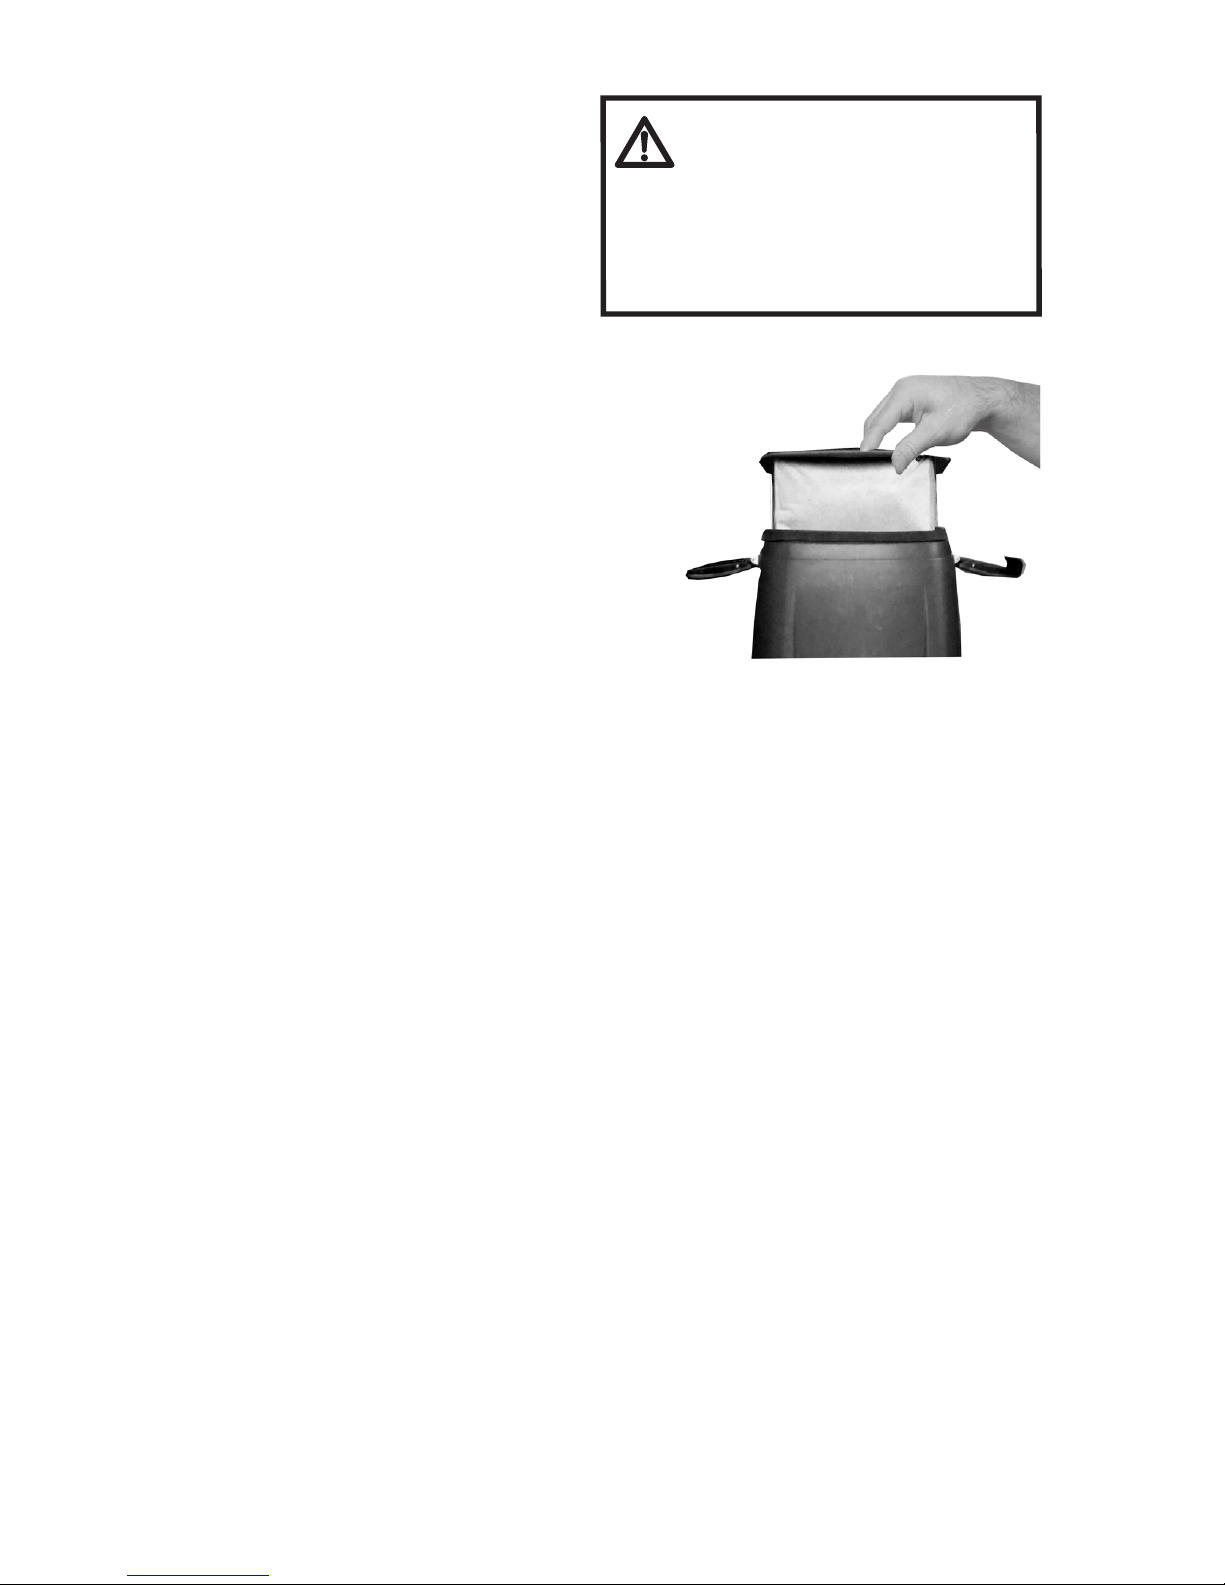
To Change the lter bag:
1. Shut off power switch and unplug all
cords from outlet and vacuum.
2. Check disposable bag to see if it is full.
Always change disposable bag when full,
discard and replace with a new one.
3. Do not reuse the disposable bag—this
affects the ltration of the backpack.
Always check the micro lter cloth bag
each time when you replace the disposable
bag. Clean or change it as necessary.
Clean the cloth bag by simply shaking it well.
6.
5.
4.
7.
8.
9.
10.
NOTE: Very ne powders and
substances may clog the cloth
bag. Please remember to empty
bag often so that vacuum cleaner
can efciently operate.
Power cord and Storage:
NOTE: Do not repair if you are not an authorized technician familiar
with the
Commercial Backpack. Do not lubricate motor. It
is equipped with sealing bearings.
WARNING:
To reduce the risk of re, electric
shock, or injury, turn power
OFF and disconnect plug from
electrical outlet before performing
maintenance or troubleshooting.
2.
Always unwind the extension cord completely before vacuuming.
Never stretch or pull cord tightly, this will damage the cord and create a danger.
Always unplug vacuum from wall when not in use.
Always check condition of all electrical cords before use. Never use cord if it is
ripped or has a tear.
Unplug extension cord and wrap loosely when not in use.
When backpack vacuum is not in use, always store in a dry area or place.

Troubleshooting
6
Low Suction or Poor Pick Up
Possible causes Remedies
1. Disposable dust bag is full 1. Dispose current disposable bag and replace with new
2. Wand is not properly installed 2. Secure wand properly to ensure no air leaks
3. Tool not working properly
4. Air path obstructed
3 Make sure tool is on the wand properly and tightly
4. Check for any air ow obstructions
Vacuum motor is not working
Possible causes Remedies
1. Vacuum is not plugged in 1. Check to make sure vacuum is plugged in properly
2. Electrical Outlet is not working 2. Check electrical source
3. Motor thermal protector activated due to blockage 3. Allow cleaner to cool down, and check the vacuum ducts
and lters for blockage.
4. ON/OFF switch fault
5 Motor defective 4. Contact an Authorized Service Center.
5. Contact an Authorized Service Center.
WARNING:
To reduce the risk of re, electric
shock, or injury,turn power
OFF and disconnect plug from
electrical outlet before performing
maintenance or troubleshooting.

Parts List
7
BX-1
BX-1 Hose assy
BX-2 Lid
BX-3 Paper bag
BX-4 Cloth bag
BX-5 Lid latch assy
BX-6 Lid latch screw
BX-7 Body
BX-8 Bag support screw
BX-9 Bag support
BX-10 Motor shroud seal
BX-11 Motor
BX-12 Exhaust sponge
BX-13 Bottom cover
BX-14 Bottom cover screw
BX-15 Grounding screw
BX-16 Grounding nut
BX-17 Motor mount
BX-18 Thermal bafe
BX-19 Motor seal
BX-20 Noise mufe sponge
BX-21 Motor shroud
BX-22 Pre-motor lter
BX-23 Switch box assy
BX-24 Waist belt
BX-25 Waist belt mounting plate
BX-26 Waist belt screw
BX-27 Carry handle screw
BX-28 Carry handle
BX-29 Shoulder strap screw
BX-30 Shoulder strap
BX-31 2PC Aluminum wand
BX-32 Crevice tool
BX-33 Bare oor tool
BX-34 Upholstery tool
BX-35 Rug tool
BX-36 Dusting brush
BX-2
BX-3
BX-4
BX-5
BX-6
BX-7
BX-8
BX-9
BX-10
BX-11
BX-12
BX-13
BX-14
BX-15
BX-16
BX-17
BX-18
BX-19
BX-20
BX-21
BX-22
BX-23
BX-31
BX-32
BX-33
BX-34
BX-35
BX-36
BX-24
BX-25
BX-26
BX-27
BX-28
BX-29
BX-30

8
At our option we will
we
We do not
WE
SIROCCO
Sirocco
bags, filters, belts.
Sirocco

SRB006-00300003/A2
This manual suits for next models
1
Table of contents
Other Sirocco Vacuum Cleaner manuals


