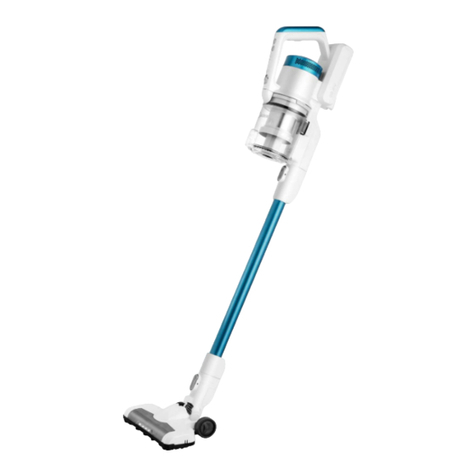
Midea P7 FLEX Wiring diagram

P7 FLEX
INSTALLATION
INSTRUCTIONS
USER GUIDE
for details.
MIDEA
2 in 1
Cordless Handstick
2 in 1
Cordless Handstick
PLEASE READ THE
MANUAL CAREFULLY
BEFORE USING AND
KEEP IT PROPERLY FOR
FUTURE USE
EN, PL, CZ, SK, HU, RU, UK, ET, LT, LV, RO, SL
MCS2129BR

2
English..................................................................
Polish...................................................................
Czech................................................................
Slovakian..........................................................
Hungarian........................................................
Russian..............................................................
Ukrainian..........................................................
Estonian............................................................
Lithuanian......................................................
Latvian..............................................................
Romanian.......................................................
Slovenian.......................................................
3-13
14-25
26-37
38-49
50-61
62-73
74-85
86-97
98-109
110-121
122-133
134-145

Safety Instructions
- Do not place the vacuum cleaner close to heat sources, radiation
sources or burning cigarette butts. Sucking in the following objects is
strictly forbidden:
1. All liquids such as water and solvent;
2. Construction dust and trash such as lime and cement dust.
3. Heat sources, such as carbon butts and cigarette butts that have
not been put out.
4. Sharp fragments, such as glass.
5. Flammable and explosive articles, such as gasoline and alcohol
products.
- This product can only be disassembled by authorized technical
personnel. Disassembling without guidance is strictly forbidden.
- Children, persons with reduced phycial, sensory or mental
capabilities, and persons who lack knowledge and/or experience of
using household appliances are strictly forbidden to use this product
without special guidance!
- This product is an indoor household product, please do not use it
outdoors.
- The vacuum cleaner is an electric appliance that must be used under
normal use conditions. Do not leave it unattended while running.
- Do not touch the power cord, socket or power adapter with wet hands.
- Clean the dust cup when it is full before using this product.
- Turn off the power when cleaning, repairing or not using the vacuum
cleaner.
- Do not immerse the vacuum cleaner in water or place it near heat
sources or in the sun, so as to avoid fire.
- Use only the original power adapter that comes with the package for
this product. Use of other adapters may damage this product.
- Turn off the power when taking out the battery. Do not disassemble
the battery by yourself. If you need Please contact the after-sales
maintenance personnel for replacement if needed. Please properly
dispose of the battery when discarding the product.
- Do not touch the pole piece or jack with conductors to avoid short
circuit.
3

Safety Instructions
- Power cut-off: Do not pull the power cord, hold the plastic part of the
plug with your hand and unplug the plug.
- Do not pass the power cord of the vacuum cleaner through sharp
objects, so as not to damage the power cord.
- Do not drag the power cord to move the charging base.
- Check the power supply voltage to ensure the same voltage as the
charging voltage of the vacuum cleaner.
- Avoid running for a long time when the suction inlet is blocked, so
as to avoid motor damage and heating deformation of the vacuum
cleaner.
- Do not use the vacuum cleaner and send it to the maintenance
department designated by Midea for maintenance in time under the
following circumstances:
1. The vacuum cleaner has obvious damage or abnormal operation
condition after falling to the floor
2. The power cord is damaged.
Tips
1. Longer charging time may be needed in the following circumstances.
a. When charging in a place where the indoor temperature exceeds
30°C;
b. When charging immediately after stopping running.
2. Please charge the vacuum cleaner after using no matter how long
it is used.
3. When not charging, it is recommended to unplug the power plug
in time.
4. If the vacuum cleaner is not in use for a long time (more than
2 months), please unplug the power plug, but in order to ensure
the battery life, please fully charge it every 2 months.
5. During charging, the machine or the power adapter may heat up,
which is a normal phenomenon. Please rest assured to use it.
4

Introduction to the Product
Installation and Parts
Battery pack
Main unit
Bent pipe
Electric scrubbing brush
List of accessories
Bed brush 2-in-1 suction
brush
Storage buckle
assembly Flat nozzle Storage base
assembly Power adapter Instructions
5

Function Operation
Use of bent pipe
Pull upwards the upper sleeve of the bent pipe, and the bent
pipe automatically rotates and bends.
Battery charging
Note
1. The battery is not charged when leaving the factory, so please fully charge the bat-
4. When the battery life of the machine is obviously shortened and the charging time
is prolonged, please replace the battery with professionals. Do not disassemble and
assemble the machine by yourself to avoid danger.
S/N Operation Instructions
Plug one end of the power cord into the
socket and insert the other end into the
charging port at the tail of the handle on the
a period of full power, the indicator will go
out.
Charging time: 5-7 hours
Discharge time: About 10 minutes for High
Speed About 20 minutes for
Intermediate SpeedAbout 60
minutes for Low-Speed
6

Function Operation
Cleaning
Note
1. To avoid blocking the air duct, please clean up large pieces of garbage (such as large piec-
4. It is strictly forbidden to remodel the complete machine, accessories and replace the power
5. Battery model: BP28825A
S/N Use of the machine
Press the "Switch button" once to start;
Press the "Switch button" again to stop;
it is an alarm that requires professional
maintenance.
It defaults to the Intermediate Speed when
powered on with a full battery (Light 1, 2, and 3
are on simultaneously). Press the "Speed control
button" once for High Speed (Light 1 and 2 is
on and Light 3 is blue), and press the "Speed
control button" again for Low Speed (Light 1 and
2 is on and Light 3 is off);
Energy indication during charging:
battery is low, and it needs to continue charging.
When Light 1 and 2 are on, the battery is fully
charged, and the lights will go out after a period
of full charge.
Energy indication during operation (discharge):
When Light 1 and 2 are on, it shows that the
or Light 2 goes off, it shows that the battery is
low. Please charge in time.
Speed
control
button
Switch
button
Light 2
Light 1 Light 3
Switch
button
Indicator
Lamp
Speed
control
button
7

Cleaning and Maintenance
Placement and use of the machine
Note
1. When the machine is placed on the storage rack or when the storage rack is
placed alone, it must be placed on a horizontal plane to avoid falling and dam-
2. The machine should be handled with care whether it is in work or placed on the
storage rack, so as not to damage the machine.
1. Installation of storage rack
and place the installed storage rack assembly
2. Placement of the machine
again whether the placement position is horizontal, and ensure that the machine
has stopped working and closed. Gently place the machine on the buckle position
of the storage rack according to the position shown on the right, and leave after
the machine is placed stably.
8

Cleaning and Maintenance
Disassembling and cleaning of dust cup
Note
1. To keep the suction of the vacuum cleaner, please clean the dust regularly,
bottom cover of the dust cup to dump the dust.
Dust full
position Press
with one hand and take out the dust cup assembly with the other hand.
Push the button
Note
1. The parts in the dust cup are washable
2. Please make sure that every part has been dried after cleaning and be-
fore mounting it back!
1. Remove the dust cup
assembly from the machine
Filter
sponge
Filter
assembly
9

Cleaning and Maintenance
Disassembling and cleaning of cyclone cone
according to the disassembly procedure.
Close Close
Disassembl and cleaning of electric scrubbing brush
Note
2. When disassembling and maintaining, be sure to stop the operation of the
3. It is not recommended to wash the scrubbing brush with water. The entan-
gled hair can be cleaned with scissors or blades, and the dust stuck on the
roller brush can be cleaned with a brush.
10

Cleaning and Maintenance
Disassembl and cleaning of electric scrubbing brush
2. Unscrew the gland of the roller brush according to the instructions, draw the
roller brush assembly to one side and clean it. Mount it back according to the
disassembly procedure after cleaning.
Press
Disassembl and cleaning of electric scrubbing brush
Note
1. When dust blocks the air duct of the bed brush, please use disposable
chopsticks to remove the dust.
3. During operation, do not touch the roller brush that rolls at the bottom.
and maintain the roller brush when it is entangled or dirty.
Release the gland of the
roller brush
Draw out the roller brush
assembly
1. Press the button to remove the 2. Pull the lock in the direction shown
below, and then rotate to take out the
Press
3. Wipe the inside clean with a cloth strip. If the roller brush is wrapped with hair,
cut it along the roller brush with scissors and clean it up. After cleaning, mount the
roller brush back according to the above disassembly steps.
11

Cleaning and Maintenance
Note
cleaned and maintained.
one hand, rotate the air vent cover with the other hand counterclockwise,
by brute force. After being fully dried, mount it back according to the above
disassembly steps.
Mounting and dismounting of battery pack
S/N Operation Instructions
Press the battery pack release button
Pull the battery pack backward
Replace the battery pack
in reverse order
Press
12

Troubleshooting
Abnormality Possible Cause Treatment
Three indicator
lights flash
- Floor brush or mite
removal brush entangled
during rolling
- Too high or too low use
ambient temperature
- Clean floor brush or mite removal
brush
- Please use in a proper environment
Unable to charge
- Too low or too high
ambient temperature when
charging
- Charge the vacuum cleaner in an
environment with proper temperature
(5°C-40°C)
Battery leakage - Battery not used for a
long time - Replace the battery
Electric floor
brush does not
work
- Large trash rolled in
(packaging film, etc.)
- Rolling brush entangled
in hair, etc.
- Remove hairs wrapped around rolling
brush
- Remove trash
Running time
becomes shorter
- Battery ages
- Too high or too low use
ambient temperature
- Battery not fully charged
- Contact the seller or after-sales service
personnel to purchase a new battery
- Use in a proper environment
- Charge the vacuum cleaner
Suction loss
- Excessive dust in dust cup
- Dust cup cotton filter
clogged
- Floor brush or accessory
suction inlets clogged
- Not fully dried after
washing
- Clean up trash in time
- Clean cotton filter
- Remove blockage
- Dry the washed parts in a cool place
for use
13

P7 FLEX
MCS2129BR
for details.
MIDEA
2 in 1
Cordless Handstick
INSTRUKCJA INSTALACJI
PODRĘCZNIK
UŻYTKOWNIKA
2 w 1
Bezprzewodowy
uchwyt do ręki
PRZED ROZPOCZĘCIEM
UŻYTKOWANIA NALEŻY
DOKŁADNIE PRZECZYTAĆ
INSTRUKCJĘ I ZACHOWAĆ
JĄ DO POTRZEBY W
PRZYSZŁOŚCI
Uwaga: Przed rozpoczęciem
użytkowania tego produktu
należy uważnie przeczytać
niniejszą instrukcję i zachować
ją do potrzeby w przyszłości.
Projekt i specykacje
mogą ulec zmianie bez
wcześniejszego powiadomienia
w celu ulepszenia produktu.
Skontaktuj się z producentem
lub sprzedawcą, aby uzyskać
dodatkowe szczegóły.

Instrukcje Bezpieczestwa
- Nie należy umieszczać odkurzacza w pobliżu źródeł ciepła, źródeł
promieniowania lub palących się niedopałków papierosów. Ssanie
następujących przedmiotów jest surowo zabronione:
1. Wszystkie płyny, takie jak woda i rozpuszczalnik;
2. Pył budowlany i odpady, takie jak pył wapienny i cementowy.
3. Materiały będące źródłem ciepła, takie jak niedopałki węgla i
niedopałki papierosów, które nie zostały zgaszone.
4. Ostre odłamki, takie jak szkła.
5. Produkty łatwopalne i wybuchowe, takie jak benzyna i produkty
alkoholowe.
- Ten produkt może być rozmontowywany wyłącznie przez
wykwalikowanego personelu. Rozmontowywanie bez instrukcji jest
surowo zabronione.
- Dzieciom, osobom o ograniczonej sprawności zycznej,
sensorycznej lub umysłowej oraz osobom nieposiadającym wiedzy i/
lub doświadczenia w obsłudze urządzeń gospodarstwa domowego
zabrania się używania tego produktu bez specjalnego nadzoru!
- Niniejszy produkt jest urządzeniem przeznaczonym do użytku
domowego w pomieszczeniach zamkniętych, nie należy go używać
na zewnątrz.
- Odkurzacz jest urządzeniem elektrycznym przeznaczonym do
użytku w normalnych warunkach. Nie należy pozostawiać go bez
nadzoru podczas pracy.
- Nie należy dotykać przewodu zasilającego, gniazdka ani zasilacza
mokrymi rękami.
- Przed rozpoczęciem użytkowania tego produktu należy wyczyścić
pojemnik na kurz po jego napełnieniu.
- Należy wyłączyć zasilanie podczas czyszczenia, naprawy lub
nieużywania odkurzacza.
- Nie należy zanurzać odkurzacza w wodzie ani umieszczać go w
pobliżu źródeł ciepła lub na słońcu pod kątem uniknięcia pożaru.
- Należy używać wyłącznie oryginalnego zasilacza dostarczonego
w zestawie z tym produktem. Stosowanie innych adapterów może
spowodować uszkodzenie tego urządzenia.
- Przy wyjmowaniu akumulatora należy wyłączyć zasilanie. Nie
należy samodzielnie rozmontowywać akumulator. W razie potrzeby
należy skontaktować się z obsługą posprzedażną w celu dokonania
15

Instrukcje Bezpieczestwa
jej wymiany. Przy wyrzucaniu produktu należy odpowiednio
zutylizować akumulator.
- Nie należy dotykać przewodnikiem końcówek biegunów lub gniazda
w celu uniknięcia zwarcia.
- Wyłączenie zasilania: Nie wolno ciągnąć za przewód zasilający,
należy chwycić ręką plastikową część wtyczki i odłączyć wtyczkę.
- Aby nie uszkodzić przewodu zasilającego, nie należy przekładać go
przez ostre przedmioty.
- Nie należy ciągnąć za przewód zasilający do przenoszenia
podstawy ładującej.
- Należy upewnić się, że napięcie zasilania jest takie samo jak
napięcie naładowania odkurzacza.
- Gdy wlot ssania jest zablokowany, nie należy pracować przez
dłuższy czas, aby uniknąć uszkodzenia silnika i deformacji cieplnej
odkurzacza.
- Nie należy używać odkurzacza w następujących przypadkach i
niezwłocznie przesłać go do serwisu wyznaczonego przez Midea w
celu naprawy:
1. Odkurzacz po upadku na podłogę ma widoczne uszkodzenia lub
nienormalne warunki pracy
2. Przewód zasilający jest uszkodzony.
Porady
1. W następujących okolicznościach może być wymagany dłuższy
czas naładowania.
a. Gdy naładowanie odbywa się w miejscu, gdzie temperatura
wewnętrzna przekracza 30 °C;
b. Gdy naładowanie odbywa się natychmiast po zatrzymaniu
pracy.
2. Po zakończeniu pracy należy naładować odkurzacz, bez względu
na to, jak długo jest używany.
3. Zaleca się odłączyć od zasilania w czasie, gdy nie jest ładowany.
4. Gdy odkurzacz nie jest używany przez dłuższy czas (ponad 2
miesiące), należy odłączyć go od zasilania, ale w celu zapewnienia
żywotności akumulatora, należy co 2 miesiące w pełni go
naładować.
5. Jest to normalne zjawisko, ponieważ podczas naładowania
urządzenie lub zasilacz mogą się nagrzewać. Można go używać
normalnie.
16

Wprowadzanie Produktu
Instalacje i Części
Przycisk On/off
Przycisk Mode (Tryb)
Przycisk zwalniający pojemnik
na kurz
Przycisk do opróżniania
pojemnika na kurz
Przycisk zwalniający rurę
Przełącznik
zginalny
Przycisk zwalniający
szczotkę elektryczną
Akumulator
Lista akcesoriów
Elektryczna
szczotka do
czyszczenia łóżek
Szczotka do
tapicerki
Zespół klamry do
przechowywania
Dysza
szczelinowa
Zespół stojaka do
składowania Adapter Instrukcje
17

Działanie Funkcji
Użytkowanie rury zginalnej
Po pociągnięciu do góry górnej tulei zginalnej rury, a zginalna rura automatycznie
obraca się i zgina.
Naładowanie akumulator
Uwaga
1. Akumulator nie jest naładowany w momencie opuszczenia wytwórni, dlatego
przed rozpoczęciem użytkowania należy ją w pełni naładować.
2. Nie należy naładować akumulator w temperaturze otoczenia poniżej 5 °C lub
powyżej 40 °C;
3. Kontrolka miga przy niskim poziomu akumulatora podczas pracy;
4. Gdy żywotność akumulatora urządzenia jest wyraźnie skrócona, a czas
naładowania wydłuża się, należy wymienić akumulator przez profesjonalistów.
Aby uniknąć niebezpieczeństwa, nie należy samodzielnie demontować i
montować urządzenia.
Nr seryjny Instrukcja Operacja
Umieścić urządzenie stabilnie na
stojaku do składowania
Podłączyć jeden koniec przewodu
zasilającego do gniazda, a drugi koniec
do portu naładowania znajdującego się
w tylnej części uchwytu na głównym
urządzeniu. Miga kontrolka zasilania.
Kontrolka wyłączy się po upływie czasu
pełnego naładowania.
Czas ładowania: 5-7 godzin
Czas rozładowania: Tryb
zaawansowany ok. 10
minut, tryb średni ok.
20 minut, tryb niski ok.
70 minut
18

Działanie Funkcji
Czyszczenie
Uwaga
1. Aby zapobiec zablokowaniu kanału powietrznego, należy najpierw uprzątnąć
śmieci w dużym rozmiarze (takie jak duże kawałki papieru i folii opakowaniowej)
znajdujące się na danym obszarze;
2. Nie należy używać i przechowywać akumulatora w temperaturze otoczenia poniżej
5 °C lub powyżej 40 °C;
3. Przed wyrzuceniem urządzenia należy wyjąć akumulator od niego;
4. Surowo zabrania się przerabiania kompletnego urządzenia, akcesoriów oraz
wymiany przewodu zasilającego lub akumulatora;
5. Model akumulatora: BP28825A
Nr
seryjny Użytkowanie urządzenia
Kontrolka Przycisk
Mode
(Tryb)
Przycisk
Mode (Tryb)
Przycisk
On / Off
Przycisk
On / Off
Kontrolka
2
Kontrolka
1
Kontrolka 3
Nacisnąć raz przycisk "On/Off" do włączenia
urządzenia;
Ponownie nacisnąć przycisk "On/Off" do
wyłączenia urządzenia.
Jednoczesne miganie kontrolek 1, 2 i 3
oznacza wystąpienie alarmu, który wymaga
profesjonalnej obsługi.
Po włączeniu zasilania z akumulatora
naładowanego w pełni urządzenie domyślnie
ustawia się w trybie średnim (kontrolki 1, 2 i 3
świecą się jednocześnie). Nacisnąć raz przycisk
"Mode (Tryb)" do trybu zaawansowanego
(Kontrolki 1 i 2 świecą się, a kontrolka 3 jest
niebieska), i ponownie nacisnąć przycisk " Mode
(Tryb)" do trybu niskiego (kontrolka 1 i 2 świecą
się, a kontrolka 3 jest wyłączona);
Kontrolka poziomu akumulatora podczas
naładowania:
Miganie jednej z kontrolek 1 i 2 oznacza, że
poziom naładowania akumulatora jest niski i
należy kontynuować naładowanie. W momencie,
gdy kontrolki 1 i 2 są włączone, bateria jest
w pełni naładowana, a kontrolka zgaśnie po
okresie pełnego naładowania.
Kontrolka poziomu akumulatora podczas pracy
(rozładowania): Świecenie kontrolek 1 i 2
oznacza, że poziom baterii jest wystarczający.
Miganie kontrolki 1 lub zgaśnięcie kontrolki 2
oznacza, że poziom baterii jest niski. Należy
naładować na czas.
19

Czyszczenia i Konserwacje
Składowanie i użytkowanie odkurzacza
Uwaga
1. Gdy odkurzacz jest umieszczony na stanowisku składowym lub gdy stanowisko
do składowania jest ustawione samodzielnie, należy je umieścić na poziomym
podłożu, aby uniknąć upadku i uszkodzenia odkurzacza.
2. Niezależnie od tego, czy odkurzacz jest w pracy, czy na stanowisku składowym,
należy go używać ostrożnie, aby nie uszkodzić urządzenia.
1. Instalacje stanowiska składowego
Zainstalować zespół stojaka i podstawę do składowania w sposób pokazany na
rysunku i umieścić stanowisko składowe pionowo na poziomym podłożu w sposób
pokazany na prawym rysunku.
2. Składowanie odkurzacza
Przed umieszczeniem odkurzacza na stanowisku składowym należy jeszcze raz
upewnić się, że podłoże jest poziome, a odkurzacz został wyłączony. Delikatnie
umieścić odkurzacz na stojaku stanowiska składowego w pozycji pokazanej na
poniższym rysunku, a następnie opuścić po stabilnym ułożeniu odkurzacza.
20
Other manuals for P7 FLEX
1
This manual suits for next models
1
Table of contents
Languages:
Other Midea Vacuum Cleaner manuals

Midea
Midea VCR09B User manual

Midea
Midea M7 User manual

Midea
Midea S8+ User manual

Midea
Midea Eureka i5 User manual

Midea
Midea M7 User manual

Midea
Midea VCS35B15KC User manual

Midea
Midea H3 Series User manual

Midea
Midea MVC-V18P User manual

Midea
Midea VTW21A15T-140 User manual

Midea
Midea MVC-V18P Wiring diagram

Midea
Midea S8+ User manual

Midea
Midea MD-VC2121B User manual

Midea
Midea P71 Administrator Guide

Midea
Midea MSB 5.700bs Administrator Guide

Midea
Midea MVC-V18K-BG User manual

Midea
Midea VSC02A861 User manual

Midea
Midea SC861 User manual

Midea
Midea P12 FLEX User manual

Midea
Midea CH835 User manual

Midea
Midea i5 Extra User manual