Siterwell GS361A-H04 User manual
GS361A-H04
RadiatorThermostat
User Manual
SITERWELL ELECTRONICS CO., LIMITED
www.china-siter.com

GS361A-H04 User Manual V1.06
2/ 20
1 Overview
Radiator Thermostat (GS361A-H04), using dry battery power supply, without
wiring, easy installation, for the temperature control of warm water radiator, provide
comfortable temperature, reduce energy waste, save the cost of heating users. This
product has a built-in zigbee®(Tuya) wireless communication module with low power
and LCD display screen. It can be used individually and can be added to the
TuyaSmartAPP to make it an intelligent thermostat.
After joining the TuyaSmart system, you can select the mode, set the temperature,
set the child lock and set the window detection function in APP. Any operation at the
device side will also be synchronized toAPP, such as setting temperature manually.
2 Features
3 mode settings——Automatic mode, Manual mode and Anti-freezing mode.
Temperature setting range 5~30℃(For Automatic mode and Manual mode) or
5~15℃(For Anti-freezing mode).
With LCD display screen and big characters, easy to see.
2 years battery life.
zigbee®wireless communication protocol, safe, reliable and convenient.
Easy to join TuyaSmart intelligent system.
3 Illustration
Number
Name
1
LCD
2
Knob
Press: Setting mode
Rotate:
Adjusting temperature
3
LED
4
Interface nut
Number
Display content
1
Fault
2
Low battery
3
Temperature you set
4
Window detection
5
Automatic mode
6
Manual mode
7
Installation mode
8
Networking
9
Child lock
GS361A-H04 User Manual V1.06
3/ 20
4 Installation Instruction
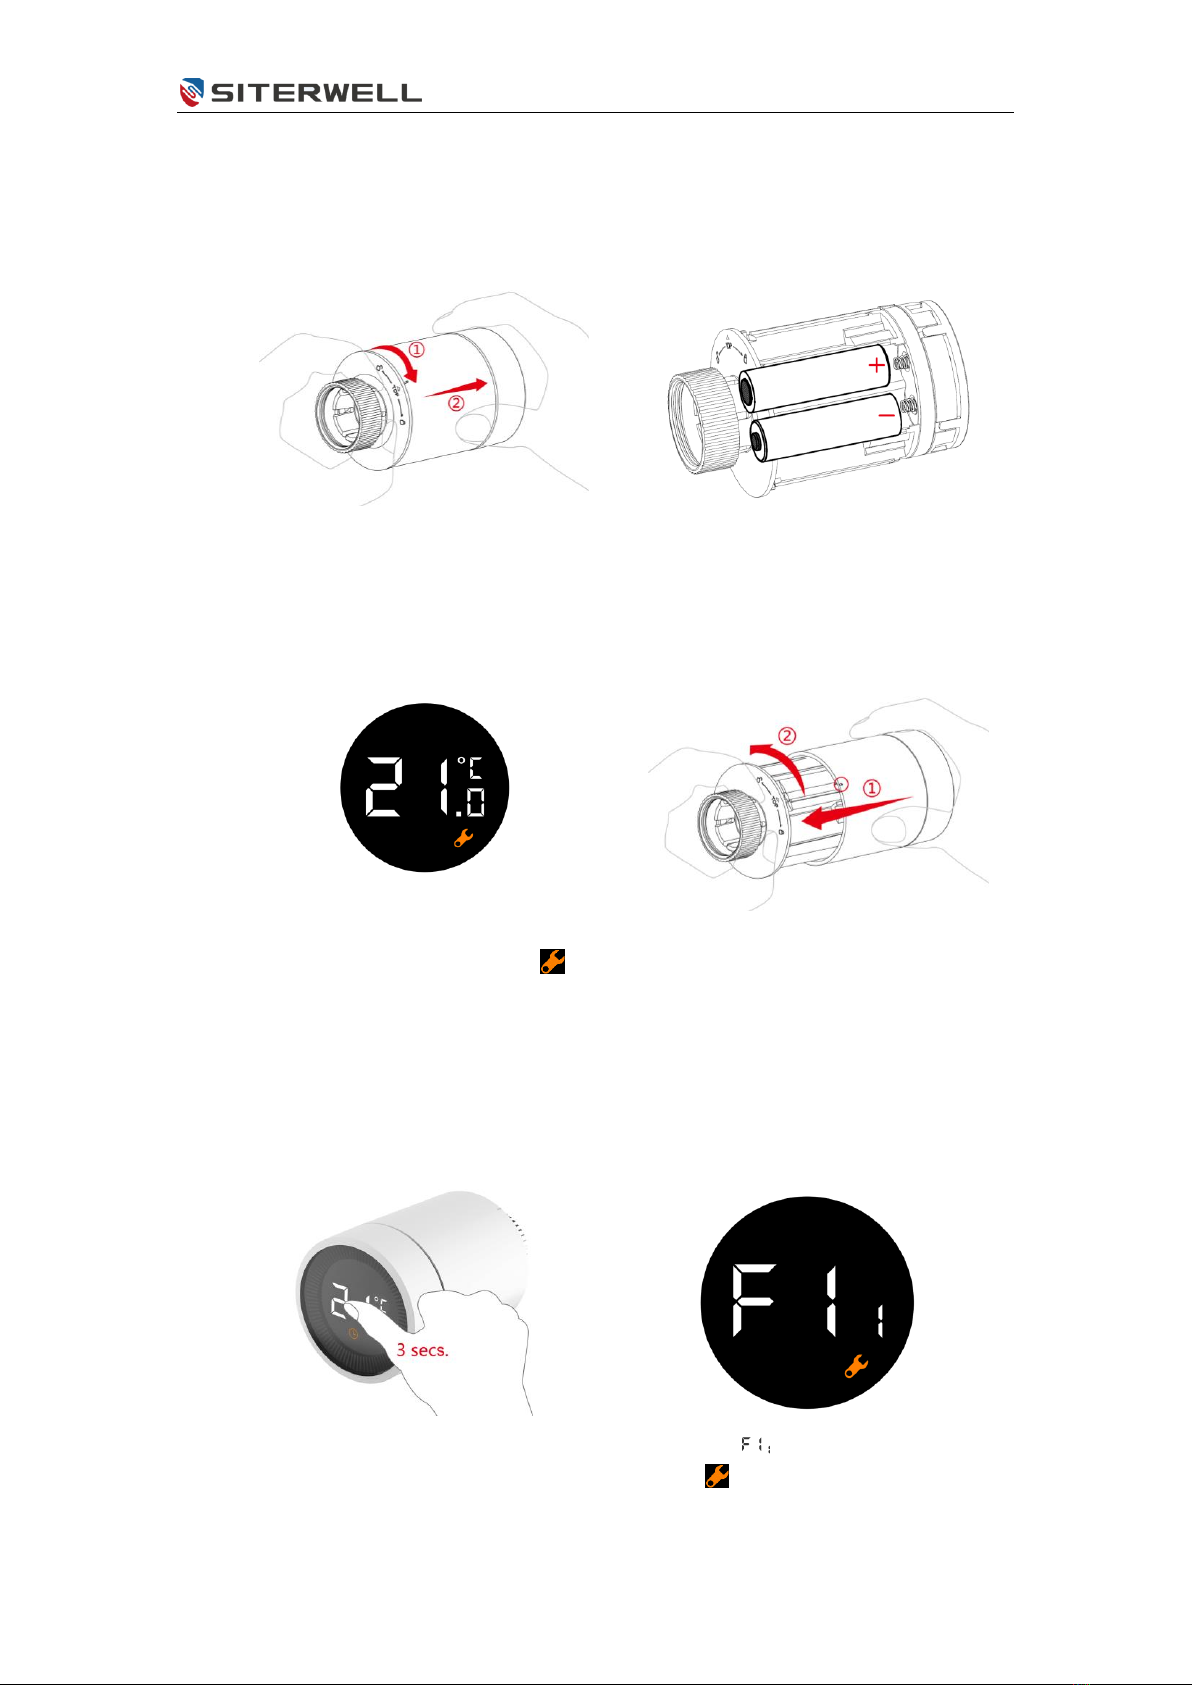
4.1 Put in battery
1) Turn the outer case towards the
arrow with right hand and pull out.
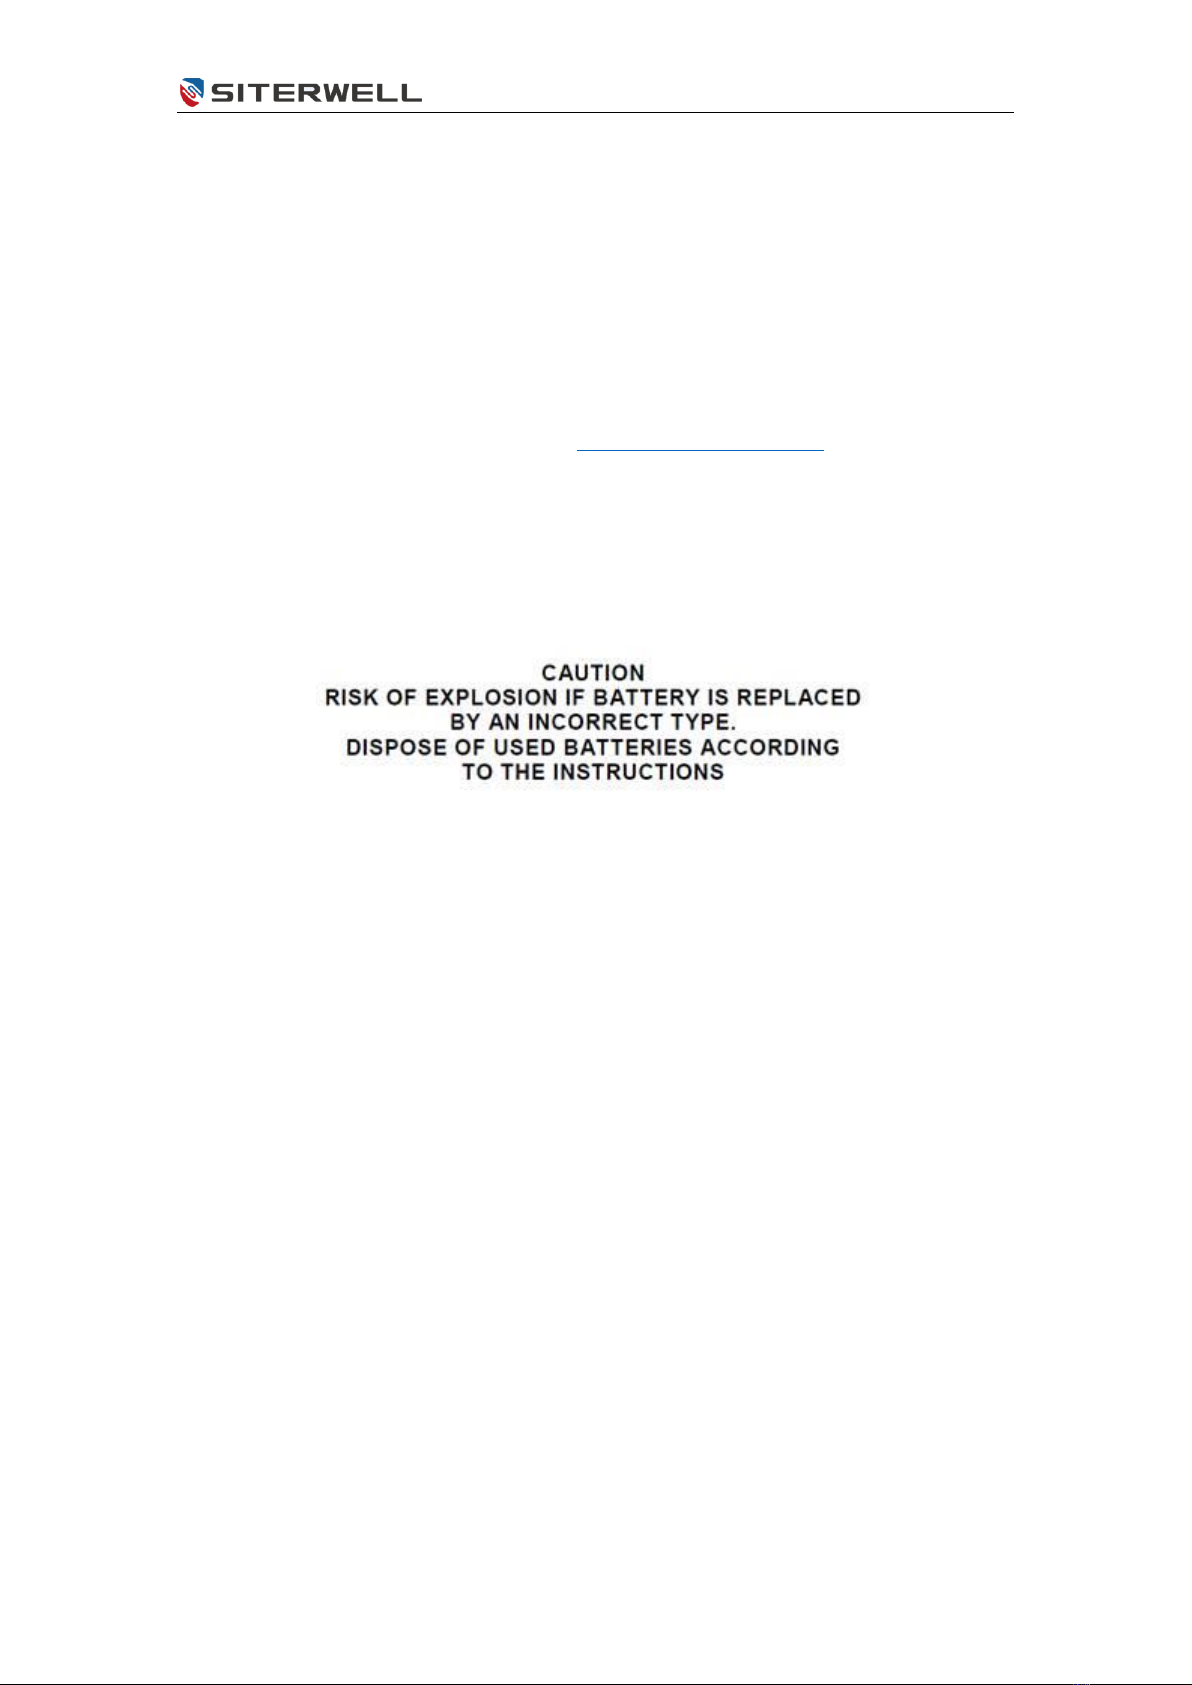
2) Refer to the polarity direction of
the battery compartment, put in 2AA
alkaline batteries.
Note that cannot use rechargeable
batteries.
3) After putting into the batteries, the
current temperature and symbol will
be displayed.
4) Load the outer case and turn it
towards the opposite direction with
right hand to complete the installation
of batteries.
4.2 Start to use
You can use your thermostat in only a few steps.
1) Press the knob and hold on for 3
seconds before the product be
installed on the valve.
2) Until the appears and the
symbol flickers, there will be slight
vibration at the same time.
GS361A-H04 User Manual V1.06
4/ 20
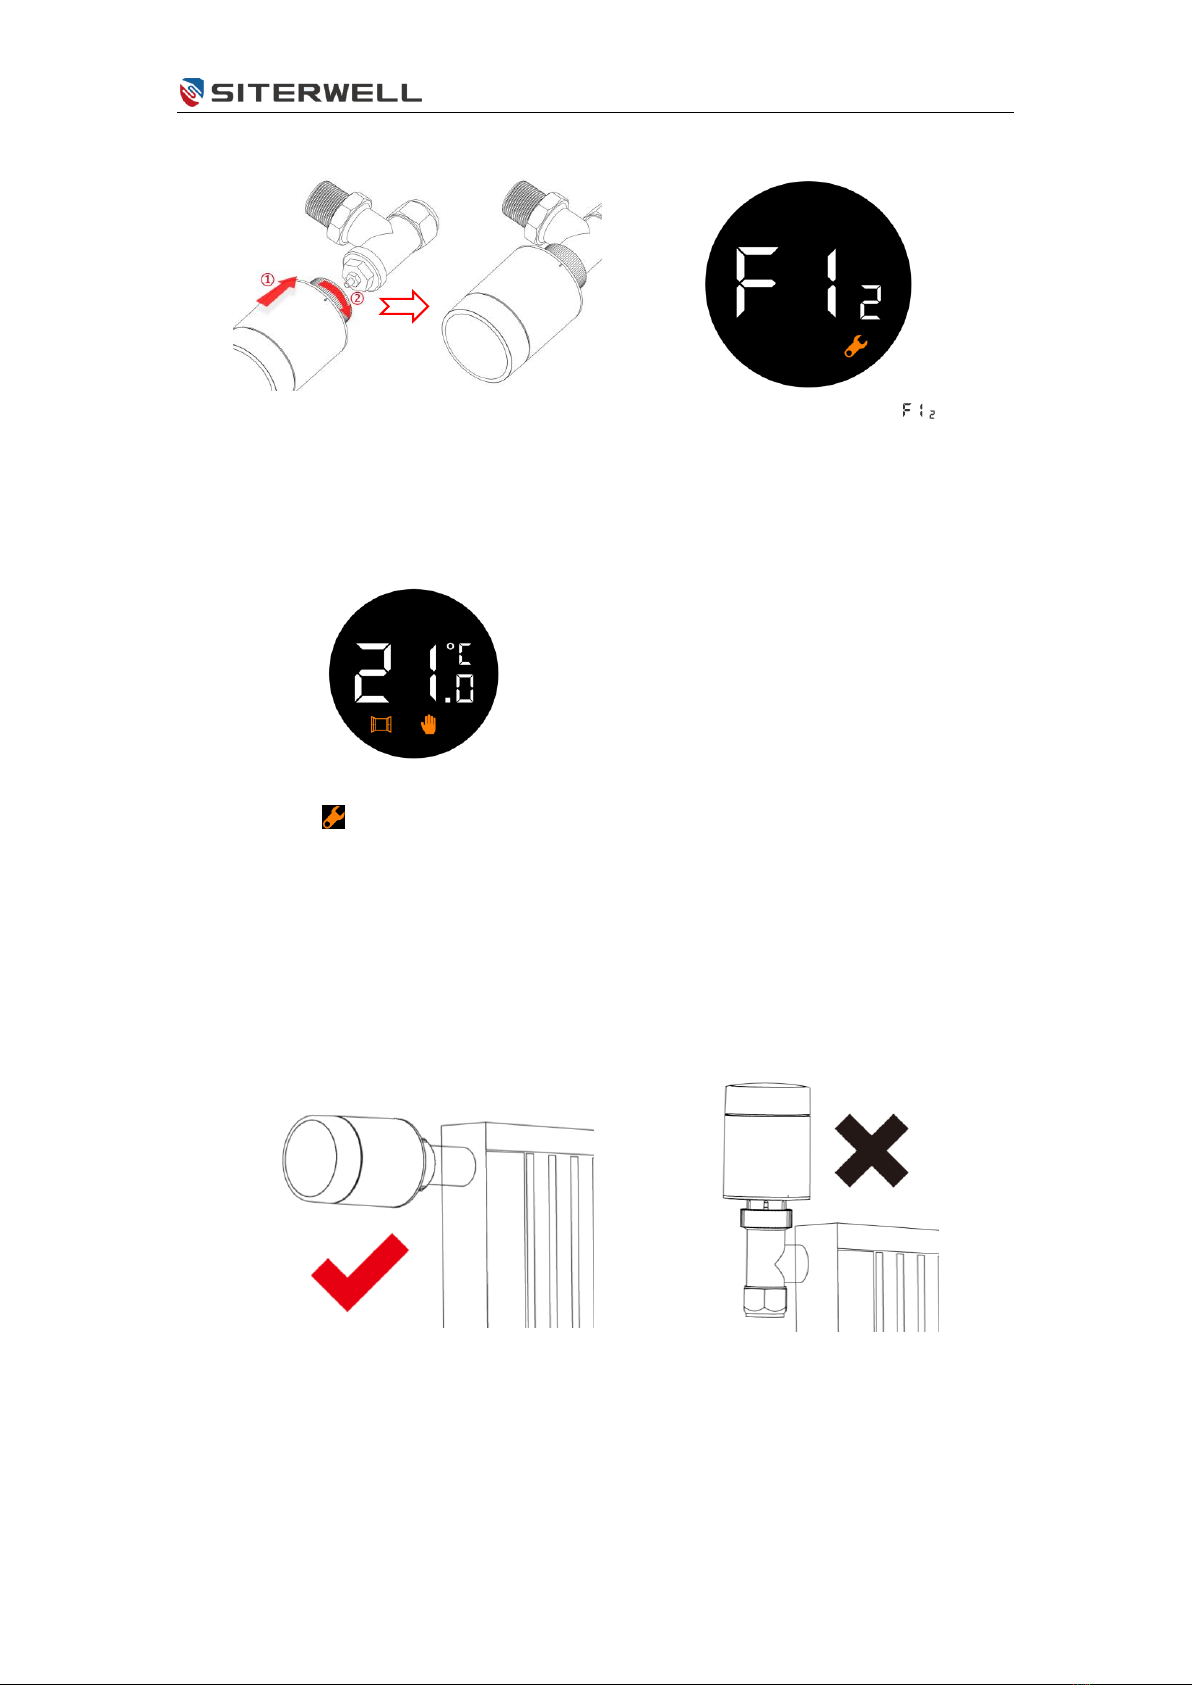
3) Align the thermostat interface nuts
to the radiator valve. Then push
forward slightly and turn the interface
nuts clockwise until tightening. The
maximum torque is 5N·m.
4) Press the knob again and
appears.
5) After about 10 seconds, the
symbol disappears and the
current temperature is displayed. The
installation is finished.
In order to minimize the influence of the radiator's own heat on the thermostat, it
is recommended to install as follows.
Correct
Wrong
GS361A-H04 User Manual V1.06
5/ 20
4.3 Automatic detection
When the thermostat is installed, the equipment will be adjusted
automatically according to the heating system. During this process, you may
find that the thermostat is slow response or self-heating / self-cooling. This is
normal and is a necessary part of the adjustment process.
The thermostatwill close the radiator valve at a specific time, and then opens
it again to detect the exact opening position of the valve. The automatic
detection function can make use of heat as efficientlyas possible and control
the temperature more accurately.
If necessary, please reload the battery and activate the installation mode and
manually run the automatic detection function.
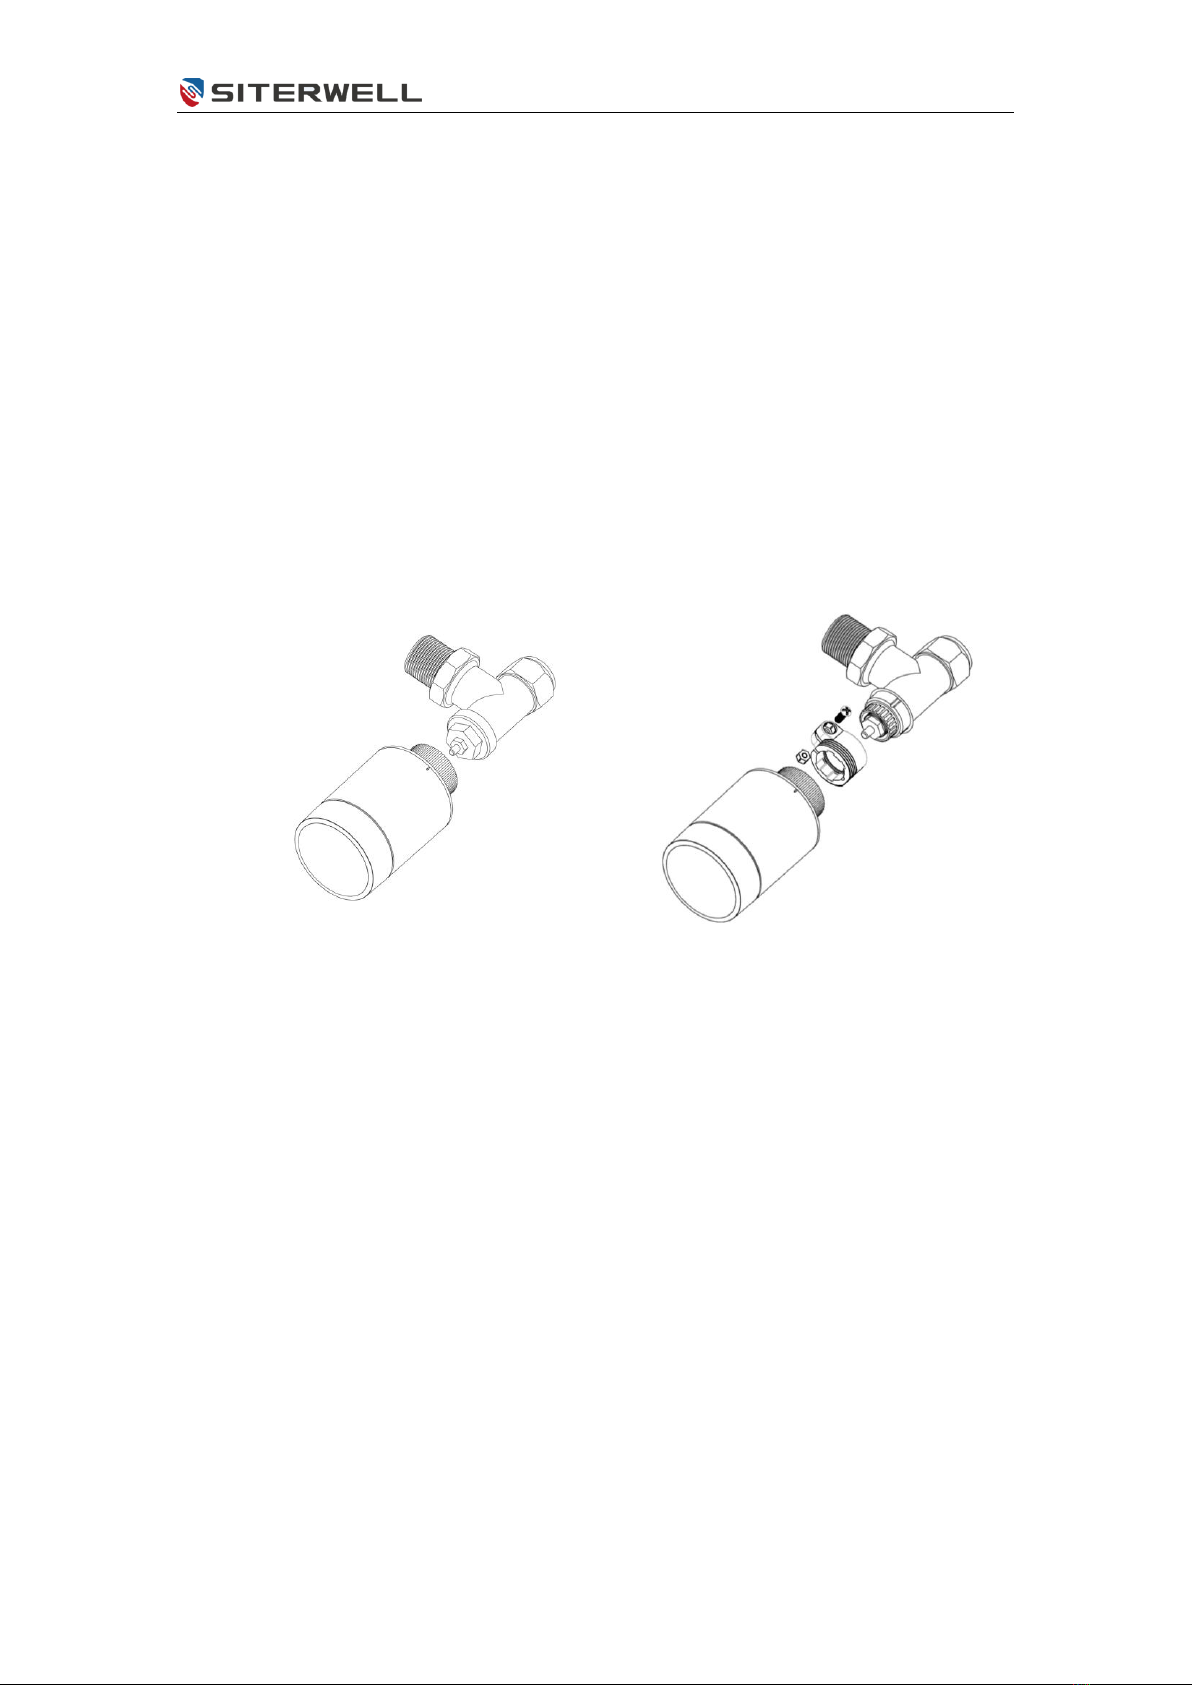
4.4 About valve
Installation diagram of valve A.
Installation diagram of valve B.
GS361A-H04 User Manual V1.06
6/ 20
5 Operation instruction
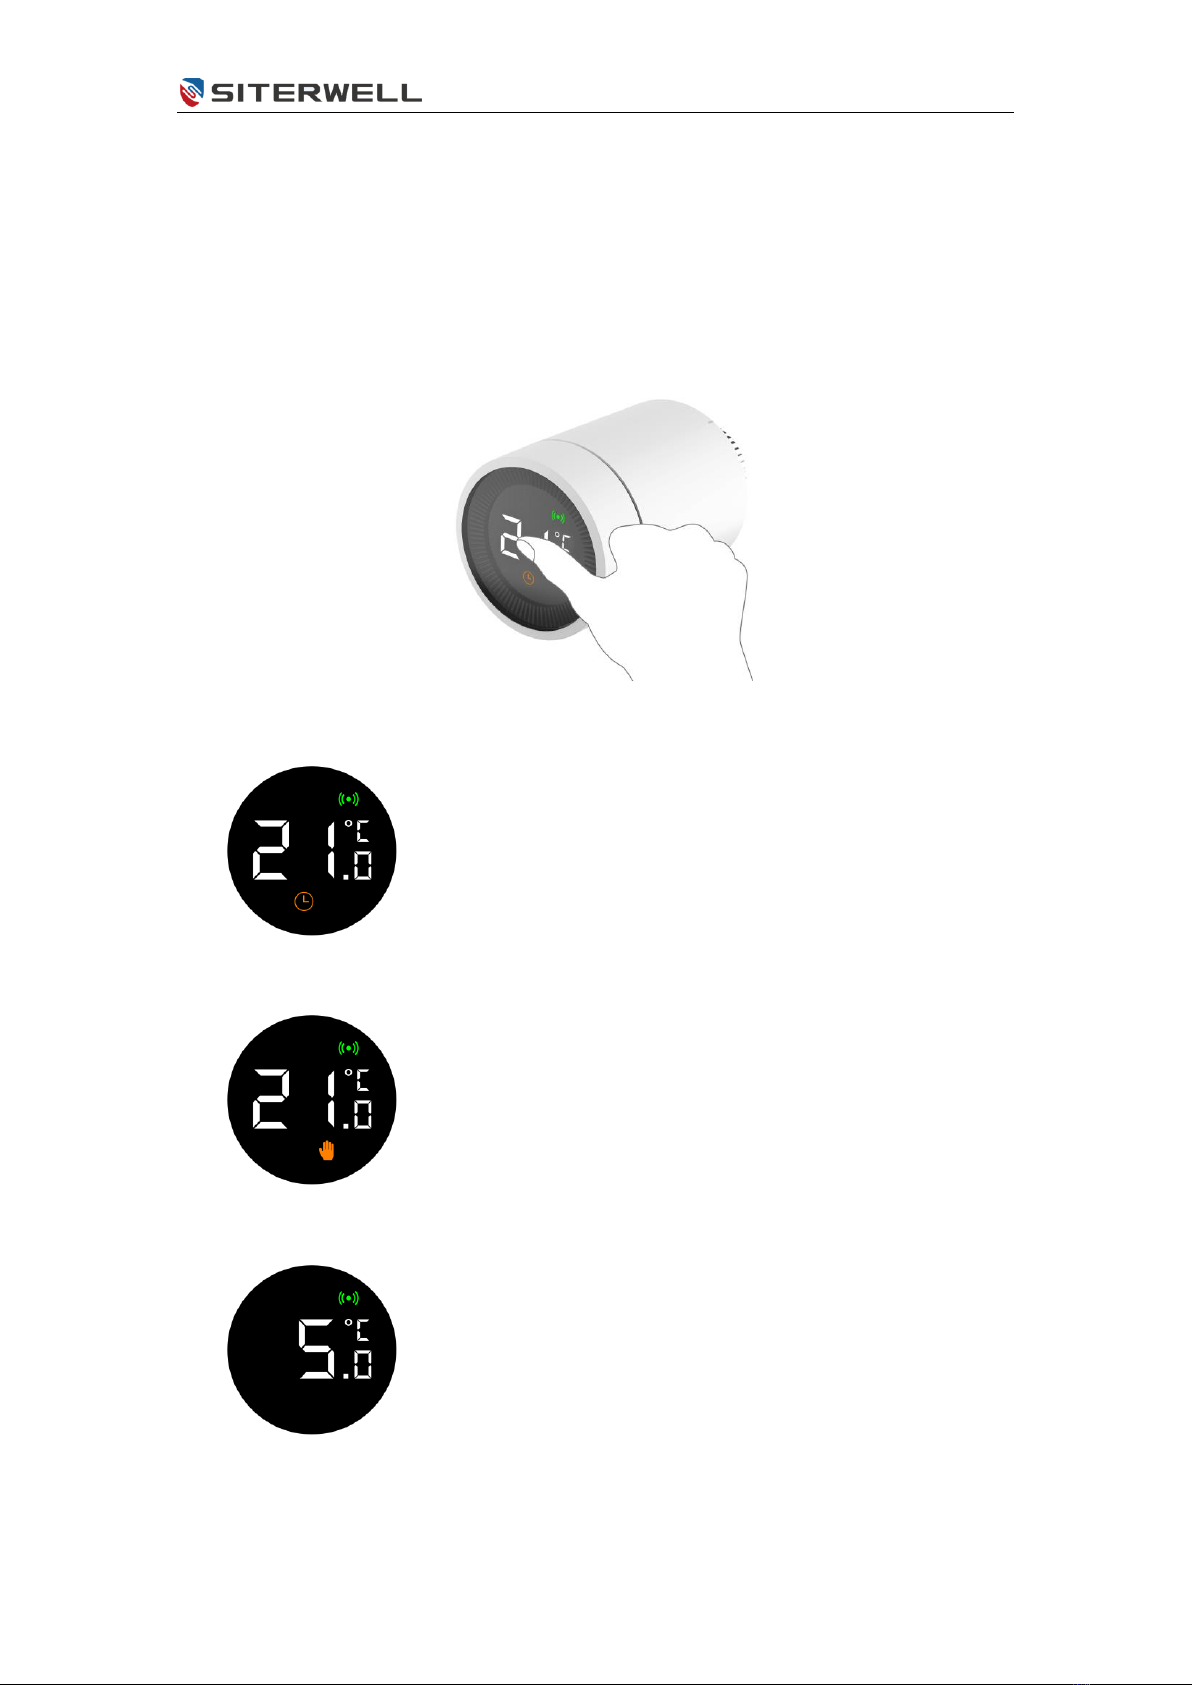
5.1 Select mode locally
In standby status, press the button to switch in three modes: Automatic, Manual
and Anti-freezing, as shown in the following figure.
Automatic mode
Automatic mode, the thermostat automatically switches to
the required temperature, such as set at 21℃when being
home, set at 17℃when sleeping, and set at 15 ℃when
being away home. The automatic mode needs to connect
to the gateway and needs network.
Manual mode
Manual mode, this temperature you set will not change
because of the different situation mode. the temperature
can be set manually by adjusting the knob and the
temperature range is 5~30℃.
Anti-freezing mode
Anti-freezing mode, while you leave home for a long time,
set the thermostat as an anti-freezing mode with a range of
5~15℃. This mode is mainly designed to protect water
pipes from freezing at low temperatures.
GS361A-H04 User Manual V1.06
7/ 20
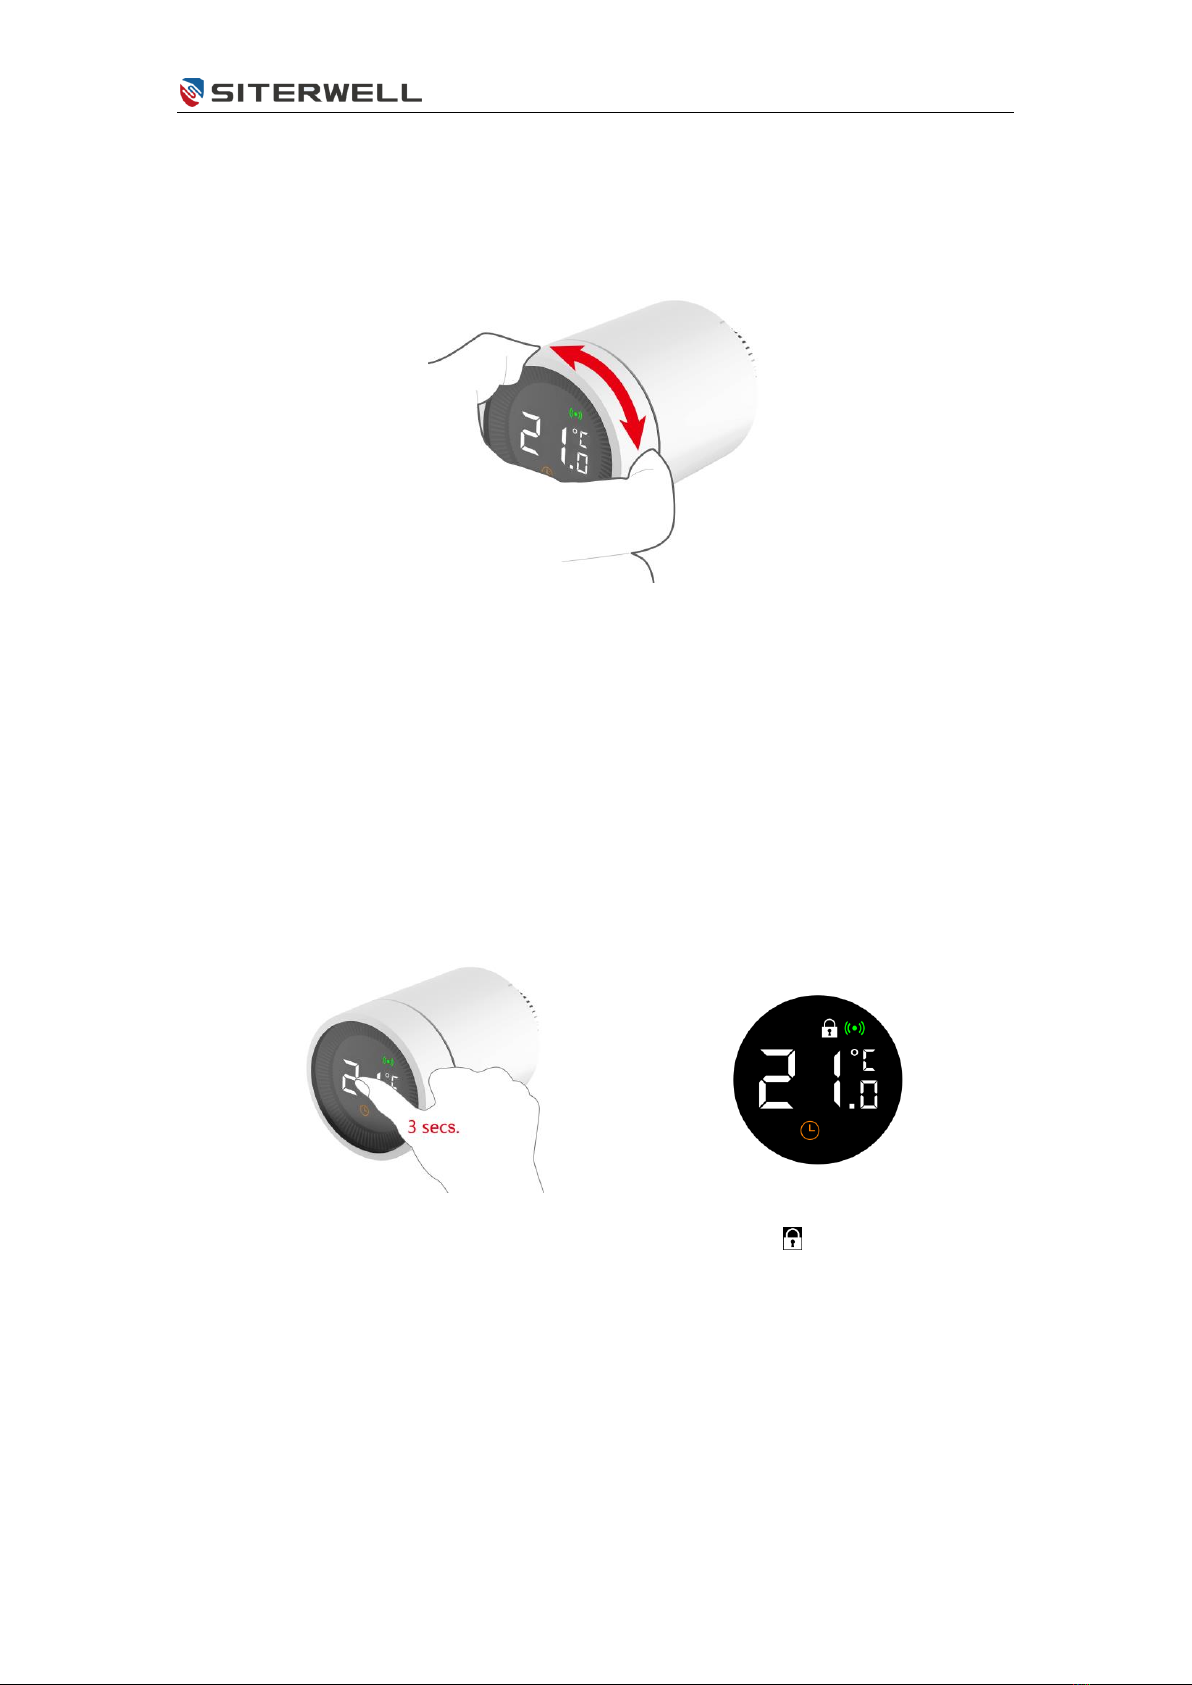
5.2 Set temperature locally
Under the standby status, turn around the knob can adjust the temperature after
pressing the knob, as shown in the following figure.
5.3 Set child lock locally
Long press the thermostat knob to turn on or close the child lock function, as
shown in the following figure. When the child lock function enables, all operations on
the thermostat will be invalid to prevent children from playing with the thermostat or
misoperation because of curiosity.
Note that setting child lock locally must be done after installation.
1) Press the knob and hold on for more
than 3 seconds.
2) A symbol appears to indicate
that the child lock has been
enabled. Repeated operation 1
will un-enable the child lock
function.

GS361A-H04 User Manual V1.06
8/ 20
5.4 Installation of TuyaSmart APP
Scan the QR code as below, get and install TuyaSmart APP for IOS and Android
system.
TuyaSmart APP

GS361A-H04 User Manual V1.06
9/ 20
5.5 Set gateway of TuyaSmart
After installing TuyaSmart APP, it is necessary to operate the network-setting of
the Tuya Gateway (called TYGWZ-01).
1) Login the APP after
registration
2) Click ‘Add Device’
3) Select ‘Gateway
(ZigBee)’
4) Make sure the LED is
always on and click to
next
5) Wait and until next
Interface appears
6) Finished
GS361A-H04 User Manual V1.06
10 / 20
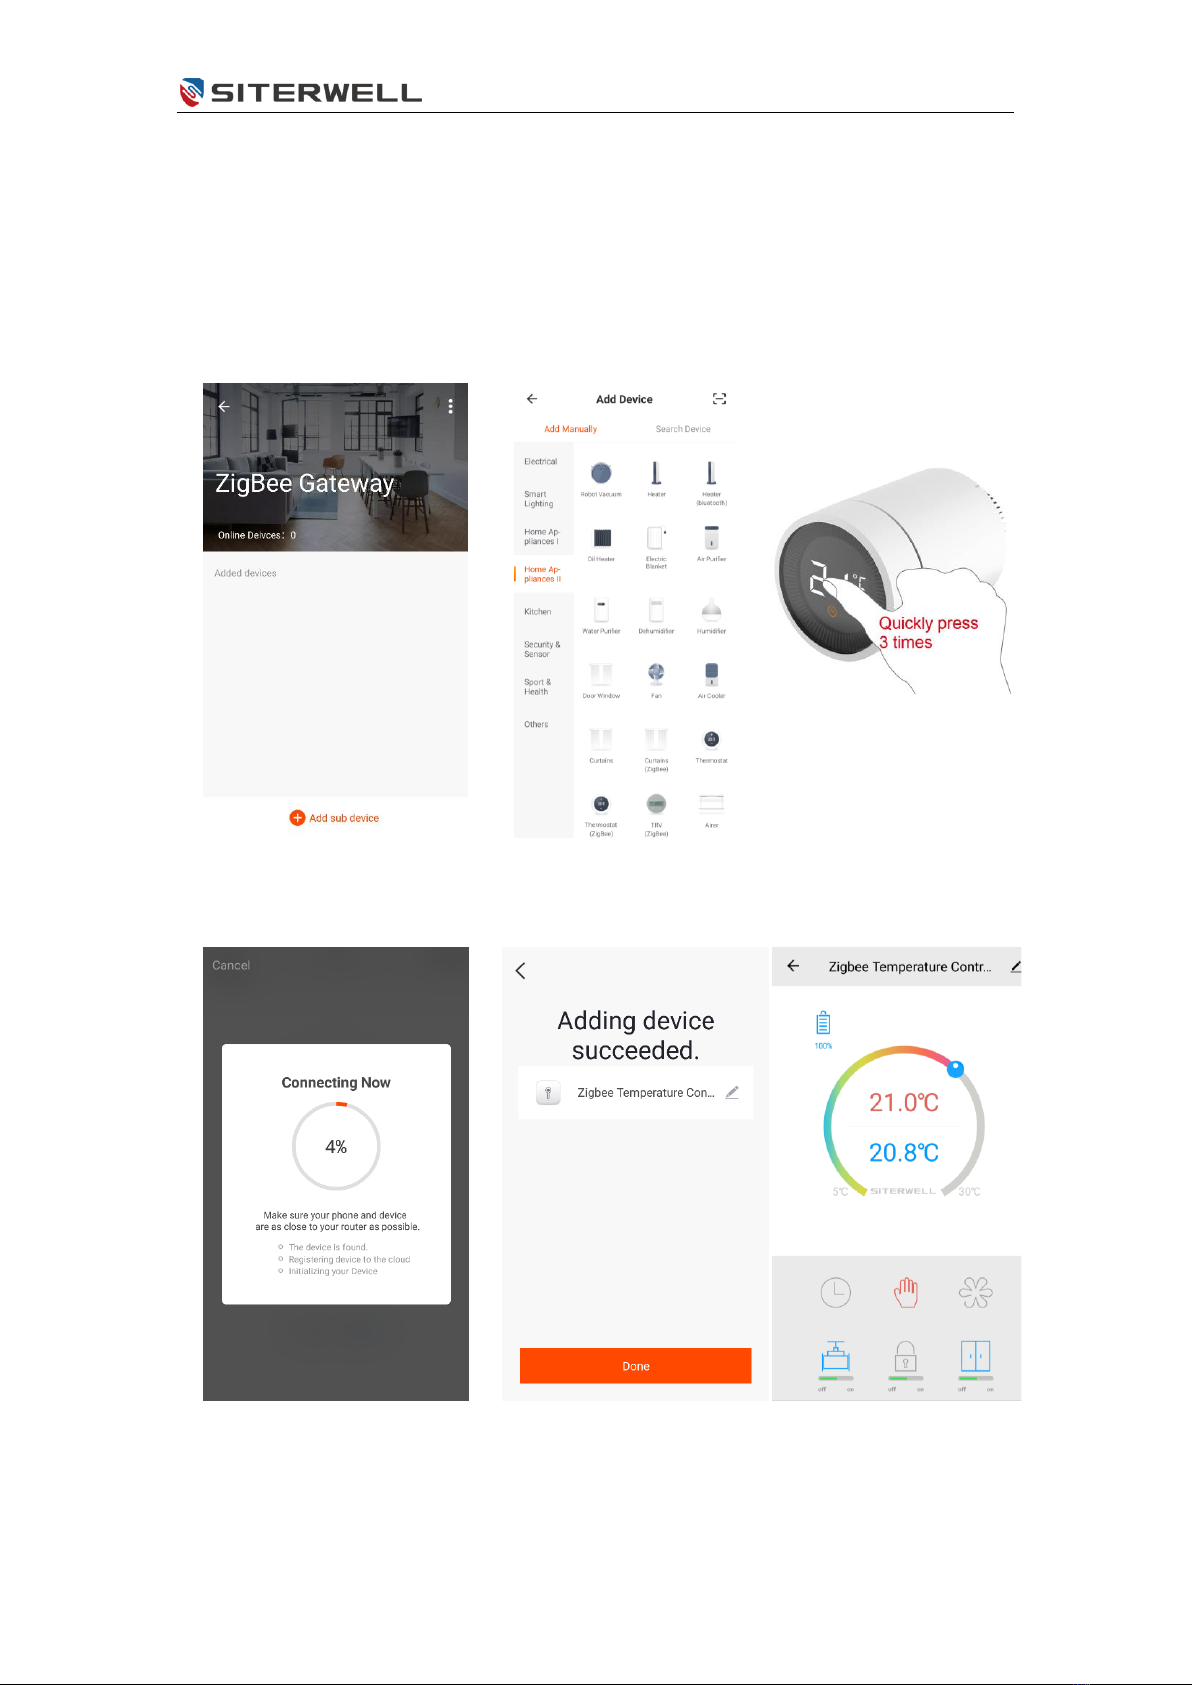
5.6 Add into TuyaSmart
In standby mode, the thermostat will enter the matching mode by pressing the
knob three times quickly. Matching process is limited to 2 minutes, cannot be
interrupted halfway and then automatically withdraw.
1) Click ‘Add sub device’
2) Find out ‘Thermostat
(ZigBee)’and click it
to match.
3) Click the knob 3
times quickly.
4) Wait and until next
Interface appears
5) Successfully
6) Main page

GS361A-H04 User Manual V1.06
11 / 20
5.7 Mode selection in APP
It supports to switch Automatic mode, Manual mode and Anti-freezing mode
in APP. Please refer to the introduction of section 5.1 for the differences between
different modes.
Click ,or button to set one
mode.
GS361A-H04 User Manual V1.06
12 / 20
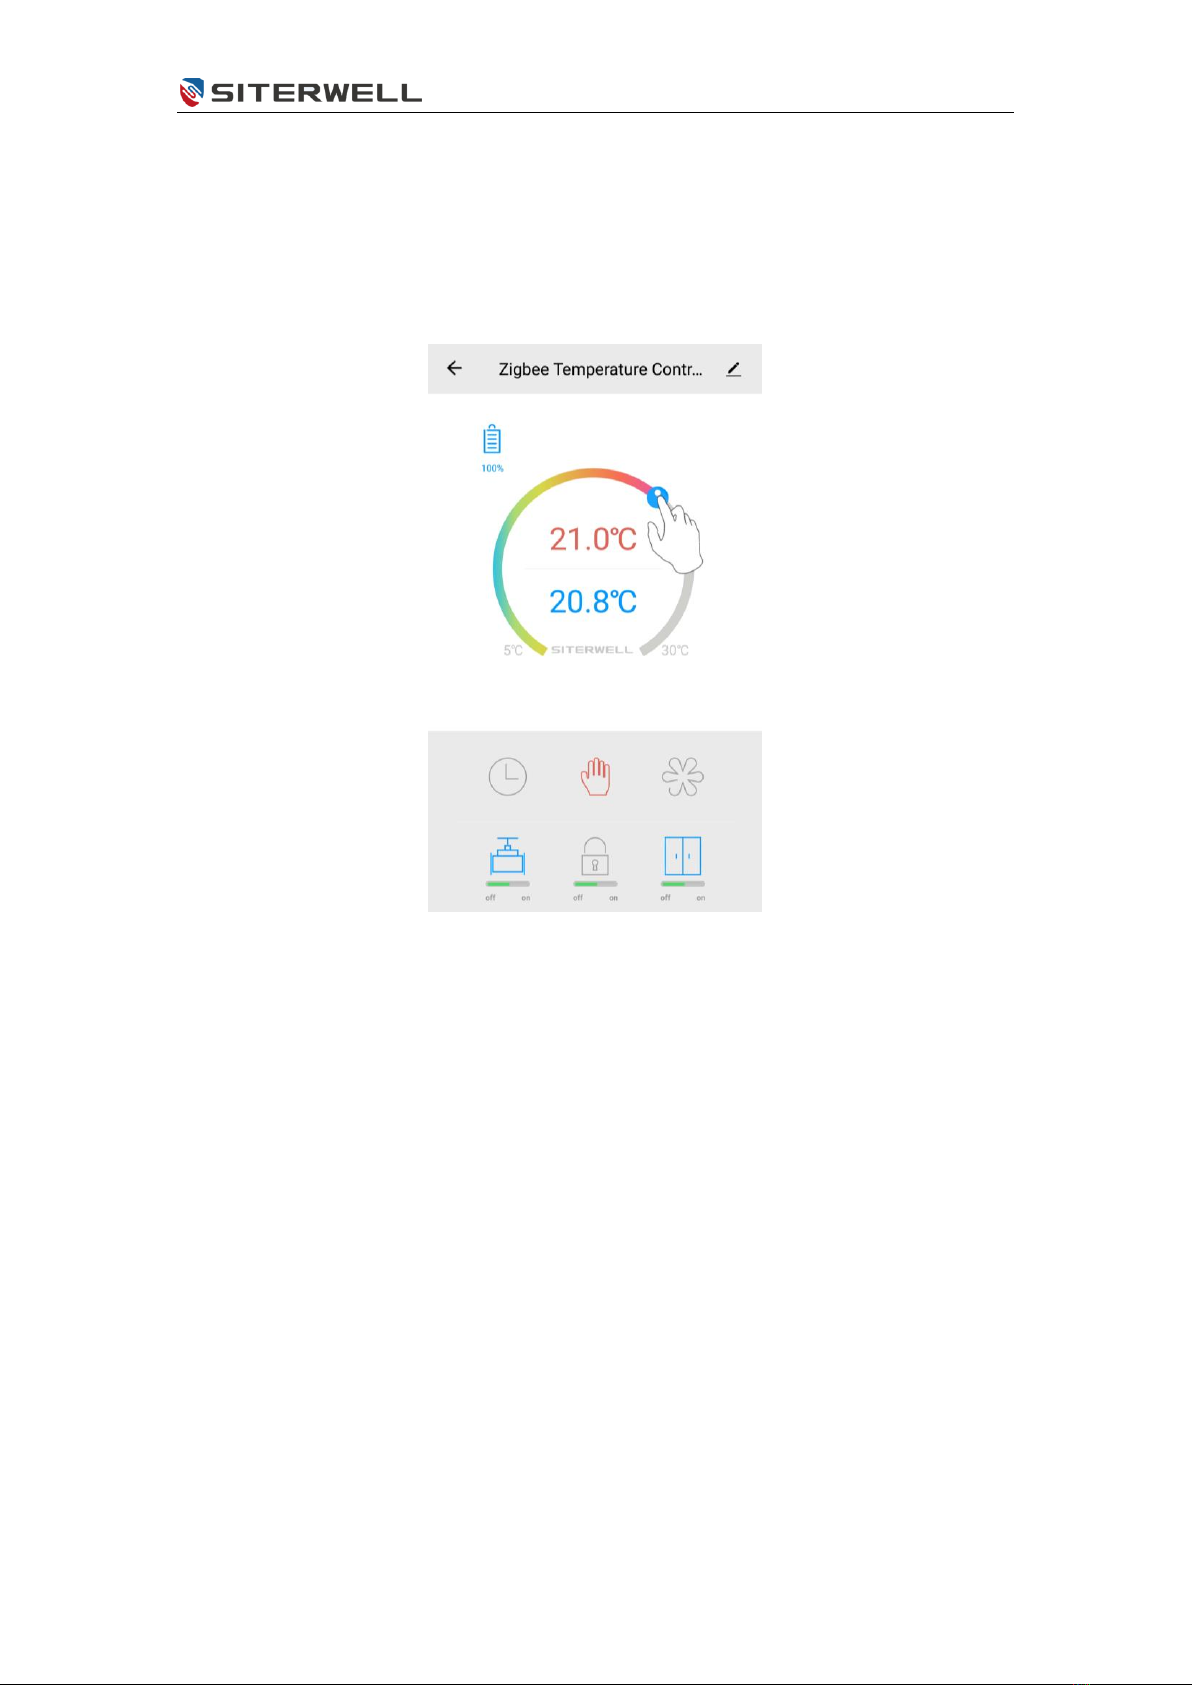
5.8 Set temperature in APP
The temperature settings in different modes are supported in APP, and the
operation can be accomplished by dragging the adjusting ball simply.
Drag the adjusting ball to set the
temperature.

GS361A-H04 User Manual V1.06
13 / 20
5.9 Set child lock in APP
Child lock can be enabled or canceled by APP, as shown in the following figure.
When the child lock function is enabled, all operations on the thermostat will be invalid
to prevent children from playing with the thermostat or misoperation because of
curiosity.
Click the child lock button to enable
or unenable the child lock function.
GS361A-H04 User Manual V1.06
14 / 20
5.10 Set window detection
The window detection function can be enabled or canceled by APP, as shown in
the following figure. When the window opening detection function is enabled, if the
thermostat detects that the window is opened, the valve will be closed for 30 minutes
to reduce heat loss.
The window detection function is opened by default. If it has been shut down, it
can be reopened according to the following steps.
Click on the window button to enable or
cancel the window detection function.

GS361A-H04 User Manual V1.06
15 / 20
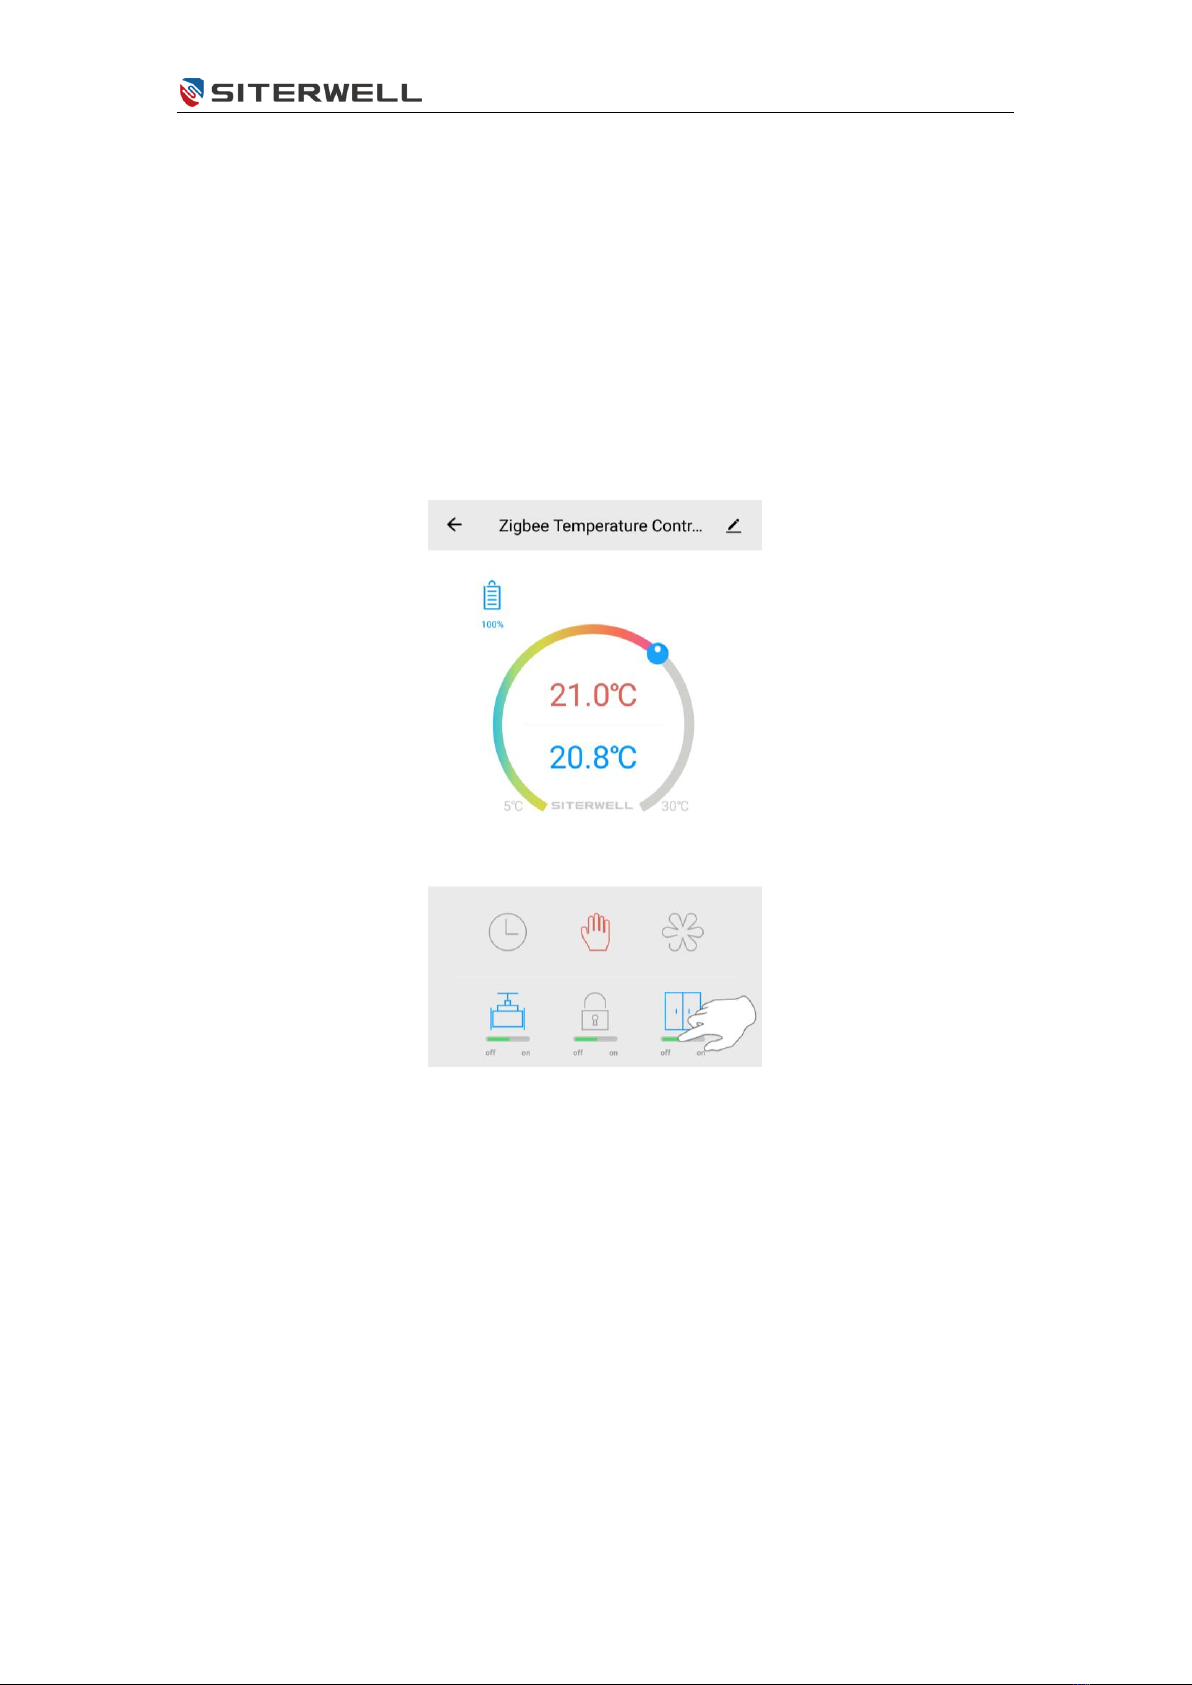
5.11 Set valve detection
The valve detection function can be turned on or off by APP, as shown in the
following figure. When the valve detection function is opened, when necessary, it will
run its own valve inspection procedures.
The valve detection function is opened by default. If it has been shut down, it can
be reopened according to the following steps.
Click on the valve button to enable or
cancel the valve detection function.

GS361A-H04 User Manual V1.06
16 / 20
5.12 Automatic Mode Settings
1) Click button
2) Click ‘Add timing’
3) Set the time and
temperature and save.
4) Save successfully and
click ‘Back’
5) Finished
GS361A-H04 User Manual V1.06
17 / 20
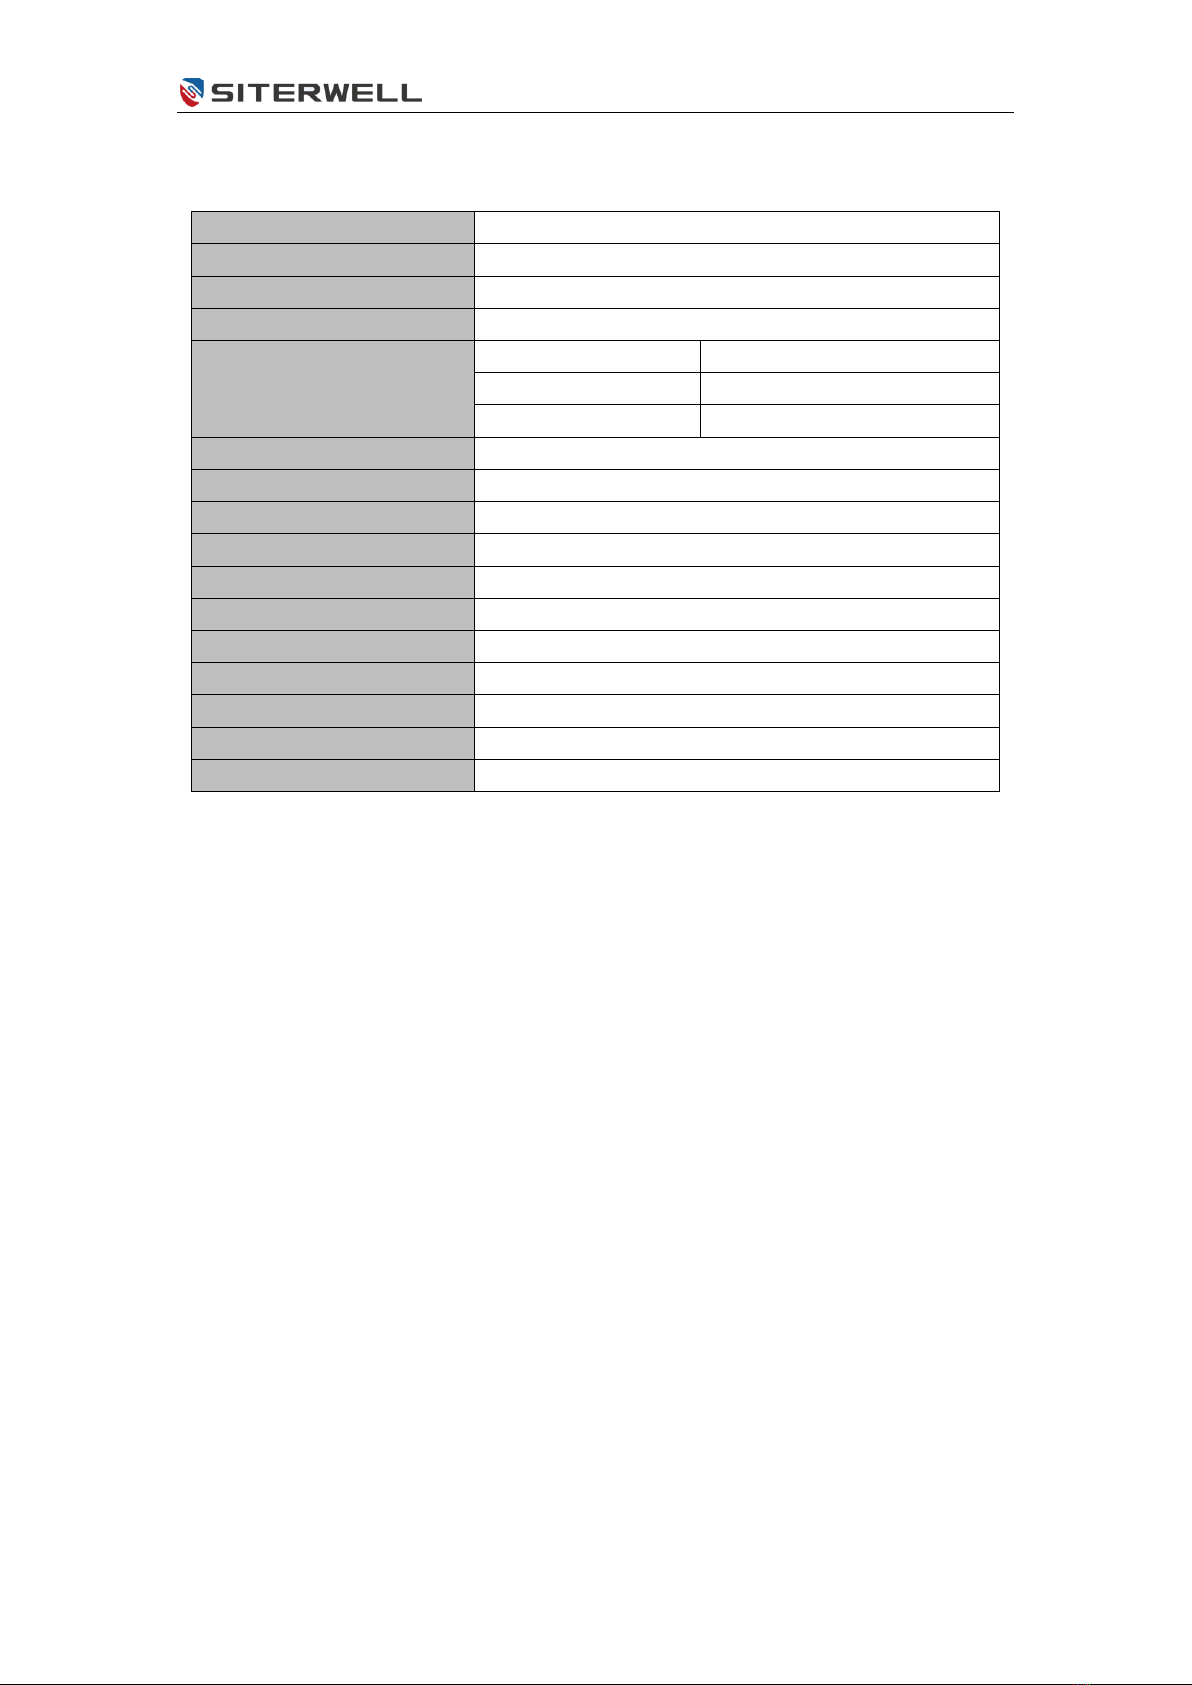
6 Technical Specifications
Power input
DC3V(AA×2, Alkalinity)
Battery life
2 years
Bluetooth version
ZigBee®
Wireless distance
≥30 meters @in an open air
Setting temperature
Automatic mode
5~30℃
Manual mode
5~30℃
Anti-freezing mode
5~15℃
Measurement temperature
0~50℃
Measurement intervals
Once every 2 minutes.
Valve stroke
6mm max
Noise level
<35 dBA
Environment temperature
0~40℃
Storage temperature
-20~65℃
Max water temperature
90℃
Environment standards
RoHS
Size
Φ57×89mm
Interface nut
M30×1.5mm
Weight
~192g (Include batteries)

GS361A-H04 User Manual V1.06
18 / 20
7 Troubleshooting
Number
Problems
Reasons
Solutions
1
The thermostat can
operate normally, but
the room temperature is
obviously higher than
the set temperature.
The thermostat is not
installed correctly.
Remove the thermostat from
the valve, then take out the
battery and wait 30 seconds to
reload it. Then refer to section
4.2 and reinstall the thermostat.
Valve fault
Replace the valve, then take
out the battery and wait 30
seconds to reload it. Then refer
to section 4.2 and reinstall the
thermostat.
2
The thermostat can
operate normally, but
the room temperature is
obviously lower than the
set temperature.
Low inlet temperature of
radiator.
Contact the professional person
to overhaul the hot water pipe.
3
APP can't operate the
thermostat.
The thermostat is not
connected to the APP.
Reference section 5.5.
The thermostat is far away
from the APP, or there are
multiple obstacles in the
middle.
Adjust control distance.
Low battery.
Replace the battery.
4
The thermostat can
operate normally, but
the room temperature
cannot be kept
constant.
5
LCD displays
6
After the thermostat is
installed on the battery,
the thermostat has no
response.
Battery polarity inversion
Product fault.
Contact a seller to repair or
replace a product.
7
LCD displays
The thermostat is not
installed correctly.
Remove the thermostat from
the valve, then take out the
battery and wait 30 seconds to
reload it. Then refer to section
4.2 and reinstall the thermostat.
Too high temperature
setting.
Reset temperature.
Valve fault.
Replace the valve, then take
out the battery and wait 30
seconds to reload it. Then refer
to section 4.2 and reinstall the
thermostat.

GS361A-H04 User Manual V1.06
19 / 20
Room area is too large
(radiator does not match)
Replace radiator.
The inlet water pressure or
inlet temperature is too low.
Check inlet water pressure and
inlet temperature.
GS361A-H04 User Manual V1.06
20 / 20
Statement
The information in the User's Manual is absolutely correct at the time of publication,
however we are not responsible for the application of this document. The application
mentioned in this document is for illustration purposes only. We do not guarantee or
represent that these applications without further modifications are appropriate and that
we also have the right to modify the product without any notice. For the latest
information, please refer to our website http://www.china-siter.com.
If the equipment is used in a manner not specified by the manufacturer, the
protection provided by the equipment may be impaired.
SITERWELL ELECTRONICS CO.,LIMITED
Address:
No.666 Qingfeng Road, Jiangbei District,
Ningbo, Zhejiang
Phone:
0086-574-87729576
Postcode:
315000
Web:
www.china-siter.com
Table of contents


