SJOBLOMS 010-8351 User manual

Version 200318
USER MANUAL
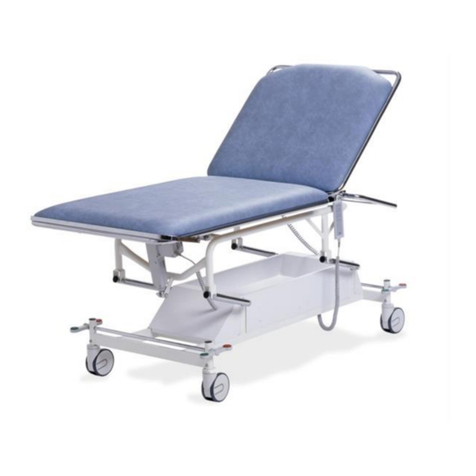
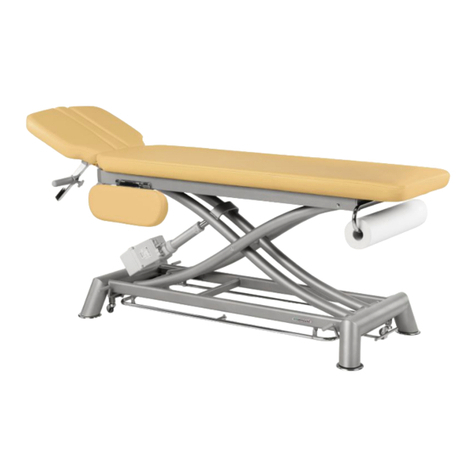
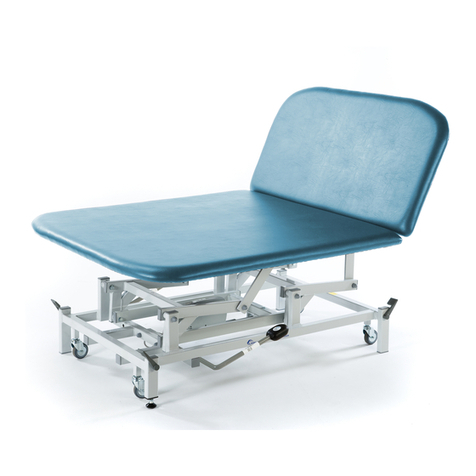
THREE-SECTIONED EXAMINATION TABLE
For models
010-8351, 011-8351
NOTE!
The operator must read the user manual
carefully BEFORE the product is used,
to avoid unnecessary risks to the patient and operator.

3-sectioned exam table Table of contents
TABLE OF CONTENTS
Foreword
Warranty
Important information
1. Function Description
1.1 General description
2. Operation
2.1 When the patient is being seated
2.2 Connection
2.3 Height adjustment
2.4 Adjusting the backrest
2.5 Adjusting the Trendelenburg position
2.6 Adjusting the leg section
2.7 Replacing the paper roll
2.8 Paper dispenser
2.9 The function of the castors
3. Maintenance & Cleaning
3.1 Routine check-ups
3.2 Cleaning
3.3 Lubrication scheme
3.4 Spare parts, hydraulic
3.5 Spare parts, electric
3.6 Accessories
3.7 Solutions for lubrication, cleaning and disinfecting
4. Technical specification
4.1 Dimensions
4.2 Motors and control units
4.3 Battery backup
4.4 Labels
5. EU-Declaration of Conformity
6. Contact details

3-sectioned exam table Foreword, warranty, information
FOREWORD
Welcome as the owner of a product manufactured by Sjöbloms Sjukvårdsutrustning
AB. We hope that you will be pleased and satisfied with our quality product.
If a problem should arise with this or any of our products, you are always welcome
to contact us, and our service department will assist you with the expertise needed
to solve the problem.
The user manual contains all the information needed to use, maintain and service
the product. The document is continuously updated as the products are modified.
Therefore we reserve against possible changes in the user manual.
WARRANTY
Sjöbloms provides a two-year warranty for material, design and manufacturing
defects, provided the products are not subjected to tampering or excessive wear.
For the guarantee to apply, the product must have been used in accordance with
the user manual, and the maintenance performed as specified.
IMPORTANT INFORMATION
This product is intended for professional medical use. The user manual should be
read carefully before using the product, to avoid unnecessary risks for the patient
and operator.
The user manual contains warnings where there is a risk of personal injury, which
should be noted. Improper handling can be fatal.
A warning triangle is shown where particularly important information can be found.
Warning triangle

3-sectioned exam table Functional description
1. FUNCTIONAL DESCRIPTION
This product is meant for professional use in health care, for examination of the
patient.
It is designed to be a functional and user-friendly tool for the operator and patient.
Note that the product must only be used by competent health professionals who
read the user manual, for correct handling.
General description
3-sectioned examination table, electrically or hydraulically adjustable, chromium-
plated or coated all-welded steel tube chassis. Backrest and Trendelenburg
adjusted by gas spring. The cushions are stuffed with foamed plastic and
upholstered with imitation leather.
125mm swivel central-locking castors. Various accessories such as neck pillow,
armrests etc. are also available.

3-sectioned exam table Operation
When the patient is being seated
2. OPERATION
2.1 When the patient is being seated
If the chair is equipped with armrests,
fold away one of them so that the patient
may be seated correctly.
The patient is the get on and off the chair
from the side.
NOTE!
Be aware of clothes getting stuck on the chassis’ castor tube (A).
A
For maximum safety, it is important
that the staff help the patient to sit
correctly in the seat. This also includes
the placement of the chair.
The castors must be locked when a
patient is on the chair.
Have the patient sit where the arrow
shows.
NOTE!
The patient must not sit on the foot
or head end side.
Misuse causes a risk of tipping over.
A

3-sectioned exam table Operation
Connection, height adjustment
2.2 Connection
The contact should be connected to a grounded 230V outlet. The gynecology chair
is now ready for use.
2.3 Height adjustment
Electric, hand control
(standard)
Hydraulic
To raise the product
Pump the longer part of
the pedal to raise the
table to the desired
height.
To lower the product
Press and hold the shorter
part of the pedal to lower
the table to a desired
height.
Electric, foot control
(optional)
NOTE!
Ensure that no
unauthorized persons are
in the couch's working
range, as a pinch hazard
exists when raising and
lowering the product.
Follow the symbols
and arrows to regulate
the couch.
Follow the symbols and
arrows to regulate the
couch.

3-sectioned exam table Operation
Adjusting the backrest
2.4 Adjusting the backrest
NOTE!
Ensure that no unauthorized persons are in the couch's working range, as a
pinch hazard exists when raising and lowering the product.
Electric, hand control
(standard)
Hydraulic / gas spring
Raising the backrest
Press at least one of the
handles positioned on the
side of the backrest.
The gas spring helps to raise
the backrest (variably
adjustable).
Lowering the backrest
Press the handle again while
pushing down the backrest.
Elektric, foot control
(optional)
For exam table with two
motors: The right pair
regulates the backrest.
The left pair regulates the
height of the table.
For exam table with three
motors: The right pair
regulates the backrest
and/or the Trendelenburg
position. Press the middle
switch to change between
the two functions.
The left pair regulates the
height of the table.
Follow the symbols and
arrows to regulate the
couch.

3-sectioned exam table Operation
Adjusting Trendelenburg/seat section
2.5 Adjusting the Trendelenburg position
Electric, hand control
(standard)
Hydraulic/gas spring
Trendelenburg/seat position
Press one of, or both, the
handles (cirkeln).
The gas spring helps adjust
the tables’ Trendelenburg
function.
To lower the Trendelenburg
position, press the handle
again while pressing down the
table top.
2.6 The leg section
Adjust the same way as the
seat section. The handles are
placed on the side of the
exam table.
Electric, foot control
(optional)
The right pair regulates
the backrest and/or the
Trendelenburg position.
Press the middle switch to
change between the two
functions.
The left pair regulates the
height of the table.
Follow the symbols and
arrows to regulate the
couch.
NOTE!
Ensure that no unauthorized persons are in
the couch's working range, as a pinch hazard
exists when raising and lowering the product.

3-sectioned exam table Operation
Paper holder, dispenser
2.7 Replacing the paper roll
2.8 Paper-holder
The paper-holder is located under the foot pad at the short-end side. Flip the
paper-holder open and pull out new paper. Cover the table with the paper.
Fix the paper into place by pressing down the tear-off edge. Tear off the old paper,
and the table is ready to be used again.
a) Unscrew the black ball.
b) Push the metal rod to the left.
c) Pull the rod gently towards you
until it comes loose on the right
side.
d) Pull the rod gently to the right.
The rod is now loose and you can
put on a new paper roll.
e) Put the rod back on the left side.
f) Put the rod back on the right
side, in the score.
g) Push the rod to the right.
h) Screw the ball tight again.

3-sectioned exam table Operation
Castor functions
2.9 The function of the castors
The 3-sectioned table is equipped with 125 mm central-locking castors.
Central-locking castors
Free castors
Braked castors

3-sectioned exam table Maintenance & Cleaning
Routine check-ups
3. MAINTENANCE & CLEANING
3.1 Routine check-ups
Routine check-ups should be made to ensure proper functionality.
Important!
Failure to perform the following routine can cause the patient and/or operator to
be exposed to unnecessary risks and the couch may have a reduced life expectancy.
Please check all functions and parts on a regular basis.
Check the following:
Any unusual sounds.
Gas spring functions.
Castors and castor locking mechanism.
On electric tables:
Damages to electric cables.
The motor function.
That joints and fittings are lubricated according to the lubrication char.
3.2 Cleaning
Cleaning artificial leather
Water and a mild soap solution is recommended.
Disinfection
If the product needs to be disinfected, use a diluted alcohol solution. Too strong an
alcohol solution can have a drying effect and the imitation leather may deteriorate
and crack.
Chlorine
Chlorine-base solutions are not recommended as a general rule, since it effects
products and environment negatively, differently depending on concentration. If
chlorine-based solutions are used, always wipe afterwards with damp cloth.

3-sectioned exam table Maintenance & Cleaning
Lubrication scheme
3.3 Lubrication scheme
Lubrication according to the scheme should be performed every 6 months or as needed.
HYDRAULIC
ELEKTRIC
1. First lock the castors.
2. Enlist the help of another person and tip the
couch on the side, in order to lubricate the
moving joints.
The spray can above indicates where to lubricate.

3-sectioned exam table Maintenance and cleaning
Spare parts
3.4 Spare parts, hydraulic
1
2
1
3
No. Art no Article
1-2 G0001 Gas spring
3 010-8540 Paper-roll holder including ball
4 125321630T2LPZ Castor, central-locking
5 125321630T3LPZ Castor, central-locking, directional-locking
6 HY001 Hydraulic pump

3-sectioned exam table Maintenance & Cleaning
Spare parts
3.5 Spare parts, electric
4-5
8
10
9
11
1
2
1
3
No. Art no Article
1-2 G0001 Gas spring
3 010-8540 Paper roll holder including ball
4 125321630T2LPZ Castor, central-locking
5 125321630T3LPZ Castor, central-locking, directional-locking
8 491010 Hand control, one motor, Ad-motion
9 HB7160001+20500 Hand control, one motor, Linak
10 HB824500004+11 Hand control, two motors, Linak
11 HB834500003+11 Hand control, three motors, Linak

12
13
14
15
17
18-19
No. Art no Article
12 FS1001 Foot control, one motor, Linak
13 TFS-3-2-2 Foot control, one motor, Ad-motion
14 FS2001 Foot control, two motors, Linak
15 FS3001 Foot control, three motors, Linak
16 491008 Motor Timotion
17 491009 Control unit, Timotion
18 CB9140AE3+000F0 Control unit, Linak
19 343100+0015004A Lifting motor, Linak
20 312100+3115004C Backrest motor, Linak
21 312100+1110004C Trendelenburg motor, Linak
20
21
16

3-sectioned exam table Maintenance & Cleaning
Accessories
3.6 Accessories
Armrest Armrest, fully adjustable Neck cushion
Footrest
Accessories not in picture
White-coated chassis, Battery backupelectrically adjustable backrest and/or
Trendelenburg position.

3-sectioned exam table Maintenance & Cleaning
Solutions
3.7 Solutions for lubrication, cleaning and disinfecting
R-1, Cleaning solution for artificial leather
5557001, Lubrication
C068, Disinfection solution, DAX Plus
Cleaning solution Lubrication Disinfection

3-sectioned exam table Technical specifications
Dimensions
4. TECHNICAL SPECIFICATIONS
4.1 Dimensions
Length: 200 cm
Width: 70 cm
Height: 57-95 cm
Length backrest 76 cm, seat section 46 cm, leg section 76 cm.
Backrest angle: +68°
Trendelenburg angle: -23°
Backrest angle: 35°
Weight: ca 72 kg
Max patient weight 160 kg
SWL 180 kg

3-sectioned exam table Technical specifications
Motors, control units
4.2 Motors and control units
The motors comply with EMC directives in accordance with standard EN 60601-1-2.
At full load, the motors can be used a maximum of 6 minutes/hour. The actuator
manufacturer guarantees at least 10 000 cycles performance.
Control units
Max. usage time 10% or 6 min/h at continuous operation. Complies with directives
in accordance with standard EN 60601-1.

3-sectioned exam table Technical specifications
Battery backup
4.3 Battery backup
(optional)
General
The batteries used in the control unit are sealed lead batteries.
The included power cord should be plugged into an electrical outlet with 230 volts.
The charger will recharge the battery in less than 12 hours. The charger can safely
be connected for charging for extended periods.
If a battery is not used for a long time, it will gradually lose its stored energy. It is
therefore recommended that the batteries are recharged at least 8 hours before
usage.
Battery life
Battery life depends on several factors including the extent of discharging. If the
battery is discharged too extensively between charges the lifespan will be reduced.
Charging as often as possible is recommended.
The built-in buzzer "Charge the battery" that is built into the controller will sound
when a discharge of 50% has occurred.
The life expectancy of the batteries is about 500-1200 charge cycles.
NOTE!
When the battery is depleted, the battery should be brought to a battery
collection, if applied in your country, to conserve the environment.
This manual suits for next models
1
Table of contents
Other SJOBLOMS Medical Equipment manuals
