Skeeter Boat Trailer Instructions for use

SKEETER TRAILERS
OWNERS OPERATION MANUAL
WWW.SKEETERBOATS.COM

WARNINGS 1
TRAILER LENGTH 2
ATTACHING YOUR TRAILER 2
HITCH RECOMMENDATIONS AND TIPS 4
COUPLER AND HITCH BALL OPERATION 5
USING SAFETY CABLES 6
TONGUE JACK AND CARE 6
TRAILER LIGHTS 7
LED 7
BEFORE YOU TOW 7
WINCH ADJUSTMENT 8
SWING TONGUE 8
ON THE ROAD 10
STOPPING/FOLLOWING DISTANCE 10
HILLS 10
PASSING 10
SWAY/FISHTAILING 10
ROAD SHOULDERS 11
BACKING 11
BREAKDOWNS & ACCIDENTS 11
GETTING IN AND OUT OF WATER 11
LAUNCHING AND LOADING 12
TRAILER MAINTENANCE AND STORAGE 13
TUFF COAT FINISH 13
WHEEL INSTALLATION 14
WHEEL ALIGNMENT 14
TIRE REPAIR 14
CHECK ALL NUTS AND BOLTS 14
LUG BOLT OR NUT TIGHTENING METHOD 14
TRAILER BRAKING SYSTEM 15
Table of Contents
HYDRAULIC SURGE (DISK BRAKES) 15
BRAKE OPERATION AND MAINTENANCE 15
BRAKE ADJUSTMENT 15
TROUBLE- SHOOTING HYDRAULIC BRAKES 17
WHEEL, TIRE AND HUB CARE 18
DISC BRAKES 18
TIRE CHANGING 18
JACK PLACEMENT 18
TIRE BASICS 19
FINDING TIRE PRESSURE AND LOAD
LIMITS
19
TIRE PRESSURE 19
MEASURING AND ADJUSTING AIR
PRESSURE
20
CONSEQUENCES OF UNDER INFLATION 20
TIRE FUNDAMENTALS 21
TIRE INFORMATION 21
TIRE SIZE 21
TIRE, CARE 22
DETERMINING LOAD LIMITS 22
LOCATING THE LOAD LIMIT INFORMATION 23
UNDERSTANDING HOW CARGO AFFECTS
TRAILER CAPACITY
24
TIRE TERMINOLOGY 24
TRAILER TERMINOLOGY 27
REPLACEMENT OF VIN TAGS 30
CANADIAN REGISTRATION RECALL
CLEARANCE DOCUMENT
30
ADDITIONAL INFORMATION 30
WARRANTY REGISTRATION & QUESTIONS 30
SAFETY DEFECTS REPORTING 31
WARNINGS
THE FOLLOWING SIGNAL WORDS AND
SYMBOLS ARE USED TO ALERT YOU TO
POTENTIAL HAZARDS. PLEASE ADHERE TO
ALL MESSAGES AND INSTRUCTIONS THAT
FOLLOW THESE WORDS TO AVOID POSSIBLE
SERIOUS INJURY, OR DEATH.
WARNING indicates a potentially hazardous
situation which, if not avoided, could result
in serious injury, or death.
CAUTION indicates a potentially hazardous
situation which, if not avoided, may result in
minor or moderate injury.
NOTICE indicates special precautions that
must be taken to avoid damage to the trailer
or other property.
CAUTION
!
NOTICE
WARNING
!

2 3
Make sure the coupler completely covers the ball and the
ball clamp inside the coupler is below the ball, not on top
of the ball. Use a padlock or supplied pin to secure the
coupler lever in the locked (down) position, failure to do
so can cause trailer to become detached from tow vehicle,
which may result in serious injury or death.
After the coupler is locked on the hitch ball, raise
the front of the trailer using the tongue jack. If the
coupler comes loose, reattach the coupler to the
hitch ball and raise the front of the trailer again. If
the coupler will not stay attached, check the hitch
ball and coupler for size and damage.
BEFORE TOWING THIS TRAILER
CHECK THAT:
•Coupler and hitch ball are the same size and
correct rating.
•Coupler is latched (Closed).
•All safety chains are attached. The trailer
safety chains are crossed under the tongue.
•All trailer lights are working correctly.
•Boat is secured to the trailer front and rear. (DO NOT use
winch line alone).
•Tongue jack is all the way up and stored.
•Wheel lug bolts or nuts are tight.
•Tires have correct pressure.
•Trailer brakes are adjusted and breakaway cable is
attached to tow vehicle
•Load in trailer is within trailer capacity, distributed
correctly, and the trailer tongue weight is correct.
This product contains chemicals known to the State of
California to cause cancer and other birth defects or other
reproductive harm.
Introduction
Death, serious injury, and/or property damage can result
if you do not read and follow instructions in the owner’s
manual. Make sure all people towing this trailer read and
follow the instructions.
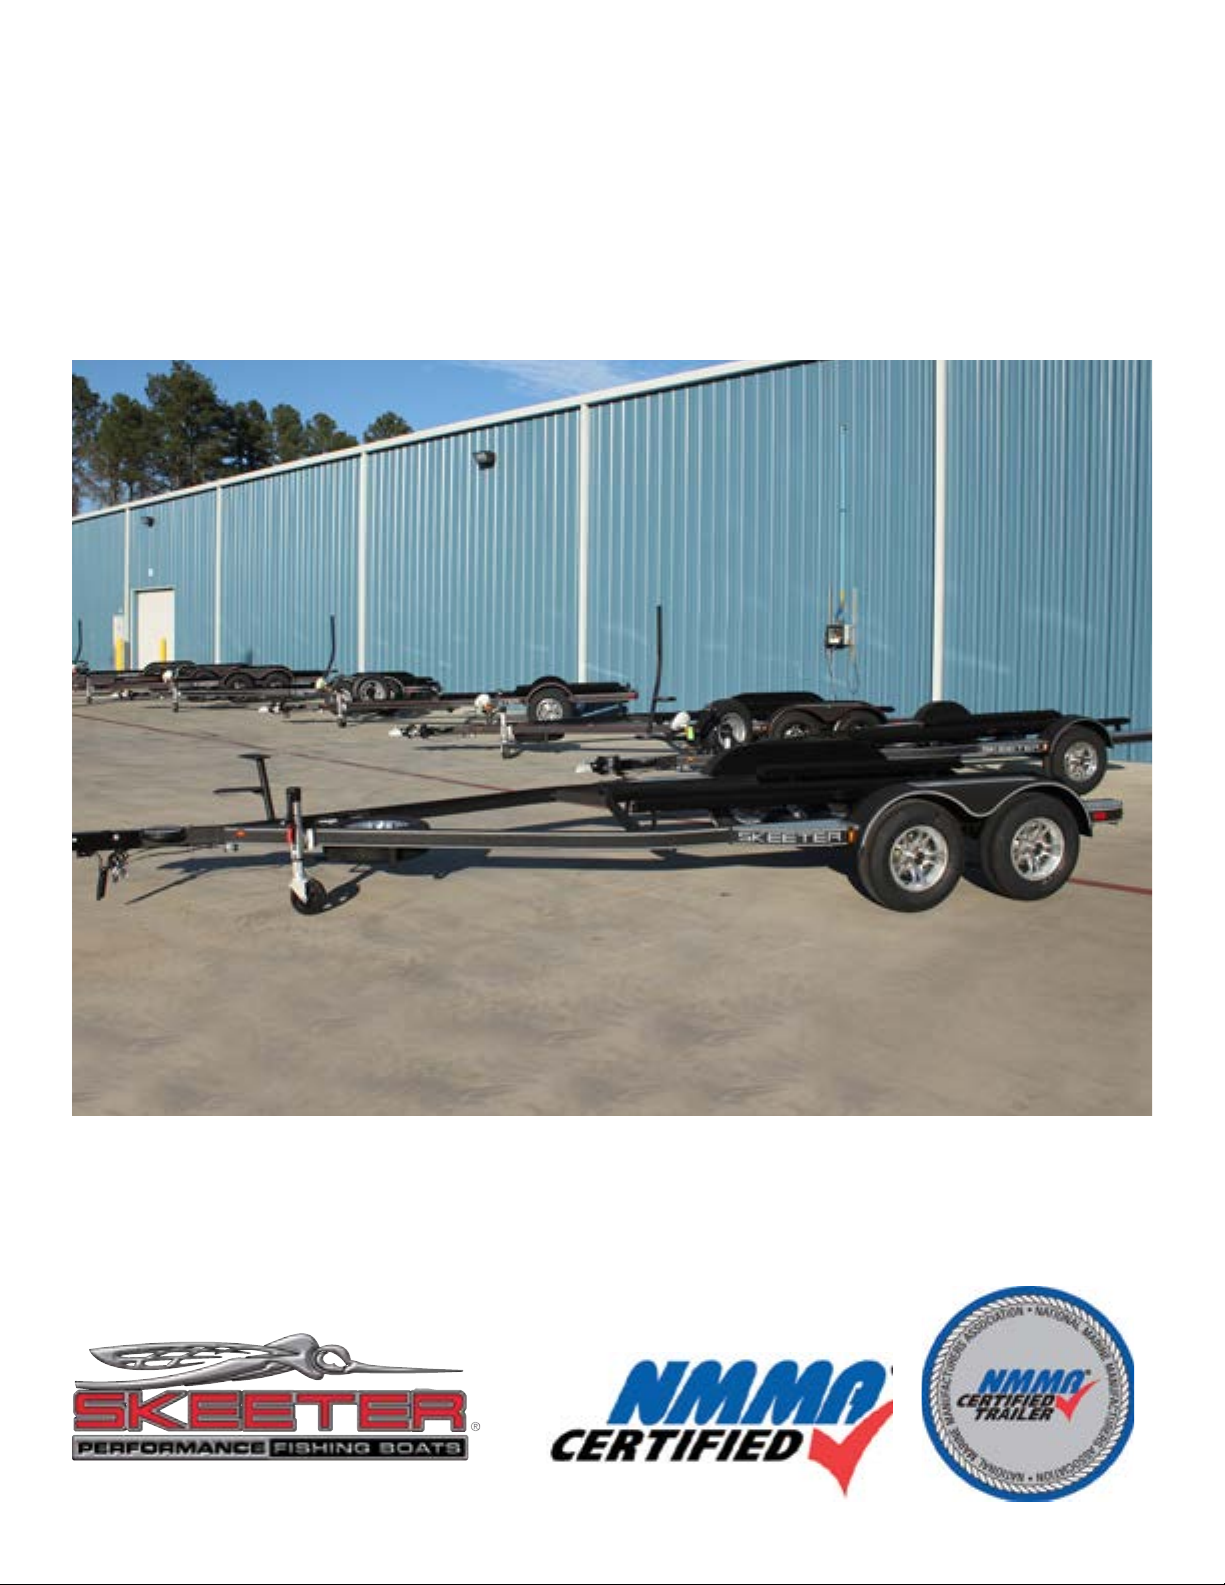
We would like to thank you for purchasing
a SKEETER Boat Trailer, which is National Marine
Manufacturers Association ( NMMA ®) certified,
and National Association of Trailer Manufacturers
(NATM ®) compliant.
NMMA Certification means we comply with
established industry standards and federal safety
regulations. NATM verification compliance program
verifies trailers are built to meet best practices
according to state and federal regulations.
Both organizations require annual or bi-annual
inspections of the manufacturers facility and
trailers.
Your new trailer is designed to make loading and
launching your boat easier. Read this manual
carefully before you use your trailer because
it gives important details on the trailer you
just purchased. Pay attention to and follow all
instructions and maintenance procedures in this
manual.
Trailer Length
Make sure when the boat is on the trailer, there is enough
space between the front of your boat and the back of your
tow vehicle.
The weight of the boat, as listed in the boat
manufacturer’s product brochure, may not include the
weight of the motors, fuel, water and personal gear
and should not be used alone when choosing a trailer.
Overloading can cause serious injury or property damage.
Attaching Your Trailer
Always get help to back your tow vehicle to your trailer.
NEVER move the trailer to the tow vehicle.
Before hitching your trailer to your tow vehicle,
please check the items listed on the decal located
on or near the winch stand.
Your SKEETER Dealer will provide another decal if
it is missing or illegible.
Raise the front of the trailer with the tongue jack.
Back your tow vehicle close to the trailer, then get
out and check the location of the coupler and hitch
ball. Move your tow vehicle until the coupler is over
the hitch ball. Using the tongue jack, lower the
trailer until the coupler completely covers the hitch
ball. Lock the coupler with the supplied hitch pin.
WARNING
!
WARNING
!WARNING
!
NOTICE
WARNING
!NOTICE

4 5
Several models of Weight distribution hitches will
render the brakes inoperative. SKEETER cannot
assume responsibility or accept warranty claims in
such instances. Please make sure the Weight
distribution hitch you choose is compatible with
the trailer’s braking system.
Please Note: Hitch ball height is determined by
measuring from the ground to the top of the
coupler ball housing with the trailer frame level
when the trailer is on a level surface. The average
height to the top of the hitch ball is usually from
14 inches to 21 inches above the ground when
loaded. Actual height will vary from trailer to
trailer.
For proper load distribution on tandem and triple torsion
axle trailers, it is very important that the trailer is
parallel to the ground while towing
Every coupler on a SKEETER boat trailer is
permanently marked with:
•Manufacturer’s code, name or trademark;
•SAE ® coupling designation and gross
coupler rating;
•Part number or style model; and Proper
ball diameter.
Coupler and Hitch Ball Operation
Do not use a different size ball shank, or capacity than
recommended and be sure both the hitch ball and hitch
ratings are the same or more than the Gross Vehicle
Weight Rating of your trailer.
Keep the latch mechanism clean and lightly oiled.
If the latch mechanism or coupler is bent or
deformed in any manner, do not use the trailer
until a new latch assembly or coupler is installed.
Some replacement assemblies and rebuild kits are
available at your SKEETER dealer.
SKEETER trailers are equipped with XR-84
couplers. An example is shown below.
TO OPEN THE COUPLER (XR-84)
Remove hitch pin from hole on side of the coupler.
Lift handle up and toward the rear until it rests in
the open position. This coupler is self-latching and
does not require the latch handle to be in the open
position to insert the hitch ball.
TO CLOSE COUPLER (XR-84)
Coupler does not need to be in the open position
when placing on hitch ball. To latch coupler onto
hitch ball, make sure hitch pin is removed from
side of coupler and simply lower coupler over ball.
During this process, the coupler handle will rise
and then self close when the coupler is fully seated
onto hitch ball. If handle does not return to the
fully closed position, ball is not fully inserted into
coupler socket, there is a misalignment between
coupler and ball or ball is oversized or egg shaped.
DO NOT FORCE HANDLE. If necessary, replace ball
with a quality unit that meets SAE specifications
and the GVWR of the trailer. Once the handle is
fully closed, insert hitch pin into hole on side of
coupler. Hitch pin should go completely through to
other side of coupler. To close coupler handle, push
handle horizontally toward the front and it will
slide down into the closed position.
You are required to obey local and state laws and
regulations regarding brakes, licensing, and additional
equipment that is needed for your trailer. Contact your
state motor vehicle department for more information.
After the coupler is secured to the hitch ball, raise
the tongue jack all the way. If you have a swing-up
style tongue jack, turn it to the traveling position
and make sure the lock pin is secure in the hole.
Cross the safety chains or cables under the tongue
and attach them to the tow vehicle. Connect the
trailer wiring harness to the lighting system of
your tow vehicle. Remember to check your lights.
Spot check all other trailer components (i.e. tires
and tie-downs).
Hitch Recommendations and Tips
Make sure the jack is in the stored or traveling position
before towing the trailer. If it is not, it can cause the
trailer to separate from the tow vehicle, which may result in
serious injury or death.
Our trailer’s GVWR must not exceed the capacity of your
hitch. Be sure you have the right size ball, shank, and
capacity to match your trailer’s model and coupler size.
The correct ball size and capacity is marked on the coupler
Two types of trailer hitches are normally used:
Weight carrying hitches which attach to the tow
vehicle and support the trailer tongue weight only,
and Weight distributing hitches which transfer
some of the tongue weight to the tow vehicle by
using extra spring bars on each side of the trailer
ball. Bumper hitches are not recommended for
boat trailers.
For most boat trailers, a Weight carrying hitch
is usually adequate. Weight distributing hitches
are recommended for very heavy loads. Before
you decide which hitch to buy, contact your
SKEETER Dealer and read the manufacturer’s
recommendations for your towing vehicle.
SKEETER does not recommend self-installation of
trailer hitches.
If you choose a Weight distributing hitch, contact a
dealer specializing in hitches and hitch installation
to make sure it is properly installed, that it is
compatible with your trailer’s brake system and
that you don’t exceed weight requirements.
Do not use Weight distributing hitches with surge- braked
trailers. Overloading or improper installation of
Weight distributing hitches may not let hydraulic
surge brake actuators work and the tow vehicle and
trailer may take longer to stop.
WARNING
!
WARNING
!
WARNING
!
WARNING
!
WARNING
!
IMPORTANT

6 7
Like the winch, or any kind of mechanical
assembly, a jack requires lubrication maintenance.
Regularly grease the drive gear, and rack & pinion
and oil the caster and wheel bearings.
Trailer Lights
To avoid serious injury or death back trailer lights to make
sure they are in working order before any trip. If your trailer
has electric brakes, unplugging the trailer wire from the tow
vehicle will disable the trailer brakes.
Always double check your lights to make sure they
are in working order before any trip.
Twice a year, it is a good idea to inspect your
taillights and look for bare wires, cracked insulation
or corroded terminals. Always be sure the white
ground wire is connected to the trailer frame.
Replace all worn or damaged parts.
Dialectric grease can be put on plug contacts and
bulb bases to prevent rust and corrosion.
Tow vehicles with three-light lighting system
(different lights for brake, turn, and tail lights)
need an adapter to change the three-light system
to a two-light system. Make sure your vehicle is
equipped with the proper lighting package. We
recommend a professional, i.e. your auto motive
dealer, install it for you. SKEETER’s Wire Color Code
is listed below.
LED
Your SKEETER trailer is equipped with LED’s which
are energy efficient and have a longer life.
Wire Color Code
WHITE Ground
BROWN Taillights, side Marker Lights.
YELLOW Left Brake, Left Turn
GREEN Right Break, Right Turn
BLUE Back Up Solenoid, Reversing Light
SKEETER Wire Color Code
Before you Tow
(Tying Down Your Boat)
Make sure the boat is secure and held in place before
towing.
Tie down the boat securely at the stern, in both a
downward and forward direction, with approved
tie downs. Use the rear tie down points provided
on your trailer.
Do not tow your vehicle if latch handle will not
remain closed or with the handle open. Check to
see if coupler is locked by lifting up on the handle.
If the handle opens, the hitch ball is not the right
size, oversized, egg shaped or the latch parts have
been damaged. If the latch is damaged, contact
UFP for replacement parts at www.ufpnet.com.
For further information see actuator brochure in
your new trailer packet or visit www.ufpnet.com
You must install the hitch pin (supplied) into the
hitch pin hole before towing to prevent the coupler
latch opening accidentally, which may result in serious
injury or death.
Always attach the trailer and boat bow safety
chains before towing.
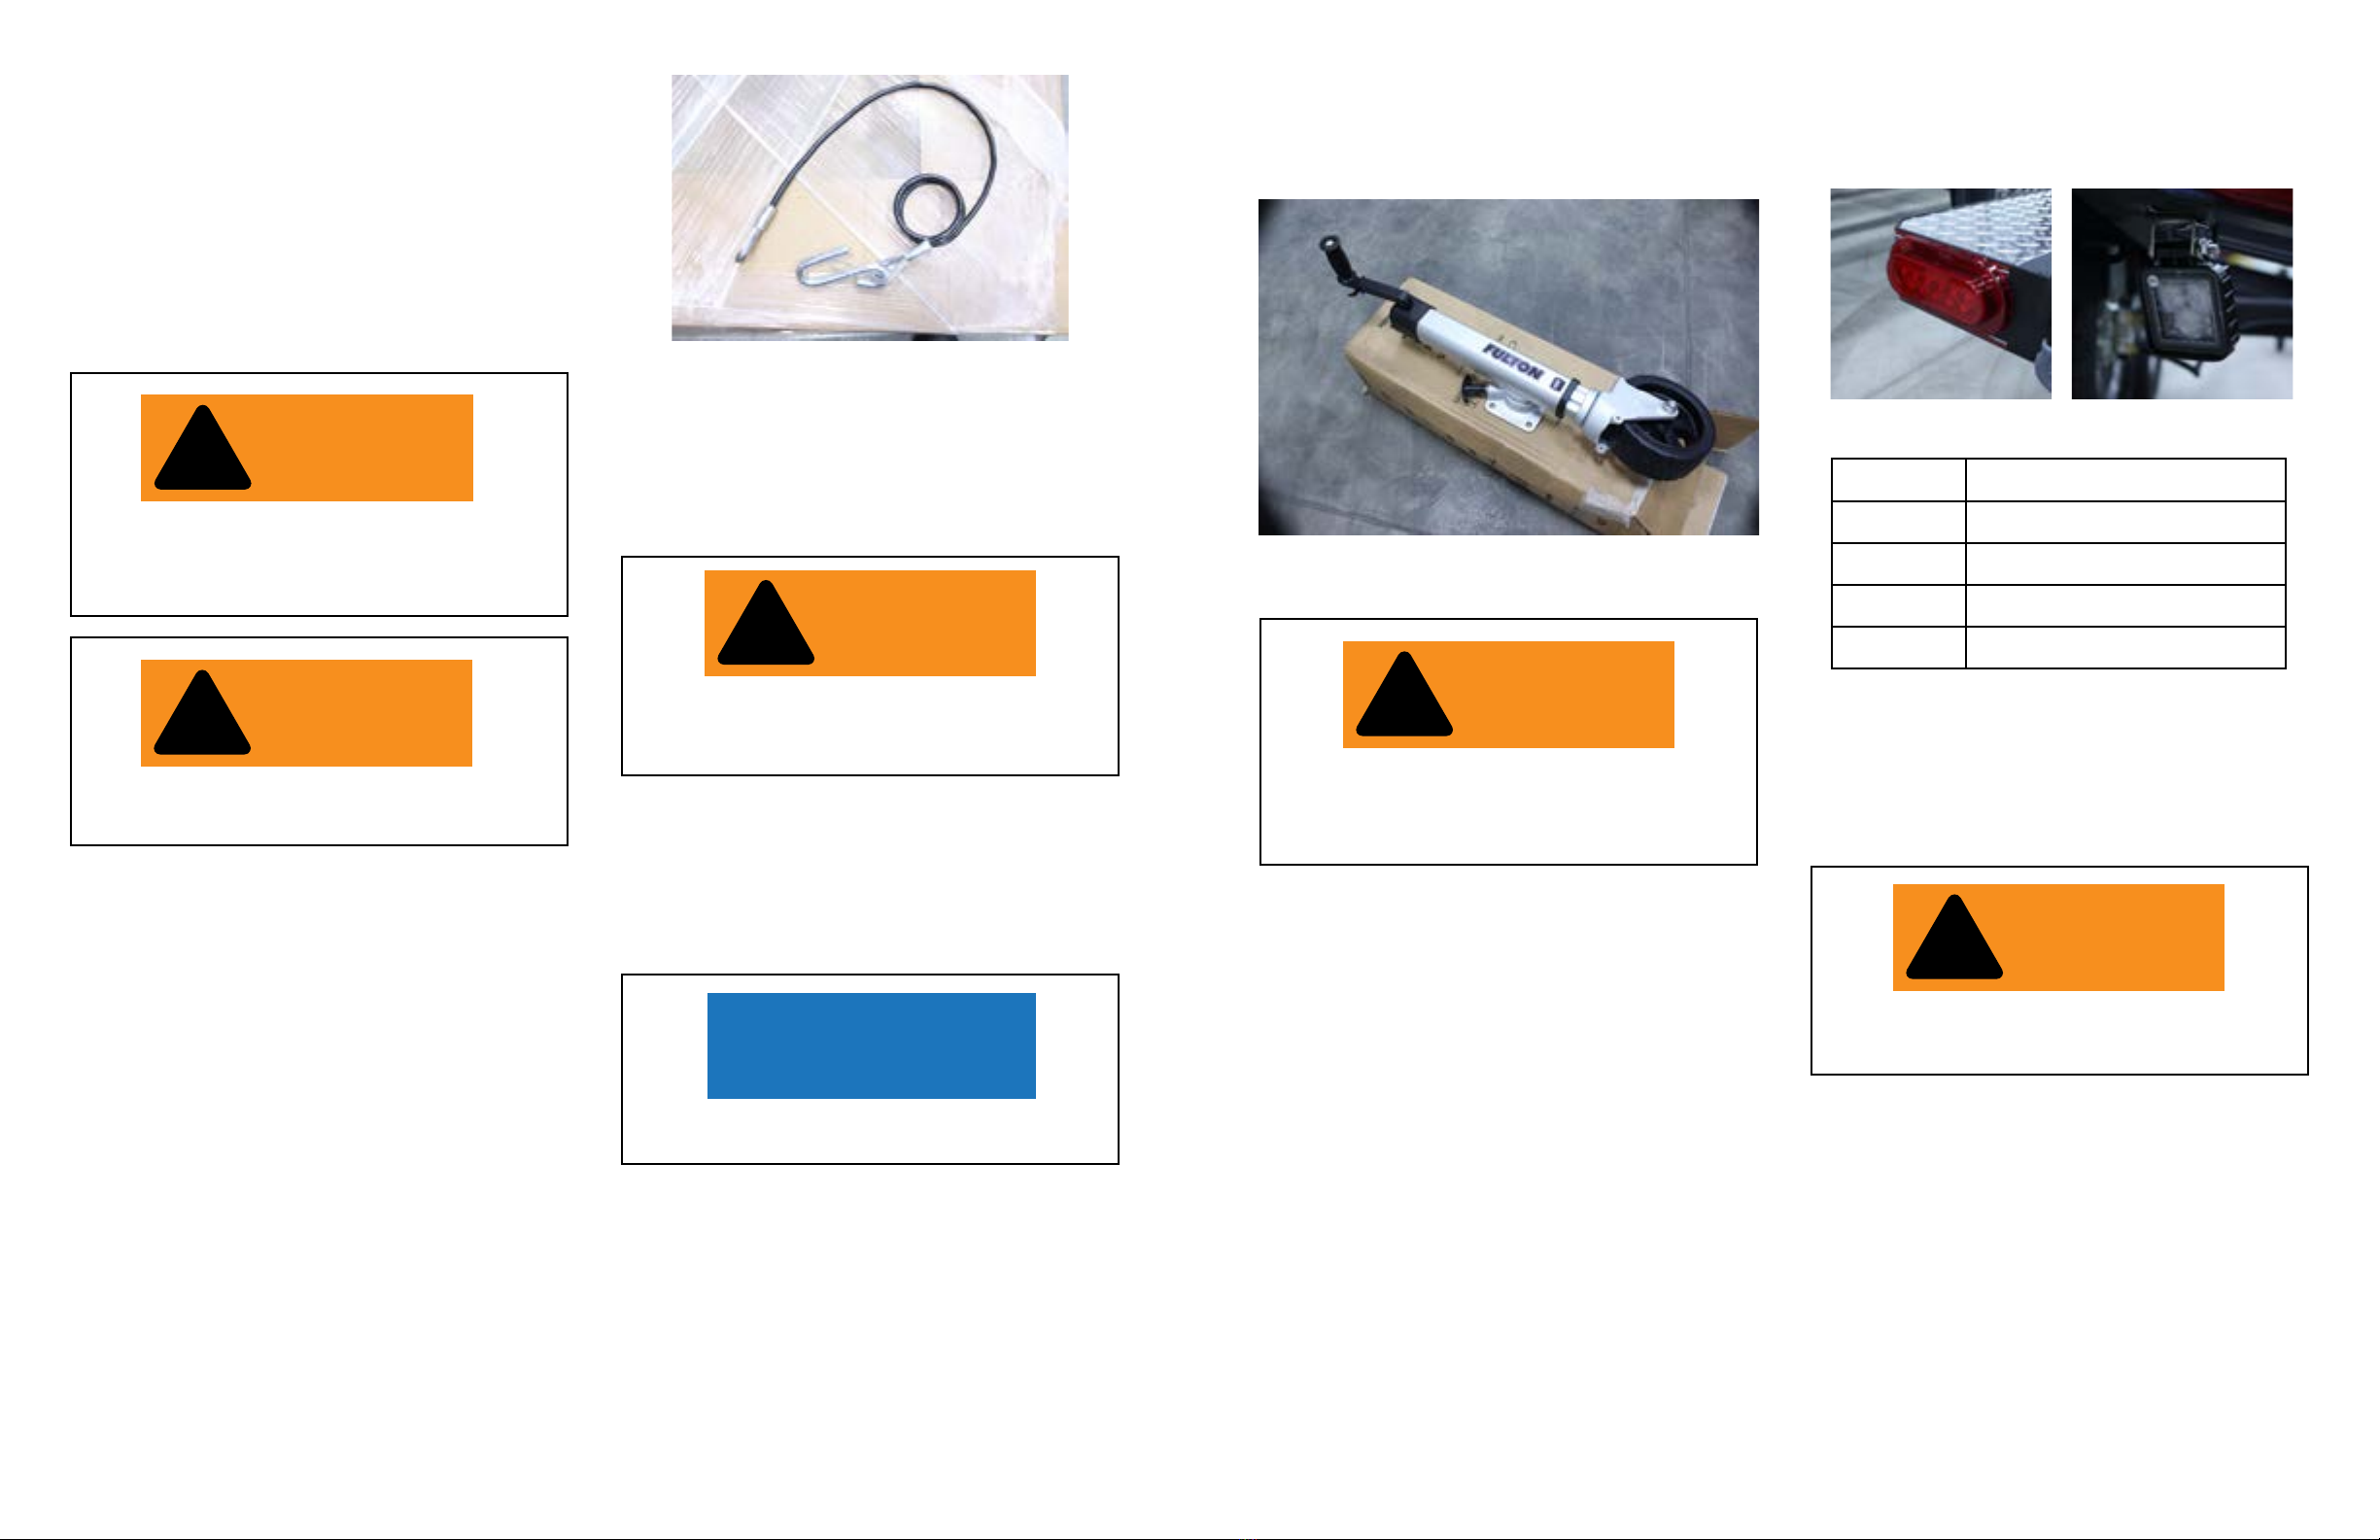
Using Safety Cables
Your trailer hitch should have a place to attach the
trailer safety chains or cables. Crisscross the trailer
safety chains or cables under the trailer tongue
before attaching to the towing vehicles. Most state
laws require the crisscrossing of these chains or
cables. This may prevent the trailer tongue from
falling to the road in the event that the trailer
coupler becomes detached from the hitch ball.
Do not connect the trailer safety chains or cables
together.
Original trailer safety chains or cables should not
be removed or tampered with. Should you need
to replace them, contact a SKEETER Dealer for
replacement chains or cables and hooks.
Proper attachment of the safety chains/cables is
essential to trailer safety.
Tongue Jack Use and Care
Place the jack into position, crank the jack
handle until the trailer coupler is high enough for
the coupler to go over the hitch ball and lower the
trailer coupler onto the ball by cranking the jack
handle in the opposite direction.
To avoid serious injury or death, back your tow vehicle to
your trailer. DO NOT move your trailer to the tow vehicle.
When the trailer is moved without a tow vehicle the brakes
do not work.
If your jack is a swing up type, return it to its
stowed (up) position, making sure the securing pin
is firmly in its hole. If your jack is not a swing-up
type, retract your trailer jack completely (wheel
raise as high as possible) before towing the trailer.
Care must be used when engaging or disengaging a
swing-up style tongue jack.
When using the jack in the down position to
support weight, make sure the securing pin is
firmly in its hole before adding any weight to the
jack. If the securing pin is not firmly in its hole,
the jack may collapse under the weight placed
on it. While towing, if your jack is not folded up
or retracted completely, damage could result and
your jack may have to be replaced.
WARNING
!
WARNING
!
WARNING
!
WARNING
!
NOTICE
WARNING
!

8 9
PRE-DEPARTURE SAFETY CHECKLIST
Before driving, make sure your vehicle maintenance and trailer maintenance are current.
This is very important because towing puts additional stress on the tow vehicle.
• Check and correct tire pressure on the tow vehicle and trailer, including
the spare tire.
•Make sure the wheel lug nuts/bolts on the tow vehicle and trailer are
tightened to the correct torque.
• Be sure the hitch, coupler, draw bar and other equipment that connect the
trailer and the tow vehicle are properly secured and adjusted.
• Make sure the safety chains are properly criss-crossed and connected, not
touching the road but with enough slack to make turns.
• Check that the wiring is properly connected; not touching the road, but
loose enough to make turns without disconnecting or damaging the wires.
• Make sure all running lights, brake lights, turn signals and hazard lights are
working.
• Verify that the brakes on the tow vehicle and trailer are operating correctly.
• Ensure the breakaway system lanyard is connected to the tow vehicle but
not to the safety chains or ball mount.
• Check that all items are securely fastened on and in the trailer.
• Be sure the trailer jack, tongue support and any attached stabilizers are
raised and locked in place.
• Check load distribution to make sure the tow vehicle and trailer are properly
balanced front to back and side to side.
• Check side- and rear-view mirrors to make sure you have good visibility.
• Check routes and restrictions on bridges and tunnels.
• Make sure you have wheel chocks and jack stands.
National Association of Trailer Manufacturers
2420 SW 17th Street • Topeka, KS 66604 • (785) 272-4433 • www.natm.com
FORMKT1503 Rev. 3/15/16 Copyright © 2015 by National Association of Trailer Manufacturers
Make sure your boat is properly secured to the
trailer. Do not depend on the winch line, strap or
cable alone to hold your boat secure. Check winch
line, strap or cable for fraying, cuts or tears. If it is
damaged, replace it immediately.
DO NOT USE IF DAMAGED!
Winch Adjustment and Use
Never disengage the winch ratchet lock while
winching your boat onto the trailer.
Whether your winch is a hand-operated model
(standard) or an electric model (after market), both
can be adjusted for the best possible performance.
The winch height should be adjusted so that the
winch cable/strap is level or as close as practical
with the bow eye of the boat when the boat is
resting on the trailer, with the bow stop roller
or vee block just above the bow eye of the boat.
Your boat will then be pulled in straight line onto
the trailer and against the bow stop on the winch
stand. The angle the winch is pulling your boat
should not make the boat lift up or pull down when
pulling the bow eye against the underside of the
bow roller or vee block. It should pull the bow eye
straight into the underside of the bow roller or vee
block.
Maintenance of the mechanical winch is simple.
Keep clean, lubricate regularly and apply heavy
grease to the gears frequently. Make sure the
winch line, strap or cable doesn’t rub against
anything sharp; fraying and wear could result. If
your line, strap or cable becomes worn, contact
your SKEETER Dealer for replacement as soon as
possible.
Swing Tongue
The inline swing tongue is a UFP designed product
which the manufacturer hides the bolts and
hinge inside the application giving it a much nicer
appearance.
The inside is a cast steel plated-piece that allow
for the part to be opened without scratching the
paint. This also has a pin application and bolt.
WARNING
!

10 11
DO NOT apply the brakes.
DO NOT turn the steering wheel sharply.
After slowing down below 25 mph, gradually turn
the steering wheel just enough to get you back on
the roadway.
Proceed with caution when entering traffic.
Dropping off the shoulder may cause alignment
issues with the trailer axle.
Backing
To back your trailer, keep your hand at the bottom
of the steering wheel. To move the trailer left,
move your hand left. To move the trailer right,
move your hand right. Break very slowly if your
tow vehicle and trailer starts to jackknife, or is not
headed where you want it, STOP. Pull forward to
straighten out, and then start again.
Breakdowns & Accidents
Get off the road If something goes wrong, and
immediately park your tow vehicle in a safe place,
as far away from the road as possible. Turn on your
emergency flashers. Get all the occupants out of
the vehicle and away from the roadway.
If you must continue on the road to reach a
safe place off the road, turn on your emergency
flashers, slow down and proceed with caution.
Do not hesitate to drive on a flat tire if it is
necessary to reach a safe place completely off the
roadway. Drive slowly, since the scraping tire and
wheel could cause a fire.
Getting In and Out of the Water
The handling of your boat and trailer at the ramp
requires practice, skill and patience. With care and
attention to the following tips, you can launch and
load your boat with relative ease.
Always prepare the boat for launching before you
get to the ramp. Stop in a launching prep area near
the ramp that does not block traffic and remove
your tie-downs, tilt up your engine or drive unit,
replace your transom drain plugs, etc.
Do not disconnect the wiring harness, winch cable
or optional boat bow safety chain until you are by
the water, ready to launch.
On the Road
SKEETER recommends all people wear safety
restraints at all times while towing with any
vehicle. Going too fast is a major cause of vehicle
trailer accidents. At a minimum, observe the
posted speed limits. Slow down for curves,
bad weather, hazardous road conditions and
expressway exits. A road hazard that could be
avoided at 45 or 50 mph, may not be avoided at
55mph.
Stopping/Following Distance
Your tow vehicle and trailer are heavier and longer
that your tow vehicle alone. This means it will
take you longer to stop. Allow at least 4 seconds
between you and the vehicle in front of you. Start
counting when the back of the vehicle in front
of you passes a fixed object, such as a sign post,
telephone pole, or crack in the road. If the front of
your vehicle reaches the object before the end of
the 4 seconds, slow down to increase the distance.
Then check the following distance again. If you are
driving in bad weather, such as rain, snow or fog.
Use at least a 5 second gap.
Hills
To prevent your tow vehicle’s engine from lugging
when going up hills, shift into lower gears. This
will improve gas mileage and reduce engine
overheating.
Swaying or “fishtailing” happens more often going
downhill. To prevent this from happening, decrease
speed BEFORE going down the hill. If your trailer
has surge brakes, do not shift into lower gears
when going downhill. This can make the trailer
brakes come on the entire time you are going
downhill and may cause your trailer brakes not to
work.
DO NOT ride the brake pedal going downhill. When
you need to slow down, press the brake pedal and
slow down at least 5 mph below the speed limit.
Then let completely off the brake pedal and let the
brakes cool before you press the brake pedal again
if possible or practical.
Passing
Your tow vehicle and trailer are heavier and longer
than your tow vehicle alone and you will need
more time and distance to pass.
Passing by another vehicle in the same or opposite
direction can cause sway or fishtailing. This sway is
greater when your speed is higher. See the SWAY/
FISHTAILING section below on what to do if this
happens.
Sway/Fishtailing
If the trailer starts to sway or fishtail, do not increase
speed. Apply brakes or turn the steering wheel. You could
loose control and have an accident, including a “Jackknife,”
resulting in severe injury or death. Remove your foot from
the accelerator and steer straight ahead while the sway or
fishtailing stops. Pull off the road when safe to do so and
check for the cause.
One or more causes (cross winds, passing vehicles,
quick driver steering actions, improper loading,
excessive speed, etc.) may result in sway.
Check the cargo in your boat to make sure it has
not shifted. Also make sure the trailer is loaded
heavier in the front.
Check that all the tires are properly inflated and all
lug bolts or nuts are tight.
Check the trunk or cargo bed of the tow vehicle to
make sure it is not overloaded.
Drive at a slower speed.
Sway happens most often at higher speeds.
Road Shoulders
Sometimes the trailer is wider then the tow
vehicle. Drive in the center of the lane to allow for
a wider trailer. If wheels of your vehicle or trailer go
off the paved roadway:
Hold the steering wheel firmly. Let off the gas
pedal and slow down below 25 mph.
WARNING
!

12 13
Launching Checklist In the Parking Area
•Remove the trailer-to-motor supports.
•Remove tie-downs.
•Load and store gear that goes on the boat.
•Check all systems, including your boat’s engine,
blower, bilge pump and lights.
•Remember to properly install all drain plugs.
At the Ramp-in Launch Position
•Disconnect the bow safety chain hook for the
bow eye.
•Follow launching instructions.
•Always practice good boating.
Bunk or Custom Trailers - Launching
& Loading
You can rest assured that your new SKEETER bunk
style custom-welded, adjustable or aluminum
trailer is engineered to provide the easiest
launching/loading experience possible. Unfasten
the boat bow safety chain,and tie a mooring line to
the boat so you will have control once it is floating.
Slowly back the trailer down the ramp until there
is enough water to make the rear of the boat
float. Stop, secure the tow vehicle (in park, or in
gear if standard trans. Engine off, and firmly apply
the parking brake) walk to the front of the boat
and hold the winch handle securely, reverse the
winch lock and begin unwinding the line. Unwind
it slowly and carefully back the trailer down the
ramp until there is enough water to make the boat
float. Because the bunks generate more friction
than rollers, you need to back the trailer further
into the water. Tie a mooring line to the boat so
you will have control once it is floating.
If the winch handle slips out of your hand, let it spin. DO
NOT try to stop it. It may lead to serious injury or death.
On an average grade, the bunks on your trailer
will allow your boat to gently slip back and float
into the water. If your boat does not immediately
move, try unwinding about six inches of line, lock
your winch and give the boat a push. Then unlock
the winch and try again. If this does not work you
might try backing the trailer in deeper if possible.
Care should be given when launching from trailers
with bunks that are equipped with Channel Glide
Bunk Covers or other plastic like materials. These
materials make the bunk surfaces very slippery,
and the boat may begin to unload as soon as
tension is released on the winch cable/strap.
When loading, always prepare for the procedure
prior to reaching the ramp. If the ramp is busy,
preparation will shorten the time it takes for you
to get your boat out of the water.
You probably will not have to back the trailer into
the water as far to load the boat as you did to
launch it. In fact, the easiest way is to back your
trailer up until the rear of the bunks are in the
water.
By not putting your trailer too deep in the water,
your boat will actually center itself on the bunks
about 1/3 to 1/2 the distance onto the trailer.
Connect the winch cable/strap to the bow eye of
the boat. Lock your winch before attempting to
wind the cable/strap in.
Once your boat is aligned and is pulled firmly
against the winch stand roller or vee block and
your winch is in the locked position, connect the
boat bow safety chain and you are ready to drive
to the loading/ preparation area near the ramp to
connect all other tie-downs.
WARNING
!
Trailer Maintenance and Storage
One of the best maintenance procedures for your
trailer is washing the trailer with soap and rinsing
with fresh water after every use. This will help
prevent rust and give your trailer that “showroom”
appearance for a long time.
Check your tire pressure (when tires are cold)
and make sure they are inflated to the correct
pressure. Tires can lose considerable amount of
air pressure when stored during non-use. It is
recommended that during storage, trailers be
blocked up with the tires off the ground. Note:
Under inflated tires can cause wear and tear
problems.
Every trip check your lug nuts or bolts for tightness
on your wheels. Once a year, or every 2000 miles,
whichever comes first, check your greased hub
bearings. Check your light wires and electric
brake wiring (if applicable) for damage and make
sure they do not hang down where they could
be caught. When parked or stored, ensure brake
actuator is fully extended to release brakes and
master cylinder push rod. For off-season storage,
park your boat and trailer in a protected area, such
as a garage or carport. Do not put plastic bags
around your light fixtures as condensation may
occur and cause corrosion.
While your boat is in storage, it is a good time to
touch up any rust spots, nicks and chips on your
boat and trailer. Galvanized trailers occasionally
show small rust spots, so touch up those spots
with cold galvanizing spray paint, available at most
paint stores.
A little trailer maintenance goes a long way in
preserving the appearance and performance of
your trailer. Please follow our recommendations.
We want you to have your SKEETER boat trailer
for a long, enjoyable time.
Tuff Coat Finish
This is a sprayed on polyurea. It is sprayed over a
fully primed frame structure, offered by SKEETER
to protect the surface of the trailers against rock
chips.
Wheel maintenance
All warranty claims will be voided if improper
maintenance or improper cleaning agents are
used. Your investment in a product of the highest
quality and workmanship does require care to
maintain its factory appearance.
Regular Cleaning
Typical road soils trap moisture, which can cause
corrosion over a period of time. Brake dust, caused
by friction of your trailers braking system, is itself
corrosive and may cause pitting of the wheel
finish. These soils must be removed regularly,
possibly weekly, depending on your trailering
habits.
Use of proper cleaning agents
Your wheels finish should be treated as you would
treat the finish of your car. All one-piece
aluminum wheels, and two piece aluminum
wheels are clear coated to preserve the finish and
ease of cleaning. Most household cleaning agents
are too harsh for the finish on your wheel and
must be avoided.
There are commercially available wheel cleaners,
but we urge extreme caution regarding their use,
since they tend to be acid or lye based. Always
follow the manufacturer’s recommendations on
the bottle for safe and effective cleaning.
Note: Salt water can cause discoloration of
aluminum wheels. This is not covered by your
warranty. Chrome Steel Wheels
After cleaning, always apply a coat of soft non
abrasive cream wax to help prevent surface
corrosion. Surface corrosion or rust can be
prevented with proper care.
Additional tips
To prevent scratching of the wheel finish,
never clean your wheels with scouring pads or
mag polish. If you use automatic car washes,
tell them not to use steam cleaners or strong
chemicals to clean your wheels. They can cause
permanent staining or corrosion.

14 15
Additional Tips (Continued)
Boat bottom cleaners containing muratic or
other acids have a highly corrosive effect on both
painted, galvanized or aluminum trailers and
should not be allowed to contact the trailer.
Use caution when cleaning tires with steel wool
or bristle brush. These types of abrasive materials
must not come in contact with the wheels.
Never allow any harsh chemicals or tire cleaner
to contact with the wheels, as they will damage
the appearance of the wheel permanently. Never
spray cold water on extremely hot wheels. Always
allow time to cool before cleaning with soap and
water or the recommended wheel cleaner
Wheel Installation
Clean and inspect all stud threads and mounting
surfaces before installation. Threads must not
be lubricated, but must be free of corrosion, rust,
burrs and fractures. Replace studs if they are
corroded beyond reasonable repair, if threads are
stripped, or a fracture is found. Check and make
sure the approved lug nuts are correct for the
application. When placing the wheel on the studs,
there will be an apparent looseness of fit, until the
lug nuts are applied.
Check the lug nut thread engagement. Every stud
must be long enough to thread into the lug nut
a length at least equal to the stud diameter. For
example: a 1/2” thread diameter must thread into
the lug nut at least a 1/2”. Check for this problem
on every stud, some may be different lengths. If
there is less than one stud thread engagement, do
not install wheels.
Lug nuts must be applied in a star or crisscross
pattern until desired torque is reached.
Wheel Alignment
A wheel alignment adjusts the angles of the
wheels so they are positioned correctly relative to
the vehicle’s frame. This adjustment maximizes
the life of your tires. These adjustments require
special equipment and should be performed by a
qualified technician.
Tire Repair
The proper repair of a punctured tire requires a
plug for the hole and a patch for the area inside
the tire that surrounds the puncture hole.
Punctures through the tread can be repaired
if they are not too large, but punctures to the
sidewall should not be repaired. Tires must be
removed from the rim to be properly inspected
before being plugged and patched.
Check All Nuts and Bolts
Even though SKEETER uses self-locking, vibration
resistant nuts, it is the owner’s responsibility to
make sure all of the fasteners are tight before
using the trailer not just the first time you use it,
but on a regular basis.
Check you lug bolts or nuts tightness before every trip.
Lug Bolt or Nut Tightening Method
Initially tighten to 20-25 lbs, using a criss-cross
tightening sequence on a 5 bolt wheel. Finish
torquing per manufacturer’s recommendations
on all new trailers. SKEETER is not responsible for
damage from loose lug nuts. Re-torque after 25-
50 miles of use and on a periodic schedule from
then on. Lug bolts or nuts should be clean and dry.
Do not put grease or other lubricant on them.
WARNING
!
Lug Nut Pattern
Most state laws require brakes on trailers, check
laws in your state.
Always keep tie-downs tightly fastened. Always
use tie-downs or similar securing devices to secure
the boat to the trailer, as well as the winch strap/
cable and safety chains/cables supplied with your
trailer.
Trailer Braking Systems
All four braking systems offer excellent trailer
braking, but each have unique qualities.
Hydraulic Surge (Disc Brakes)
Hydraulic surge disc brakes operate on the same
idea as hydraulic surge drum brakes. The disc
brake needs a special actuator with a back-up
solenoid wired into the tow vehicle’s reverse
lights. When the tow vehicle is put in reverse, the
solenoid locks out the braking system allowing
the trailer to back up on level ground without the
brakes locking up. Since you can see most of the
disc brake components, they are easy to keep
clean and maintain. See the brochure in your new
trailer packet for further information or visit
www.ufpnet.com
In many states, trailers are required to have brakes
on all wheels.
Brake Operation and Maintenance
Contact your state motor department, your
SKEETER Dealer or www.boats.com/trailerclub/
traileringlaws.asp for the trailer brake
requirements in your state.
Inspect your brake system on a regular basis and
adjust if necessary and replace any damaged or
worn parts. Your SKEETER Dealer can also inspect
your brakes. Replace brake fluid with DOT3, which
is available from most auto part stores.
Trailer brake manufacturers recommend that when
the boating season is over, the brake drums should
be removed and the brake assembly should be
inspected. All parts should be clean, dry and free
from corrosion.
With hydraulic brakes, do not shift to a lower
gear and use your engine as a brake when going
downhill. This could activate the trailer’s brakes
continuously for the duration of the downhill
run, causing overheating and fading to the point
of possibly losing your trailer’s braking ability
completely.
A better way is to slow down as you approach
the top of the hill, and maintain an even, slow,
controlled downhill speed with repeated
applications of your tow vehicle’s brakes, allowing
enough time in between for the brakes to cool off.
Brake Adjustments
Only a qualified mechanic trained in the repair and
maintenance of braking systems should attempt
brake adjustment, repair and replacement. To
make the brake adjustments to your SKEETER
trailer, follow the method explained below. If you
are not sure about making these adjustments,
your SKEETER Dealer can make these adjustments
for you.
Tighten
First
1
2
3
5
4
Tighten
Last
IMPORTANT

16 17
Using pads without enough brake lining material can result
in brake damage, create excessive heat and cause the
brakes not to work correctly, which could cause serious
injury or death.
WARNING
!
SYMPTOM SOLUTION
BRAKE NOISE
Shoe chatter, lining coated with grease or oil. Locate cause of grease or oil leakage.
reline and grind for proper lining-to-drum contact.
Vibrations with loose bolts. Out of round drums. Tighten hub bolts or nuts and recondition or replace
drums.
Vibration with loose bearing adjustment or rough bearing. Adjust or replace bearings and races.
Worn/craked drums or machined beyond oversize limits. Replace drums.
EXCESSIVE TRAVEL OF ACTUATOR
Leaks in hydraulic lines. Replace defective lines.
Low fluid in master cylinder reservoir. Air in hydraulic lines. Refill master cylinder and bleed system
Leaking wheel cylinders. Repair or replace
Leaking primary cup in master cylinder. Ports
closed or restricted with dirt. Defective hoses.
Leaking check valves fails to keep hydraulic
systems preloaded.
Check problem components and adjust repair or
replace as required.
Excessive lining-to-drum clearance Adjust brakes or replace linings.
PRESSURE BUILD-UP IN SYSTEM
Contaminated fluid causing cup swelling. Drain, flush and replace fluid. Replace cups.
Master cylinder piston fails to stop and keeps
the compensating port closed.
Check all components and adjust, repair or replace
as required.
Hose or cylinder ports are closed or restricted with dirt. Overhaul or replace.
HEAVY CLUNKING SOUND FROM ACTUATOR
Leaks in hydraulic lines. Replace hydraulic lines.
Low fluid in master cylinder. Refill master cylinder and bleed system
If no hydraulic leaks & good fluid level Replace shock absorber.
Trouble-Shooting Hydraulic Brakes

18 19
Wheel, Tire and Hub Care
Since your SKEETER boat trailer is put in water and
put through other severe conditions, it needs more
attention to the wheels and its components than
your car. Your SKEETER trailer is equipped with The
Vault Hybrid Lubrication System™ or EUZ
hubs.
To check your bearings, raise your wheel clear of
the road surface (by the procedure indicated in “tire
changing”). With your hands on the outside edges
of the tire, try to rock the wheel by pushing on one
side and pulling on the other. No noticeable rocking
should occur. Spin the wheel and listen for noise
or roughness. A smooth, silent operation means
that your bearings are in good order. If a grinding
sound is heard, contact your SKEETER Dealer for
warranty and or replacement instructions.
For Disc Brakes
Adjustment is not necessary on SKEETER’S disc
brakes. Make sure the brake parts are free from
rust and debris. Check brake pads periodically to
make sure there is a proper amount of lining left.
Check the brake fluid and make sure it is full before
every trip.
Only a qualified mechanic trained in the repair &
maintenance of braking systems should attempt
brake adjustment, repair and replacement.
Tire Changing
Replace your trailer tires promptly if they become
worn or damaged. If within the warranty period,
contact the tire manufacture for an adjustment.
You can get a spare tire at your SKEETER Dealer.
We also recommend that you carry a jack, such as
a small hydraulic jack for tire changes.
Getting your hands in tight places under the fender can
cause accidental pinching.
We recommend wearing gloves while changing
tires. After the tire is changed, be sure to re-torque
the lug bolts or nuts as mentioned in the “Torque
Procedure” section. To change a tire, make sure the
trailer is not allowed to move. Attach it to the tow
vehicle and block a tire on the opposite side.
Jack Placement
Make sure the trailer is not allowed to move. Attach it to
the tow vehicle and block the tires.
On tubular steel type trailers, the best place to put
your tire jack is under the axle where the spring
mounts to the axle. On a torsion axle trailer, place
the jack under the axle tube as near the tire as
possible, but not on the torsion arm. If the jack
will not fit under the axle, place it under the main
frame rail (boom) as close to the axle as possible.
On aluminum I-Beam trailers, the only allowable
place to put the jack is under the axle as
mentioned above.
WARNING
!
SKEETER wheel sizes are as follows:
14” 5 Hole 4 1/2” Bolt Circle
15” 5 Hole 4 1/2” Bolt Circle
18” 5 Hole 4 1/2” Bolt Circle
Do not mount or attempt to mount anything other than
the same size tires on the same size wheel (rim)
per manufacturer specifications.
Example 16.5” tire on a 16.5” wheel. Mounting the incorrect
size tires or wheels can result in a loss of control which
could cause serious injury or death.
Tire Basics
Properly maintained tires improve the steering,
stopping, traction and load-carrying capability of
your vehicle. Under inflated tires and overloaded
vehicles are a major cause of tire failure. To
avoid flat tires and other types of tire failure, you
should maintain proper tire pressure, observe tire
and vehicle load limits, avoid road hazards, and
regularly inspect your tires.
Finding Tire Pressure and Load
Limits
Tire information placards and trailer certification
labels contain information on tires and load limits.
These labels indicate the trailer manufacturer’s
information including:
•Recommended tire size.
•Recommended tire inflation pressure
•Ok capacity weight (VCW-the maximum weight
the axle systems are designed to carry.) Both
placards and certification labels are permanently
attached to the front of the trailer.
Tire Pressure
Tire inflation pressure is the level of air in the tire
that provides it with load-carrying capacity and
affects the overall performance of the vehicle. The
tire inflation pressure is a number that indicates
the amount of air pressure– measured in pounds
per square inch (psi) a tire requires to be properly
Inflated. You will also find this number on the
vehicle information placard expressed in kilo
pascals (kpa) which is the metric measure used
internationally.) The worst enemy a tire can have
is too little inflation pressure. It can reduce fuel
economy through increased rolling resistance
(soft tires makes your vehicle work harder). When
a tire is under inflated, the shoulder of the tire
tread bears the most of the load and reduces tread
life through increased tread wear on the outside
edges (or shoulders) of the tire. It also generates
excessive heat, which reduces tire durability.
Uneven wear reduces the useful life of a tire. Check
your tires regularly for proper inflation. Abnormal
tire wear may also be due to misalignment or
mechanical problems.
It is important to check your vehicle’s tire pressure
at least once a month for the following reasons:
•Most tires may naturally lose air over time.
As air pressure is lost, carrying capacity is
lowered.
•Tires can lose air suddenly if you drive over
a pothole or other object or if you strike
the curb when parking.
•With radial tires, it is usually not possible
to determine under inflation by visual
inspection.
Tire Description PSI Capacity
ST205/75R14C 50 1,760 LBS
ST205/75R14C 65 2,040 LBS.
ST215/75R14C 50 1,870 LBS.
ST205/75R15D 65 2,150 LBS.
ST205/75R15E 80 2,830 LBS
ST225/75R15D 65 2,540 LBS.
P245/45R18 51 1,929 LBS.
Recommended
Cold Tire Pressure Chart
WARNING
!
CAUTION
!

20 21
Keep your tires inflated to the recommended tire pressure
on the VIN decal (found on the
front rail of your trailer). Check the tire pressure before each
trip. Failure to maintain correct tire pressure may result in
tire failure and loss of control, which could cause serious
injury or death.
Measuring and Adjusting Air
Pressure to achieve Proper Inflation
The recommended tire inflation pressure that
vehicle manufacturers provide reflects the proper
psi when a tire is cold. The term cold does not
relate to the outside temperature. Rather, a cold
tire is one that has not been driven on for at least
3 hours. When you drive, your tires get warmer,
causing the air pressure within them to increase.
Therefore, to get an accurate tire pressure reading
you must measure tire pressure when the tires are
cold or compensate for the extra pressure in warm
tires.
Before each trip, check the air pressure of each
tire. Be sure to check the air pressure in the spare
tire as well.
Adverse safety consequences of
under Inflation
Under-inflation of the tire only wear out the tire
prematurely, but can also cause the tire to flex
and to overheat quickly. Overheating of the tires
can cause tread separation and tire failure. Tire
separation or tire failure could lead to loss of
control of the trailer and could lead to an accident.
Keep your tires inflated to the recommended tire pressure
on the VIN decal (found on the front of your trailer). Check
the tire pressure before each trip.
Maintaining Proper Tire Pressure
Locate the recommended tire pressure on the
vehicle’s tire information placcard, certification
label or in the owners manual.
Keep your tires inflated to the recommended tire
pressure on the VIN decal (found on the front of
your trailer). Check the tire pressure before each
trip.
Record the tire pressure on all tires.
If the tire pressure is too high in any of the tires,
slowly release air by gently pressing on the tire
valve stem with the edge of you tire gauge until
you get to the correct pressure.
If the tire pressure is too low, note the difference
between the measured tire pressure and the
correct tire pressure. These ”missing” pounds of
pressure are what you will need to add.
At a service station, add the missing pounds of air
pressure to each tire that is under inflated.
Check all the tires to make sure they have the
same air pressure (except in cases in which the
front and rear tires are supposed to have different
amounts of pressure).
If you have been driving your vehicle and think a
tire is under inflated, fill it to the recommended
cold inflation pressure indicated on your vehicle’s
tire information placard or certification label. While
your tire may still be slightly under inflated due to
the extra pounds of pressure in the warm tire, it is
safer to drive with air pressure that is lightly lower
the vehicle manufacturer’s recommended cold
inflation pressure than to drive with a significantly
under inflated tire. Since this is a temporary
WARNING
!WARNING
!
fix, don’t forget to recheck and adjust the tire’s
pressure when you can obtain a cold reading.
Tire Fundamentals
Federal law requires tire manufacturers to
place standardized information on the sidewall of
all tires. This information identifies and describes
the fundamental characteristics of the tire and
also provides a tire identification number for safety
standard certification and in case of a recall.
Tire Information
There are many markings found on the
Sidewall of a tire. They are placed there by the tire
manufacturer.
ST-Indicates the tire is for trailer use only.
Next Number– This three digit number gives the
width in millimeters of the tire from sidewall edge
to sidewall edge. In general, the larger the number,
the wider the tire.
Next Number– This two digit number, known as
the aspect ratio, gives the tire’s ratio of height to
width. Numbers of 70 or lower indicate a short
sidewall for improved steering response and better
overall handling on dry pavement.
R– The “R” stands for radial. Radial ply
construction of tires has been the industry
standard for many years.
Next Number– This two-digit number is the wheel
or rim diameter in inches.
If you change your wheel size, you will have to
purchase new tires to match the new wheel
diameter.
U.S. DOT Tire Identification Number-This begins
with the letters “DOT” and indicates that the
tire meets all federal standards. The next two
numbers or letters are the plant code where it
was manufactured, and the last four numbers
represent the week and year the tire was built. For
example, the numbers 3197 means the
31st week of 1997. The other numbers are
marketing codes used at the manufacturer’s
discretion.
This information is used to contact consumers if a
tire defect requires a recall.
Tire Ply Composition and Materials Used– The
number of plies indicates the number of layers of
rubber-coated fabric in the tire. In general, the
greater the number of plies, the more weight a tire
can support. Tire manufacturers also must indicate
the materials in the tire, which include steel, nylon,
polyester and others.
Maximum Load Rating– This number indicates the
maximum load in kilograms and pounds that can
be carried by the tire.
Maximum Permissible Inflation Pressure-This
number is the greatest amount of air pressure that
should ever be put in the tire under normal driving
conditions.
RADIAL TIRES
(Using a ST205/75R14C as an example)
ST Special Trailer type tire
205 Nominal width of the tire in millimeters
(205 millimeters in this example)
75 Aspect ratio of height to width)
(75% in this example)
R Radial Tire
14 Size of Wheel (14” in this example)
C Load Range Rating
Tire size labeling information
Tire Size
Your trailer will be equipped with radial tires. It
is important to understand the tire labeling on
your tire when selecting tire or replacement tires
for your trailer. To maintain tire safety, purchase
new tires that are the same size as the vehicle’s
original tires or another size recommended by the
manufacturer. Look at the tire information placard,
the owner’s manual, or the sidewall of the tire you
are replacing to find this information. If you have
any doubt about the correct size to choose, consult
with the tire dealer.

22 23
Tire, Care, Maintenance, and Safety
Practices
Before each trip, check each tire for:
Uneven wear Nails or other sharp objects.
Correct tire air pressure.
Tread separation.
Tread depth.
Proper tightening (torque) on the lug bolts or lug
nuts
Tire checking
•Check Tire pressure regularly (at least
once a month), including spare.
•Inspect tires for uneven wear pattern on
the tread, cracks, foreign objects, or
other signs of wear or trauma.
•Remove bits of glass and foreign objects
wedged in the tread.
•Make sure your tire valves have valve
caps.
•Check tire pressure before going on a long
trip.
•Do not overload your vehicle. Check the
Tire Information and Loading Placard or
User’s Manual for the maximum
recommended load for the vehicle.
Bulges or other deformities of the
sidewall of the tire.
If bulges or other deformities exist, do not use
the trailer until the condition is corrected.
Preventing Tire Damage
•Slow down if you have to go over a
pothole or other object in the road.
•Do not run over curbs or other foreign
objects in the roadway, and try not to strike
the curb when parking.
Vehicle Placard and Tire Inflation
Pressure Label Information and
Location
The Vehicle Placard and Tire Inflation
Label are affixed to the forward part of the trailer
near where the main frames meet the tongue.
VIN # & TIRE Inflation Pressure Label Information
Location SKEETER Custom Trailer’s VIN number
begins with 7FUBB
.
Vehicle Placard (Example)
Determining load limits
The load limit on a boat trailer is referred
to as carrying capacity. The carrying capacity of
your SKEETER trailer must be more than or equal
to the weight of the boat and everything in or on
the boat, including motor(s), fuel, water, personal
gear and other items you may have on board.
The final weight of all these items is call a “net
weight” and must not exceed the carrying capacity
of the trailer. The carrying capacity should not be
confused with the GVWR rating of the trailer. The
GVWR (Gross Vehicle Weight Rating) listed for the
trailer is the maximum allowable combined weight
of the trailer, boat, motor, fuel and gear. (See page
5, Choosing the Right Trailer.)
1. Locate the statement, “The weight of cargo
should never exceed XXX kg or XXX lbs.”, on
your vehicle’s placard.
2. Determine the empty weight of your trailer
by weighing the trailer using a public scale or
other means.
3. Locate the GVWR of the trailer on your trailer’s
VIN (Certification) label.
4. Subtract the empty weight of your trailer from
the GVWR stated n the VIN label. That weight
is the maximum available cargo capacity of the
trailer and may not be safely exceeded.
VIN
Do not Exceed Load Carrying
Capacity or GVWR
The weight capacity of your trailer is found using
the Gross Vehicle Weight Rating (GVWR) of
the trailer. The GVWR is printed on the Vehicle
Identification Number (VIN) decal at the right front
of the trailer (viewing trailer from the rear). This is
the MOST weight the fully loaded trailer can weigh.
When loading your cargo , be sure it is distributed
evenly to prevent overloading front to back and
side to side. Heavy items should be placed low and
as close to the axle positions as reasonable. Too
many items on one side may overload a tire. The
best way to know the actual weight of the vehicle
is to weigh it at a public scale.
Tire Information Pressure Label (Example)
Talk to your dealer to discuss the weighing
methods needed to capture the various weights
related to the trailer. This would include the weight
empty or unloaded, weights per axle, wheel, hitch
or king-pin and total weight. The trailer must not
be connected to the tow vehicle when you get the
total weight of the of the trailer. It is up to you to
make sure the weight of your boat, trailer, and boat
car go does not exceed the GVWR. Proper load
distribution on your trailer is also very important.
Tongue weight should be no less than 5% of
recommended of specific GVWR and not to exceed
the tongue weight capacity of the hitch. Five to
ten percent of your trailer’s Gross Vehicle Weight
should be supported by the hitch ball, with the
tongue level. This is called “tongue weight”. If you
are over or under the standard weight distribution,
try moving gear inside your boat first. If further
adjustment to the trailer is necessary, contact your
SKEETER Dealer.
Locating the Load Limit Information
The manufacturers VIN label has both the carrying
capacity and the GVWR (Gross Vehicle Weight
Rating) of your trailer. It also has tire size, cold
tire pressure, VIN number, date of manufacture
and other important information. The VIN label is
located on the trailer frame towards the front end
of the trailer rail.
Your trailer’s GVWR must not exceed the capacity
of your hitch.
Make sure the total weight of the trailer, boat, engine, fuel,
batteries, and gear does not exceed the trailer’s GVWR.
Check with your SKEETER Dealer or
automotive dealer to make sure you have the proper towing
vehicle for the load you will be pulling. Check your vehicle
manufacturer’s hitch weight recommendations as well.
Be sure you have the right size ball, shank and capacity to
match your trailer’s model and coupler size. The correct ball
size and capacity is marked on the coupler.
WARNING
!
WARNING
!
IMPORTANT

24 25
Understanding How Cargo Affects
Trailer Capacity
The cargo or gear placed inside a boat while
on a trailer adds to the GVW (Gross Vehicle Weight)
of the trailer, and uses some of the capacity that
may be available for the boat. The combined
weight of the gear, boat, as well as anything else in
or on the boat while trailering must not exceed the
carrying capacity listed for your trailer.
Excessive loads and/or under inflation cause tire
overloading and, as a result, abnormal tire flexing
occurs. This situation can generate an excessive
amount of heat within the tire. Excessive heat
may lead to tire failure. This is the air pressure
that enables a tire to support the load, so proper
inflation is critical. The proper air pressure may be
found on the certification/VIN label and/or on the
Tire Placard. This value should never exceed the
maximum cold inflation pressure stamped on the
tire.
Adverse Safety Consequences of
Overloading on Handling, Stopping
and on Tires
Poor weight distribution can cause trailer sway
(“fishtailing”) and put extra force on your boat, trailer,
towing equipment and tow vehicle, which can result in a
accident, serious injury or death
‘DO NOT exceed your vehicle’s GVWR
Overloading the trailer could produce the following:
• Increased stopping distances
• Improper tongue weight
• Abnormal or premature tire wear
• Tire failure
• Suspension failure
• Decreased cornering stability
• Brake overheating or failure
• Undue stress or failure of trailer
components
• Hull damage
Never exceed the trailer’s listed GVWR
Determining Compatibility of Tire
and Vehicle Load Capabilities
The proper tire for your SKEETER Boat trailer is
listed on the VIN label on the trailer.
Replacing a tire with any tire other than the size
and type indicated on the VIN label should not
be done. Each tire has a maximum load capacity
printed on the sidewall.
The combined sum of the load capacities of
all the tires of the trailer should meet or exceed
the GVWR listed on the VIN label of the trailer. The
Original Equipment Tires are designed to meet
these requirements.
Tire Terminology
Bead: The part of the tire that is made of steel
wires, wrapped or reinforced by ply cords and that
is shaped to fit the rim.
Bead Separation: This is the breakdown of the
bond between components in the bead.
Bias Ply Tire: A pneumatic tire in which the play
cords that extend to the beads are laid at alternate
angles substantially less than 90 degrees to the
centerline of the tread.
Carcass: The tire structure, except tread and
sidewall rubber which, when inflated, bears the
load.
Chunking: The breaking away of pieces of the
tread or sidewall.
Cold Inflation Pressure: The pressure in the tire
before you drive for at least 3 hours.
WARNING
!
WARNING
!
Cord: The strands forming the plies in the tires.
Cord Separation: The parting of cords from
adjacent rubber compounds.
Cracking: Any parting within the tread, sidewall, or
the inner liner of the tire extending to cord
material.
CT: A pneumatic tire with an inverted flange tire
and rim system in which the rim is designed with
rim flanges pointed radially inward and the tire
is designed to fit on the underside of the rim in a
manner that encloses the rim flanges inside the air
cavity of the tire.
Curb Weight: The weight of a motor vehicle with
standard equipment including the maximum
capacity of fuel, oil and coolant, and, if so equipped,
air conditioning and additional weight optional
engine.
Extra Load Tire: A tire designed to operate at
higher loads and at higher inflation pressures than
the corresponding standard tire.
Groove: The space between the adjacent tread
ribs.
Gross Axle Weight Rating: The maximum weight
that any axle can support, as published on the
certification/VIN label on the front left side of the
trailer. Actual weight determined by weighing each
axle on a public scale, with the trailer attached
to the towing vehicle.
Gross Vehicle Weight Rating: The maximum
weight of the fully loaded trailer, as published
on the certification/VIN label. Actual weight
determined by weighing trailer on a public scale,
without being attached to the towing vehicle. Hitch
Weight: The downward force exerted on the hitch
ball by the trailer coupler.
Inner liner: The layer(s) forming the inside surface
of a tubeless tire that contains the inflating
medium within the tire.
Inner liner Separation: The parting of the inner
liner from cord material in the carcass.
Intended Outboard Sidewall: The sidewall that
contains a white-wall, bears white lettering or
bears manufacturer, brand, and /or model name
molding that is higher or deeper than the
same molding on the other sidewall of the tire or
the outward facing sidewall of an asymmetrical
tire that has a particular side that must always
face outward when mounted on a vehicle.
Light Truck (LT) Tire: A tire designated by its
manufacturer as primarily intended for use on
lightweight trucks or multipurpose passenger
vehicles.
Load Rating: The maximum load that a tire is rated
to carry for a given inflation pressure.
Maximum Load Rating: The load rating for a tire
at the maximum permissible inflation pressure for
that tire.
Maximum Permissible Inflation Pressure: The
maximum cold inflation pressure to which a tire
may be inflated.
Maximum Loaded Vehicle Weight: The sum of
curb weight, accessory weight, vehicle capacity
weight and production options weight.
Measuring Rim: The rim n which a tire is fitted for
physical dimension requirements.
Non-Pneumatic Rim: A mechanical device which,
when a non-pneumatic tire assembly incorporates
a wheel, supports the tire, and attaches, either
integrally or separably, to the wheel center
member and upon which the tire is attached.
Non-Pneumatic Spare Tire Assembly: A non
pneumatic tire assembly intended for temporary
use in place of one of the pneumatic tires and rims
that are fitted to a passenger car in compliance
with the requirements of this standard.

26 27
Non-Pneumatic Tire: A mechanical device which
transmits, either directly or through a wheel
or wheel center member, the vertical load and
tractive forces from the roadway to the vehicle,
generates the tractive forces that provide the
directional control of the vehicle and does not
rely on the containment of any gas or fluid for
providing those functions.
Non-Pneumatic Tire Assembly: A non-pneumatic
tire, alone or in combination with a wheel or
wheel center member, which can be mounted on a
vehicle.
Normal Occupant Weight: This means 68
kilograms
(150 lbs.) times the number of occupants specified
in the second column of Table 1 of 49 CFR
571.110.
Pin Weight: The downward force applied to the
5th wheel or goose neck ball, by the trailer kingpin
or goose neck coupler. Occupant Distribution: The
distribution of occupants in a vehicle as specified in
the third column of Table 1 of 49 CFR
571.110.
Open Splice: Any parting at any junction of tread,
sidewall, or inner liner that extends to cord
material.
Outer diameter: The overall diameter of an
inflated new tire.
Overall Width: The linear distance between
the exteriors of the sidewalls of an inflated tire,
including elevations due to labeling, decorations, or
protective bands or ribs.
Ply: A layer of rubber coated parallel cords.
Ply Separation: A parting of rubber compound
between adjacent plies.
Pneumatic Tire: A mechanical device made
of rubber, chemicals, fabric and steel or other
materials, that, when mounted on an automotive
wheel, provides the traction and contains the gas
or fluid that sustains the load.
Production Options Weight: The combined weight
of those installed regular production options
weighting over 2.3 kilograms (5 lbs.) in excess
of those standard items which they replace, not
previously considered in curb weight or accessory
weight, including heavy duty brakes, ride levelers,
roof rack heavy duty battery, and special trim.
Radial Ply Tire: a pneumatic tire in which the
ply cords that extend to the beads are laid at
substantially 90 degrees to the centerline of the
tread.
Recommended Inflation Pressure: This is
the inflation pressure provided by the vehicle
manufacturer on the Tire Information label and on
the Certification /VIN tag.
Reinforced Tire: A tire designed to operate at
higher loads and at higher inflation pressures than
the
corresponding standard tire.
Rim: A metal support for a tire or attire and tube
assembly upon which the tire beads are seated.
Rim Diameter: This means the nominal diameter
of the bead seat.
Rim Size Designation: This means the industry of
manufacturer’s designation for a rim by style or
code.
Rim Type Designation: This means the industry
of manufacturer’s designation for a rim by style or
code.
Rim Width: This means the nominal distance
between rim flanges.
Section Width: The linear distance between the
exteriors of the sidewalls of an inflated tire,
excluding elevations due to labeling, decoration or
protective bands.
Sidewall: That portion of a tie between the tread
and bead.
Sidewall Separation: The parting of the rubber
compound from the cord material in the sidewall.
Special Trailer (ST) Tire: The “ST” is an indication
the tire is for trailer use only.
Test Rim: The rim on which a tire is fitted for
testing, and may be any rim listed as appropriate
for use with that tire.
Tire Checking: Small cracks in the tire sidewall
usually associated with age or sitting in intense
sunlight conditions.
Tread: That portion of a tire that comes into
contact with the road.
Tread Rib: A tread section running
circumferentially around a tire.
Tread Separation: Pulling away of the tread from
the tire carcass.
Tread Indicators (TWI): The projections within
the principal grooves designed to give a visual
indication of the degrees of wear of the tread.
Vehicle Capacity Weight: The rated cargo and
luggage load plus 68 kilograms (150 lbs.) times the
vehicle’s designated seating capacity.
Vehicle Maximum Load on the Tire: The load on an
individual tie that is determined by distributing to
each axle its share of the maximum loaded vehicle
weight and dividing by two.
Vehicle Normal Load on the Tire: The load on and
individual tire that is determined by distributing to
each axle its share of the curb weight, accessory
weight, and normal occupant weight (distributed in
accordance with Table 1 of CRF 49 571.110) and
dividing by 2.
Weather Side: The surface area of the rim not
covered by the inflated tire.
Wheel Center Member: In the case of a non
pneumatic tire assembly incorporating a wheel,
a mechanical device which attaches, either
integrally or separably, to the non-pneumatic rim
and provides the connection between the non
pneumatic rim and the vehicle: or, in the case of an
non-pneumatic tire assembly not incorporating a
wheel, a mechanical device which attaches, either
integrally or separably, to the non-pneumatic tire
and provides the connection between tire and the
vehicle.
Wheel-Holding Fixture: The fixture used to hold
the wheel and tire assembly securely during
testing.
Trailer Terminology
Aft: A nautical expression referring to the back
area of a boat.
Actuator: See “Trailer actuator”
Anchor Chock: A bracket or roller usually mounted
on the front of the boat and often sticking forward
past the bow of the boat.
Back-Up Solenoid: An electrical solenoid used on
brake actuators for trailers with disc brakes that
allows the trailer to be backed up on level ground
without the brakes locking up.
Bearing Protector: A device that is installed on the
hub that allows lubrication of the bearings.
Boat Bow Safety Chains: Safety chain(s) are
attached to the winch stand of the trailer and
hooked onto the bow eye of the boat as a safety
precaution. (See Safety Chains)
Boat Strakes: Small ribs on the underside of
the boat running fore and aft, visible from the
underside of the boat.
Boom: The main frame members that run fore and
aft on the trailer.
Bow: The front tip of the boat.

28 29
Bow Eye Length: A measurement taken from
the transom to the bow eye for purposes of
determining trailer length and winch stand
placement.
Bow Pulpit: A small platform sticking forward past
the tip of the bow of the boat.
Bow Stop Roller: A roller on the trailer’s winch
stand that the bow of the boat rest against.
Brackish Water: Polluted water or mixed
freshwater and saltwater.
Brake Controller: An electrical brake controller
mounted inside the cab of the tow vehicle that lets
you manually activate the brakes and also houses
the inertia sensing device. (See Inertia Sensing
Device)
Brake Flush Kit: A garden hose adapter kit that
attaches to drum brakes that allows fresh water
to be flushed into the drum brakes to rinse out salt
water, brackish water or small debris.
Bunks: Generally made of wood covered with
carpet. Provides the main support under the boat’s
hull while on a bunk style trailer.
Channel Glide Bunk Covers: A slippery channel
shaped plastic like material that goes over the
existing wood bunk to make launching and loading
the boat easier by reducing friction between the
boat and the carpeted bunk.
Coupler: Coupler Locking Device: A lock or small
nut & bolt through the locking hole on the latch of
the coupler that helps to prevent the coupler from
coming off the hitch ball.
Coupler Safety Chains: Safety chains running from
the coupler or actuator area on the trailer to the
hitch area of the tow vehicle.
Fishtailing: The boat and trailer swaying from side
to side while being towed.
Fore: A nautical term referring to the front area of
the boat.
Gross Vehicle Weight: The actual combined weight
of the trailer, boat with motor, fuel and gear.
Gross Vehicle Weigh Rating (GVWR):The
maximum allowable combined weight of the
trailer, boat, motor, fuel and gear.
Hitch Ball: The ball shaped part of the hitch on the
rear of the tow vehicle used to connect the trailer.
Hydraulic Surge (Drum Brakes): Drum brakes on
the trailer using the hydraulic surge method to
apply the brakes.
I-Tube: An unique extra extrusion is added to
the aluminum tube to help protect and hide the
wiring and brake lines inside the non-corrosive
environment.
Inertia Sensing Device: This is part of an electrical
unit used with electric brakes that senses the
vehicle slowing down and activates the trailer
brakes automatically. It is generally mounted
inside the cab of the tow vehicle. (See Brake
Controller)
Keel: The fore and aft center line of the boat, the
lowest point of the hull on a V-bottomed boat.
Launch Position: Having the trailer deep enough in
the water that if the boat were launched it would
have enough water to support the boat without
making contact with the ground or cause any
damage.
Load Guides: Attachments to the side of the trailer
that have rollers, bunks or PVC tubes that are near
the side of the boat to assist in keeping the boat
centered on the trailer while loading or launching.
Mooring Line: A rope or line attached to the bow
of the boat so that a person has control of the boat
after it is launched off the trailer.
Port: A nautical directional term for left or left side.
Roller Pattern: The spacing the rollers have on the
underside of the boat on roller trailers.
Rollers: Round cylindrical rolls that support the
boat and roll when the boat is being launched or
loaded on a roller style trailers.
Safety Chains or Cables: A general term used to
describe either the safety chains located on the
winch stand that attach to the bow eye of the
boat, or located near the coupler or actuator and
attach near the hitch area of the tow vehicle.
Saltwater: Water with salt content in it.
Side Rollers: Refers to roller style load guides. (See
Load Guides)
Spindle Nut Retainer: A steel cap that fits over the
spindle nut used in conjunction with a cotter pin to
keep the spindle nut from unscrewing.
Spring Suspension: The springs work together to
provide an absorption for the boat and trailer
during towing. The springs come in many different
applications depending on the capacity rating
required.
Starboard: A nautical directional term for right or
right side.
Stern: A nautical expression referring to the back
end of the boat.
Swing Tongue: A tongue installed on a trailer that
has the ability to fold so that the length of the
trailer would be shortened for storage.
Tie-downs: A securing device that attaches to or
near the rear transom of the boat and downward
to the trailer to help secure the back end of the
boat to the trailer.
Tongue: The most forward portion of the trailer
that has the coupler or actuator attached to it.
Tongue Weight: The amount of weight the tongue
is carryng if weighed at the actuator or coupler.
Torsion Axle Trailer: A trailer using torsion as a
means of suspension rather than leaf springs.
Trailer Tow Vehicle: The vehicle that pulls the boat
and trailer.
Trailer Actuator: The part of the trailer that is
bolted or welded to the tip of the tongue of the
trailer that houses the hydraulic reservoir and
several other components of a hydraulic brake
system. This also is the part that attaches to the
hitch ball on the tow vehicle.
Trailer Coupler: The part of the trailer that is
bolted or welded to the tip of the tongue of the
trailer and attaches to the hitch ball of the tow
vehicle.
Trailer Tongue: See “Tongue”
Transom: The near vertical rear end of the boat
where the outboard motor is generally attached,
or the lower unit of the inboard outboard motor is
generally attached.
Transom Drain Plugs: In the lower rear transom
area that when removed will drain excess water
from the boat after the boat is out of the water on
the trailer. Drain plugs must be kept in the transom
drain plug holes whenever the boat is in the water.
Tuff Coat: A professionally sprayed-on
polyurethane finish that protects the trailer from
rock chips and nicks.
Vee Block: A “V” shaped block on the trailer’s
winch stand that the bow of the boat rests against.
Underwater Launching Lights: This is a optional
feature for most SKEETER trailers. This system
works off a sensor installed on the rear of the
trailer that works as a ground and as the trailer
backs into the water, the lights go on and light up
the bunk like a runway and turn off immediately
when the trailer exits the water. Set usually consist
of 3 lights on each of the two rails.
Weight Carrying Hitch: A hitch that distributes
some of the weight of the boat and trailer into the
frame of the tow vehicle.

30 31
Winch Latch Assembly: A latch assembly located
on the winch that switches the winch from a
“reel in” condition to a “reel-out” or a “neutral
free-wheeling” condition.
Winch Safety Chains: See “Boat Bow Safety
Chains”
Winch Strap/Cable: A cable or strap attached to
the trailer winch used in loading, launching and
securing of the boat.
60 degree Cone Angle Zinc Plated Lug Bolts: A 60
degree lug bolt used to attach the wheel to the hub
or drum on trailer.
Replacement of Manufacturers
Certificate of Origin (MCO) or Vehicle
Identification Number (VIN) Tags
For your protection, never purchase a used
SKEETER trailer without securing a state or
province issued Certificate of Title properly
transferred to you as the purchaser of the trailer
by the legal owner. If the trailer has not been
registered or is registered in a non- title issuing
state, an MCO and/or other proof of ownership
of the seller should be obtained. Before taking
delivery of the trailer, verify that the VIN number of
the trailer per the title or MCO matches the VIN
number on the tag located on the inside front rail
of the trailer. SKEETER will only replace MCOs
for trailers that are less than two years old and
that are owned by the first retail purchaser of the
trailer. VIN tags may be replaced under certain
circumstances.
Certain documentation will be required before
issuing a possible replacement. There is a fee for
replacement of the VIN tag.
For information regarding a replacement of an
MSO or VIN tag for trailers with a VIN beginning
with 7FUBB contact:
Cheryl_Richardson@Yamaha-Motor.com
(903) 983-5662
Canadian Registration Recall
clearance document
If you are exporting a Skeeter custom welded
trailer into Canada with a VIN number that begins
with 7FUBB and need this document , contact
Cheryl at (903) 983-5662 or email at
Cheryl_Richardson@Yamaha-Motor.com
Additional Information
The following websites are provided for reference:
Safe trailer towing National Highway Traffic Safety
Administration (NHTSA®) http://www.nhtsa.dot.
gov/ cars/problems/ Equipment/towing/
Unique Functional Products (UFP®) www.ufpnet.
com or 800-835-9211. Trailer components such as
actuators, axles, brakes, etc. Tred it tire and wheel
www.tredittire.com or 855-887-3348 Tires and
most wheels contact them regarding wear and
warranty questions. Fulton Performance Products
Jacks and winches visit www.fultonperformance.
com Optronics, Inc. Lighting components visit
www.optronicsinc.com
Warranty Registration
Please ensure that your Skeeter dealer has
warranty registered your trailer. Having your trailer
on file will speed up the process if you have a
problem, need replacement parts, or if we need to
contact you with important information about your
trailer. Using the Vehicle Identification Number
(VIN) we can look up the registration which has the
information we would need to make sure that you
get the right parts for your trailer. Please ask you
SKEETER Dealer or give us a call if you have any
question regarding the Warranty Card. Keep the
upper portion of the card for your records. If you do
not have access to a computer, send in the lower
half to the following address:
SKEETER Products Inc.
One Skeeter Road
Kilgore, TX 75662
Warranty Questions
If your SKEETER boat trailer does not live up
to our warranty, we want to make it right. Discuss
the problem first with your SKEETER Dealer
In most cases, a satisfactory solution can be
resolved.
Reporting Safety Defects
Manufacturer SKEETER Products Inc.
One Skeeter Road KILGORE, TX 75662
If you believe that your vehicle has a defect which
could cause a crash or could cause injury or death,
you should immediately inform the National
Highway Traffic Safety Administration (NHTSA) in
addition to notifying SKEETER Products Inc.
If NHTSA receives similar complaints, it may open
an investigation, and if it finds that a safety defect
exists in a group of vehicles, it may order a recall
and remedy campaign. However, NHTSA cannot
become involved in individual problems between
you, your dealer, or SKEETER Products Inc.
To contact NHTSA you may either call the Vehicle
Safety Hotline toll-free at
1-888-327-4236 (TTY: 1-800-424-9153),
www.safercar.gov, or write to:
Administer
NHTSA
1200 New Jersey Avenue S.E.
Washington, DC 20590
You can also obtain other information about motor
vehicle safety from http: www.safecar.gov.
Manufacturers of marine products are required to
keep current owner registration lists. If there
is a safety modification or product recall, SKEETER
Products Inc. will be able to notify you accordingly.
IMPORTANT NOTICE
Laws regarding towing and trailers vary from
state to state, make sure you are in full
compliance with the laws in your area regarding
trailer brakes, coupler requirements, safety
chains, trailer width requirements, trailer lights,
etc. Contact your state motor vehicle department
for more information. Also, check with your
automotive dealer or vehicle’s owner’s manual
to make sure you have the proper towing vehicle,
hitch and ball for the load you’ll be pulling.

32 33
Skeeterboats.com
903-984-0541
For your records, please fill in the following information.
It is important for future part or service requests.
Model Year
Model Number
Serial Number (VIN)
Carrying Capacity
Date Purchased
Dealer Name
Dealer Address
Dealer Telephone
Tire Size
Recommended Tire Pressure
If you sell your trailer: This manual must be transferred to the new owner. At the transaction, the original
owner should photocopy this page, along with the name and address of the new owner and send it to:
Customer Relations
Skeeter Products One Skeeter Road Kilgore, TX 7562
(903) 984-0541
OriginalOwner
Address
City, State, Zip
New Owner Address
City, State, Zip
Warranty is not transferable to 2nd or other owner
Table of contents