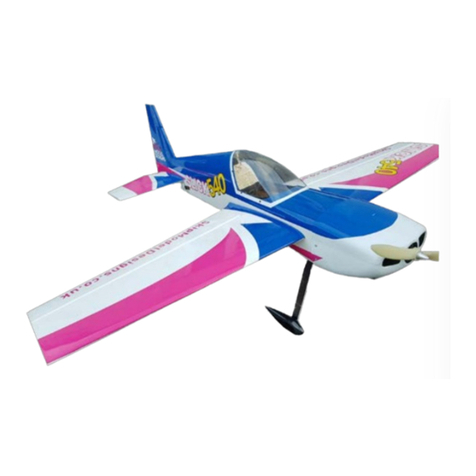
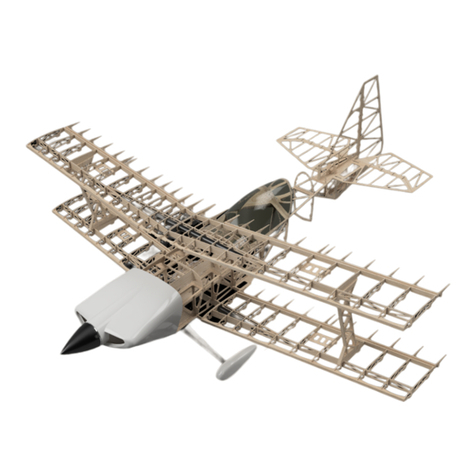
Skip Model Designs 1200mm Challenger 2 User manual

1200MM Pitts Challenger 21200MM Pitts Challenger 2
1300MM Christen Eagle1300MM Christen Eagle

Thank you for purchasing the Skip Model Designs 1200mm Challenger 2/ 1300mm Christen
Eagle.If you have any issues, questions, concerns or problems during assembly, please
contact us :
SAFETY in Assembly
During assembly of this aircraft, you will be asked to use sharp knives and hobby adhesives. Please follow all safety procedures recommended by the
manufacturers of the products you use,and always follow these important guidelines:
• ALWAYS protect your eyes when working with adhesives, knives, or tools, especially power tools. Safety glasses are the best way to protect your
eyes.
• ALWAYS protect your body, especially your hands and ngers when using adhesives, knives, or tools, especially power tools. Do not cut toward
exposed skin with hobby knives. Do not place hobby knives on tables or benches where they can roll o or be knocked o.
• ALWAYS have a rst-aid kit handy when working with adhesives, knives, or tools, especially power tools. ALWAYS keep hobby equipment and
supplies out of the reach of children.
• SAFETY in Flying! This is NOT a toy! It is a very high-performance RC airplane capable of high speeds and extreme manoeuvres. It should only be
operated by a competent pilot in a safe area with proper supervision.
• ONLY y your aircraft in a safe, open area, away from spectators and vehicles and where it is legal to y. NEVER y over an unsafe area, such as a
road or street.
• NEVER y near overhead power or utility lines. If your airplane ever becomes stuck in a line or a tree DO NOT attempt to retrieve it yourself. Contact
the authorities for assistance in retrieving your aircraft. Power lines are DANGEROUS and falls from ladders and trees CAN KILL!
• Never y too close to yourself or spectators.
• Spinning propellers are DANGEROUS! Never run your motor inside a house or building with the propeller attached Remove the prop for safety. • • •
Always y within your control.
• Always follow manufacturers instructions for your radio system.
•Always preform a pre-ight check of your aircraft to be certain of the aircraft’s airworthiness.
•Always obtain proper insurance before ying. Always y model aircraft in accordance with the Academy of Model Aeronautics (AMA) Safety Code and
BMFA/ LMA. Please visit These websites easily found in major search engines.
Limits of Responsibility
Skip Model Designs provides high-quality aircraft and components to it’s customers and end users. These aircraft and components are assembled by
the end user to produce a ying model. It is beyond skip model design’s to monitor the end user’s completed aircraft. Therefore, Skip Model Designs
in no way accepts or assumes responsibility or liability for damages resulting from the end user assembled product. The end user assumes all
responsibility and liability in use of Skip Model Designs and components
Required Items
• Masking or painters tape
• Hobby knife with #11 blades.
• Fresh 30 minute & 15 Minute epoxy.
• Plenty of both Medium and Thin CA.. Activator can also be used.
• Electric drill with an assortment of small drill bits.
• Small at head and Phillips head screw drivers.
• Standard and needle nose pliers.
• Hammer, Hacksaw and other basic Hobbiest Tools
• Metric ball driver or allen key set.
• Sanding block and sandpaper. Hobby Plane
• 6 Savox 0256 Servos (min) torque Digital Servos.
• 2” Spinner
• Hacker Hacker A40 8L 530KV (V4)
6s Lipo
Make sure that the plane is secured properly when you start up the engine.
Have at least 2 helpers hold your plane from the tail end or from behind the
wing tips before you start theengine. Make sure that all spectators are behind,
or far in front, of the aircraft when running up the engine.
Make sure that you range check your R/C system thoroughly before the rst
ight. It is absolutely necessary to range check your complete R/C installation
rst WITHOUT the engine running. Leave the transmitter antenna retracted,
and check the distance you can walk before ‘fail-safe’ occurs. Then start up
the engine, run it at about half throttle and repeat this range check with the
engine running.
Make sure that there is no range reduction before ‘fail-safe’
occurs. Only then make the 1st ight. If you feel that the range with engine
running is less then with the engine o, please contact the radio supplier and
the engine manufacturer and DON’T FLY at that time.
Check for vibrations through the whole throttle range. The engine should run
smoothly with no unusual vibration. If you think that there are any excessive
vibrations at any engine rpm’s, DON’T FLY at this time and check your engine,
spinner and propeller for proper balancing. Due to the models construction
( Been Light) it is very important to have everything running smoothly.

With Any model build, It is important to test t components
together before gluing ( Where applicable). 5 Minutes test
Fitting can save hours of Unpicking.
To build ANY COMPONENT of this model, Please make
sure you have a large enough area to work safely, and that
your work bench for the next few months is clean, tidy and
most importantly FLAT
First Part of the build is Fuselage
Find the part which matched the Image, This is the main
part of the fuselage. 80% Of the fuselage is built upside
down. This way the fuselage will be built true.
--------------------------------------------------------
Tack Glue F2 to the main fuselage brace with Medium CA.
Becareful now to stick the entire model to your work bench.
----------------------------------------------------------------------
Add the 2 Fuselage Sides on to the main brace and F2
Again, Only Tack Glue at this stage.

Add the Fuel Tray to F2 and the Sides. This is a tricky part
to t in place, You will need to move the sides out slightly
to slide in ( Now you know why i said tack glue)
Once you have in place. Again Tack glue in place for now
--------------------------------
Add former F3 to the rear of the Fuel Tray. Once in
place, you can now add medium CA to all parts, Ensure
Everywhere is glued correctly,
--------------------------------
Continue Add all other fuselage Ribs to the main Brace of
the Model Except F1.

At the rear of the Fuselage Add the following Parts to F9
and the fuselage Main Brace,
This is to make the Rear UC Plate Area. RUCD AND
RUCP
--------------------------------
While Working down this end of the model. You will nd the
following Parts, This is for the Elevator Servos ( Dual)
You could Run one servo, However, i do not advise as
there is alot of power in the elevators ( Authority)

At The front of the Model, You now need to add the Main
Undercarriage Plate Doublers ( MUCPD)
These Fit on the inside of F2 and the Sides. Glue with 5 or
15 Min Epoxy. ( Before you do, Read the next few steps
as you can mix 1 Batch of epoxy and do all the steps below
in one hit)
-
---------------------------------------------
Add MUCPD on top of MUCPD2 Ensure all surfaces are
fully Glued
---------------------------------------------
Glue the MUCP TO MUCPD2 AND the fuselage Sides.
Ensure all surfaces are fully Glues

46% Christen Eagle 2
Fuselage Assembly
Add the Rudder Servo Tray Between F5 AND F6. again i
recommend Epoxy. Ensure all Edges are Glues Correctly
------------------------------
While Still Upside Down. You now need to add all the
Stringers to the Bottom of the Plane
Spruce 3.2 x 3.2 to These 2 Locations ON BOTH sides of
the Model.
Ensure the stringers Come past where F1 will be

Add the 3.2mm x 5mm Balsa Stringers to these Locations
from F9
Again, Ensure the Stringers go past where F1 Will be
------------------------------
The One Balsa Stringer goes on the Inside of the Fuselage
Side. Be Sure to run thin CA Along this edge, Clamp if
needed. This Balsa Stringer Goes up to F3 only and ends
by the Undercarriage Plate.
--------------------------
With All the Stringers now in place, it is me to Add F1.
you will need to position over the Edge of bench to get
this former on. It is a tight t and you will need to Chamfer
some of the mating edges. Glue with 30 Min Epoxy and
clamp to give you plenty of working time.,

Once all Glues have gone o, You can now ip the model
over and admire you boat:)
Trim o any excess stringers to front of model,
------------------------------
With The fuselage now ipped over, you can now add F2T,
F3T AND F4T to the Fuselage.
--------------------------
Slide in and Glue to Top Wing Mounts. This needs to be
done with Epoxy,

To get the angle on F6T. Please Insert the 2 small triangle
parts. This will set the Angle
--------------------------------------------
Add the last few formers to the rear Turtle Deck and Glue
in place
--------------------------------------------
Now this is complete. You can now add all other stringers
( Front and rear) the model. These are made from 2.4mm
x 2.4mm Balsa.

With The fuselage mostly Complete. It is Time to build the Elevators and Rudder. Find all
Parts Associated to the Following Drawings and Glue together
ere will be a gap under FR1. is is for the Elevators to slide under aer

Rudder


Make 2 O

Once all Parts are made, Glue the Rudder Fin in place.
The rudder n Locates in to FT9.
You will have to sand down the Rudder stern post so it ts
Between the RUCP
Glue the Rudder n in place with 5 Minute Epoxy
Ensure the Rudder is Square to the Model.
--------------------------------------------
Once the rudder is in place. You now need to Glue the
Bottom Fuselage Wing saddle in place.. Laminate the 4
Pieces of 6mm Balsa Together and Glue in place.
Ensure the Rib W1 ts. Final Fitting will be done after.
--------------------------------------------
Once this is in place. You can now sheet the model as
shown with the 1.5mm Balsa as shown

Final Part to the Fuselage Build is the motor Box. Find all parts labeled M1 TO M6. These parts all
t together and will create The correct Amount of right thrust for the model. Glue together and to F1
With epoxy.
Use Balsa Triangle to secure to F1.
The Canopy Frame Is a very Simple Process. Find the Frame Bottom and Glue on C1 C2 AND
C3. Once in palce, The Canopy it self us used to cover all, Simply Glue in place with Epoxy so the
Canopy does not fog up, Ensure not to Glue the frame to the Main Fuselage Brace.. Once all is
glued, A dd your own prefered xing methord to the Frame/ Body
Congratulations, The fuselage is 90% Complete. Next up is the Wings.
These are a total Plan build on a very detailed Plan.
We cannot show this in the instructions, however, we can show photos below.. All remaining Steps
are done o Part 3 Of the plan ( This is to stop people copying)


This manual suits for next models
1
Other Skip Model Designs Toy manuals
Popular Toy manuals by other brands
Cobra RC Toys
Cobra RC Toys E-GLIDER 2.0 instruction manual
RCRCM
RCRCM TYPHOON Plus manual
HobbyZone
HobbyZone UM T-28 Trojan S instruction manual

Patch Products
Patch Products OK TO WAKE OWL101-US Instructions for use
VTech Baby
VTech Baby Peek-A-Boo Book user manual

Fisher-Price
Fisher-Price PowerTouch Learn to Write Numbers manual
THE WORLD MODELS
THE WORLD MODELS Sky Raider Mach II instruction manual

Trix
Trix H0 BR 75.4 instructions

Canon
Canon Creative Park JAGUAR XKR Assembly instructions
Hangar 9
Hangar 9 Piper J-3 Cub 40 Assembly manual
Real Good Toys
Real Good Toys 67100 manual

Fisher-Price
Fisher-Price Ocean Wonders Aquarium instruction sheet
