manuals.online logo
Brands
  1. Home
  2. •
  3. Brands
  4. •
  5. Canon
  6. •
  7. Toy
  8. •
  9. Canon Creative Park JAGUAR XKR User manual

Canon Creative Park JAGUAR XKR User manual

-
1
-
Assembly Instructions ; Seven A4 sheets
No. of Parts ;49
*Bulid the model by carefully reading the Assembly Instractions, in the parts sheet page order.
The Jaguar XKR brings the Jaguar Sports Car tradition that began with the XK 120, into the modern era. The sleek
curves of the Jaguar XKR are reminiscent of the Jaguar E-type, a timeless classic from the 1960s, and give the car
an exemplary "British" air. Features inside include new twin air intakes, and the Super Charged 4.2 liter V8 engine
employs a variable inlet camshaft timing system that extracts a peak torque of 560Nm and a maximum power output
of 420hp. The Jaguar XKR accelerates from 0 to 100km/h in just 5.2 seconds. The super charger means that high
levels of power and torque are achieved at any engine speed.
This papercraft is about one eighteen the size of a real Jaguar XKR.
*This model was designed for Papercraft and may differ from the original in some respects.
JAGUAR XKR
View of compleate model(Front view)
View of compleate model(Side view)
View of compleate model(Back view)
Mountain fold
Valley fold
Scissors line
Instructions
1. Use scissors to cut out all the pieces carefully.
2. To add curves, take the part in your hand and use a cylindrical rod to work a curve into it.
3. Check the instructional diagrams for mountain folds and valley folds, and use something pointed to score along the fold lines. It is
important to make each fold clean.
4. Before gluing, look at the instructional diagrams and photos and put the pieces together roughly to see how the finished product should
look. This will also give you an idea of where to add curves.
If the white edges of the parts you have cut stand out, color them with a marker pen or paint in the same color as the part before gluing.
This will result in a cleaner finish.
5. After placing the pieces together roughly, add glue to the glue tabs (marked ) and assemble the model.
Pour some glue onto a piece of paper, and use a toothpick to spread a thin layer on the glue tabs. This will ensure a clean finish.
Be sure to attach the parts in order as shown by the numbers in squares. Take your time and glue each one carefully.
Glue tab
Notation Key
Tools
Scissors Ruler Glue An instrument with a pointed tip (eg. a stencil pen or bodkin)
A cylindrical rod (a knitting needle or pencil) Tape Tweezers Toothpicks
Something to color the edges of the paper after cutting (a marker or some paint)
A craft mat etc
Glue, scissors and other tools may
be dangerous to young children so
be sure to keep them out of the
reach of young children.
Be careful not to cut your fingers
when using scissors.
Cut in line
JAGUAR XKR : Assembly Instructions
Add glue first, and confirm where to attach.
Align the center lines.
Carefully add curves where necessary. Carefully add curves where necessary.
represents parts to add curves to.
Follow the order of the numbers in
squares to assemble.
Follow the order of the numbers in squares to assemble.
The lines in the diagram are divided as follows: ( )Mountain fold ( )Valley fold.
This diagram shows the left side.
Assemble the right side in the same way.
Right side
JAGUAR XKR : Assembly Instructions
Slightly squeeze the bonnet so it is convex,
and attach it to the valley fold line on the windshield (part 4).
-
2
-
Once you have attached it to the bonnet,
add tape to the underside for extra strength.
The lines in the diagram are divided as follows: ( )Mountain fold ( )Valley fold.
represents the underside of the paper.
Carefully add curves where necessary.
represents parts to add curves to.
Follow the order of the numbers in squares to assemble.
Align the center lines.
This diagram shows the left side.
Assemble the right side in the same way.
Right side
Right side
-
3
-
JAGUAR XKR : Assembly Instructions
Line up the glue spots and attach the pieces. Hold them together until the glue dries.
Align the center lines, and curve the paper as you attach them.
1. Carefully score along the fold lines before cutting out.
2. As shown in the diagram, cut out the parts without cutting between the glue tabs.
3. Glue together carefully.
4. Cut between the glue tabs once the glue has completely dried.
Fold each glue tab carefully.
The lines in the diagram are divided as follows: ( )Mountain fold ( )Valley fold.
Align the center lines.
Do not cut out yet.
Do not cut out yet. Cut out once the glue has dried completely.
Carefully add curves where necessary.
represents parts to add curves to.
Carefully add curves where necessary.
represents parts to add curves to.
represents the underside of the paper.
Carefully add curves where necessary.
represents parts to add curves to.
Follow the order of the numbers in squares to assemble.
This diagram shows the left side.
Assemble the right side in the same way.
Right side
-
4
-
JAGUAR XKR : Assembly Instructions
[Diagram of the other side]
Color the underside black,
and roll into a tube.
Put a small amount of glue
in the slots and attach together.
The lines in the diagram are divided as follows: ( )Mountain fold ( )Valley fold.
represents the underside of the paper.
Carefully add curves where necessary.
represents parts to add curves to.
Follow the order of the numbers in squares to assemble.
represents lines that will be hidden when assembled.
Align the center lines.
Right side
Left side
-
5
-
JAGUAR XKR : Assembly Instructions
Assemble into a box shape.
Use the lines as a guide for where to attach.
Glue to add extra strength.
represents the underside of the paper.
Follow the order of the numbers in squares to assemble.
represents lines that will be hidden when assembled.
-
6
-
The lines in the diagram are divided as follows: ( )Mountain fold ( )Valley fold.
Align the center lines.
JAGUAR XKR : Assembly Instructions
[Back wheels]
Look carefully at the gap between the wheel and the body of the car,
ensuring that the left and right wheels are in line when they are attached.
When attaching the outside of the wheel,
make the center of the hubcap slightly concave.
Then, once the glue is completely dry,
bend the edges of the tire back so that it is convex.
The seam should be at the exact top
The seam should be
at the exact top
The mark should be at the top
This side should face outwards
The lines in the diagram are divided as follows: ( )Mountain fold ( )Valley fold.
represents the underside of the paper.
Carefully add curves where necessary.
represents parts to add curves to.
Follow the order of the numbers in squares to assemble.
This diagram shows the left side.
Assemble the right side in the same way.
[Front wheels] This diagram shows the left side.
Assemble the right side in the same way.
Right side
Right side
Right side
Right side
Right side
Right side
Right side
Right side
When attaching the outside of the
wheel,make the center of the hubcap
slightly concave.Then, once the glue
is completely dry,bend the edges of
the tire back so that it is convex.
-
7
-
JAGUAR XKR : Assembly Instructions
The Jaguar XKR brings the Jaguar Sports Car tradition that began with the
XK120, into the modern era. The sleek curves of the Jaguar XKR are reminiscent
of the Jaguar E-type, a timeless classic from the 1960s, and give the car an
exemplary "British" air. Features inside include new twin air intakes, and the
Super Charged 4.2 liter V8 engine employs a variable inlet camshaft timing
system that extracts a peak torque of 560Nm and a maximum power output of
420hp. The Jaguar XKR accelerates from 0 to 100km/h in just 5.2 seconds.
The super charger means that high levels of power and torque are achieved at
any engine speed.
This papercraft is about one eighteen the size of a real Jaguar XKR.
*This model was designed for Papercraft and may differ from the original in some
respects.
JAGUAR XKR
Pattern ; Seven A4 sheets
No. of Parts ;49
*Bulid the model by carefully reading the Assembly Instractions, in the parts sheet page order.
View of compleate model(Side view)
View of compleate model(Back view)
-
1
-
View of compleate model(Front view)
JAGUAR XKR : Pattern
-
2
-
JAGUAR XKR : Pattern
-
3
-
JAGUAR XKR : Pattern
-
4
-
JAGUAR XKR : Pattern
-
5
-
Cut out this part.
Cut out this part.
JAGUAR XKR : Pattern
-
6
-
Right
(Front)
Left
(Front)
Right
(Rear)
Left
(Rear)
-
7
-
JAGUAR XKR : Pattern
Out side
Out side
Out side
Out side

Other Canon Toy manuals

Canon CREATIVE PARK Reindeer User manual

Canon

Canon CREATIVE PARK Reindeer User manual

Canon CREATIVE PARK Sumo wrestling game User manual

Canon

Canon CREATIVE PARK Sumo wrestling game User manual

Canon Paper Craft Clown and sea lion acrobatics User manual

Canon

Canon Paper Craft Clown and sea lion acrobatics User manual

Canon Creative Park Nikko Toshogu Shrine Yomeimon User manual

Canon

Canon Creative Park Nikko Toshogu Shrine Yomeimon User manual

Canon PAPER CRAFT Pop-up Card Birdcage User manual

Canon

Canon PAPER CRAFT Pop-up Card Birdcage User manual

Canon CREATIVE PARK Falcon User manual

Canon

Canon CREATIVE PARK Falcon User manual

Canon Creative Park Pomeranian User manual

Canon

Canon Creative Park Pomeranian User manual

Canon Creative Park Hwaseong Fortress User manual

Canon

Canon Creative Park Hwaseong Fortress User manual

Canon CREATIVE PARK Manta ray User manual

Canon

Canon CREATIVE PARK Manta ray User manual

Canon creative park Quick start guide

Canon

Canon creative park Quick start guide

Canon Nippon Maru User manual

Canon

Canon Nippon Maru User manual

Canon CREATIVE PERK Elastic-powered Bus : Pattern User manual

Canon

Canon CREATIVE PERK Elastic-powered Bus : Pattern User manual

Canon Creative Park Teddy Bear User manual

Canon

Canon Creative Park Teddy Bear User manual

Canon Creative Park 3D Decoupage St. Patrick's... Quick start guide

Canon

Canon Creative Park 3D Decoupage St. Patrick's... Quick start guide

Canon Creative Park Elastic-powered Bus Quick start guide

Canon

Canon Creative Park Elastic-powered Bus Quick start guide

Canon Creative Park Mallet of Luck User manual

Canon

Canon Creative Park Mallet of Luck User manual

Canon Racer 539 Hawk User manual

Canon

Canon Racer 539 Hawk User manual

Canon MANEKI NEKO User manual

Canon

Canon MANEKI NEKO User manual

Canon Creative Park Shaky-Shaky Maracas User manual

Canon

Canon Creative Park Shaky-Shaky Maracas User manual

Canon PAPER CRAFT User manual

Canon

Canon PAPER CRAFT User manual

Canon Creative Park Matryoska doll User manual

Canon

Canon Creative Park Matryoska doll User manual

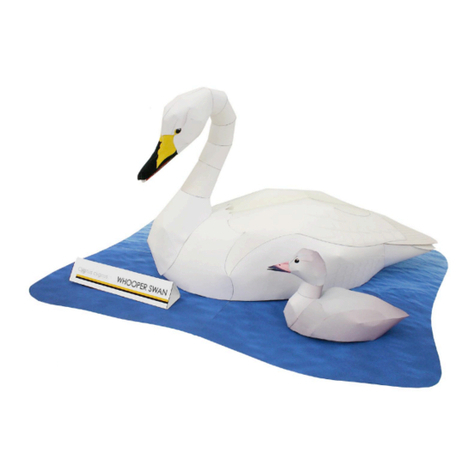
Canon PAPER CRAFT Whooper Swan User manual

Canon

Canon PAPER CRAFT Whooper Swan User manual

Canon Creative Park Marine iguana User manual

Canon

Canon Creative Park Marine iguana User manual

Canon Creative Park Football Money Box Quick start guide

Canon

Canon Creative Park Football Money Box Quick start guide

Popular Toy manuals by other brands

Mattel Monster High DNX66 instructions

Mattel

Mattel Monster High DNX66 instructions

TILLIG BAHN 04930 manual

TILLIG BAHN

TILLIG BAHN 04930 manual

REVELL Bell UH-1 "Huey Hog" Assembly manual

REVELL

REVELL Bell UH-1 "Huey Hog" Assembly manual

Laser Dollhouse Designs Craftman One Car Garage Assembly instruction

Laser Dollhouse Designs

Laser Dollhouse Designs Craftman One Car Garage Assembly instruction

Brookstone Rover 2.0 user manual

Brookstone

Brookstone Rover 2.0 user manual

Eduard Spitfire Mk.XVI landing flaps quick start guide

Eduard

Eduard Spitfire Mk.XVI landing flaps quick start guide

Mattel Polly Pocket GGC29 instructions

Mattel

Mattel Polly Pocket GGC29 instructions

Cebekit C-9800 manual

Cebekit

Cebekit C-9800 manual

Mattel MOJANG instructions

Mattel

Mattel MOJANG instructions

Mattel MATCHBOX GROW PRO instructions

Mattel

Mattel MATCHBOX GROW PRO instructions

Wooden City Biplane Limited Edition Assembly instruction

Wooden City

Wooden City Biplane Limited Edition Assembly instruction

THE WORLD MODELS Zero Fighter 60S instruction manual

THE WORLD MODELS

THE WORLD MODELS Zero Fighter 60S instruction manual

LeapFrog Learning Path My Own Leaptop Parent guide & instructions

LeapFrog

LeapFrog Learning Path My Own Leaptop Parent guide & instructions

Mattel Barbie HGC18 instructions

Mattel

Mattel Barbie HGC18 instructions

Black Horce Model BH39 Instruction manual book

Black Horce Model

Black Horce Model BH39 Instruction manual book

PURSUIT T-34C TURBO MENTOR user manual

PURSUIT

PURSUIT T-34C TURBO MENTOR user manual

Nine Eagles SOLO instruction manual

Nine Eagles

Nine Eagles SOLO instruction manual

Horizon Hobby EXTRA 300 1.3M instruction manual

Horizon Hobby

Horizon Hobby EXTRA 300 1.3M instruction manual

manuals.online logo
manuals.online logoBrands
  • About & Mission
  • Contact us
  • Privacy Policy
  • Terms and Conditions

Copyright 2025 Manuals.Online. All Rights Reserved.