SkyScan 87700 User manual

1
LCD2
display
Battery cover
LCD1
display
Hanging holes
®
ATOMIC CLOCK WITH OUTDOOR WIRELESS TEMPERATURE
AND MOON PHASE
MODEL 87700
Instruction Manual
FEATURES:
ATOMIC CLOCK:
•WWVB Radio controlled time with manual time setting
•12/24 hour time display
•Time display: hour, minute, second
•Alarm setting with snooze function
•Calendar display
•Weekday display (4 languages to choose from: English, French, Spanish and German)
•Time zone setting
•Daylight savings time ON/OFF option (DST)
•ºC or ºF temperature display selectable
Function
keys
Foldable stand
2
Holder
•Indoor temperature display
•Outdoor temperature display via 433MHz transmission
•Wall mount or freestanding
•Current moon phase display
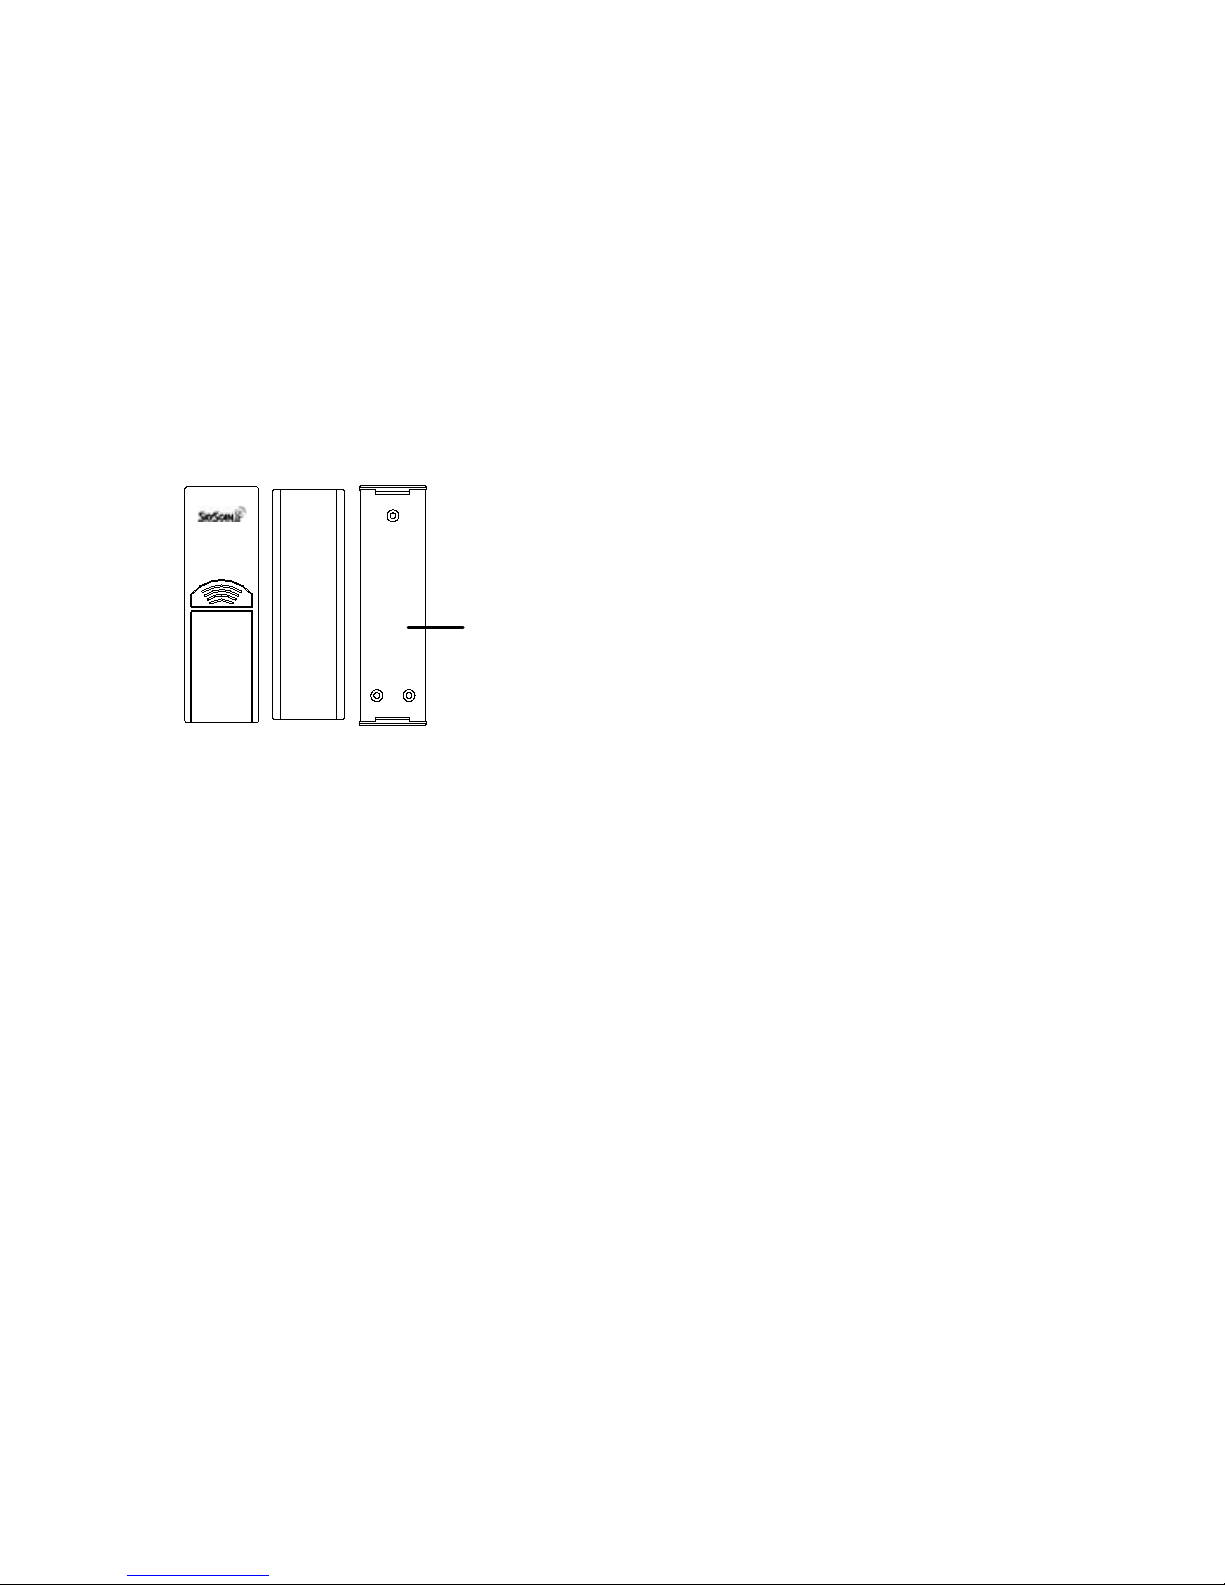
OUTDOOR TEMPERATURE TRANSMITTER:
•Remote transmission of outdoor
temperature to the atomic clock by 433
MHz signals
•Wall mounting case
TO INSTALL AND REPLACE BATTERIES IN THE ATOMIC CLOCK
The atomic clock uses 2 x AA, 1.5V batteries. To install and replace the batteries, please
follow the steps below:
1. Remove the cover.
2. Insert batteries observing the correct polarity (see marking inside battery compartment).
3. Replace compartment cover.
DO NOT SET THE CLOCK.
TO INSTALL AND REPLACE BATTERIES IN THE TEMPERATURE
TRANSMITTER
The transmitter uses 2 x AA,1.5V batteries. To install and replace the batteries, please follow
the steps below:
1. Remove the cover.
2. Insert the batteries, observing the correct polarity (see marking inside battery
compartment).
3. Replace the battery cover on the unit.
Alkaline batteries are recommended for use in both units. Avoid using rechargeable
batteries.

3
SETTING UP:
NOTE: Do not set the clock until the outdoor temperature is displayed.
1. Place batteries in the outdoor transmitter first, then into the atomic clock. DO NOT
PRESS ANY BUTTONS FOR 10 MINUTES.
2. After 10 minutes both the Indoor and Outdoor areas on your clock should have a
temperature showing. If not, remove both sets of batteries, wait 10 minutes and repeat
step one.
3. After the clock receives the outdoor temperature, and 10 minutes has elapsed, set
your time zone. The default time zone is Eastern Standard Time (EST). If you live
in the Eastern Time zone move to step 5.
4. To set the time zone:
•Push and release the “SET” function button.
•The time zone (LCD2) will start flashing (Default setting -5EST).
•Push the (+) function button to change the default setting (-5EST) to the desired
time zone.
-6 CST (Central Time Zone)
-7 MST (Mountain Time Zone)
-8 PST (Pacific Time Zone)
(See “Time Zone Setting” if you live outside the USA)
5. After the clock receives the outdoor temperature the WWVB time code reception will
automatically start. The clock will automatically set itself to the exact time, day and date
after receipt of the WWVB time code reception. This typically takes over night. For best
reception place your clock next to a window facing Colorado over night. Once a
successful reception is received the Radio Reception ( ) icon will appear above the
blinking colons. Once a successful reception is received relocate your clock to a desired
location. The clock will then automatically attempt to receive the WWVB time from
12:00 am through 6:00 am each day (attempts WWVB reception every full hour within
this time frame). When this is successful, the received time will override the manually
set time. The date is also updated with the received time (Please refer to notes on
“Radio controlled time” and “Manual time setting”).
Note:
In the event of changing batteries of the unit ensure that the batteries do not spring free from
the contacts. Always wait at least 10 minutes after removing the batteries before reinserting,
otherwise start up and transmission problems may occur.

4
Weekday
FUNCTION KEYS
The atomic clock has four easy to use keys:
SET key : To enter into the set mode for the following functions: time zone, DST
ON/OFF (daylight saving time), language, hour, minute, year, month, day,
weekday, 12/24 hour, ºC or ºF temperature display
+key : To toggle between the seconds, temperature or weekday display
To change any values in manual set mode
ALM key : To enter into the alarm set mode
To set the alarm ON/OFF
SNZ key : To activate the snooze function during alarm
To display the alarm time in normal mode display
To exit the setting modes
ATOMIC CLOCK LCD SCREEN DESCRIPTIONS
The atomic clock's LCD is divided into 2 sections. When batteries are inserted, all the
segments will light up briefly before displaying the information for time, date, indoor and
outdoor temperatures.
MOON PHASE SYMBOLS:
The atomic clock automatically calculates and updates the moon phase diagram on LCD2.
The phase display will change approximately every 2 days, 11 hours. Whenever the date or
time is changed manually, the atomic clock will display the updated moon phase within a few
minutes. Twelve stages of the moon’s phases are represented.
Date
Outdoor temperature display
WWVB time
T i m e reception icon
Alarm icon
Indoor temperature

5
New Moon Small Waxing Large Waxing First Quarter Small Waxing Large Waxing
Crescent Crescent Gibbous Gibbous
FullMoon Large Waning Small Waning Last Quarter Large Waning Small Waning
Gibbous Gibbous Crescent Crescent
Note: The moon phase visible in the sky is noted by a darkening of the LCD screen. Therfore,
a full moon is a complete dark circle.
MANUAL SETTINGS
Note:
If the atomic clock has already successfully received the WWVB time signal and
displays the correct time and date, then the Manual settings can be skipped.
After completion of the above described procedures in “Setting up” the manual setting
modes can be entered by pressing and holding the SET key for 3 seconds. The following
settings can now be programmed:
•Time zone setting
•DST ON/OFF
•Language display setting
•Manual time setting
•Year setting
•Month setting
•Date setting
•Weekday setting
•12/24 hour time display setting
•ºC or ºF setting

6
TIME ZONE SETTING
After entering the manual setting mode as described above, the time zone can be set using
the number of hours different from Greenwich Mean Time (GMT) range in LCD2. To do this:
1. The time zone (LCD2) will start flashing (Default setting "-5h“). Select the desired time zone
by pressing and releasing the +key.
Note: The time zones from –4 to –10 hours will be displayed with 3 characters
abbreviations:
•-4 ATL (Atlantic time),
•-5 EST (Eastern time; default time zone),
•-6 CST (Central time),
•-7 MST (Mountain time),
•-8 PST (Pacific time),
•-9 ALA (Alaska time),
•-10 HAW (Hawaii time).
•"GMT” will be displayed if set to GMT (0).
2. Press and release the SET key to enter the “DST Setting“.
DST SETTING (daylight saving time)
1. The ON digit will start flashing on LCD1. Set the DST ON or OFF by pressing the +k e y .
2. Press and release the SET key to enter the “Language Setting“.
Note:
The DST default is “ON”, meaning that the WWVB will automatically change the time
according to Daylight Saving Time in the spring and fall. For areas that do not recognize DST
changes (Arizona and parts of Indiana) turn the DST “OFF”.
LANGUAGE SETTING
The weekdays can be displayed in LCD2 with the pre-set languages: English, French,
Spanish and German.
US = English
F = French

7
E = Spanish (Espanol)
D = German (Deutsch)
1. Set the desired language for the weekday display in LCD 2 by use of the + k e y .
2. Press and release the SET key to enter the mode “Manual Time Setting”.
MANUAL TIME SETTING
In case the atomic clock is not able to detect the WWVB-signal (disturbances, transmitting
distance, etc.), the time can be manually set. The clock will then work as a normal Quartz
clock.
Note: In 12 hours mode the time will be displayed with an additional “PM”for the time from
12:00 noon until 11:59 pm.
1. The hour digits will start flashing on LCD1.
2. Set the desired hours by pressing and releasing the +key followed by pressing the SET
k e y .
3. Now the minute digits will start flashing.
4. Set the desired minutes by pressing and releasing the +key. If the +key is held, the
units will increase by 5.
5. Press and release the SET key to move to the “Year Setting”.
Note:
The unit will still try and receive the signal every day despite it being manually set. When it
does receive the signal, it will change the manually set time into the received time. During
reception attempts the WWVB tower icon will flash. If reception has been unsuccessful, then
the WWVB tower icon will not appear but reception will still be attempted the following hour.
WWVB time reception takes place from 12:00 am through 6:00 am each day (attempts
WWVB reception every full hour within this time frame). When the time signal is received for
example at 1:00 am, the atomic clock will not attempt to receive the WWVB signal for the
remaining hours until 6:00 am. Therefore, the next signal attempt will take place between
12:00 am and 6:00 am the next day. The other times WWVB reception takes place, are upon
setup and after manual time set exiting mode. Reception is generally not possible during
daylight hours due to the interference of the sun.
YEAR SETTING
The year can be selected sequentially from 2000 to 2049 and will then start over again
(default setting 2000). Only the last 2 digits of the year will be visible on LCD2.

8
1. The year digits will start flashing on LCD2. Select the desired year by use of the +k e y .
2. Press and release the SET key to switch to the “Month Setting”.
MONTH SETTING
1. The month digits on LCD2 will start flashing. Set the desired month by use of the +k e y .
2. Press and release the SET key to move to the mode “Date Setting”.
DATE SETTING
1. The digits for the date will start flashing on LCD2 (Default setting 1). Set the desired
date by use of the +k e y .
Note: The date can only be set in conjunction with the selected month. For example, it
is not possible to set the date 30 if the month of February is selected.
2. Press and release the SET key to enter the “Weekday Setting”.
WEEKDAY SETTING
1. The weekday symbols will be displayed on LCD2 in the pre-set language and flashing.
Set the desired weekday by use of the + k e y .
2. Press and release the SET key to enter the mode “12/24 Hours Time Display
Setting”.
12/24 HOURS TIME DISPLAY SETTING
1. The “12” or “24” will start flashing in LCD1 (Default setting 12h). Select the desired
time display mode by use of the + ke y .
2. Press and release the SET key to enter the “ºC/ºF Temperature Setting“.
°C OR °F TEMPERATURE SETTING
1. The characters “°C” or “°F” will start flashing on LCD1 (Default setting °F). By use of
the +key select “°C” for temperature display in degrees Celsius or “°F” for degrees
Fahrenheit.
2. Press and release the SET key to exit the setting mode and switch back to the normal
display mode.
EXIT THE MANUAL SETTING MODES
•To return to the normal display mode from anywhere in manual setting mode simply
press the SNZ key anytime.

9
•If no keys are pressed for at least 15 seconds in setting mode, the atomic clock will
automatically switch back to normal display mode.
A L A R M S E T T I N G
To enter into the alarm setting mode:
1. Hold the ALM key for 4 seconds. The hour digits start flashing.
2. Press and release the + key to set the hour.
3. Press and release the ALM key to set the minutes. The minute digits start flashing.
4. Press and release the + key to set the minutes.
5. Press and release again the ALM key to exit the Alarm setting mode or wait for 15
seconds automatic timeout.
TO DEACTIVATE THE ALA R M :
The alarm will be automatically ON when the alarm time is set. To deactivate the alarm
(OFF), press and release once the ALM key in normal mode display. The alarm icon will
disappear, the alarm is now off.
SNOOZE SETTING
The snooze can only be activated during alarm time for a snooze duration of 10 minutes by
pressing the SNZ key on the back of the clock
OUTDOOR TEMPERATURE TRANSMITTER:
The temperature is measured and transmitted to the atomic clock every 1 minute. The atomic
clock will update the temperature display every 5 minutes.
The range of the outdoor temperature transmitter may be affected by the temperature. At cold
temperatures the transmitting distance may be decreased. Please bear this in mind when
positioning the transmitter. Also the batteries may be reduced in power during periods of
extreme cold temperatures.
Alarm icon
(((•))) (ON)

10
433MHz RECEPTION CHECK FOR OUTDOOR TEMPERATURE
TRANSMITTER
The atomic clock will receive the temperature data within 10 minutes. If the temperature data
is not received 10 minutes after setting up (the display shows “- - -”), then please check the
following points:
1. The distance of the atomic clock or outdoor temperature transmitter should be at least 6
feet away from any interfering sources such as computer monitors or TV sets.
2. Avoid placing the receiver onto or in the immediate proximity of metal window frames.
3. Using other electrical products such as headphones or speakers operating on the same
signal frequency (433MHz) may prevent correct signal transmission and reception.
4. Neighbors using electrical devices operating on the 433MHz signal frequency can also
cause interference.
Note:
When the 433 MHz signal is received correctly, do not re-open the battery cover of either the
outdoor temperature transmitter or atomic clock, as the batteries may spring free from the
contacts and force a false reset. Should this happen accidentally then reset all units (see
Setting up above) otherwise transmission problems may occur.
The maximum transmission range is 200 feet from the outdoor temperature transmitter to the
atomic clock (in open space). However, this depends on the surrounding environment and
interference levels. If no reception is possible despite the observation of these factors, all
system units have to be reset (see Setting up). See our website www.skyscaninfo.com for
more information.
CHANGING THE DISPLAY MODE (DAY, SECONDS, AND TEMPERATURES)
There are four possible display modes to view the day, seconds, and temperatures.
The month&date/weekday/indoor temperature/outdoor temperature is the default.
To change the display:
1. Press the + key. The display should now show the
month&date/weekday/seconds/outdoor temperature.
2. Press the + key a second time and the display will now show the
month&date/weekday/indoor temperature/seconds.
3. Press the + key third time and the display will now show the
month&date/seconds/indoor temperature/outdoor temperature
4. Press the + key a fourth time and the display will return to the default display.

11
WWVB RADIO CONTROLLED TIME
The NIST radio station, WWVB, is located in Ft. Collins, Colorado and transmits the exact
time signal continuously throughout the United States at 60 kHz. The signal can be received
up to 2,000 miles away through the internal antenna in the atomic clock. However, due to the
nature of the Earth’s Ionosphere, reception is very limited during daylight hours. The atomic
clock will search for a signal every night when reception is best. The WWVB radio station
derives its signal from the NIST atomic clock in Boulder, Colorado. A team of atomic
physicists continually measures every second of every day to an accuracy of ten billionths of a
second a day. These physicists have created an international standard, measuring a second
as 9,192,631,770 vibrations of a Cesium 133 atom in a vacuum. This atomic clock regulates
the WWVB transmitter.
Once the outdoor temperature is displayed on the atomic clock, the WWVB tower icon in the
clock display will start flashing in the top center of the LCD. This indicates that the clock has
detected a radio signal and is trying to receive it. When the time code is received, the WWVB
tower becomes permanently lit and the time will be displayed.
If the tower icon flashes, but does not set the time or the WWVB tower does not appear at all,
then please take note of the following:
•Recommended distance to any interfering sources like computer monitors or TV sets is
a minimum of 6 feet.
•Within ferro-concrete rooms (basements, superstructures), the received signal is
naturally weakened. In extreme cases, please place the unit close to a window and/ or
point its front or back towards the Fort Collins, Colorado, transmitter.
•During nighttime, the atmospheric disturbances are usually less severe and reception is
possible in most cases. A single daily reception is adequate to keep the accuracy
deviation below 1 second.
Note:
In case the atomic clock is not able to detect the WWVB-signal (disturbances, transmitting
distance, etc.), the time can be manually set (please refer to notes on Manual time setting) .
12
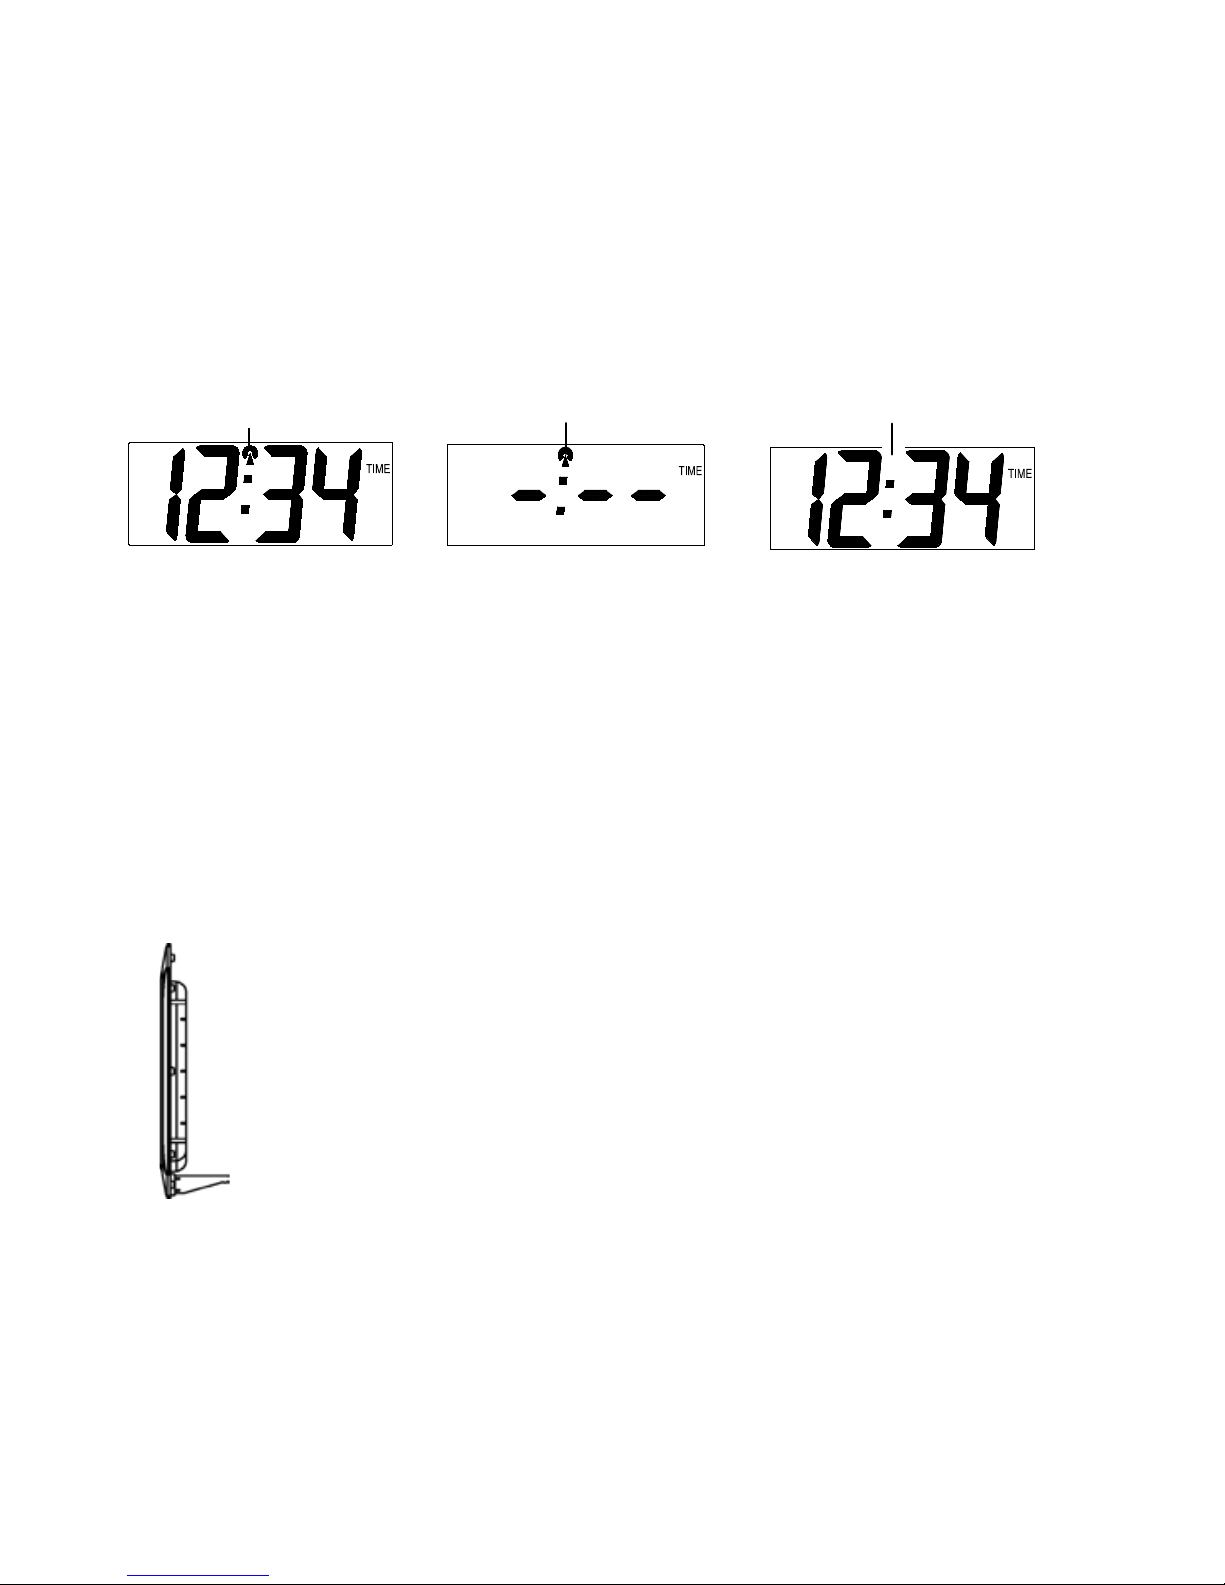
ICON DESCRIPTION:
POSITIONING
Before permanently mounting ensure that the atomic clock is able to receive WWVB signals
from the desired location. Also, extreme and sudden changes in temperature will decrease
the accuracy of the atomic clock, and changes in elevation will result with inaccurate
temperatures readings for the next 12 to 24 hours. These changes will require a 12 to 24 hour
wait before obtaining reliable data.
POSITIONING THE ATOMIC CLOCK:
There are two possible ways to mount the atomic clock:
•use of the foldout table stand, or
•wall mounting
FOLDOUT TABLE STAND
The foldout table stand leg is located on the backside. Pull the stand out from
the bottom center edge of the atomic clock, below the battery compartment.
Once the foldout table stand is extended, place the atomic clock in an
appropriate location.
Successful reception of
WWVB time signal
Currently searching for the
WWVB time signal (tower
blinking)
Unsuccessful reception of WWVB
signal. Will work as normal quartz
clock. Will search for the WWVB time
signal overnight.

13
WALL MOUNTING
1) Using a straightedge, horizontally space at 2.36 inches (60 mm) three
screw positions on a wall.
2) Install three mounting screws (not included) into a wall within
transmission range—leaving approximately 3/16 of an inch (5mm)
extended from the wall.
3) Place the atomic clock onto the screws, using the hanging holes on
the backside. Gently pull the atomic clock down to lock the screws into
place.
Note:
Always ensure that the atomic clock locks onto the screws before
releasing.
POSITIONING THE OUTDOOR TEMPERATURE TRANSMITTER
To achieve a true temperature reading, avoid mounting where direct sunlight can reach the
outdoor temperature transmitter. It is recommended to mount the outdoor temperature
transmitter on a North-facing wall or in any well shaded area. The maximum transmitting
range is 200 feet obstacles such as walls, concrete, and large metal objects can reduce the
range.
Place both units in their desired location, and wait approximately 10 minutes before
permanently mounting to ensure that there is proper reception. The outdoor temperature
transmitter is not waterproof and should not be placed anywhere it will become submerged in
water or be directly in the rain.
The outdoor temperature transmitter can be mounted in two ways:
•with the use of screws, or
•using the adhesive tape.
MOUNTING WITH SCREWS
1) Remove the mounting bracket from the outdoor temperature
transmitter.
2) Place the mounting bracket over the desired location. Through
the three screw holes of the bracket, mark the mounting
surface with a pencil.
3) Where marked, start the screw holes into mounting surface.

14
4) Screw mounting bracket onto the mounting surface. Ensure that the screws are flush
with the bracket.
MOUNTING WITH ADHESIVE TAPE
1) With a nonabrasive solution, clean and dry the back of the
mounting bracket and the mounting surface to ensure a
secure hold. The mounting surface should be smooth and
flat.
2) Remove the protective strip from one side of the tape.
Adhere the tape to the designated area on the back of the
mounting bracket.
3) Remove the protective strip from the other side of the tape.
Position the outdoor temperature transmitter in the desired
location, ensuring that the atomic clock can receive the
signal.
TROUBLESHOOTING:
Problem:
The LCD is faint.
Solution:
1) Replace the batteries.
Problem:
No reception of WWVB signal
Solution:
1) It may help reception to face the front or back of the atomic clock in
the general direction of Ft. Collins, Colorado.
2) Wait overnight for signal.
3) Be sure the atomic clock is at least 6 feet (2 meters) from any
electrical devices, i.e. TV sets, computers, or other radio controlled
clocks.
4) Remove batteries for ten minutes. See setting up.
Problem:
Hour is incorrect (minute and date are correct).
Solution:
1) Be sure the correct time zone and daylight saving time are selected.
Problem:
"OF.L“ appears in the indoor temperature section of the LCD
Solution:
1) Move the atomic clock to an area with warmer or cooler surrounding
temperature. Current surrounding temperatures are outside
measuring range.
Problem:
"--.-" appears in the outdoor temperature section of the LCD.

15
Solution:
1) Remove the batteries of both units for ten minutes, then reinsert
them again. Make sure the batteries are new and fresh. See setting
up.
2) Move the atomic clock closer to the transmitter or place the
transmitter closer to the atomic clock. Make sure the clock is at a
receivable range from the transmitter.
3) Move the units to another location. Interferences from other electrical
devices operating on the same signal frequency (433MHz) may
prevent correct signal transmission and reception.
Problem:
"OF.L“ appears in the outdoor temperature section of the LCD.
Solution:
1) Wait until the current surrounding temperature cools down or
increases. Current temperature is outside of the measuring range of
the transmitter or has temporary affected battery strength. The
outdoor temperature will be displayed again once the current
surrounding temperature is within the range of the transmitter.
CARE AND MAINTENANCE:
•Avoid placing the units in areas prone to vibration and shock as these may cause damage.
•Avoid areas where the units can be exposed to sudden changes in temperature, i.e. direct
sunlight, extreme cold and wet/moist conditions as these will lead to rapid changes which
reduces the accuracy of readings.
•When cleaning the LCD and casing, use a soft damp cloth only. Do not use solvents or
scouring agents.
•Do not submerge the units into water.
•Immediately remove all low powered batteries to avoid leakage and damage. Replace only
with new batteries of the recommended size.
•Do not make any repairs to the units. Please return it to the original point of purchase.
Opening and tampering with the units may invalidate the warranty.
SPECIFICATIONS:
Temperature measuring range
Indoor: +32ºF to +122ºF with 0.2ºF resolution
0ºC to +50ºC with 0.1ºC resolution
("OF.L" displayed if outside this range)

16
Outdoor : -21.8ºF to +157.8ºF with 0.2ºF resolution
-29.9ºC to +69.9ºC with 0.1ºC resolution
("OF.L“ displayed if outside this range)
Temperature checking interval
Indoor: every 10 seconds
Outdoor: every 5 minutes
Transmission distance: maximum 200 feet in open field, depending upon surrounding
structures, mounting location and possible interfering sources (see
www.skyscaninfo.com for additional information).
Power source (Alkaline batteries recommended)
Atomic clock : 2 x AA, 1.5V batteries
Transmitter: 2 x AA, 1.5V batteries
Battery life: about 12 months
Dimensions (L x W x H)
Atomic clock : 10.03“ x 1.22“ x 9.56“ / 255 x 31 x 243mm
Transmitter: 1.57“ x 0.9“ x 5.04“ / 40 x 23 x 128 mm
LIABILITY DISCLAIMER:
•The manufacturer and supplier cannot accept any responsibility for any incorrect
readings and any consequences that occur should an inaccurate reading take place.
•This product is only designed for use in the home or office.
•This product is not to be used for medical purposes or for public information.
•The specifications of this product may change without prior notice.
•This product is not a toy. Keep out of the reach of children.
•No part of this manual may be reproduced without written authorization of the
manufacturer.
WARRANTY:
This product is warranted to be free of defects in manufacturing for 1 year after purchase.
Defective clocks should be returned to the place of retail purchase.
BATTERIES CHANGE:
For best performance, batteries should be replaced at least once a year to maintain the best
running accuracy. Ensure that the batteries used are new and the correct size.

17
Please help in the preservation of the environment and return used batteries
to an authorized depot.
WARNING!
•Do not mix old and new batteries.
•Do not mix alkaline, standard (carbon-zinc), or rechargeable (nickel cadmium)
batteries. Equity Industries Corp.
5721 Bayside Road
Virginia Beach, VA 23455
For Customer Inquiries:
Web: www.skyscaninfo.com
Email: shelley@eic.hrcoxmail.com
Tel: (757) 460-2483
Model 87700 Printed in China 2004
Table of contents
Other SkyScan Clock manuals

SkyScan
SkyScan 80083 User manual

SkyScan
SkyScan 88900 User manual

SkyScan
SkyScan 84060 User manual

SkyScan
SkyScan 28600 Manual

SkyScan
SkyScan 88825 User manual

SkyScan
SkyScan 27011 User manual

SkyScan
SkyScan 88302 User manual

SkyScan
SkyScan 28800 User manual

SkyScan
SkyScan 84062 User manual

SkyScan
SkyScan Jumbo Atomic Clock 86931 User manual

SkyScan
SkyScan 87800 User manual

SkyScan
SkyScan 86730 User manual

SkyScan
SkyScan 87310 User manual

SkyScan
SkyScan 86715 User manual

SkyScan
SkyScan 88202 User manual

SkyScan
SkyScan 28500 Manual

SkyScan
SkyScan 86722 User manual

SkyScan
SkyScan 28500 User manual

SkyScan
SkyScan 31704 User manual

SkyScan
SkyScan 86722ALU User manual


