SLIDEWHIZZER Stair Slide User manual
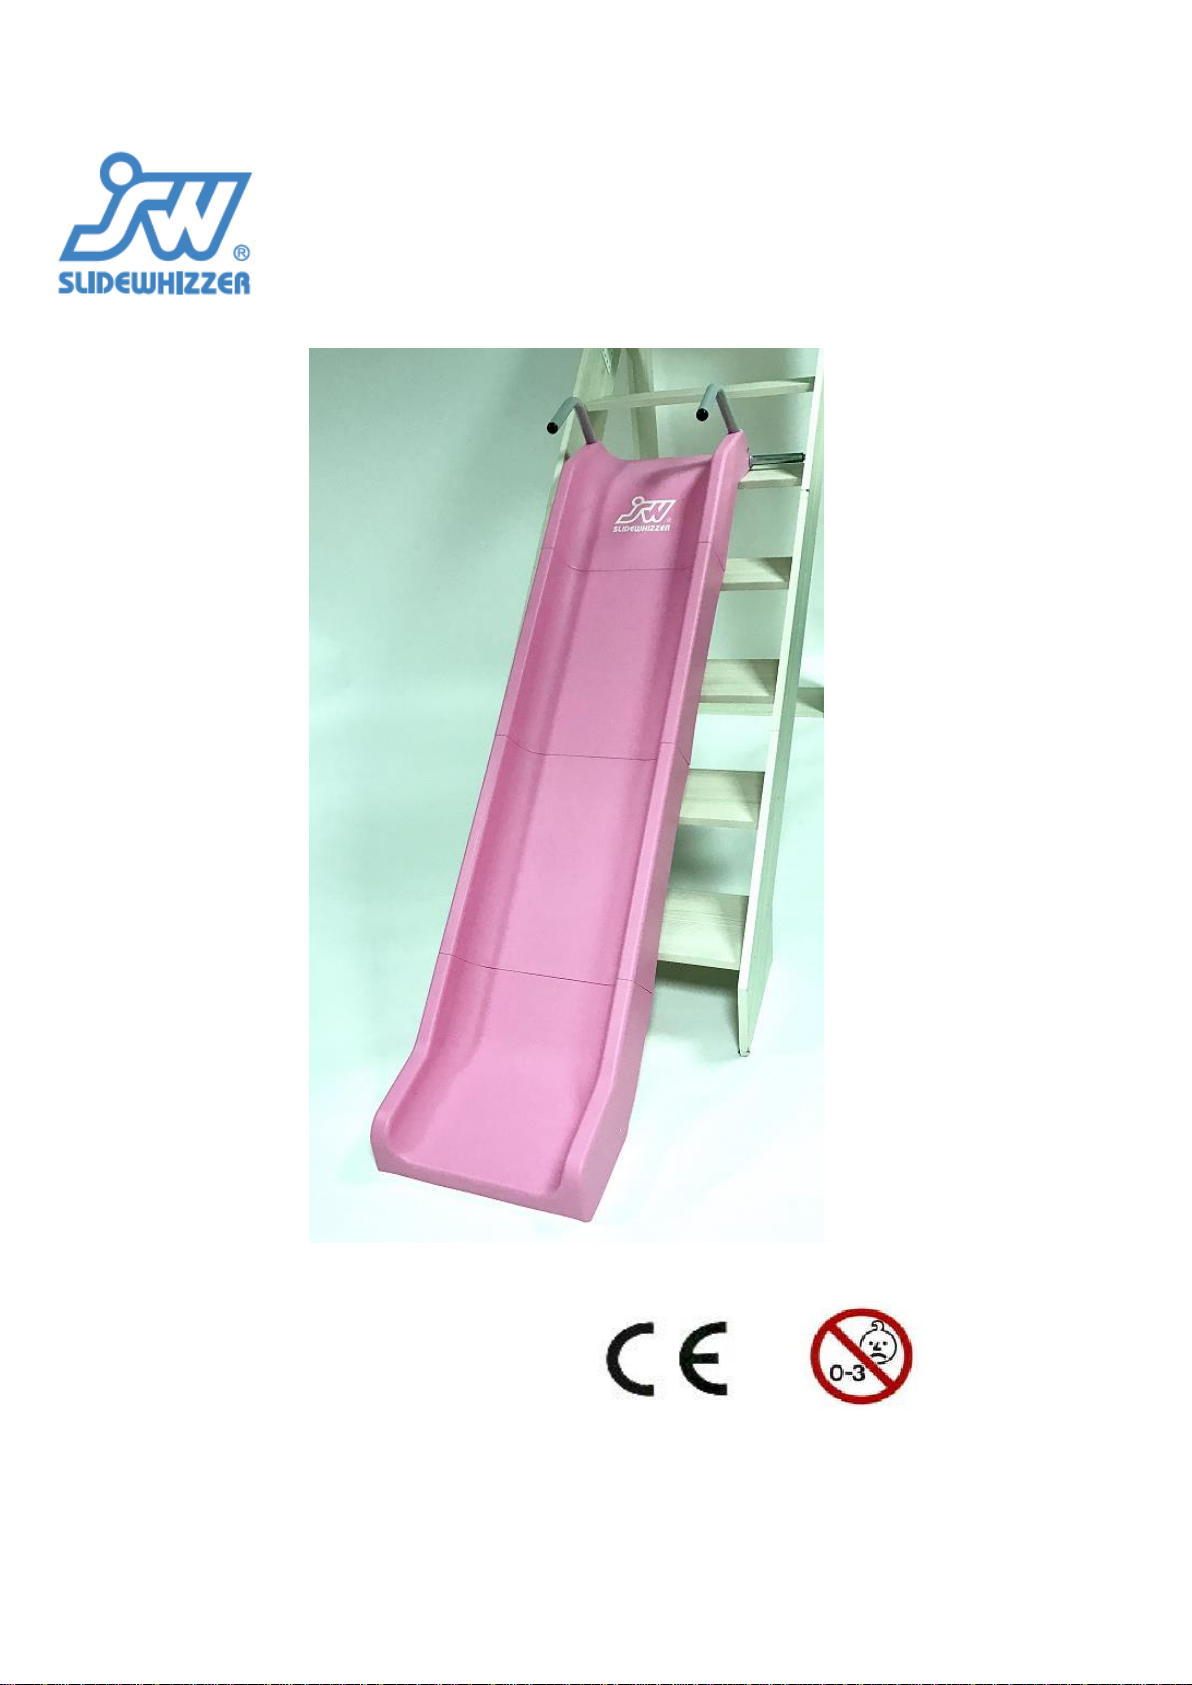
Stair Slide
Assembly Instructions
Page 1 of 9

SAFETY NOTES
instructions and advice must be followed:
1. Thoroughly read all parts of this manual and strictly follow the instructions
before using.
specified by the manufacturer.
3. Not suitable for children under 3 years as contains small parts
and insufficient strength.
4. This equipment must be assembled and checked by an adult.
5. Please retain complete instructions for future reference.
6. For indoor use.
7. Check all nuts and bolts for tightness and tighten when required.
8. Check all coverings and bolts for sharp edges and replace when required.
9. Place this equipment on a level surface at least 2 meters from any structure or
obstruction. Such as a fence, garage, house, overhanging branches, laundry
line or electrical wires.
10. Other persons must never be allowed to stand within the range
11. DO NOT install this equipment over concrete, asphalt or any other hard surface.
12. Leave all fittings finger tight until assembly is complete (for ease of construction)-
then tighten firmly.
13. Always supervise young children at play, until they are physically competent and
confident.
14. This item is not designed for adults or maximum weight of 1 child not to
exceed 35kgs.
15. DO NOT allow children to stand on the slide chute and over load in one play element.
16. DO NOT allow loose, baggy (or hooded) clothes to be worm, since children can get
trapped and may be unable to free themselves.
17. DO NOT allow children to climb on parts on this equipment not intended for this
purpose.
18. Regularly check the item for wear and damage, removing the item from use when
necessary until replacement parts are fitted.
19. Please remove all packaging including shrunk-on film, polybag, carton, pallet, …ect.
before giving to a child.
20. This product is for home use only and has not been designed for commercial use
in play fitness centers, nurseries, etc.
21. Failure to assemble this item as per the instruction may cause injury to the user.
22. Please keep these instruction in a safe place for future reference.
23. Age suitability: 3-10 years.
Page 2 of 9
24. Do not put your hand near moving parts.
To prevent damage and accidents to persons and/or property, the following
2. Do not use any accessories other than those provided and /or
of action of the equipment when in use.
★ Before assemble the product, please check the width of to be placed stair is among 65cm – 112 cm .
The height of assembled stair slide is 91 cm. Please make sure it’s completely assembled before using it.
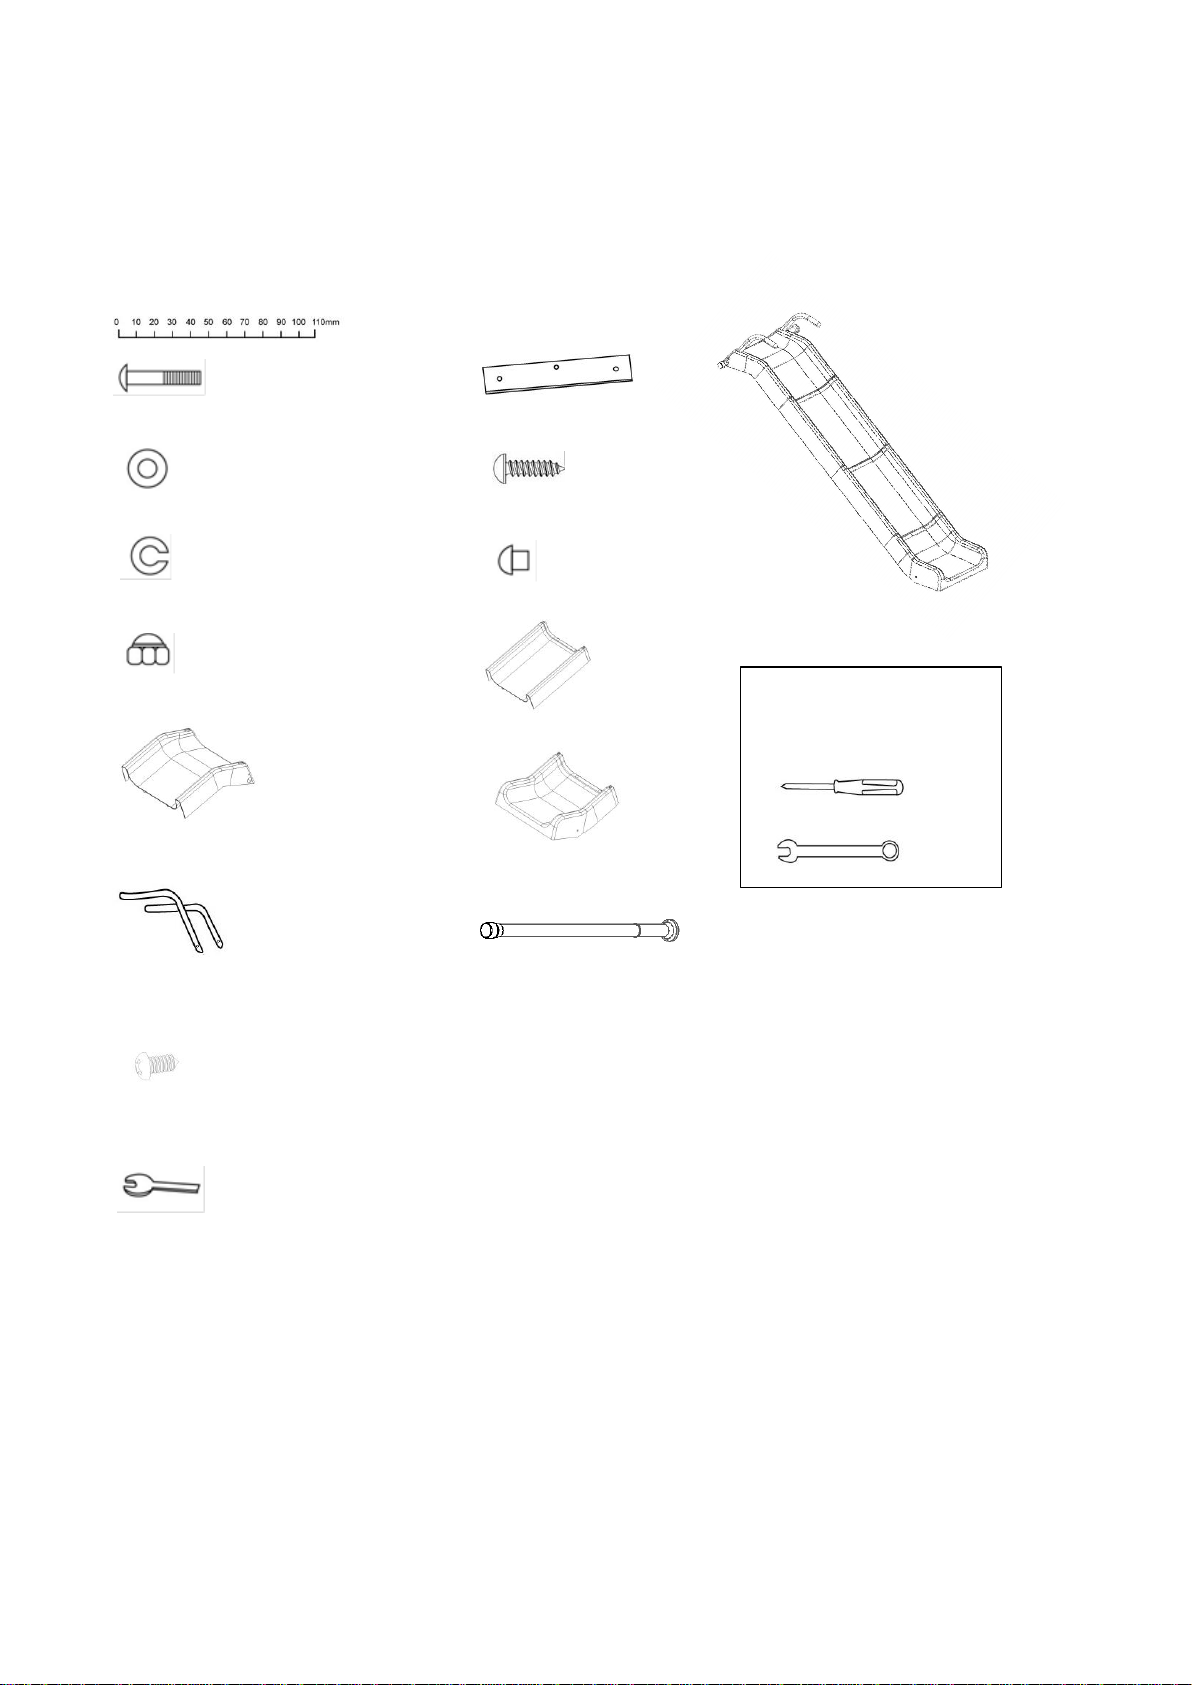
M6 35mm bolt (x 2)
M6 washer (x 2)
Spring washer (x 2) Plastic cap (x 2)
Domenut (x 2)
TOOL REQUIRED
Middle slide chute (x 2) 1. Philips head screw driver
2. Combination Wrench 10
Top slide chute (x 1) Bottom slide chute (x 1)
L
Z
Adjustable bar (x 1)
Handrail tube (x 2)
1/4" x 5/8" (x 6)
Spanner (x 1)
Page 3 of 9
COMPONENT LIST
Steel plate (x 3)
B
D
E
F
J
M
N
X
Q
M4 x 14mm (x 6)
R
V
W

Assembly Steps:
Step 1 Assembling the Top slide chute and
the Middle slide chute
1 - 1. The Top slide chute (J) and the Middle slide chute (V) have tongue-and-groove joint
on the edge for the connection.
1 - 2. Turn the Top slide chute (J) and the Middle slide chute (V) to the back side.
(Figure 1)
1 - 3. Connect the top slide chute (J) and Middle slide chute (V) by embedding
tongue-and-groove joint firmly. (Figure 2) (Figure 2)
(J) (V)
(Figure 1)
NOTE:
Please ensure the connection are perfect and
the two slide chutes meet closely without any gap.
Page 4 of 9
step 4
step 5
step 1
step 2
step 3
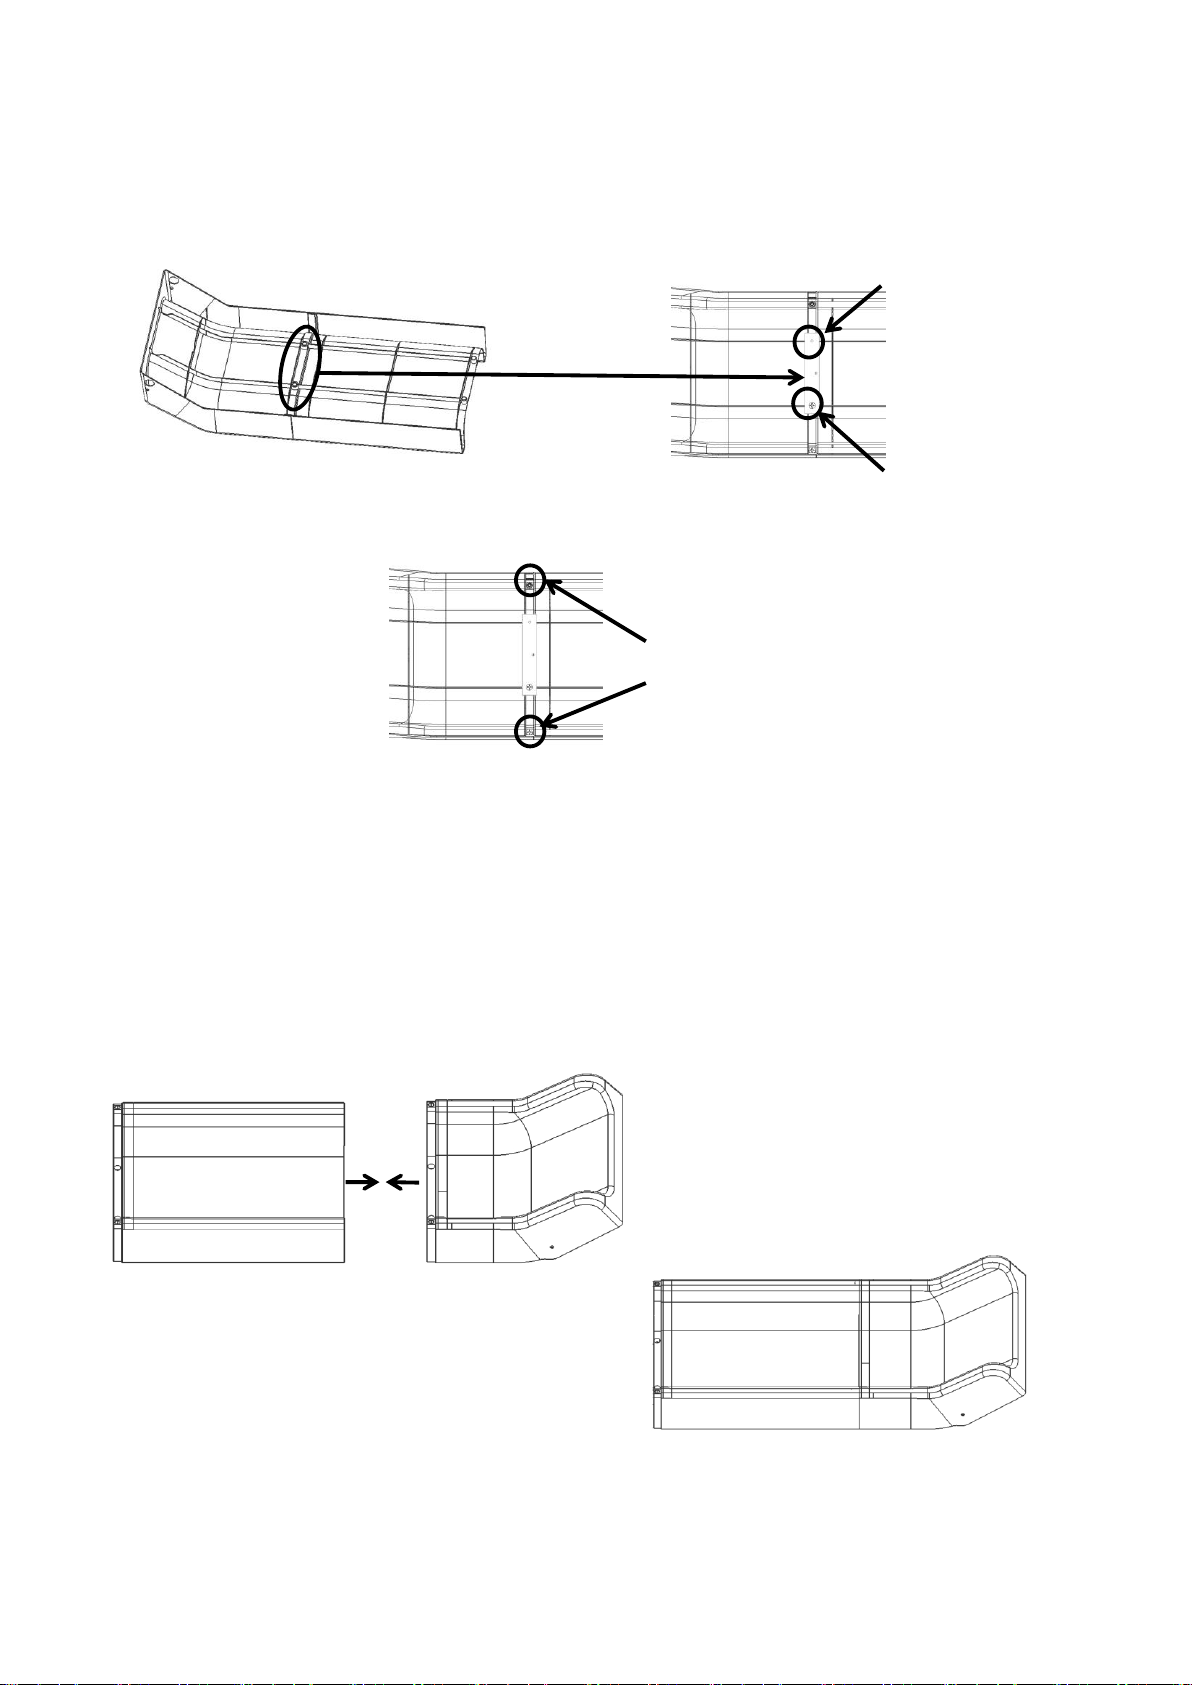
1 - 4. Fix the Top slide chute (J) and the Middle slide chute (V)
by using the steel plate (X) x 1 and bolt (Q) x 2. (Figure 3)
1 - 5. Fix the edge of Top slide chute (J) and the Middle slide chute (V)
by using bolt (M) x 2. (Figure 4)
Step 2 Assembling the Middle slide chute and
the Bottom slide chute
2 - 1. Lay out the Middle slide chute (V) and the Bottom slide chute (W). (Figure 1)
2 - 2. Connect the Middle slide chute (V) and the Bottom slide chute (W) by embedding
tongue-and-groove joint firmly. (Figure 2)
(Figure 2)
(V) (W)
(Figure 1: Front view of the Middle
and Bottom slide chute)
NOTE:
Please ensure the connection are perfect and
the two slide chutes meet closely without any gap.
Page 5 of 9
(Figure 3)
(Figure 4)

2 - 3. Turn Figure 2 to the back side and fix Middle slide chute (V) and
Bottom slide chute (W) by using the steel plate (X) x 1 and bolt (Q) x 2.
(Figure 3)
(Figure 3)
2 - 4.
Fix the edge of the Middle slide chute (V) and the Bottom slide chute (W)
by using bolt (M) x 2. (Figure 4)
Step 3 Complete the slide chute assembly
3 -1 . Turn the slide chute of Step 1 and Step 2 to the back side and connect them
by embedding tongue-and-groove joint firmly. (Figure 1)
NOTE:
Please ensure the connection are perfect and
the two slide chutes meet closely without any gap.
3 -2 . Fix the slide chute of Step 1 and Step 2 by using the steel plate (X) x 1
and bolt (Q) x 2. (Figure 2)
Page 6 of 9
(Figure 2)
Slide chute of Step 1
(Figure 1)
Slide chute of Step 2
(Figure 4)
3 - 3. Fix the edge of the slide chute of Step 1 and Step 2 by using bolt (M) x 2.
(Figure 3)
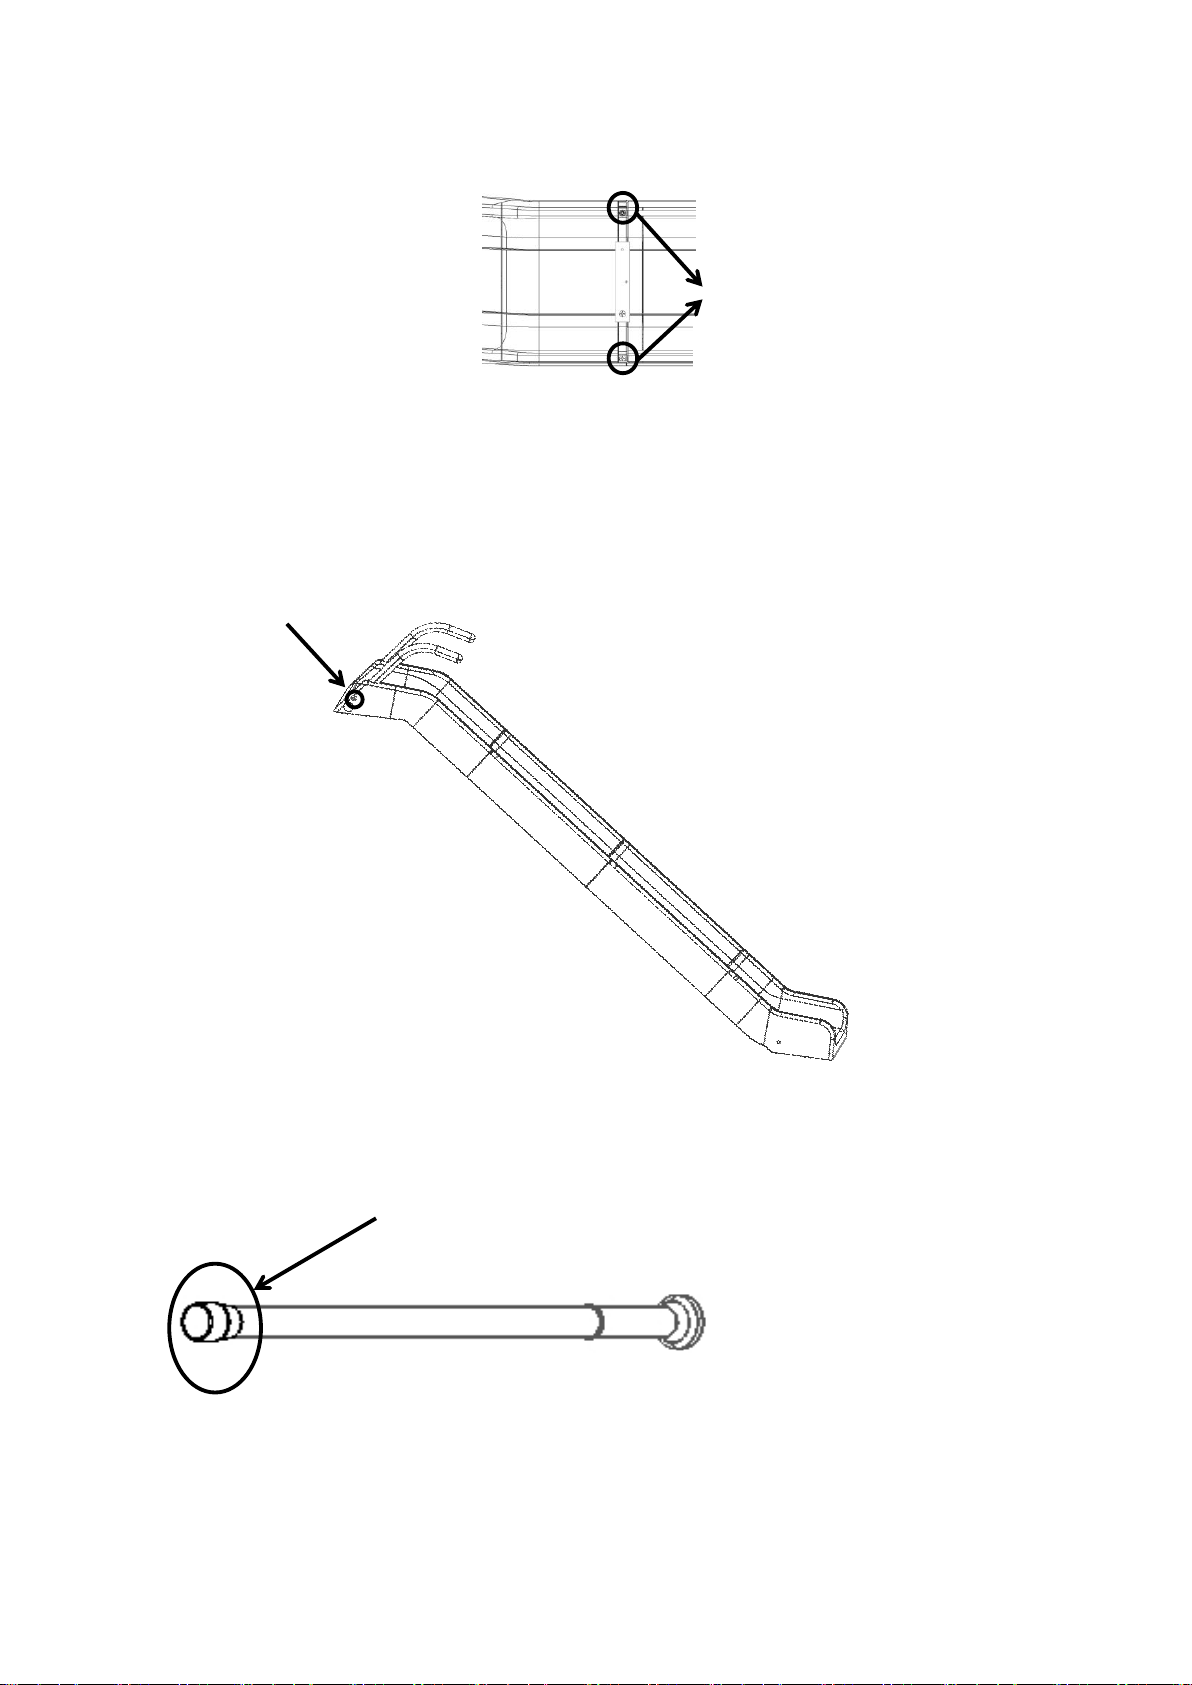
Step 4 Assembling the Handrail tube
4 - 1 . Make the handrail tube (L) go through the Top slide chute (J)
by using bolt (B) x 1 + washer (D) x 1+ spring washer (E) x 1 and
domenut (F) x 1. Insert plastic cap (R) into the top of handrail tubes.
Step 5 Assembling the Adjustable Bar
5 - 1. Please remove the rubber pad from the adjustable bar (Z).
Page 7 of 9
(Figure 3)

5 - 2. Make the adjustable bar (Z) without rubber pad go through
the Top slide chute (J).
5 - 3. Fix the adjustable bar (Z) with rubber pad onto the wall of the ladder
and adjust the length of the adjustable bar (Z) to make sure its firmly.
Page 8 of 9

Care and Maintenance
1. This equipment must be assembled and checked by an adult.
2. Regularly check all nuts and bolts for tightness before use and replace any worn,
defective or missing parts. DO NOT try to repaire broken parts.
3. Regularly check wavy slide, steel tube and other parts are tightened completely
and replace worn & damaged parts when necessary.
4. Remove wore and damage parts from use when necessary until replacement
parts are fitted.
5. At the beginning of each season, please oil all metallic move parts to maintain
and regularly oil when necessary during the usage season.
6. Wavy Slide placement:
(a) Place this equipment on a well-lighted area.
7. Weather condition:
(a)
Slide should be kept dry--do not use when these parts are wet.
(b) Wind or air movement shall be calm and gentle.
(c) Please do not use when face sun directly to affect visibility or change
orientation to leave sun behind.
8. This item is not designed for adults or maximum weight of 1 child not to
exceed 35kgs.
9. Please keep these instruction in a safe place for future reference.
10. To keep clean of this equipment.
Page 9 of 9
Other manuals for Stair Slide
1
Table of contents


