smartmotion x-city neo User manual

User Manual
MID DRIVE

User Manual
1. Smartmotion electric bicycle
2. Battery charger
3. Bottle cage
4. Pedals(2)
5. Front mudguard
6. keys for battery lock(2)
7. Front light
8. Front wheel quick release axle
9. Elastic strap
To Prepare
1. Unpack
Unpack the protective cover, take the front wheel
It is highly recommended that a trained and qualied
bicycle mechanic assembles your bike. Your bike is 85%
2. Assembly Instructions
Do not activate the brakes until the bike is
fully assembled. Squeezing brake levers
while calipers have no disc rotor between
them can damage the brakes.
Contents
1. Contents of shipping carton
2. Assembly instructions
3. Safe Riding Recommendations
4. Maintenance & Adjustment
6. Do’s and Don’ts
7. Colour Display Panel
8. Colour Display Panel Controls
9. Seatpost
10. Battery instructions
11.Warranty
12. Conformity
13. Service Checklist
14. Service Record
Congratulations for purchasing a Smartmotion ebike!
Please read this guide fully BEFORE using your electric
bike.
This manual is not intended to be an extensive reference
book about service, maintenance and/or
repairs. Please consult your Smartmotion dealer for ser-
vice and technical support.
5.
then carefully lift the electric bikes out from the
carton(two people recommended forthis task).
and mudguard out of protection. Carefully stand
the bike upright,resting on it’s fork then installing
wheels.
We recommend that you familiarise yourself
with the bike parts before assembling. Gather all
required tools. Be sure to work in a clean, dry space
with plenty of room.You might wish to lay down a
tarpaulin or old blanket to protect the bike during
frame on a block or sturdy box under the battery
housing to work with it in an upright position.
Please watch the balance when installing wheels.
assembly. You may nd it helpful to stand the bike
assembled in its carton, and the following steps must
be taken to ensure it is ready and safe to ride

2. Assembly Instructions
2. Fork
a. Insert the handle bar stem onto the steering
tube, turn it to align it with the forks correctly, then
fasten the centre screw using the 6mm allen key to
5-8N.m.Tighten stem pinch bolts with 4mm allen
key 9 to 10N.m.
b. Remove all four stem bolts, insert handle bars and
re-insert bolts. Adjust bars to ideal angle and tighten
to 5-6N.m.
Adustable stem models -To adjust the stem angle,
loosen the 5mm bolt on the side of the stem. Adjust
the angle and fasten the angle adjusting bolt to 17
to 18N.m.
3. Mudguard
Install the front mudguard and front light on the
front mudguard hanger mount on the inside of
the fork then put the front light bracket on. Put
the bolt through the fork then fasten the bolt with
a 5mm allen key.Then fasten the two mudguard
bracket to the forks with phillips screwdriver.c
Finally connect the light cable.
4. Power Connection
Finally connect the main cable which is near the left
side of headtube to the handlebar components
cable, making sure the arrows align before pushing
the connectors together.
2. Assembly Instructions
*Due to dierent production batch, you may need to use clamps to install
mudguard.Clamps includes in package .

5. Seat
Release the seat post clamp lever and set the
seat post height to the position which is suitable
for you to comfortably reach the groundwhen you
are sitting on the bike, then refasten the seat post
clamp.The maximum height should be within the
max height markings on the seatpost.
6. Pedals
Attach the pedals to the cranks, paying attention
to the“L”or“R”marked on the pedal axles. Note:
the pedals have opposing threads – screw in the left
pedal counterclockwise and screw in the right pedal
clockwise.
2. Assembly Instructions
7. Front wheel
Assemble the front wheel quick release axle by
pushing it through the hollow hub, making sure
that one spring is on each side of the hub.Then
screw on the end nut several turns. Next, carefully
forks onto the wheel axle, being careful the disc
best with 2 people).Tighten the non-rotor side nut
Loosen or tighten the nut until it takes the correct
amount of force to close the lever. It should be hard
to close, but not so hard you cannot fully close it. It
must fully close (as in picture) otherwise the wheel
may come loose, causing serious injury. Note: if
you are not well trained in cycle assembly, this
procedure must be checked by a cycle technician.
2. Assembly Instructions

bicycle to anyone who is unfamiliar with it.The bicycle can
legally only be used on the road by a person aged 14 years or
over.
2. If you are in a country where wearing a cycle helmet is not
compulsory, we still strongly advise you to always wear one.
If you are unfamiliar with cycling, we also advise you to attend
your local SmartMotion dealer.Your e-bike is not a toy and
should be considered a serious mode of transport.
3. As with all bicycles it is important that you stay within safe
limits. If you feel you are traveling too quickly for the road
conditions you probably are, so slow down! High speed will
increase forces in the case of an accident and increase the
possibility of injury.
4.Test your brakes prior to using the bike every time you use
it and remember the bike will not stop as quickly in wet or icy
conditions as it would on a dry road.
5. Check the tyres, rims, pedals, stem, cables, chain, etc for
general condition regularly.
at dusk, at night, or at other times of poor visibility. If you must
ride under these conditions, check and be sure you comply
with all local laws about night riding; follow the rules of the
road.Take the following additional precautions: make sure that
your bicycle is equipped with correctly positioned and securely
moves will help you get the attention of approaching motorists,
anything else you are carrying on your bicycle doesn’t obstruct
do so.
heeding the seat manufacturer’s safety instructions and that
the combined weight of the seat and child do not exceed the
8.You must not leave the bike unattended or use the kickstand
to stand the bike without your support when a child is in the
rear seat as the bike could tip over and cause serious injury.
9. Make sure the rear suspension underside of your seat is out
10. Your bicycle must be returned to your servicing dealer
or bicycle/motorcycle mechanic after one month or 200km
of riding (which ever comes first) to re-tension the spokes.
Then every six months or 1000km (which ever comes first)
for a general service and thorough inspection. Failure to do
this can void your warranty due to unnecessary wear.
3. Safe Riding Recommendations
Pre-ride Checklist
Please make sure the brake lever sequence is
correct for your country before riding. In UK, NZ
and Australia the left brake lever is for rear brake
and the right brake is for the front brake. In all
other countries it is the other way: left for front,
right for rear.
Check the tyres for any visible damage.
Check tyre pressures are 40-60psi(275-410KPA),
and adjust ifnecessary.
Check brake functions, cable tension, pad
clearance, etc.
Check all electronic functions are ok (functions
detailed later in this manual).
working (detailed later in manual).
Torque Settings
Check bolts are tightened according to the following
a. Brake Disc bolts 6-8N.M
b. Seat angle clamp bolt/s Refer to markings
c. Crank bolts 45N.M
d. Gear shifter bolts 4N.M
e. Rear carrier bolts 8N.M
f. Mudguard bracket nuts/bolts 8N.M
g. Handle bar clamp bolts 17-20N.M
h. Quick release axles. Measured torque not typically
used. Common industry practice is resistance at
lever half way through swing from open to fully
closed.
For all other nuts/bolts, the torque depends on the
thread diameter:
M4 2.5-4.0N.M
M5 4.0-6.0N.M
M6 6.0-7.5N.M
Note: make sure axle nuts are always done up tight
on both wheels as connections to the motor and the
dropouts can be damaged due to the axle spinning.
3. Safe Riding Recommendations
7. If a rear child seat is tted, ensure that the seat is installed
load capacity of the Smartmotion bike’s rear rack, and that the
child is no heavier than the listed maximum carrying capacity
of the child seat product. Before use, ensure that the child is
securely fastened.

For basic adjustment, tools Required
• Allen/Hex Key Set: 6mm, 5mm, 3mm, 2mm
• Philips Screw driver
1. Gear Adjustment
Adjust the cable tension Adjustment Bolt to align
guide pulley with the centre of the cogs (setting this
in gear 3 or 4 is easiest). Low adjustment: In 1st gear
check and if necessary, turn the L adjustment screw
so that the guide pulley moves to a position directly
in line with the largest (1st gear) sprocket. High
adjustment: turn the crank arm while gear shifting
the derailleur to move the derailleur to the top gear
position, and then check and if necessary, turn the H
adjustment screw to adjust so that the guide pulley
4. Maintenance & Adjustment
H adjustment screw
L adjustment screw
Adjustment Bolt
3. Lubrication
Once a month lubricate all pivot points on your
derailleur and the derailleur pulleys with suitable
chain lube.
Every three months lubricate the brake lever pivots,
gears and chain with suitable oil.
4. Brakes
power. Like a car, it is important to regularly
(recommended yearly or if brakes feel soft and
spongy) bleed brakes to remove air bubbles from
the system.
For adjustment and bleeding of hydraulic disc
brakes, see brake manufacturers instructions.
5. Cleaning your electric bike
Warm soapy water and a cloth can be used to clean
the frame of your bike, but care must be taken not
to immerse any of the electrical components; they
are rainproof but cannot be immersed in water.The
motor can be cleaned with a soapy cloth, but also
must not be immersed in water.The battery can be
cleaned with a damp cloth, then dried afterwards.
Note: in salty conditions it is essential to clean and
lube your bike regularly.
is in line with the outer line of the smallest sprocket
when looking from the rear. Turn the crank arm to
set the derailleur to the low position.
2. Bike setup
It is important to set up your bicycle up for both
safety and comfort, failure to do say may result in
fatigue or injury.
Set the seat height:
• Sit on the saddle
• crank in the lowest position)
• Adjust the seat height so your leg is fully straight.
• Once height is set, move your foot so the pedal
is under the ball of your foot, check that your leg
has a slight bend at the knee.
Important! Do not extend the seatpost past the
Minimum insertion mark. Doing so may result in
frame/post failure. Serious injury may be caused.
If in doubt contact your local Samartmotion retailer
for advice.
Tyre pressure:
Check tyre pressure before every ride. Ensure
pressure is kept between the limits found printed on
the side wall of the tyre.
6. Other Maintenance
Your bicycle must be returned to your servicing
dealer or bicycle/motorcycle mechanic after one
to re-tension the spokes.Then every six months
service and thorough inspection. Failure to do this
can void your warranty due to unnecessary wear
and tear.
Excluding the electronic components, your
The electric drive system is maintenance free and
has self-diagnostic codes that will be displayed on
the LCD console (detailed later in this user guide)
should anything go wrong. Again, speak to your
dealer should any issues arise.
4. Maintenance & Adjustment
Smartmotion e-bike uses regular bicycle components
which are subject to proper care and maintenance
requirements. Lubrication, adjustments and
replacement consumables such as brake pads are
available from authorized Smartmotion dealers,
where a full consultation should be available.

5. Main Specifications
X-City neo 5. Main Specifications
X-Urban
BATTERY
RACK
BRAKE
GEARS
FRAME
HANDLE BAR
FORK
MUDGUARD
TYRE
RIM
DISPLAY PANEL
LIGHT
SEAT
CABLES
MOTOR
WARRANTY
BATTERY
RACK
BRAKE
GEARS
FRAME
HANDLE BAR
FORK
MUDGUARD
TYRE
RIM
DISPLAY PANEL
LIGHT
SEAT
CABLES
MOTOR
WARRANTY
Down tube hidden 36V 16AH(576watts) Samsung Li-ion battery.
Heavy duty rear rack, with elastic for luggage.
Hydraulic disc brakes, with 180mm rotors.
9 speed 11-36T cassette, with derailleur & shifter.
Aluminium low step, intergrated cable routing,down tube hidden battery.
Centre mount stand.
Aluminium semi‘cowhorn’handle bars.
100mm travel alloy suspension forks.
Polypropylene guards with heavy duty stays.
27.5”double wall alloy rim.
Centre mounted LCD console with 5 level Pedal assist and active throttle
in all modes. Adjustable max speed.
Integrated front and rear light powered from the main battery.
comfort seat. Suspension Seatpost.
Water resistant cable plugs on all components for simple and quick
servicing/replacement.
High torque mid-motor, 40T narrow-wide direct mount.Torque sensor
2 year warranty on battery and motor, 3 years on frame, 12 months other
parts.
Down tube hidden 36V 16AH(576watts) Samsung Li-ion battery.
Heavy duty rear rack, with elastic for luggage.
Hydraulic disc brakes, with 180mm rotors.
9 speed 11-36T cassette, with derailleur & shifter.
Aluminium ,intergrated cable routing, down tube hidden battery.
Reinforced for oroad use.
Aluminium MTB handle bars.
100mm travel alloy suspension forks.
Polypropylene guards with heavy duty stays.
SchwableSmart Sam 27.5"*2.25" 57-584 K-Guard
27.5”double wall alloy rim.
Centre mounted LCD console with 5 level Pedal assist and active throttle
in all modes. Adjustable max speed.
Integrated front and rear light powered from the main battery.
Comfort seat. Suspension Seatpost.
Water resistant cable plugs on all components for simple and quick
servicing/replacement.
High torque mid-motor, 40T narrow-wide direct mount.Torque sensor
2 year warranty on battery and motor, 3 years on frame, 12 months other
parts.
Max load:The max load of the electric bike is 100kg coupled with the max load (25kg) of the rear rack
The weight of bicycle: 26 kg
SchwableSmartSam27.5"*2.25" 57-584K-Guard.
Max load:The max load of the electric bike is 100kg coupled with the max load (25kg) of the rear rack
The weight of bicycle: 26 kg
nents.
6. Do’s and Don’ts 6. Do’s and Don’ts
-
Dotreat your ebike like any bicycle you would want
to last well… keep it stored somewhere secure and
away from the weather elements.
Don’t treat your ebike as a dirt-bike!The motor and
battery are weather proof, but not water-tight. It is
ok in rain, but not to ford streams, etc!
Never take your ebike on the beach as salt water
and sand will drastically shorten the lifespan of
many of the ebike’s components (motor, gears,
wiring connections, etc).
Note: Your warranty is void if evidence of salt, sand,
or water damage are present within the compo
Important: If you live very close to the sea, you
should keep your bike indoors when not in use.
This will ensure the longevity of your ebike and its
subcomponents and will help streamline maintenance
Don’t power up the throttle while the eBike is held
stationary. Motor operation for more than a few
seconds while the wheel is locked/stationary can
damage the motor and controller.
Important: Your bike will arrive with the battery
partially charged.You should connect the battery
to it’s charger before using for the rst time. It’s
also best to fully use all of the battery capacity
for it’s rst use, and once per year thereafter,
However “top-up” charging the battery between
these intervals is ok.
Note: The Voltage Meter displayed on the LCD may
represent lower values when the motor unit is under
load(on hills, etc), this is normal. Battery capacity
readings are most accurate when the bike is idle and
not under load or use.
Dotake extra care on the road as you will be
travelling faster than you normally do on a bike and
your bike is now power-assisted, so will behave
Don’t let others ride your eBike unless you have
properly explained safe and appropriate use to
them.
Don’t use your charger outdoors. It is for indoor
use only.
and care duties. Doreturnyoureiketo the Smartmotiondealerwhere
pruchased for service and maintenance.
Don’t attempt to open the motor or battery
should your system malfunction, or for any other
reason. Anti-tampering labels are applied to both
the motor and battery units and breakage of the
Dotop up your battery where practical. Lithium
batteries prefer shallow discharge patterns. Keeping
yourbatterytoppedupbetweenrideswillprolong
Dodisconnect your battery from the charger when it
is charged. Leaving it connected permanently when
not in use will shorten cell life.
Never leave a fully discharged battery uncharged
for more than a week.Doingthiscausesirreparable
damage to your battery and is a listed exclusion in
the Limited Warranty.
Don’t leave your battery for more than 3 months
without checkingit’scapacityand top-up charging
Note: A Smartmotion battery neglected for a prolonged
period of time causes exponential voltage loss and
associated cell damage. This will void the battery’s
2-year warranty. It is to your advantage to properly
care for your battery and is the most valuable
Important:
Lithium Ion batteries contain a vast amount of
electrical and chemical energywhich is stable within
the scope of normal usage and care. Long-term
deviation from the recommendations detailed in
the Battery Care Guide can expose your battery and
surrounding property to risk of combustion. While
betakenbythe owner toensurethatallassociated
risks are mitigated through careful and proper use.
seals will void the Limited Warranty
Domakesureyoucharge the batteryaccordingto
recommendatuons dound in the battery care guide.
the life of your battery.
Always charge your Smartmotion battery in a safe
and isolated space, away from combustibles and in
a well-ventilated area. Ensure airfolw is available
a well-ventilated area. Ensure airfolw is available
it where needed.
Ebike batteries can be dangerous!
extremely unlikely that whisoccurs, precautions must
component on your samrtmotion ebike.

7. Colour Display Panel 7. Colour Display Panel
Battery Indicator
When the battery is full all ten battery segments
show green. When the battery is low the bars will
turn red. The voltage will drop while the battery is
under load (motor running).
Speedometer
Large display of your current speed. You can
toggle between average and max speed also.
Pedal Cadence
This outer ring lights up to show you your
pedal/motor RPM.
Power Meter
Shows how much power the motor is using.
Trip Meter
Displays the distance you have travelled from
when you last tripped the meter.
Time
Ride time.
Odometer
Displays the total distance the bike has
travelled.
Mode Display
An icon will be displayed depending what mode
of assist.
Cadence measures your pedal rotation, but not
pressure. Use this mode for the easiest ride.
Torque mode measures your pedal pressure
and multiplies the output.
Walk-along will allow you to walk with the bike
with a small amount of assistance.
Power/Assist
Level of assist. 1 being low, 5 being high.

8. Color Display Panel
Controls
Your display is easily controlled with 4 buttons located
on your handlebars
Power On/Off
Press to start the display and power up the
seconds.
Note: the display will p ower off after 10 minutes
without use.
Pedal Assist
Pedal Assist is controlled with the
buttons.Touch to turn the assist up, and touch
to turn it down.
SET
8. Colour Display Panel
Controls
Torque and Cadence Mode
Toggle betweenTorque and Cadence modes by
pushing twice quickly.
Average Speed, Max Speed
Click to change between displaying range,
average speed and max speed.
Setup
Press and hold for 2 seconds to enter the setup
menu.
Touch to select the menu.
Use and to change the value.
Touch again to choose the“Save & Exit”option
Sleep Mode
If the bike remains stationary for 5 mins, the LCD
automatically powers down. But if you are charging
Error Code Display
If there is something wrong with the electronic
control system, the display will show the error code
automatically. Should you receive an error code,
contact your local dealer for advice.
Before contacting service center check all plugs
for loose connections.
01 POWER OVERLOAD Rest Bike, try again
06 LOWVOLTAGE Charge Battery
07 OVERVOLTAGE Wrong battery
08 HALL SENSOR Check motor cable
09 MOTOR PROBLEM Check motor cable
10 CONTROLLER OVERHEAT Rest 10 min
11 TEMPERATURE SENSOR Contact service
12 CURRENT SENSOR Contact service
21 SPEED SENSOR Contact service
22 BMS PROBLEM Contact service
30 CONTOLLER PROBLEM Check all plugs
Note: Error codes differ between colour and B/W
Displays, see LCD Display section for alternative
error codes.
SET
SET
SET
SET
Walk Mode
Press and hold down for 3 seconds to enter into
the mode of power assist walk.The bike will go on
at a uniform speed of 6km/h and display on the
screen.
Turn Lights On/Off
With the display on, click the button to toggle
Screen Modes, Night/Day & LCD Backlight
Day Mode Night Mode
The default screen mode is with a black background.
Press and hold simultaneously for 3+ seconds
to switch to white background. Press and hold
to return to black(night) mode.
with USB port on bike, the LCD will powers down in
2 hours.
9. Seatpost
Suspension Seatpost
For bikes with a suspension seatpost:
For optimum performance you need to set the
preload so when your weight is fully on the seat
the spring is depressed about 30-40%.Test the
travel, then, if you need to adjust, remove the
seatpost and, with a 5mm allen key, screw the
shock up into the seatpost to increase spring
pressure, or back down to reduce it.
Your dealer can also set this up for you.
seatpost clamp to faciliatate changing the
riding position.
It is important that the nut on the collar is
tightened so the post will not move in the bike
frame.
Make this adjustment with the quick release
lever in the open position.
Adjust the seat to the correct height and close
the lever.When you sit on the saddle there
should be no vertical movement at all in the seat
post below the suspension.
10. Battery Instructions
Battery Removal
The battery is secured by double lock. To remove the
battery,
you need to insert the key and turn.Then turn
Note: Before loading the battery, please make sure the
Charging your Battery
r
the lever clockwise and pull the battery down o the
tube. If the lever is too hard to turn, please push the
battery case in a little then turning the lever.
key lock is in unlocked position.To secure the battery,
please turn the key clockwise after loading the battery.
Your bike has been tted with a quick release
You can charge your battery while it is mounted on
the bike, or separately. Safe charging practice is
covered in the Battery Care Guide.
Plug the assembled charger unit into the outlet, lift
the rubber grommet out of the charging socket and
connect the charger. Do not be alarmed if electrical
sparks appear, this is normal.
The light on the charger will display a red color LED
light. This remains red while charging, and turns to
green when the battery is fully charged. Once a
desired capacity is reached, disconnect the charger
and turn the outlet switch o.

11. Warranty
WARRENTY
Your SmartMotion bike is covered by the following
extensiveWarranty
.
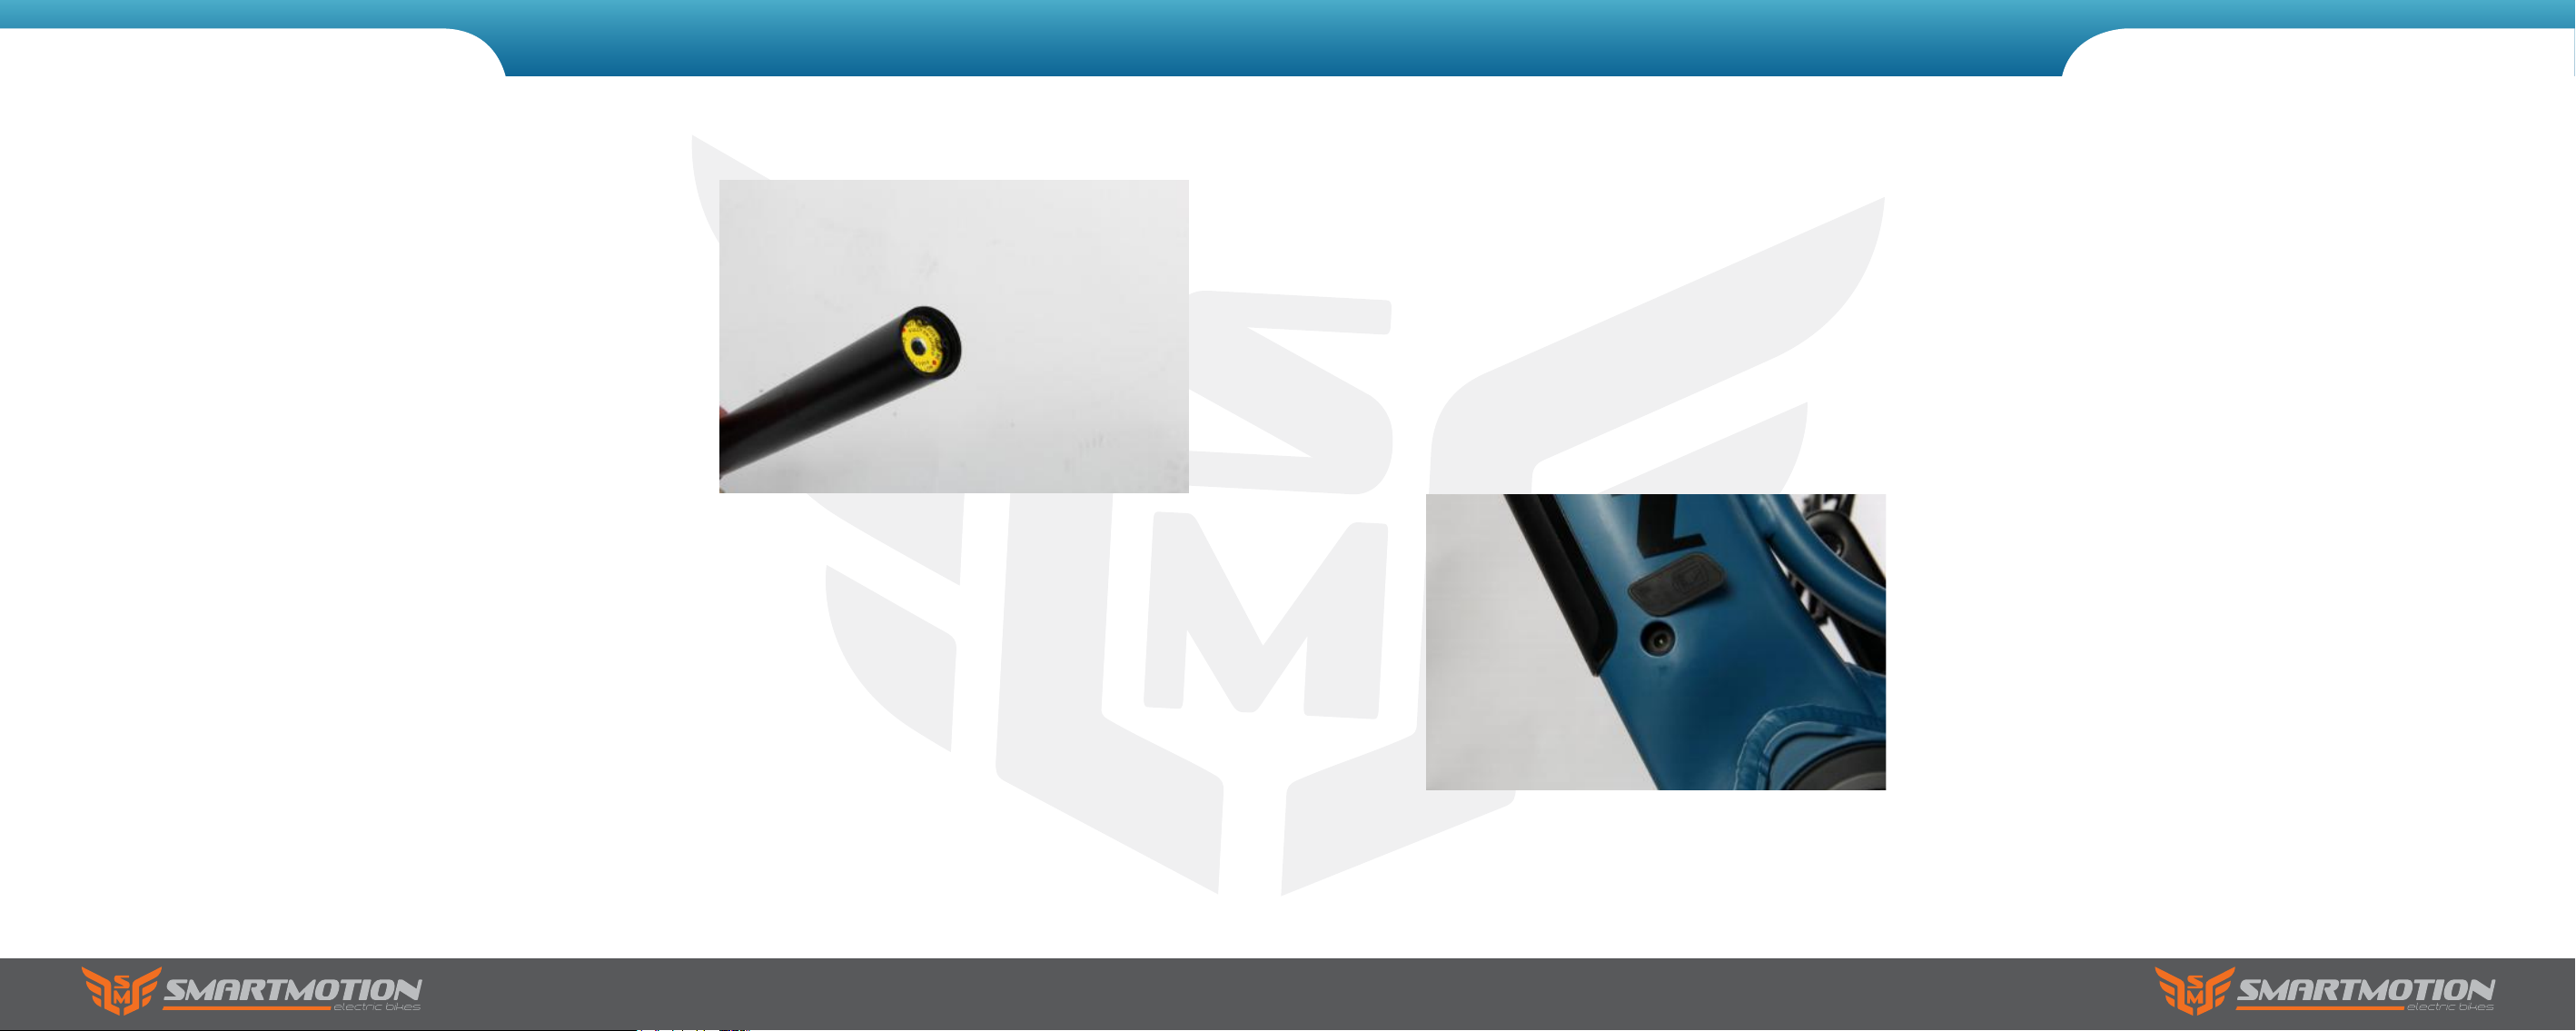
Capacity
You can check the capacity of your battery by
pushing the‘test’ button on the top of the
batteryor check it on the color LCD display
10. Battery Instructions
Connections
All ebike components (throttle, LCD Display,lights
controller, etc) on the SmartMotion bikes have
isolating marine-rated plugs, so, should you damage
a component, replacement is easy.Take the bike to
your local dealer and they will order a replacement
pair.
Green light : 50%-100% battery capacity
Yellow light : 20%-50% battery capacity
Red light : under 20% battery capacity
of the handlebar.
Definitions
“PRODUCT” means any individual component,
subcomponent, assembly,or complete unit that has
originated from or is a Smartmotion electric bike.
“WARRANTOR” means the licenced Smartmotion Bikes
importer in the country of sale.
“PURCHASER” means the purchaser, consumer, or end
user of the PRODUCT by way of purchase, gift, or prize
from an authorized dealer.
Limited Warranty
SMARTMOTION BIKES (“WARRANTOR”) warrants that each
Smartmotion PRODUCT will be free from defects in quality,
material and workmanship from TWELVE (12) months to
THIRTY-SIX (36) months (refer to the warranty schedule for
details) from the date of the rst retail purchase of the
PRODUCT. The Limited Warranty is referred to herein as the
“Limited Warranty”. The PURCHASER’s sole and exclusive
remedy under this Limited Warranty for defects in the
PRODUCT shall be the repair, replacement or credit/refund
arrangement, at the WARRANTOR’s sole discretion, of the
defective PRODUCT, or subcomponents thereof. By purchasing
the PRODUCT, the PURCHASER is deemed to accept the terms
of the Limited Warranty. The validity, construction and
performance of the Limited Warranty shall be governed by the
laws and regulations of the respective country in which the
product was sold.
Exclusions
1. This Limited Warranty will be automatically and immediately
null and void if the serial number of the PRODUCT is altered,
erased, defaced or otherwise subject to any tampering.
2. This Limited Warranty will be null and void and the
WARRANTOR will have no liability or responsibility with respect
or relation to exclusions which include but are not limited to:
a. The failure to properly assemble, use, maintain, store, or
transport the PRODUCT as specied in any manuals or other
literature supplied by WARRANTOR, on WARRANTOR’s website,
or in accordance with any applicable laws, codes, regulations or
standards;
FRAME 3 YEARS
MOTOR 2 YEARS
BATTERY 2 YEARS
OTHER COMPONENTS 1 YEAR
CONTROLLER 1 YEAR
RIDER WEIGHT LIMIT 100 KG
CARGO WEIGHT LIMIT 25 KG
COMBINED WEIGHT LIMIT 125 KG

11. Warranty
.
.
b. The failure to meet the six-month service schedule;
11. Warranty
c. Any PRODUCT purchased from any entity other than
WARRANTOR, WARRANTOR’s OEM (original equipment
manufacturer) customers, or WARRANTOR’s authorized dealers;
d. Any observed damages, failure, or underperformances
observed to the motor or controller units or any subcomponent
thereof as a result of or related to the following:
i) Subjecting the motor or controller unit(s) to electrical
overload by using the PRODUCT in a way for which it was
not intended;
ii) Subjecting the motor or controller unit(s) to electrical
overload caused by improper use of the gear train / shifter;
iii) Using the throttle to power the bike from a stationary
position;
iv) Submerging the motor unit;
v) Unauthorized modication, tampering or opening of the
motor or controller unit;
e. Any observed damages, failure, or underperformances
observed to the battery or charger units as a result of or related
to the following:
i) Subjecting the battery unit to neglect by leaving it in a
discharged state (less than 100% capacity) for a prolonged
period of time;
ii) Leaving the charger unit connected to the battery unit for
a prolonged period after the battery has fully charged;
iii) Signicant impact or other evident damage to
the battery or charger units;
iv) Charging the battery in a wet environment or
outside;
v) Unauthorized modication, tampering or
opening of the battery unit;
vi) Prolonged and unnecessary exposure to rain
or sea spray during storage or transport;
vii) Submerging the battery or charger unit(s);
viii) Using any charger unit other than a correct
original or replacement Smartmotion charger unit;
ix) Gradual decline of battery capacity that falls
within the expected capacity decay schedule
(appended in the BatteryCare Guide which has
not been aected by (i)
f. Any failure of the PRODUCT or any subcomponent
thereof occurs where the combined weight of rider and
cargo using the PRODUCT have exceeded 125kg;
g. Any subcomponent, part or accessory of the
PRODUCT that has failed or has sustained damage where
there is evidence of corrosion, rust, exposure to salt water,
spray or air, or other deterioration of surfaces due to
improper care, maintenance and/or storage;
h. Any damage inicted to the PRODUCT or
subcomponent that may have been caused by irregular or
substandard aftermarket components installed on the
PRODUCT;
i. Alteration, change or improper modication of the
PRODUCT, including its subcomponents, parts or assemblies;
j. Cosmetic issues, such as scratches, chips or colour
deviations;
k. Accidents, neglect, misuse, abuse, improper use,
lack of reasonable or proper maintenance, improper assembly,
repairs improperly performed, improper replacement parts,
use exceeding the recommended and permitted limits of the
PRODUCT, or not following the warranty procedure set forth
herein;
l. Damages sustained to the PRODUCT due to activities
including but not limited to acrobatics, stunt riding, ramp riding,
racing, or otherwise reckless riding for which the PRODUCT is
not designed for;
m. Part or full failure of the PRODUCT or its
subcomponents that are subject to normal wear or
deterioration which include but are not limited to:
(i) Chain, gear or sprocket wear;
(ii) Bearing wear including that of hub, motor
and drive train component assemblies;
(iii) Brake pad, uid, seals and disc wear;
(iv) Tyre and tube wear
(v) Handgrip, pedal, and saddle wear;
(vi) Battery capacity decay;
n. Any damage or loss inicted to foreign
components, accessories, items or other assembly
axed or installed on the PRODUCT that is not a
native subcomponent of the PRODUCT which has
occurred as a part of or related to a claim herein
otherwise;
o. Any expenses related to the transportation
of the PRODUCT to or from an authorized service
centre, labour costs to remove parts from the
PRODUCT, compensation for loss of use while the
PRODUCT is being repaired, or provision of a
substitute electric bicycle while the PRODUCT is
being repaired;
11. Warranty
.
.
p. Any defect or non-conformity that has not been timely
and promptly communicated in writing to WARRANTOR or
WARRANTOR’s authorized representative as set forth herein;
11. Warranty
3. Allow up to THIRTY (30) days from the date of
submission for the WARRANTOR to provide conrmation
as to the repair, replacement or other remedy that the
WARRANTOR has deemed appropriate, unless the
WARRANTOR advises of a longer time frame in advance.
The PURCHASER must allow additional time for transit of
the PRODUCT or its subcomponents. The WARRANTOR
cannot be held responsible for delays caused by any force
majeure incidents while the product is in transit.
This warranty is made by the WARRANTOR with only rst
PURCHASER of the PRODUCT via an authorized dealer.
The limited warranty does not extend to any subsequent
PURCHASER or any third parties. The unexpired portion of
this Limited Warranty may not be transferred to any entity.
q. Any damage, loss or expense caused by unforeseen
events or force majeure;
r. Loss of time, loss of use, inconvenience, loss of prots,
lost business, lost business opportunities, damage to reputation,
goodwill or any incidental or consequential damages arising out
of or relating to the PRODUCT, or other matters not specically
covered hereunder.
s. Use of the PRODUCT as a rental or leased bicycle or for
any other commercial use (i.e. a bike used for commercial
deliveries) shall render the Limited Warranty immediately null
and void.
t. Any damage inicted to the PRODUCT or its
subcomponents during transport or otherwise as a result of:
(i) Improper or inadequate packing of the PRODUCT for
transit;
(ii) Intentional further damage inicted by continuity of
riding or use;
(iii) Third-party transport contractor mishandling (i.e.
courier drivers / vehicles)
PROCEDURE OF WARRANTY CLAIM
In the event of any alleged fault, malfunction or defect
with the PRODUCT or any of the PRODUCT’S
subcomponents, the PURCHASER accepts obligation to
return the PRODUCT within FOURTEEN (14) calendar days
to an authorized representative of the PRODUCT. Whether
or not the entire PRODUCT is submitted or not, the
submission of the bike or subcomponent must be
accompanied by:
a) The unaltered frame number, or photograph
of the frame number, of the PRODUCT;
b) The serial number of the relevant subcomponent
if required by the WARRANTOR;
c) Full proof of purchase clearly displaying the
PRODUCT(S) purchased and the date of purchase;
To complete a valid claim, the PURCHASER must:
1. Contact the place of purchase, or other authorized
dealer, distributor, or manufacturer of the PRODUCT to
report the claim, and await instruction as to the method
of submission. The PRODUCT or subcomponents of the
PRODUCT relevant to the claim must be surrendered
for a claim application.
2. Agree to supply any photographs, videos
and/or other relevant information requested by the
WARRANTOR;
NO TRANSFER OF LIMITED WARRANTY

This bicycle conforms to the follwing standards
EN 14764:2005
EN 15194: 2009+A1:2011 (for Australian market)
EN 14872:2006
AS-NZS 1927-2010+A1-2014
EN 14764:2005
Your bicycle meets the following for standard EN 15194: 2009+A1:2011 (Australian Spec)
Electric-power- assistant bicycle, equipped with pedals and an auxiliary electric motor, which cannot be propelled
exclusively by means of this auxiliary electric motor, except in the start-up assistance mode, and the start-up assistance
speed is less than 6 km/h.
Important notes:
1. Do not overload the rack. Maximum carrying capacity of the luggage carrier is 25Kg.
2. When you need to use the rear rack, please check mounting screws are tight.
3. Do not modify the luggage carrier
4. Do not pull a trailer with the luggage carrier.
5. Do not transport heavy objects; if a heavy object is put on the rear rack, the bike’s steering performance will be
6. manufacturer’s instructions and that there are no loose straps that can get caught in any of the wheels.
7.
8. Distribute luggage evenly between the two sides of the luggage carrier.
12. Conformity 12. Conformity

Model:
Serial Numbers:
Dealer:
Purchase Date:
6 Weeks/200km
Date:
Shop:
Mechanic:
6 Months
Date:
Shop:
Mechanic:
24 Months
Date:
Shop:
Mechanic:
12 Months
Date:
Shop:
Mechanic:
14. Service Record
13. Service Checklist
Check for damage Adjust and Tension
Lubricate
Frame & Fork
Rims
Cables & connections
Spokes*
Gears
Seat
Reflectors & Lights
Handlebars, Stem, Grips
Brakes
Cranks
Wheel Axles
All Fasteners
Chain
Derailleur
Seatpost
*Spokes to be tensioned to 130Nm
www.smartmotionbikes.com
This manual suits for next models
1
Table of contents
Other smartmotion Bicycle manuals


