smart piano The ONE User manual
NO.1805030
1
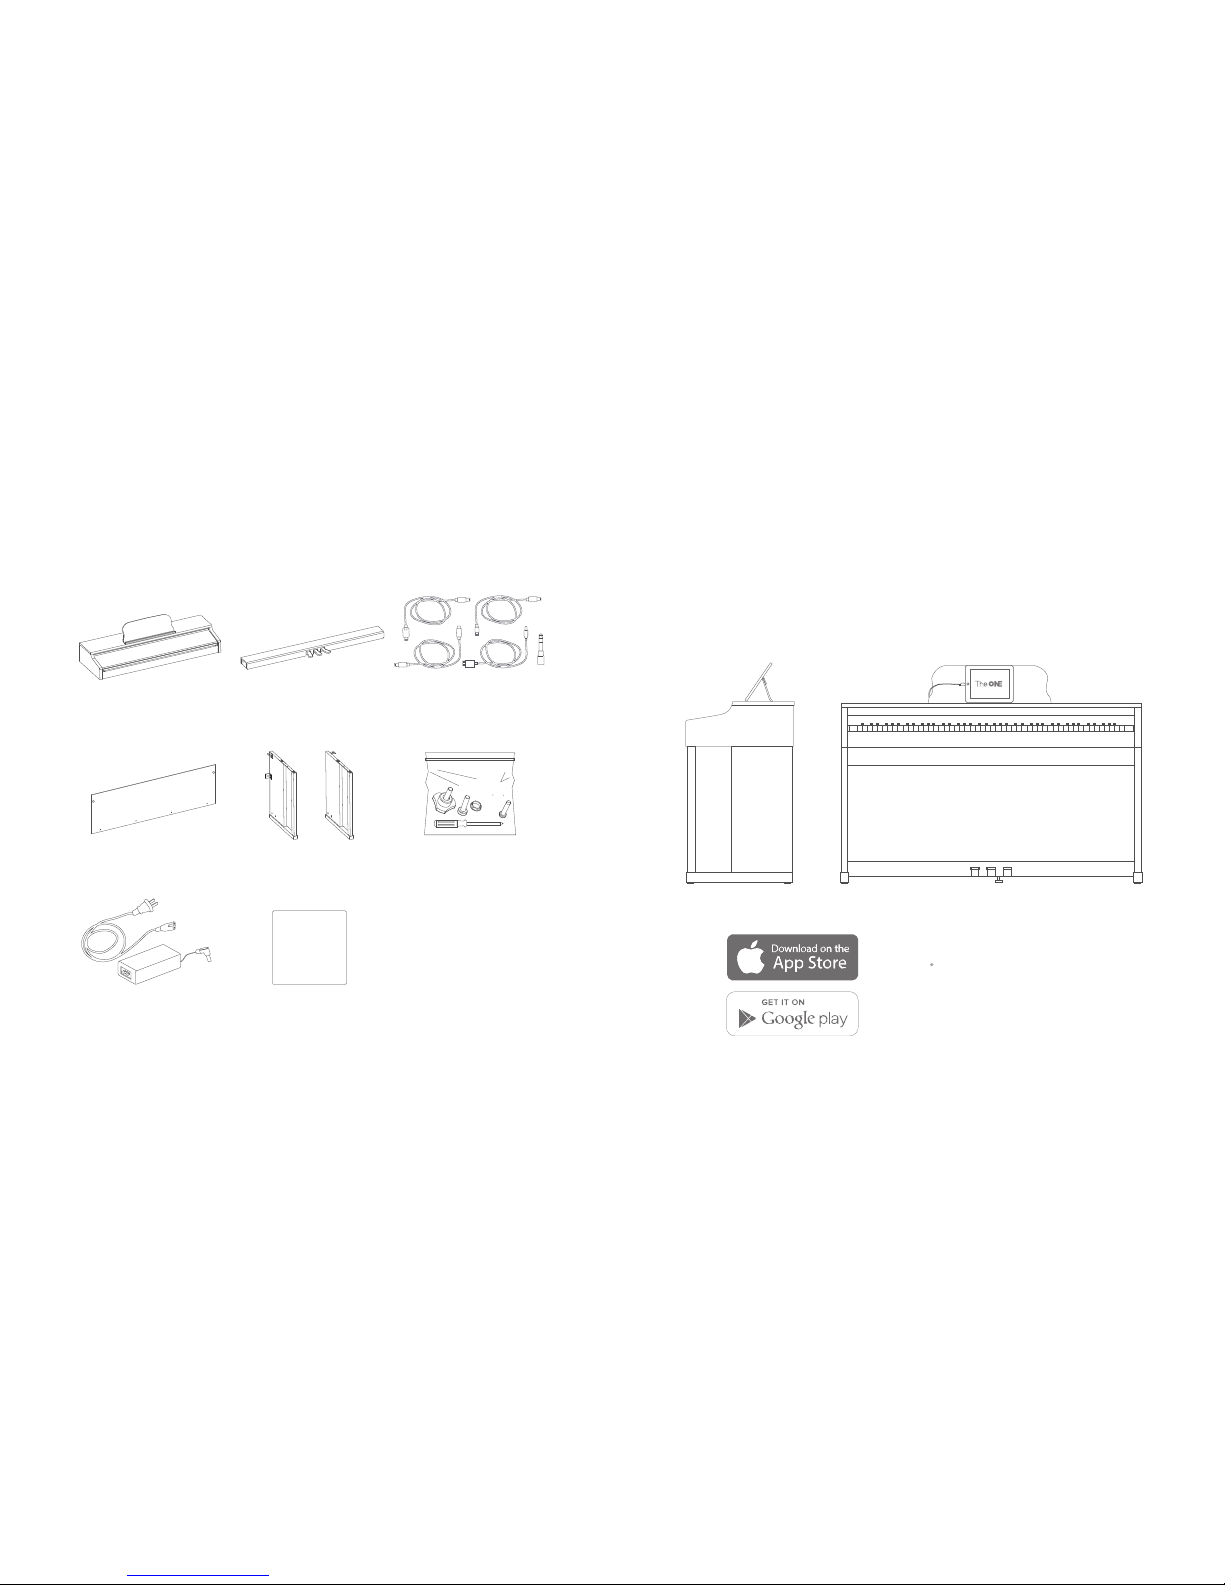
System Components & Parts List
Main body
Piano legs (left and right)
Use Guide
Pedal
Back plate
Carefully remove components from the packaging and check that all listed parts are included:
Power source DC 15V User guide
Toolkit
Headphone adaptor and cable
Product Introduction
The ONE Smart Piano
The ONE Smart Piano is a smart instrument that can teach you to play. Combining piano education with fun exercises and your
favorite songs, The ONE is suitable for both beginners and more experienced players. Its sound quality resembles a grand
piano and its functions are endless when connected with an App for your mobile devices.
For more information, visit:
http://www.smartpiano.com/pages/sheet-music
Search "The ONE Smart Piano"
on App Store or Google Play
Put on
(double-check the direction of the cap before assembling).
Use
to attach the back plate onto the left and right legs completed in step A.
12
6
Toolkit
Main body
Left Leg
Right Leg
Pedals
Back plate
Pedal line
2 3
1
2
9
78
8
9
11
11
10
3
4
5
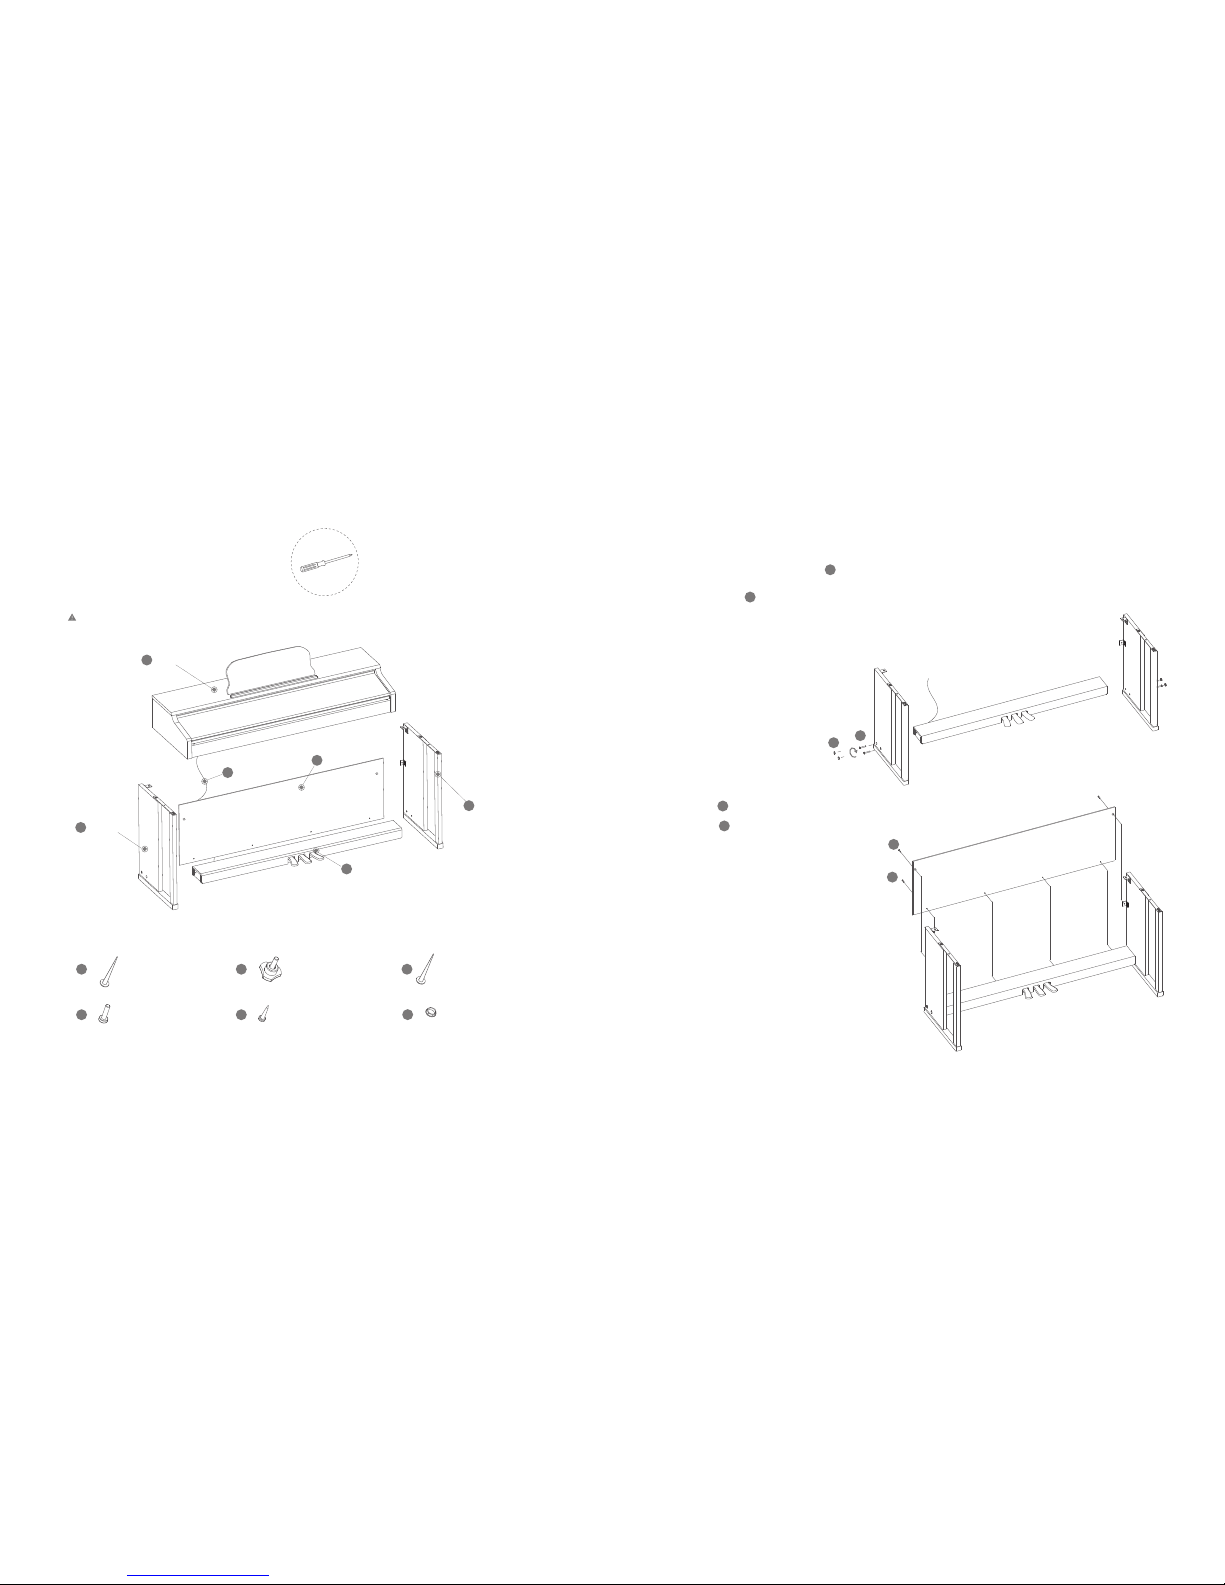
A.
B.
Before assembling the piano, find the cross screwdriver
from the toolkit. Check to make sure that all of the
following parts are in the package.
(Note: The product can be quite heavy, so we recommend having two people when moving it.)
Philip’s Head Screw *2 Self-tapping Screw *4Plastic Screw Cap *4
Hand Screw *2 Self-tapping Head Screw *4
Place the left and right legs on both sides, then fix the pedals
onto the legs as illustrated. Use Self-tapping Head Screw to tighten the pedals.
1.
2.
Avoid pressure to the pedal bridge. Adjust the pedals
appropriately so that it’s easier to locate the screw
holes.
Assembly Instructions
11
Self-tapping Screw *2
9
10
to attach the back plate onto the pedals completed in step A.
8
Plastic Screw Cap .
Philip’s Head Screw
Use 10 Self-tapping Screw
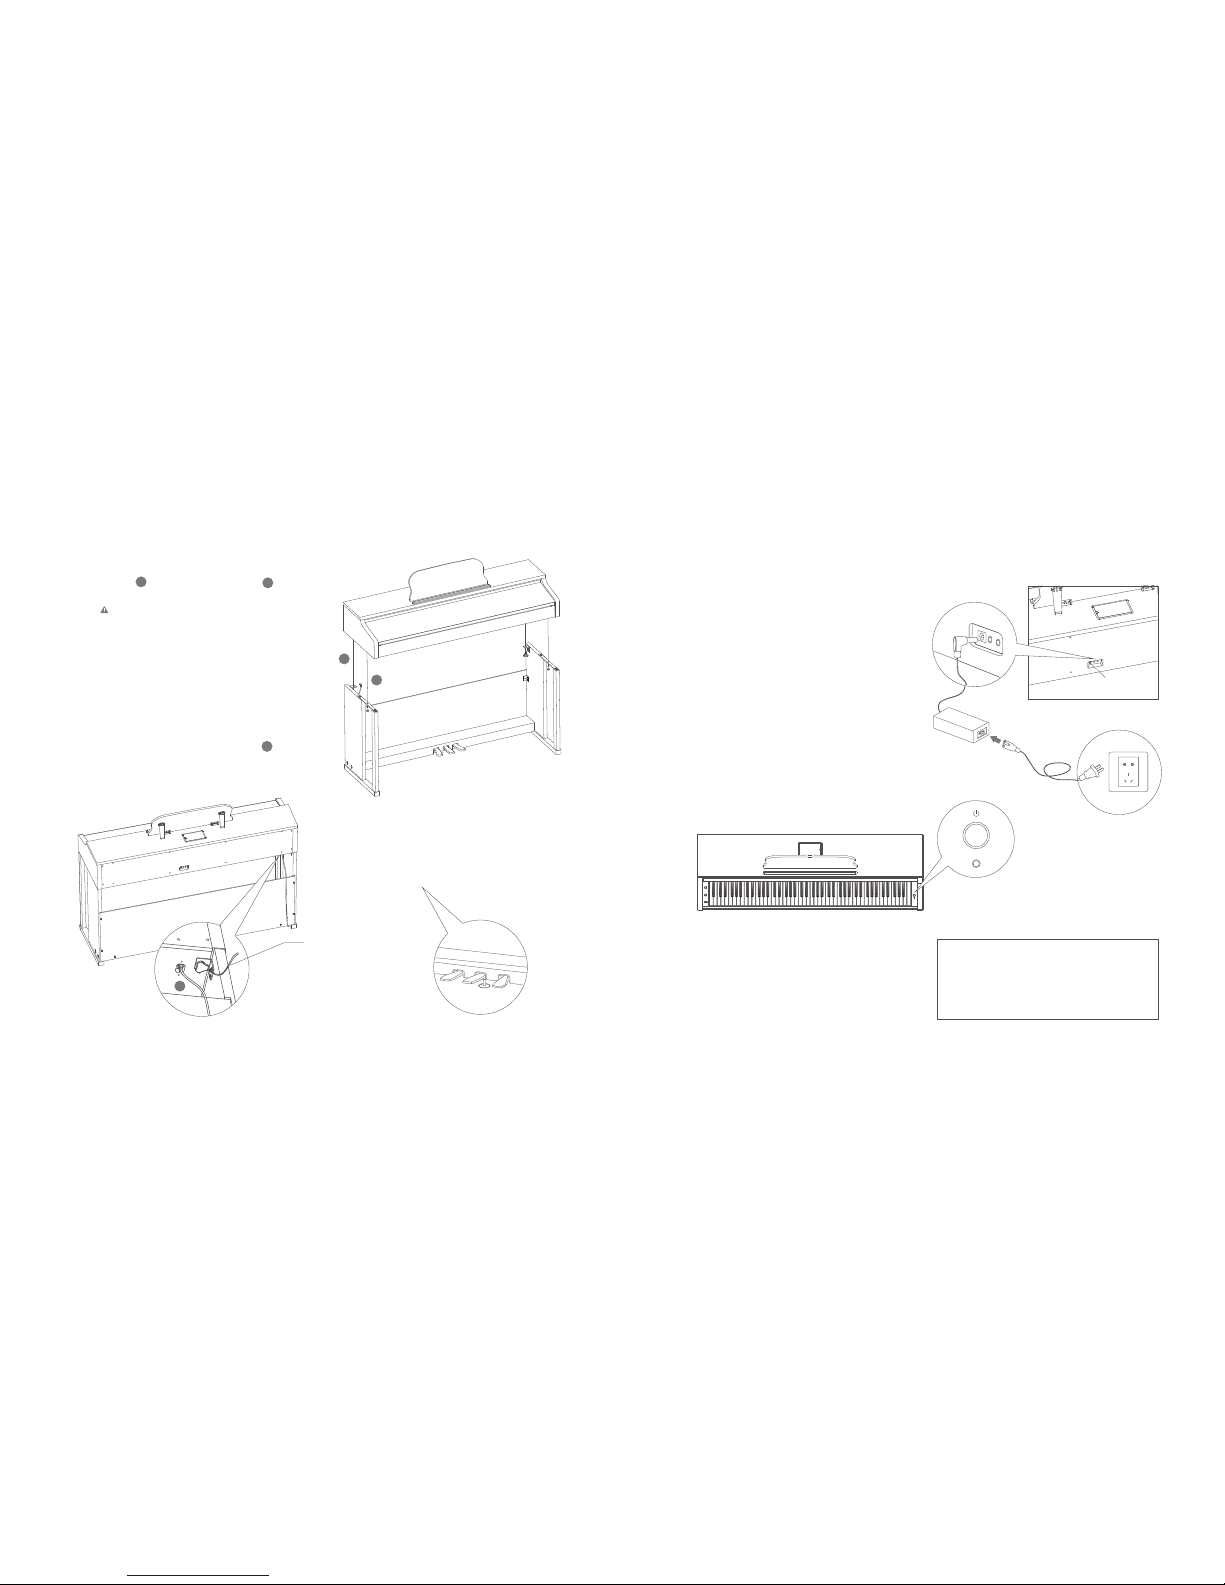
Connect the AC/DC power adapter to the power socket on the
backside of the main body and plug the other side into the
power outlet.
Start-up
Assembly Instructions
Binding wire
After assembling the overall piano frame, insert
into the holes at the bottom of the main body and attach
by using the binding wire.
1. Mount the main body onto what has been completed in step B.
Align two Self-tapping screws and two hand screws to
the screw holes, then tighten the screws.
(Note: The product can be heavy at this step, so it’s best to
have two people when carrying it)
E.
6
6
7
7
D.
C.
4 5
1.
Place the piano in a static location in your room, then unscrew the screw nut
for fixation until it presses against the floor. Do not unscrew the screw nut earlier,
or it will scratch your floor.
How to Use
Make sure the power is off. Before you switch the instrument on,
dial down the volume on the keyword as well as the volume of
any connected audio equipment to a minimum level.
2.
Switch on the piano. Lit LED lights indicate that the piano is turned on.
3.
To turn off the product, press the “Power” button.
To prevent accidental power-offs, the product can be turned off
only whenthe button is pressed for a longer time.
4.
Note:
For safety reasons, unplug the instrument when not in use
for extended periods of time, or during thunderstorms.
power socket
12
12
Pedal line

Connecting with iPad
The music stand sits on the top of the piano.
You can flip up the stand fold to place scores or tablet devices.
To Use the Stand
6 7
00:15:23
Connect
Using the cable
This product requires iPads running iOS 9.0 or later (iPad 1 is excluded).
Flip the cover over
B.
Gently press the cover
of the box to open the box
A.
Plug in the cable along the direction
illustrated.
C.
MIDI Function
Download the “The ONE Smart Piano” app to access
extended and additional features.
You can also play music from your iPad through The ONE piano.
You can use the pinao as a form of high-quality speakers for your
iPad music.
When connected toacomputer, this instrument can be used as a
MIDI keyboard. When connected with tablets, USB MIDI bidirectional
data transmission is available. For example, you can record the music
you play on this instrument into your tablet. You can also use the
instrument as speakers to play music directly from your tablet devices.
Connect
8 9
Simply tap the feature to start recording what you play and to share it on your social networks.
Note :
This module lists the main functions of the piano. For more details on additional features, refer
to the "Settings - piano settings" in The One App.
MASTER VOLUME
MIN MAX
TEMPO
150
30
90 220
280
METRONOME
Soft Sostenuto Sustain
Recording Function
Functions
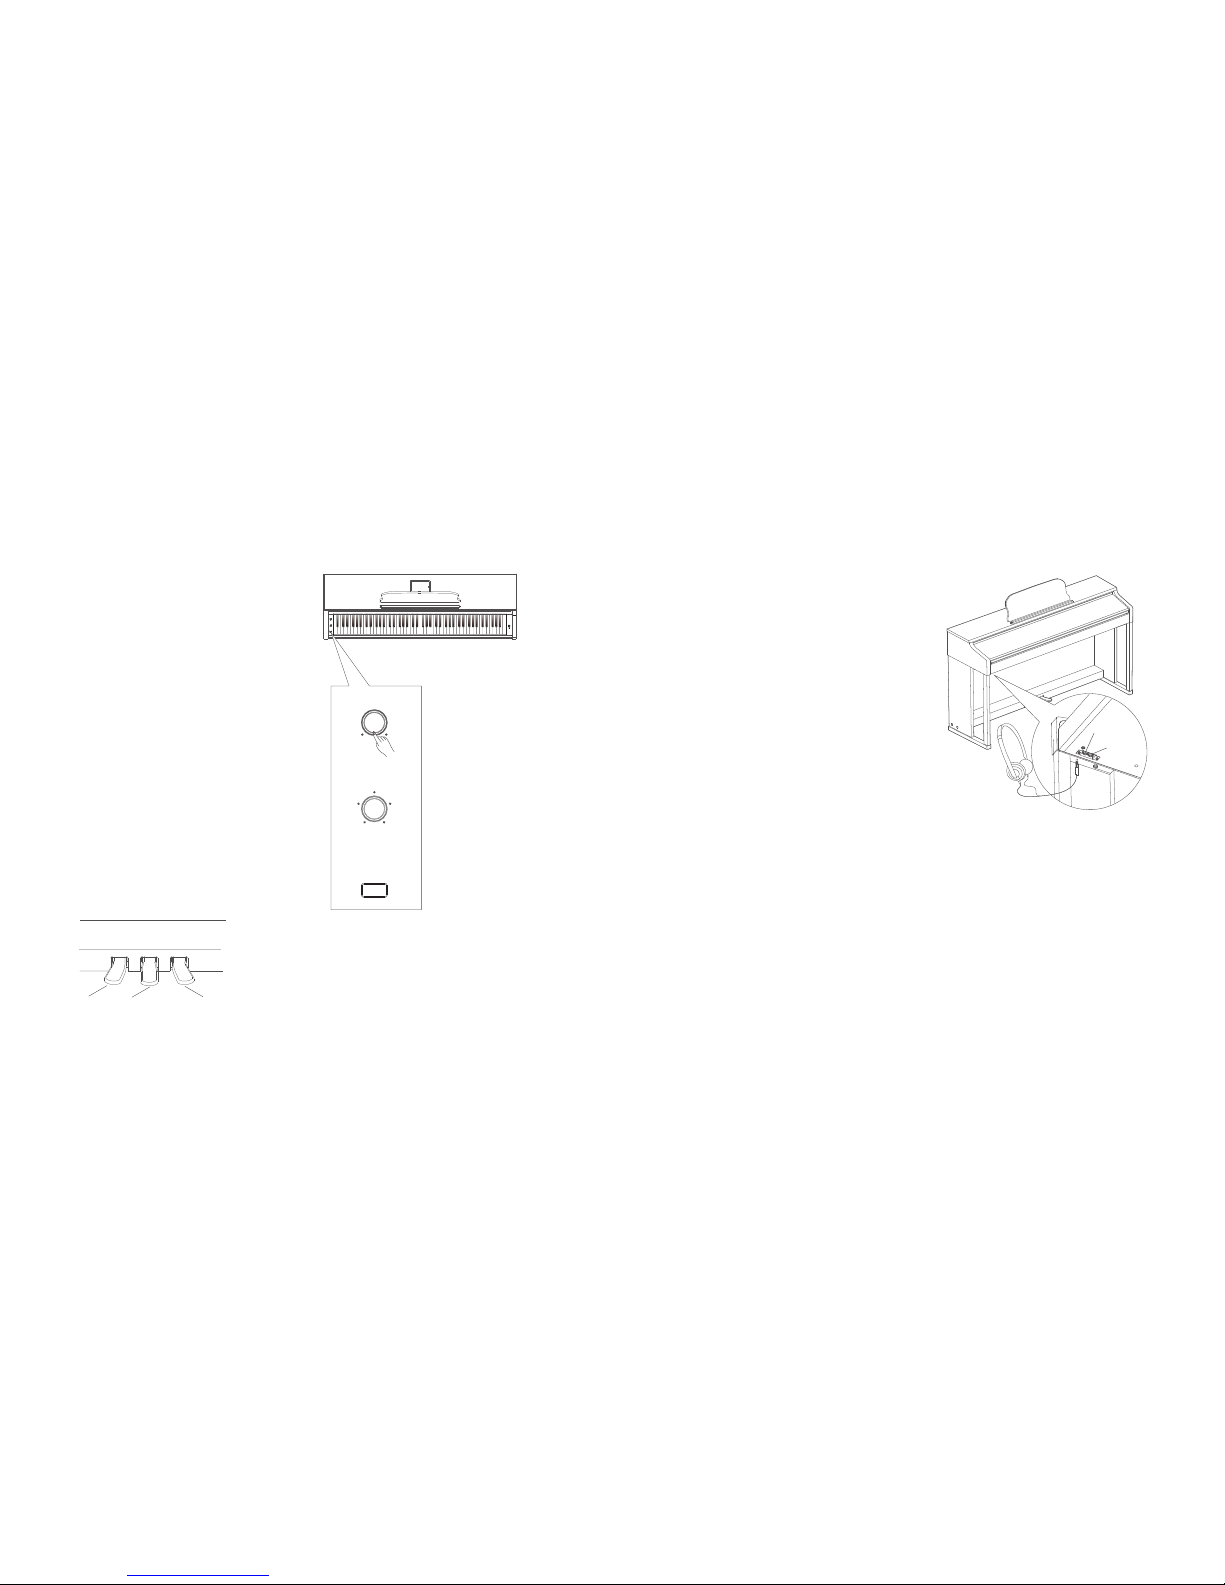
Master Volume Knob
Keyboard
Using the Metronome
After start-up, turn the volume knob tothe right to increase the volume,
and turn the volume knob tothe left to decrease the volume. You can
adjust in both directions to change the volume.
This product is a 88-key graded hammer action piano keyboardthat
supports a max of 128 key sounds at one time. As you play the piano,
you’ll experience a touch and feel similar tothat of a grand piano.
When you are practicing or recording your music, the metronome helps
you to learn rhythms.
Use the metronome function to help you keep a steady tempo as you play.
1. Press the “Metronome” button to activate it.
2. Press the “Metronome” again toturn it off.
You can adjust the beat for different needs.
The speed ranges from 30 – 280.
The beat goes higher when you turn the speed knob tothe right, and
it goes lower when you turn the speed knob tothe left.
Using the Pedals
Functions
Connecting Earphones
Extended Functions
When practicing late at night, you can play the piano with
your earphones as illustrated.
Socket : If you plug into these socket, the sound will only come out
from the earphones.
Note :
1. Avoid using the earphones for long periods of time at a high volume,
since extended use can cause ear fatigue or even hearing damage.
2. The size of the earphone socket is 6.5mm.
Note :
Setting Up the Timbre
There are 128 GMtimbres and 4 drum combinations for you tochoose from.
Note :
1. For specific tablet set-up instructions, refer tothe App description in the
App Store.
2. This product’s default instrumental sound is that of a grand piano.
Socket1
Socket2
This module only lists the practical functions, for more detailed operation rules
please refer tothe App description.

SpecificationsSpecifications
Specifications Specifications
Care Instructions
1. Avoid direct sunlight. It will cause damage to the piano.
2. Do not disassemble the piano. Disassembling may cause damages that are not covered
under the warranty.
10 11
Length: 54 Inches
Width: 18 Inches
Height: 33 Inches
Keyboard: 88-key graded hammer action piano keyboard
121 pounds
iOS 9.0 +
iPhone 5S/6/6Plus/SE/7/7Plus/8/X
iPad2/4, New Pad, iPad mini1/2/3/4, iPad Air1/2, iPad Pro
On/Off: Power will be automatically turned off if inactive for 30 minutes.
Volume: Adjust the volume of the sound.
Metronome*: Optional to use. Turn the knob to adjust the tempo.
Pedals: Three pedals. Soft, Sostenuto, and Sustain respectively from left to right.
Recording Function* Record music while playing and share with your social network.
Tone Selection* A variety of timbres to choose from.
(Functions with *: availability varies with the mobile device you’re using The ONE smart piano application on)
Size
Weight
Apple Devices
Basic Parameters
Basic Functions
Power Source: 15V power cord connected to the back of the piano.
Cable Interface: The port is visible by pressing on and opening the small box on top of the piano.
The interface supports four specialized cables for The ONE Smart Piano (USB, micro-USB, Apple
lightning connector ).
Headphone Jack: Two 6.5mm headphone jacks (front and rear).
Connecting a headphone with the front headphone jack (via a headphone jack adaptor) makes the
sound audible only through the headphone, while connecting a headphone with the rear headphone
jack makes the sound audible through both the headphone and piano speakers.
Aux In/Out: 6.5mm auxiliary interface.
Mounting screws
Screwdriver
3.5mm-to-6.5mm headsetadapter
The ONE Smart Piano Cable - 4
User Manual
Interface
Accessories
Keyboard: 88-key graded hammer action piano keyboard
Maximum Polyphony: 128-note polyphony
Tones: 128 GM-programmed timbres and 4 drum sets (only the timbre of a grand piano is available for
demo play)
Audio Sampling rate: 44.1KHz
Sampling Tones: 16-bit stereo
Amplifier Power: 25w*2
Speaker Size: Tweeter 1.25"*2 + Woofer 5"*2
Piano Lights: 88 sets of red and blue LED lights
,USB Type-C

12
Trouble-shooting
Problem Possible cause and solution
A noise is heard when turning on or
off the piano.
It’s normal to hear some noise when turning the piano on or off.
The noise may be due to interference caused by the use of a mobile
phone in proximity tothe instrument. Turn off the mobile phone, or
place it far away from the instrument.
Speakers do not work when playing
the piano
Check if the volume is too low or completely turned off. Then check if anything is
plugged into the earphone socket.
SPECIAL NOTICE
Warning
Functions of the product may be subject to strong
electromagnetic interference. If it happens, simply follow
the user manual to restore the initial settings. When the
product stops working, store it in an unused location.
Do not use the instrument in the vicinity of aTV, radio,
stereo equipment, mobile phone, or other electronic device.
Otherwise, the instrument may generate noise.
Interference with other devices
When cleaning the instrument, use a soft and dry cloth.
Do not use paint thinners, solvents, cleaning fluids, or any
chemical cleaning cloths.
Maintenance
Please make sure that the power adapter is connected toaPower
outlet with the correct voltage.
Do not use a power source with the wrong voltage.
When the device isn’t in use, or during a thunderstorm, disconnect
the power supply.
Power
Do not press too hard on switches or controls.
Avoid getting paper, metal or other materials into the
internal device. If this happens, unplug the device immediately.
Then ask for help from a qualified service personnel to inspect
the equipment.
Caution
Connection
Before connecting the product to another device, first
turn off the power on both devices. This will effectively
prevent equipment breakdowns or possible damage to
the other device.
Do not place the product in the following environments in
order to avoid deformation, discoloration, or other serious damages.
Do not expose the instrument to excessive dust or vibrations, or
extreme temperatures (such as in direct sunlight or near a heater),
or in a car to prevent panel disfiguration or possible damage tothe
internal components.
Do not place vinyl, plastic or rubber objects on the instrument,
since the panel or the keyboard may get discolored.
Location
Before moving the instrument, remove all connected cables.
Before using the product, please read the following instructions
carefully.Please keep this manual for inspection at any time in
the future.
CONTACT US
Email: [email protected]
Facebook: facebook.com/onesmartpiano
Skype: smartpiano
Table of contents
Other smart piano Musical Instrument manuals


