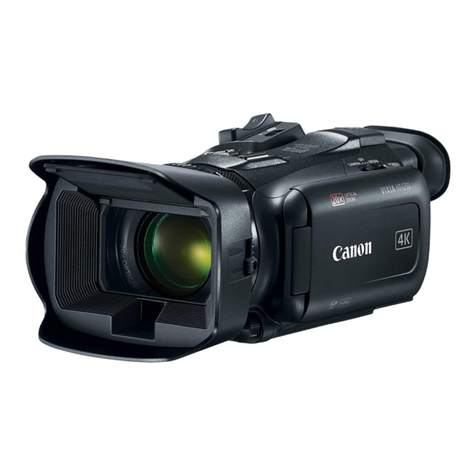
Smart Witness SVC1080-LCA User manual

VEHICLE CCTV AND SAFETY SYSTEMS
User Guide
Full HD (1080P) Vehicle Accident Camera
SVC1080-LCA

www.smartwitness.com
2
CONTENTS
GPS Function ............................................................................. 5
1. Overview ................................................................................. 6
2. Introduction ............................................................................ 7
Unit Parts ......................................................................... 8
Wiring Description ........................................................... 8
3. Contents .................................................................................. 9
4. LED Guide ............................................................................... 10
5. Functions ................................................................................ 12
6. Installation .............................................................................. 14
Camera Installation ......................................................... 14
Wiring Installation ............................................................ 14
7. SD Card Functions ................................................................. 16
8. Software Installation .............................................................. 17
9. SD Card Initialise .................................................................... 19
10. Software User Guide ............................................................ 20
Settings ........................................................................... 20
About ............................................................................... 23
Viewing Settings .............................................................. 24
File Loadng ...................................................................... 25
Playback Screen ............................................................. 27
Log File Playback ............................................................ 28
Google Maps ................................................................... 29
Save JPEG & AVI File ..................................................... 30
Print Image ...................................................................... 31
Backup Files .................................................................... 32
Cloud Backup .................................................................. 33

www.smartwitness.com
3
CONTINUED...
GPS Log to KML Converter ............................................. 35
Driver Reporting .............................................................. 36
Analysis Criteria Settings ................................................ 38
Grading Criteria Settings ................................................. 39
Grading Method ............................................................... 43
Graph Display Settings .................................................... 45
11. Specications ....................................................................... 46
Appendices
Appendix 1 - Mac OS Playback Software ................................. 47
Appendix 2 - Recording Timetable ........................................... 49
Appendix 3 - Firmware Upgrade ............................................... 50
Appendix 4 - SD Card Maintenance .......................................... 52

www.smartwitness.com
4
SAFETY ADVICE
CAUTION
RISK OF ELECTRIC SHOCK
DO NOT OPEN
DO NOT REMOVE THE COVER
REFER SERVICING TO QUALIFIED SERVICE PERSONNEL
Please ensure your vehicle is not powered when connecting
the unit to your desired power source.
Install the product where it does not block the driver’s view of
the road. Please refer to the installation section in the user
manual for a full guide on where to install product.
Damages caused by production malfunction, loss of data or
other damages that may occur while using this product is not
the responsibility of the manufacturer. When malfunction
occurs, the product may not save all videos and the sensor
may not recognise shock impacts.
WARNING:
DO NOT EXPOSE PRODUCT TO RAIN OR MOISTURE

www.smartwitness.com
5
1. Activate the product in an area without large buildings to improve
GPS reception.
For commercial purposes, the GPS has an average range error of more than
15 metres and the range error could be more than 100 meters depending on
environmental conditions like buildings and roadside trees etc.
2. The temperature range for optimum operation of the GPS receiver in
your car is -10 ~ 50°C.
3. When using the product for the rst time or after a long period (more
than three days), it may take a little longer to recognise your current
location.
It may take between ve and thirty minutes to get GPS reception.
1) If there is an object at the end of the GPS antenna
2) If your vehicle has metallic elements on the windshield
3) If equipment generating electromagnetic waves that interfere with the GPS
signal are installed in the vehicle e.g. other GPS devices including certain
types of wireless activated alarms, MP3 and CD players and camera
alarms using GPS.
4) If you are using a receiver connected by a cable, electrical interference can
be avoided by simply changing the location of the receiver (antenna).
5) On heavily overcast or cloudy days, if the vehicle is in a covered location
such as under a bridge or raised roadway, in a tunnel, an underground
roadway or parking area, inside a building or surrounded by high-rise
buildings.
6) If GPS signal reception is poor, it may take longer to locate your current
position when the vehicle is moving than when it is stationary.
GPS reception may be impaired under the following circumstances:
GPS RECEPTION

www.smartwitness.com
6
The SVC1080-LCA is a Vehicle Accident camera with Full HD (1080P)
recording. In addition to this, the camera is equipped with a 3 Axis Shock
Sensor & GPS for measuring braking, acceleration, driving style and
recording location.
The camera includes alarm outputs for telematics integration and permanent
wiring. As well as this, the unit includes a transparent locking case to prevent
tampering with evidence.
This evidence can protect a driver from many of the issues faced on the
roads today:
• Cash for Crash / Pre-meditated staged accidents
• False/Exaggerated Whiplash Claims
• Conicting Reports of Actual Events
• Lack of Witnesses
• Driving Offence Allegations (Speed Cameras, Trafc Signal Violations
etc...)
Features:
• Continuously records the driver’s view via a 170º high-quality lens
• Continuously records braking/acceleration/collision G-forces
• Approved for installation in commercial vehicles
• Built-in GPS receiver ensures the highest accuracy for vehicle
location and speed
• Simple DIY installation
• E-mark, EMC, CE and FCC approved for extra peace of mind
• VOSA and Data Protection Act compliant
1. OVERVIEW

www.smartwitness.com
7
2. INTRODUCTION
FRONT
Bracket
Stick adhesive
tape here
Camera Lens
Tamper Resistant
Locking Case
RIGHT LEFT
Key Lock
Protects SD
Card Slot
DC Power Input
Connected with
permanent wiring
REAR
SD Card Format
Button
Record Button
Record LED
Blue LED
Overwrite LED
Red LED

www.smartwitness.com
8
Remote SW+
Remote SW-
Battery -
Alarm Out 1
Alarm Out 2
Battery+ (Connect to ignition)
UNIT PARTS
Main Unit Bracket Holder Transparent
Locking Case
WIRING DESCRIPTION

www.smartwitness.com
9
3. CONTENTS
1x SVC1080-LCA Vehicle Accident Camera with
locking case
1x 3m Mounting Sticky Pad
1x Power Cable
1x Locking Case Keys
1x User Manual

www.smartwitness.com
10
Blue LED
Red LED
4. LED GUIDE
BLUE LED (Record)
The Blue LED indicates that the unit is on.
In continuous recording mode, the LED will come on for 4 seconds, then off
for one second and repeat.
In event recording mode, the LED will come on for 0.5 seconds, off for 0.5
seconds and then repeat.
In parking mode, the LED will be on for 8 seconds, off for 1 second and
repeat.
RED LED (Warning LED)
The Red LED will turn on to indicate a system failure on the unit.
Buzzer
The buzzer will sound when the event recording begins. This can be turned
off if required using the settings on the SVC1080-LCA software.

www.smartwitness.com
11
See the table below for an explanation of the LED status changes on the
back of the recorder.
No. BLUE LED RED LED Buzzer Meaning
1On On Off System Booting Up
2Double Blink Double Blink Off Upgrade
34 Second on
1 Second off Off Off Continuous Recording
Mode
40.5 Second on
0.5 Second off Off Beep once Triggered Event
Recording
5Off 0.5 Second on
0.5 Second off Off SD Card Fault
6On On Off System Fault
7On Off Beep Twice SD Unmount
8On Off Beep Twice SD Reset
9Off Off Off SD Format
10 Off 2 Second on
2 Second off Off SD Card Full
11 Off Off Beep once
for 1 Sec Auto Calibration
12 8 Seconds on
1 Second off Off Off Parking Mode
13 Off Off Off Power Off

www.smartwitness.com
12
5. FUNCTIONS
Automatic Booting
Once the SVC1080-LCA has been wired to your car power source, the unit
will automatically turn on when the car’s ignition is switched on. The system
boot up will take around 1 minute before the unit is ready to record. If there is
no SD card, the unit will beep and both LEDs will ash.
The default setting for recording is continuous at 30fps with 720P resolution.
This setting allows for separate event and panic recordings.
On this setting, the SD card’s storage will be used up quicker and depending
on the settings, it may overwrite or stop recording when full. To avoid losing
valuable data, we recommend that you back up the data onto a separate
storage device or PC/Mac.
Recording Mode (Continuous)
This is the only recording mode. In this setting, the unit will begin recording
after the system has booted up and record the entire time the unit is
powered (SD card has to be present).
However, if you change the resolution to 1080I or 720P you will have
continuous recording and event recording. The SVC1080-LCA will
automatically create event les based on the below scenarios:
1. Continuously records 720P @ 30fps in the normal folder and overwrite.
2. Up to 10 G-sensor event les will be recorded in the shock folder.
3. Up to 10 Panic event les will be recorded in the panic folder.
4. If you check the parking mode function, then the continuous record
frame rate will be changed to 1fps if the car doesn’t move for 5 minutes.
Please note that event les will not be created in 1080P mode.
The resolution and frame rates can be set as per your requirements using
the SmartWitness software. To do this, please refer to the ‘Settings’ section
on page 20.

www.smartwitness.com
13
Parking Mode
The parking mode function allows you to record data when your vehicle is
parked. If the G-sensor value changes are less than 50mg for 5 minutes, the
recording frame rate will drop to 1fps.
When the vehicle stars to move again, the parking mode will switch off
automatically and starts continuous recording immediately.
G-Sensor Calibration
To begin the G-sensor calibration, follow the steps below;
1. Install the unit and park the vehicle on a at surface.
2. Turn on the unit and press the blue button once.
3. Then the calibration can begin when the buzzer beeps.
For this function, please check the G-sensor and calibration functions using
the settings on the software.
Built-in Power Backup (Super Capacitor)
In the event of the power failing on the unit, the SVC1080-LCA will remain on
to create the last data le using the internal super capacitor.
Time and Date
The SVC1080-LCA gets the time and date information from the GPS
satellites, so there is no need to set this manually. However, you can set this
using the SVC1080-LCA software.

www.smartwitness.com
14
6. INSTALLATION
1. Attach the double sided adhesive
tape to the unit.
2. Secure the SVC1080-LCA to the
windscreen behind the rear view
mirror. Please make sure that the
surface is clean and dry before
attaching.
Tip:
Hold in position
with rm
pressure for
30 Seconds
3. Adjust camera view and make
sure the lens has an unobstructed
view.
4. Arrange the power cord neatly
alongside the windshield and
door pillar trim. Use the provided
wire splice clip.
CAMERA INSTALLATION
WIRING INSTALLATION
For permanent wiring, we recommend that you use professional installers
unless you are familiar with vehicle wiring.
If you wish to wire the camera yourself, please follow the instructions on the
next page.

www.smartwitness.com
15
1. Connect the red Fuse Cable (+) to the Fuse box in the vehicle. This
should be connected to a battery circuit.
We recommend that the SVC1080-LCA is wired so that it is only powered
when your ignition is turned on. If you wish to power permanently, then
please use our SVCSPWK as this will help to reduce battery drain.
2. Connect the black Ground cable (highlighted by the Y pin connector) to
the chasses of the car or ground point i.e battery negative terminal.

www.smartwitness.com
16
The SD card can be removed in the SVC1080-LCA using 2 different
methods;
1. Turn the ignition off and remove the SD card
2. Take out the SD card when the unit is on using the safe SD card removal
mode.
1. Turn the ignition off in the vehicle and take out the SD card
Turn the ignition off in the vehicle and check the Blue LED light. Once the
LED light has gone out, you can safely remove the SD card.
2. Safely remove & insert the SD Card when the unit is powered
Press the blue button for 3 seconds to enter into the safe SD card removal
mode. After, the blue LED will illuminate continuously. Now you can safely
remove and re-insert the SD card.
After you re-insert the SD card, press the ‘SD Reset’ button and then press
the blue button for 3 seconds and release it.
Format SD Card
To format the SD card, rstly turn the unit off and press the ‘SD Card Format’
button and hold. Then, connect the power for initialisation and hold the ‘SD
Card Format’ button during the boot up.
Once complete, all video and log les will be deleted and the congurations
will be defaulted to the factory settings.
Auto Format SD Card
The SVC1080-LCA has an auto format feature meaning that if the unit
detects any corrupted les on the card, it will format the card so that it can
continue to function.
When formatting, you will lose all recorded data on the card, so please
perform regular backups of the data.
PLEASE NOTE
7. SD CARD FUNCTIONS

www.smartwitness.com
17
8. SOFTWARE INSTALLATION
PC SYSTEM REQUIREMENT
Recommended PC specications for PC Viewer software
If the PC does not meet the minimum system requirements, the Analysis
Software may not function properly.
OS Windows Vista, Windows 7, Windows 8/8.1, MAC OS
10.7/10.8/10.9 (Mac S/W Viewing Only)
CPU Core 2 Duo 2.5GHz or Higher
RAM 2GB or higher
Interface SD Memory Card Reader
HDD Free Space Install 55MB or higher
Backup 4GB or higher
Display 1024 x 768 pixel / True Colour or higher (Depending
on SD Card)

www.smartwitness.com
18
The SVC1080-LCA software will come supplied on the SD card (if you have
purchased one) in the ‘software’ folder. Or you can download it from our
website www.smartwitness.com.
1. Plug the SD card into your computer.
2. Open the ‘FHDREC1’ le.
3. Open the ‘Software’ folder.
4. Select the ‘setup.exe’ le to bring up the following screen.
5. Select the language and then follow the on-screen dialog box.
6. The ‘SVC1080-LCA Software’ icon will now be displayed on your desktop.
NOTE: To Un-install the PC Viewer
Make sure the program is not running and open the ‘Control Panel’
Select ‘Remove Program’ and remove SVC1080-LCA Software
software

www.smartwitness.com
19
9. SD CARD INITIALISE
‘Initialise SD Card’ icon
To initialise the SD card, click on the ‘Initialise SD Card’ icon and you will be
presented with the screen below.
Blank Card Pre Initialised Card
Then, choose a card to initialise.
When selected, click the ‘OK’ button. On the following screen, select the
‘Quick Format’ button and uncheck the ‘Backup Conguration File’.
Click the ‘Start’ button to begin initialisation.

www.smartwitness.com
20
‘Settings’ icon
This option allows you to adjust the settings on the recorder. Click the above
icon to bring up the following screen.
Resolution
Adjust the resolution on the recorder from VGA (640x480), 720P (1280x720),
HD (1440x1080) or 1080P HD (1920x1080).
Frame Rate
Adjust the frame rate from 30fps, 15fps, 10fps, 1fps.
Password
Enter 4 numbers from 1000 to 9999 as a password (This is for the SD Card).
10. SOFTWARE USER GUIDE
SETTINGS
Table of contents
Other Smart Witness Camcorder manuals

