SmarTerminal SmartCompact User manual

SmartCompact Quick start guide
Front View Scanner LED indicator
LCD Touch screen
Navigation key
Home key
Power LED
Power button
Esc Key
Tab Key
Alpha Key
Func Key
Alpha-Numeric keys
Enter Key
Wireless LAN LED

Rear View
Product label
IrDA port
Battery lock
Main Battery
Stylus
Internal speaker
CF card cover
Pistol key
Reset key
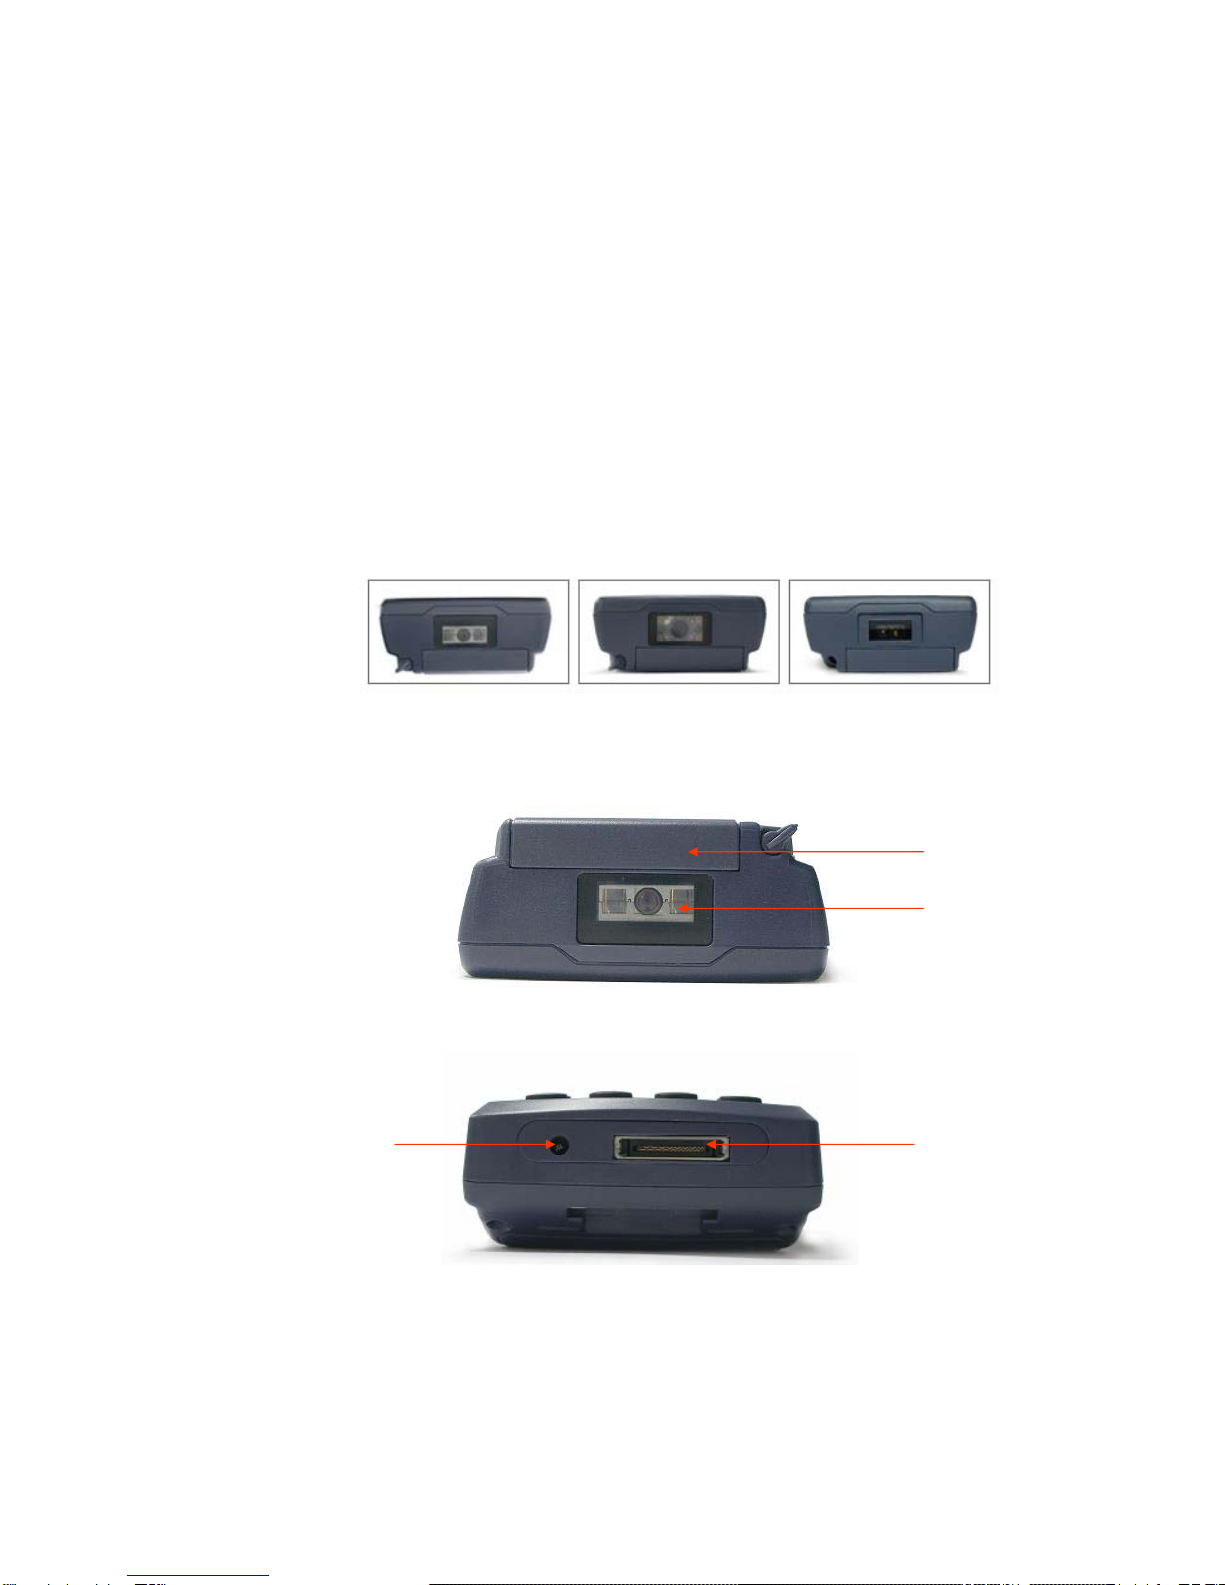
Various types
of Scanner
Symbol Laser 900
series module
Intermec 1D EV12,
15 CCD module HHP 2D CCD
Module
CF slot
Top view
Scanner window
Bottom view
DC input jack I/O port

Left view
Right view
Audio i/o port
Right scan key Left scan key
SD slot

Before getting started
1 Make sure you have everything
SmartCompact main unit
Stylus Pen
Standard battery pack (2000 mAH Li-ion)
Power adapter
Power cord
Synchronization cable (USB cable)
Backup battery 110mA Lithium-ion (Embedded)
Optional accessories
Docking station (Desktop and vehicle)
CF card cover
Protective carrying case
MSR printer and cradle
RFID reader (Under development)
Synchronization cable (Serial)
Bluetooth printer with power adapter
3000mAh Lithium-ion
2 Installing the battery pack
Detach and loose the hand strap, unlock the battery cover, insert the battery pack by inserting top first and then
press bottom firmly.
3 Using power adapter to charge PDA
Connect Dc jack present at the bottom of SmarCompact main unit to Ac power using power cord provided
4 Using backup battery on/off switch
To turn the switch on/off use stylus pen pointed top.
On position – Up
Off position – down
Configuring SmartCompact
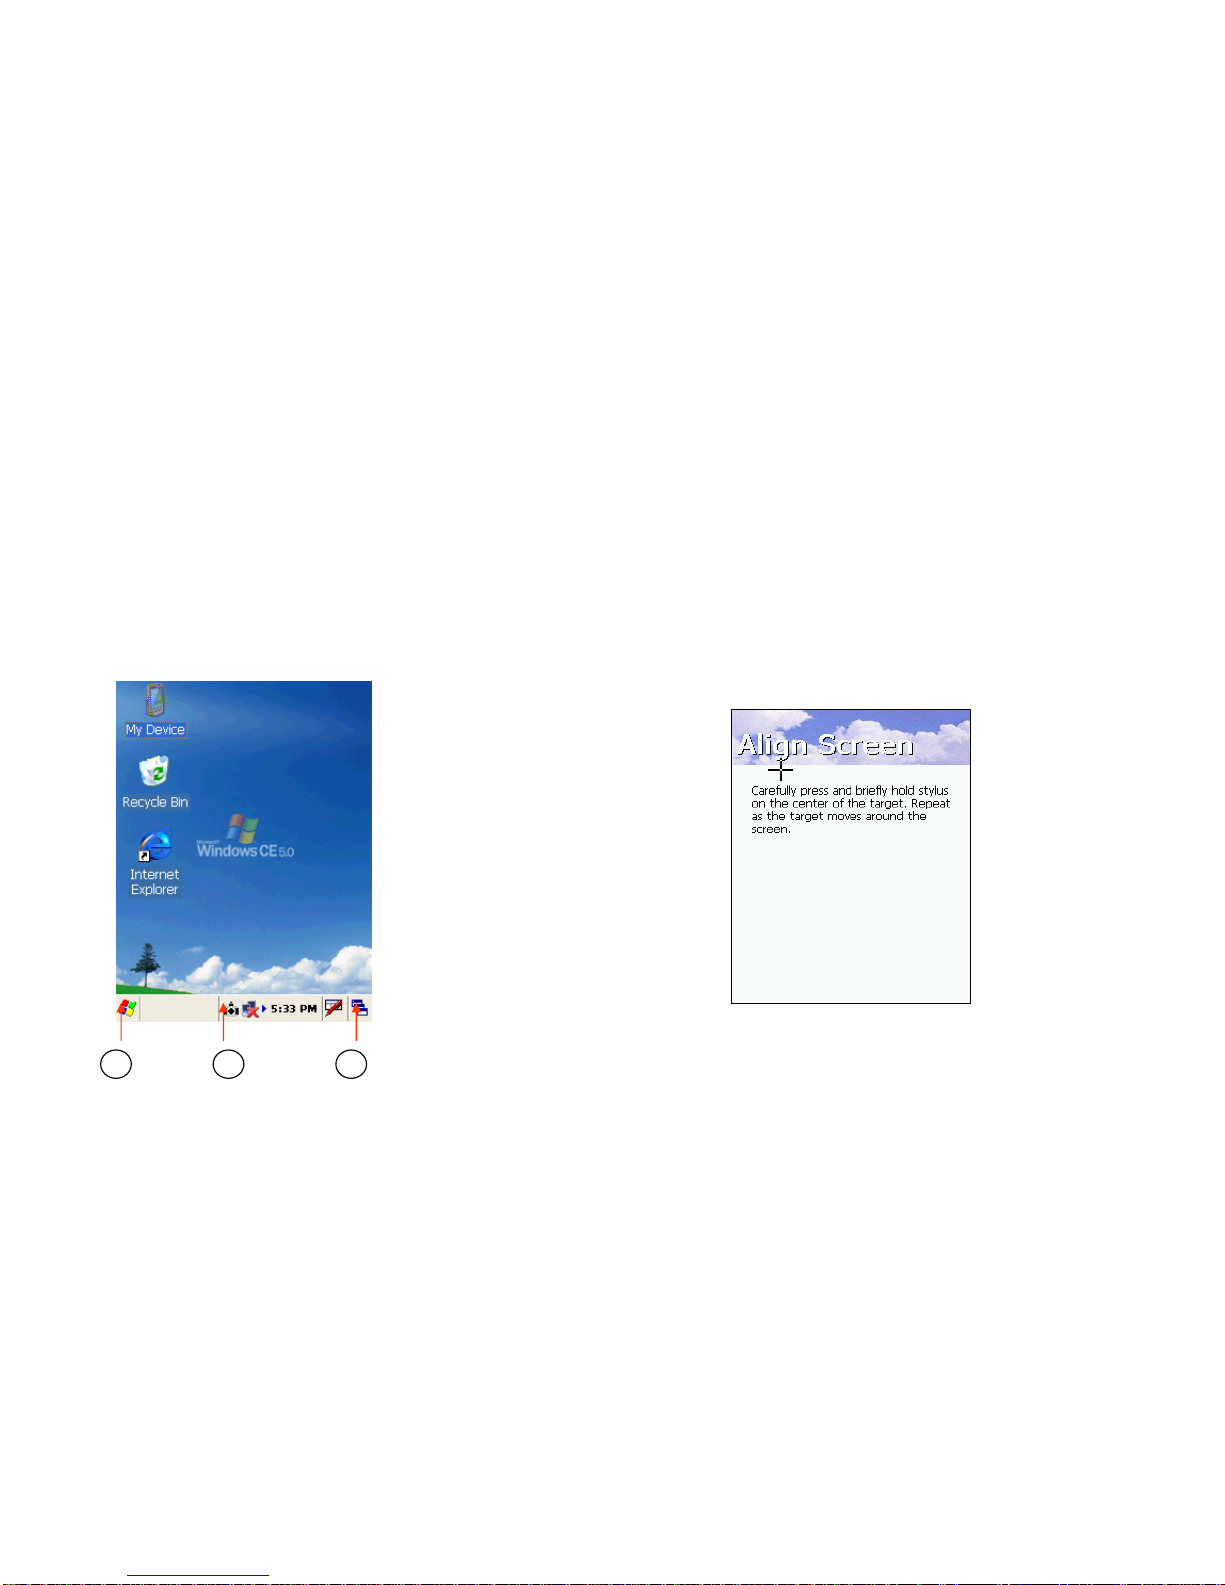
Calibrating touch screen
Main screen
1 2 3
Start > settings > control panel > stylus icon
Hit the calibrate button and touch the points shown
on the screen till it says calibration over.
1 Start button allows to open start menu
2 Task bar allows user to open and close the
programs or utilities
3 Task switch allows select and hide applications
without closing them

Setting SmartCompact
Date / Time settings
Brightness setting Volume adjusting
To adjust volume
Press “FN” key & navigation
key (< or >)
From control panel
Start > setting > control panel >
Volume & sounds > Volume
Adjust volume bar as per necessity
To adjust LCD brightness
Press “FN” key & navigation
key (up or down)
From control panel
Start > setting > control panel >
Display > Backlight
To set Date and Time
From control panel
Start > setting > control panel >
Date / Time
Set the time & date as per local time
Using applications
To execute the application
Tap an application icon on desktop or Start > Programs > Select the application
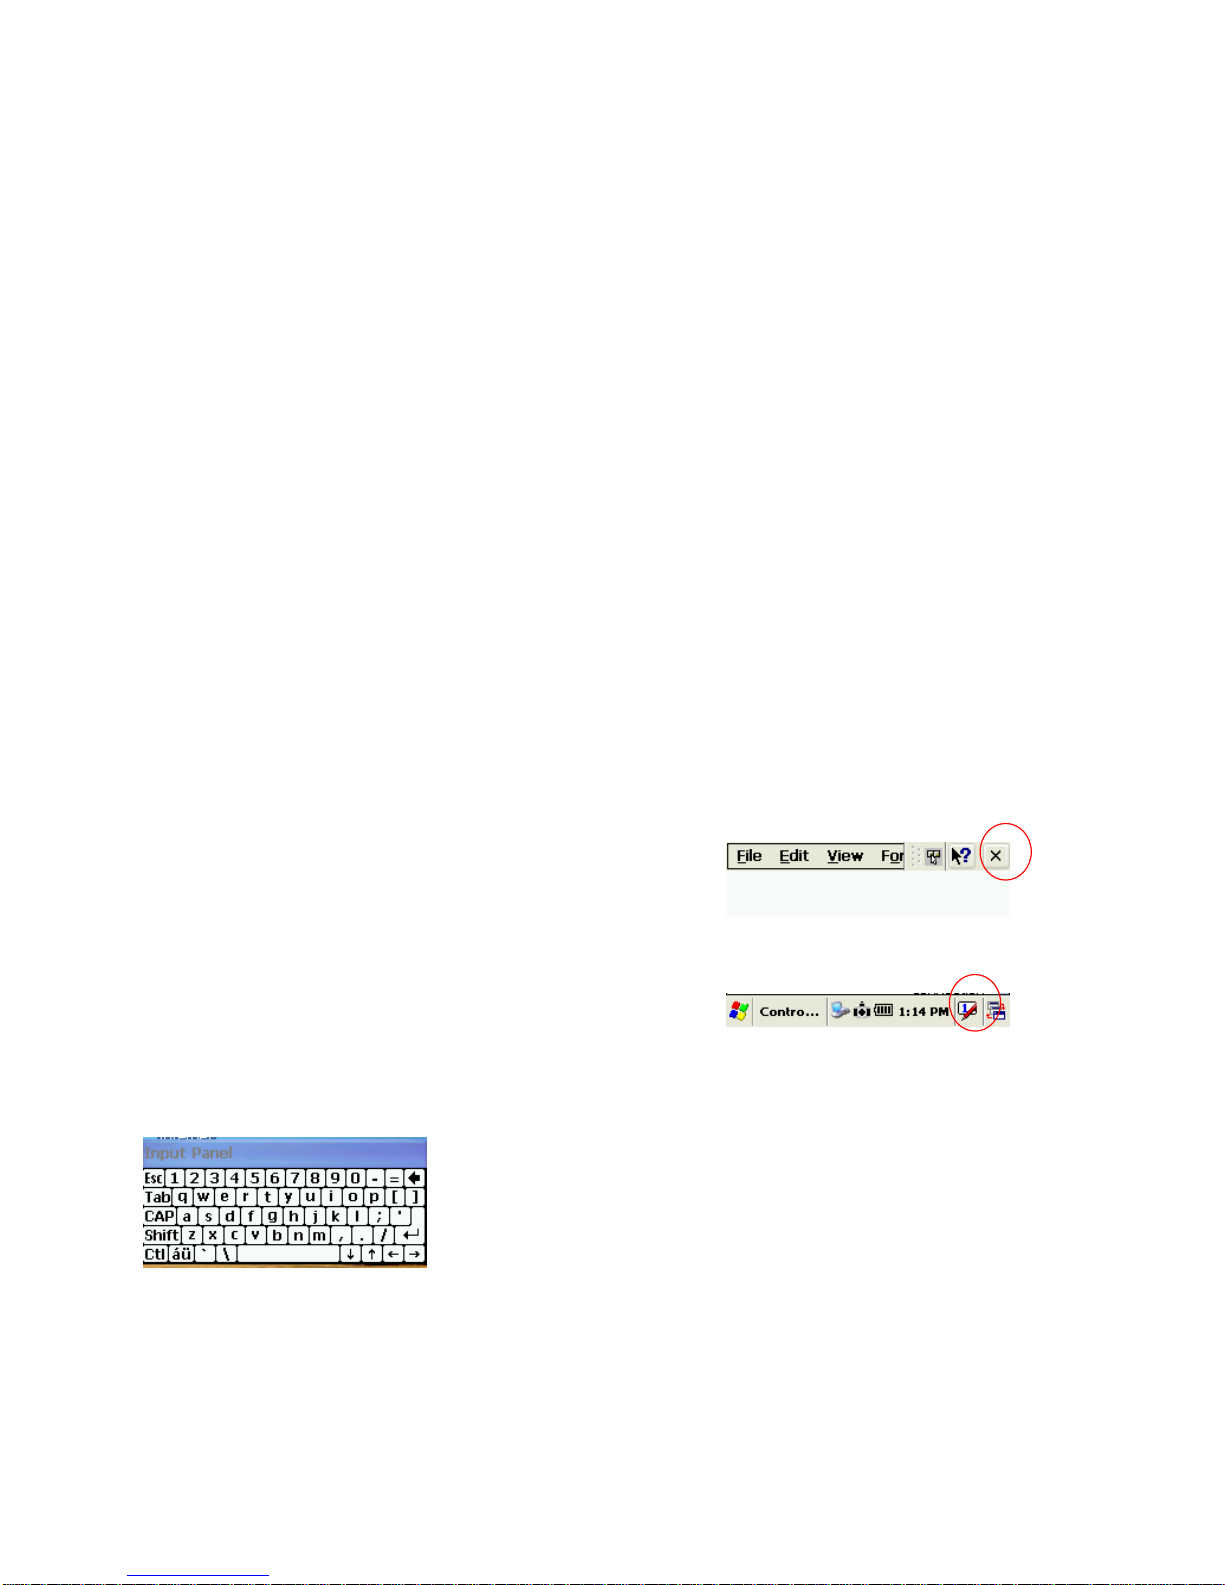
To close the application
Tap on “x” to close the particular application
To use Software input panel
Tap on stylus icon in task bar, the select keyboard
Software input panel will be displayed, input the characters with stylus
Barcode reading
1 To Configure Barcode setting
Start> settings > Control panel > Scanner configuration / barcode settings
2 Execute scanner software bundled with the device
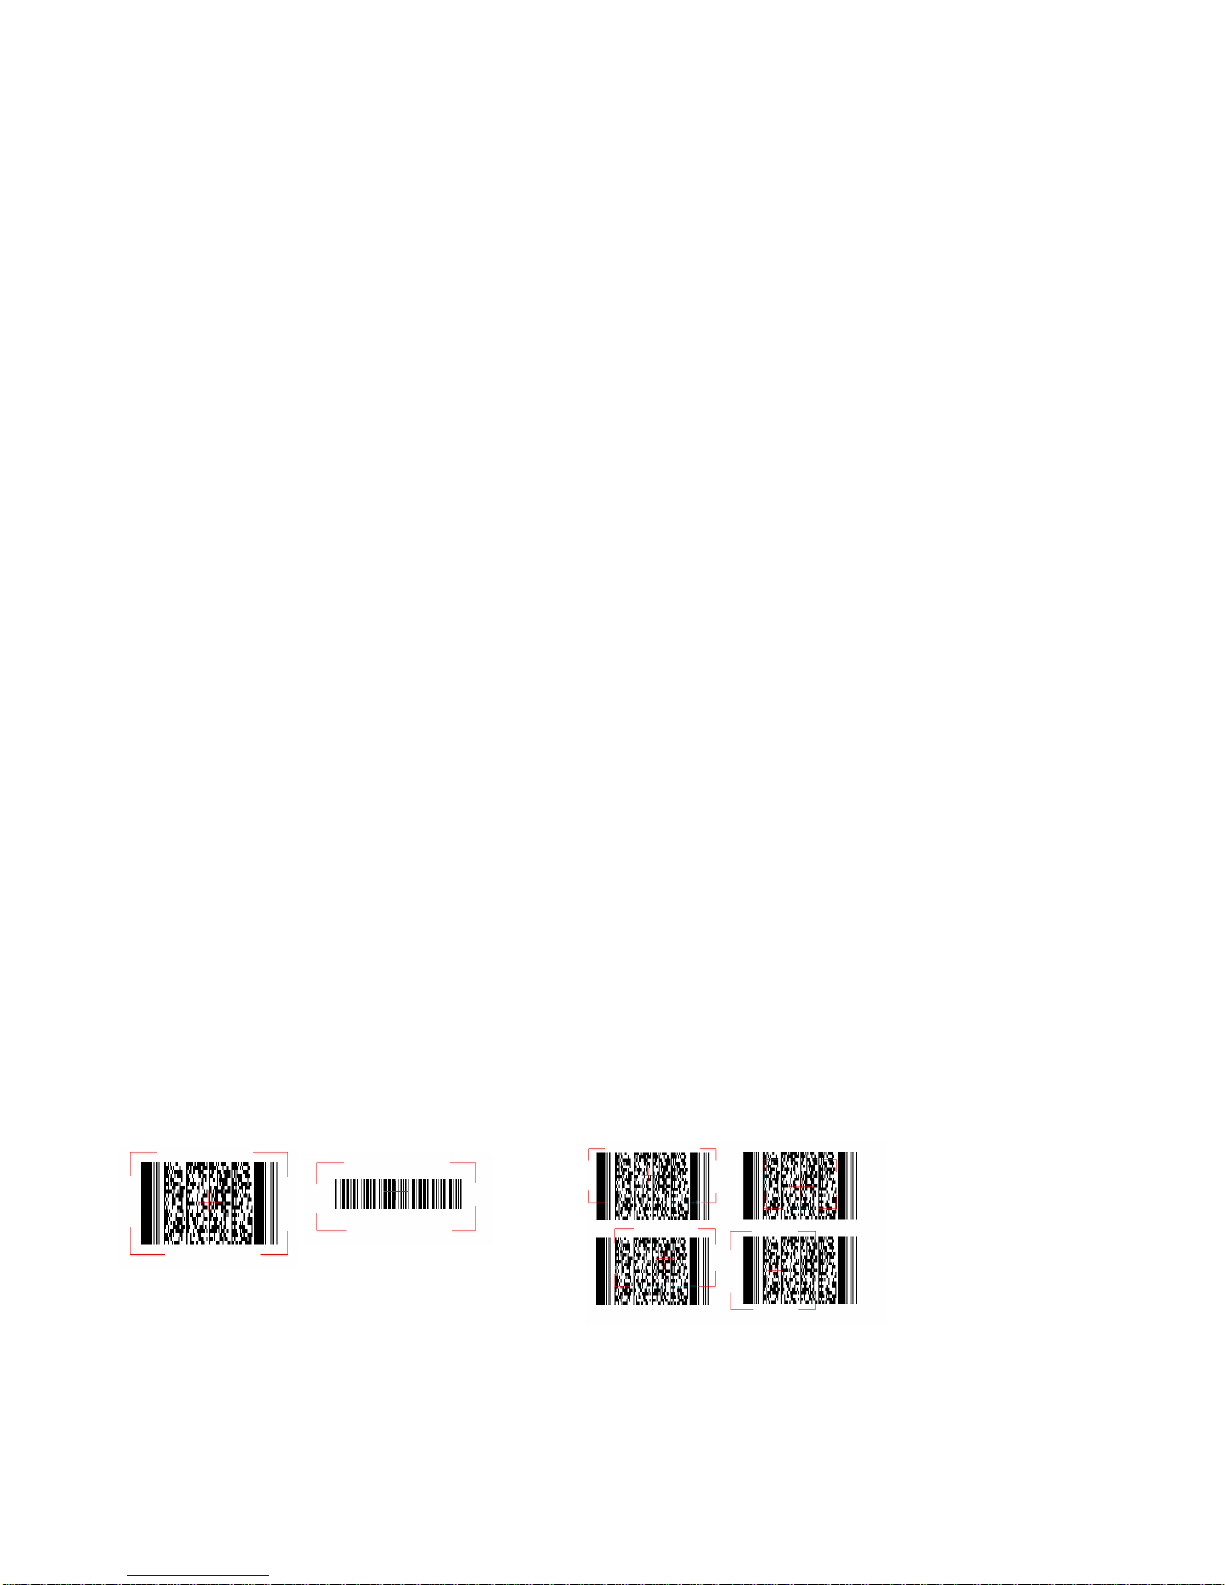
3 Aim scanner window at the barcode
4 Press Right / Left scan keys
5 Aim laser beam at the center of barcode
6 Check barcode reading result
Result can be verified by beep sound or LED indicator
7 Scanning positions
Correct Wrong

Using accessories
1 Using CF type peripherals
Remove the CF cover, insert CF card properly in the slot, close and fix the CF
(open or close cover).
2 Using SD card
Remove the SD cover, insert SD card properly in the slot
3 Serial connection
Use data sync cable to synchronize data with desktop.
4 IrDA communication
Used for data communication between two IrDA port devices.
The maximum transfer distance is 40cm.

Resetting PDA
1 Warm reset
If application hangs press warm reset to terminate the application.
Warm reset will close all applications and clear working RAM. Data which is not
saved will be lost.
For warm reset press reset button
2 Cold reset
Use cold reset if OS locks up and warm reset can’t work.
For cold reset press Function key and Software reset key simultaneously.
Device will boot up after cold reset.
Factory settings will be restored.

Scanner Settings
To start ScanDemo program
Start > Programs > Scanner > ScanDemo
Barcode icon will appear as shown in system tray
For Scanner settings, tap on icon, select setting
Basic
Trigger time out > Scanning time in seconds
Keyboard Emulation > If enabled transfer scanned data
as keyboard event
Copy / paste > copy paste scanned barcode in editor
window
Type writing > Show encrypted bar code, do not show
numeric code
Termination code > Add a automatic text after each bar
code , it can be set as None, CRLF, CR, LF, Space, Tab,
STX-ETX
Continuous Scan >To Scan continuously the bar code
with set time interval
Prefix > Add code before each bar code
Suffix > Add code after each bar code
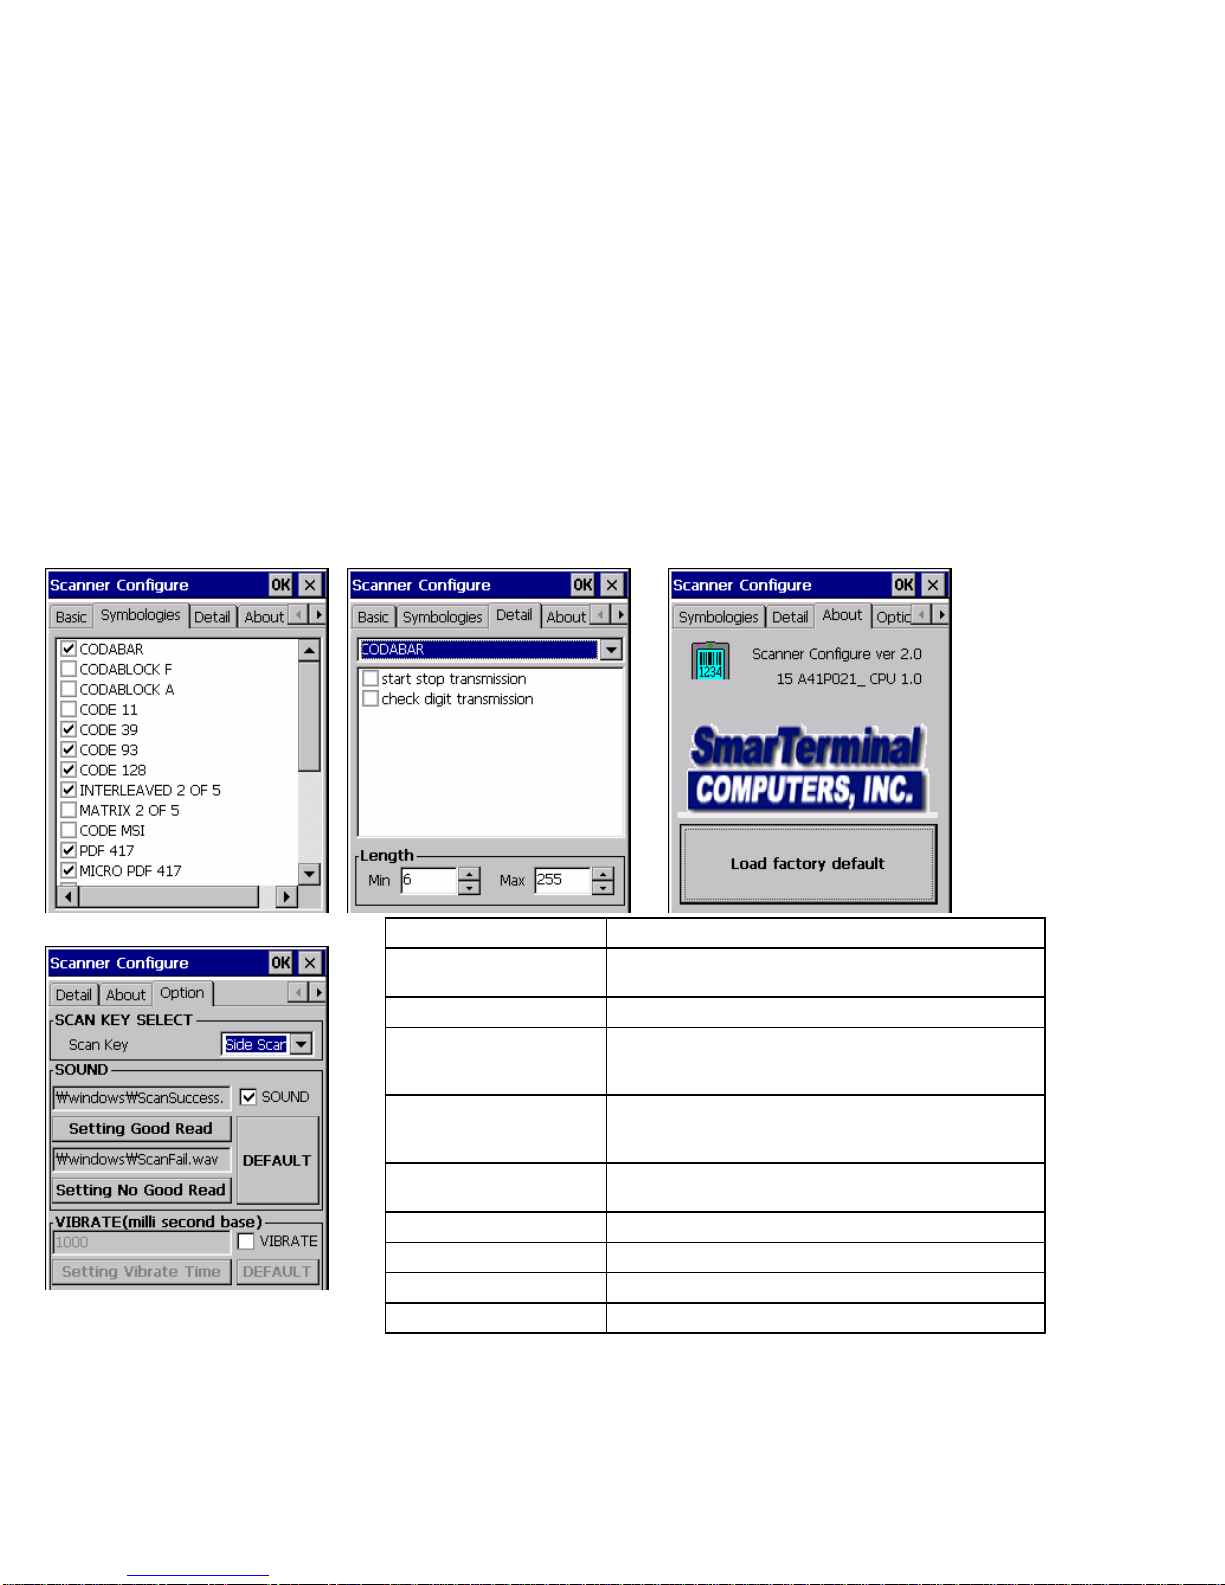
Here user can select the types and details
of Barcode to be scanned
Menu Option Function
Scan key To define a scan trigger key (side scan key , HOME key,
LEFT key, RIGHT key, UP key, DOWN key, ENTER key)
Sound To activate beep sound
Setting Good Read Tap on this button allows to select the (*.wav) sound file for
beep “On success of barcode scanning”
The selected file name will be displayed in the fill-in above
Setting No Good Read Tap on this button allows to select the (*.wav) sound file for
beep “On failure of barcode scanning”
The selected file name will be displayed in the fill-in above
Default Will restore back the default sound files for both operations
success and failure
Vibrate Select to use vibrate mode on scanning (success/failure)
Vibrate (mille second base) Time interval for vibration
Setting Vibrate time To save the assigned time interval and test it
Default To restore back the default vibration settings

Gun type RFID
Table of contents
Other SmarTerminal Barcode Reader manuals


