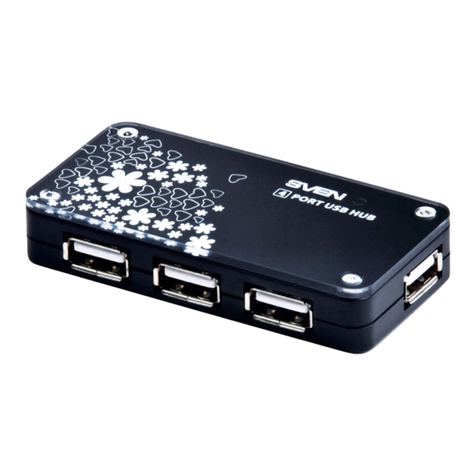
SmartLine USB-1524BC User manual

15-Port USB 2.0 Hi-Power Charging Hub
User’s Manual
USB-1524BC

1
Table of Contents
Introduction ..............................................................................................................................................2
Features .............................................................................................................................................2
Specification......................................................................................................................................2
Package Contents .............................................................................................................................3
Physical Diagram .....................................................................................................................................3
Rack Mounting..........................................................................................................................................4
Connection................................................................................................................................................5
Charging & Syncing:................................................................................................................................6
Daisy-chain (Cascade) connection.........................................................................................................8
Regulatory Compliance .........................................................................................................................10

2
Introduction
The Hi-Power Charging hub is a solution for quick charging or sync up to 15 iPads, iPhones iPods and USB charging devices
operating simultaneously; this is a perfect tool to effectively perform Sync/Charge Mode switching. Also is ideal for large capacity
USB station in-house that enables charging and syncing at a time. Places such as school’s classroom, businesses conference
or meeting in organizations.
Features
Compliant with USB Battery Charging Spec 1.2
Enables to provide up to 1.5A at Sync (CDP mode) or 2.4Aat Charge (DCP mode) output current on each port.
Supports the iOS,Android devices.
Enables Sync/Charge mode switching upon manually connecting or disconnecting host port.
If all devices are fully charged at Charge Mode, the unit would cut off the ports LED & power automatically.
Intelligently detects the power current of each port by the sensing meter with firmware, and enables the port’s LED to
illuminate its corresponding color. (Charging in progress: red; Disconnected or Fully charged: green)
Supports Over-Current Protection and ±15kV (air), ±8kV (contact) ESD protection on each port.
Supports 40A(5/50ns) & Peak Pulse Power 250 W (8/20 us) Surge and Transient spikes protection on each port.
Enables Green Energy function automatically shutdown when all the charging is finished at Charge mode.
For the High-temp protection, if the unit’s heat is over the setting, it would cut off all the output current immediately.At the
mean time, the whole LEDs of the 15 ports would be green blinking; and the rear fans start working.
The rear fans spec: SUNON Vapo DC Fan; Life Expectancy: 60,000 hours
Enables to start/cut off the fans automatically according to the temperatures setup. If the unit’s temperature is higher than
the setting, it would start the fans automatically. On the contrary, if the unit’s temperature is lower from the setting, it would
cut off the fans automatically as well.
Specification
Model No. USB-1524BC
SYNC Mode (CDP) DC5V 1.5A
Current per Port Charge Mode (DCP) DC5V 2.4A
Speed 480/12/1.5 Mbps
USB Specification USB 2.0/1.1/1.0 compliant
Upstream USB B Female
Downstream USBA Female x 15
Connector
Cascade USB A Female x 1; 3.5mm Link Jack x 2
Power Supply DC12V 20A (240W)
Green Energy Button Green Energy Button x 1
Charging in progress: Red Color x 15
Charge Mode Disconnected or Fully charged: Green Color x 15
LED
SYNC Mode Orange Color x 15
LCM Display LCM Panel and Back Light
SYNC/Charge Push Button SYNC/Charge Push Button x 1
Display On/Off Push Button Display On/Off Push Button x 1
Cooling Fan SUNON Vapo DC Fan x 2
Operating Temperature 0 ~ 40℃
Housing Metal
Dimension (L x W x H) 268 x 102 x 40 mm

3
Cautions
1. End user may extend another unit of USB 2.0 15-Port charging hub. (It allows connecting or charging maximum up to 30
USB devices simultaneously.)
2. The specific cable for iPad, tablet isn’t included in package accessory. Please check with your distributor regarding of
using appropriate cable.
3. If user connects with two units, the 2nd unit may not be detected by some computers which have built in USB 3.0 hub.
Package Contents
1. USB 2.0 Hi-Power Charging Hub
2. Power supply with power cord
3. USB 2.0 A/M to B/M cable
4. 3.5mm M/M Link Cable
5. Mounting brackets with screws
6. User manual
Physical Diagram
<Front View>
<Rear View>
1. USB Ports ( Hub ) - Allows connecting iPad, tablet or USB devices
Beware that this unit does not require a host computer connected to the hub for it to charge compatible devices.
This unit does not contain accessory set of cables for iPad, tablet. Please check with your distributor regarding of using
appropriate cable.
2. LED Indicators
Fully charged or devices disconnected: Green LED illuminates
The ports of charging in progress: Red LED illuminates
Syncing: Orange LED illuminates
3. Push Buttons
SYNC/Charge: to switch function to SYNC/Charge; manually select port number; to turn on the LCM back light.
Display On/Off: to turn on/off the LCM display; manually select port number; to turn on the LCM back light.
4. LCM display
To display the selected port, scanning time, charging status and output current.
USB port for extending 2n
d
unit
USB port for host (PC) Power jack Power switch
LED indicators USB ports (Hub) LCM display
Push buttons
3.5mm jack for link connecting 2n
d
unit Green Energy Button

4
5. Power switch
User may switch power to on / off.
6. Power jack
To use with power adaptor provided.
7. 3.5mm jack for link connection (non-audio function)
It is available to connect with another unit for managing power, sync/charge functions.
8. USB port for extending the 2nd unit
It is available to connect with another unit for extending purpose.
9. USB port for host (PC)
It is available to connect with host computer by USB cable.
10. Green Energy button
It is available to automatically shutdown upon fully charged.
Rack Mounting
To install, attach the mounting brackets to the unit’s side panels (one on each side) and secure them with the screws provided.
(1) Use the mounting brackets and screws onto rack.
(2) User may install on the applicable cabinet, rack environments such as a cage or trolley cart.
Screws (Accessory set)
Mounting Brackets (Accessory set)
Screws (Accessory set)
Mounting Brackets (Accessory set)
Screws
(
Accessor
y
set
)
Rack mounting holes
Screws (Accessory set)

5
Connection
(1) To turn off the power switch.
<Rear Panel>
(2) Plug the power adaptor to the unit’s power jack.
(3) Put the plug of power adaptor into the wall outlet.
<Rear Panel>
(4) Turn on the power switch.
<Rear Panel>
(5) Using the USBA/M to B/M cable provided and connects the USB B end on the unit.
(6) Using the USBA end and connects to your host computer.
(7) Connects host computer with the unit.
<Rear Panel>
Power Switch
Power switch
To the computer

6
(8) To use USB cable and connects with tablet or USB devices to the USB ports (Front Panel).
<Front Panel>
Charging & Syncing:
Please follow below ways for charging or syncing USB devices.
(1) Follows the step of connection with host computer, and connects host computer with the unit.
To secure check, the whole LEDs won’t be illuminated till the charging hub powered on in 5~6 seconds.
Set the hub working at Charge mode (non-connecting to PC) and the Green Energy button is turned on; the hub will
shutdown in 60 seconds if the hub idles without charging devices connected at the first power on.
(2) Connect your USB devices to the USB ports on the hub.
Sync mode –
A. As soon as the Charging hub connects to a computer, turn the power on; the charging hub may charge and sync at a
time either at single unit or cascade connecting. In this situation, the hub is designed to keep operating when all
devices are fully charged.
B. Press for 3 seconds; you may alternatively switch function to Charge or Sync mode.
a. Sync function: the port LEDs illuminate orange; and the hub works at Sync mode.
b. Charge function: the port LEDs illuminate green means the devices are fully charged or disconnected; the port LEDs
illuminate red means the devices are charged in progress. When the devices are fully charged it will switch function
to Sync mode automatically.
Note: If you switch function to Charge mode for the 1st hub, the 2nd hub will switch to Charge mode and work on same function.
When the devices are fully charged, the both 2 hubs will switch function to Sync mode individually.
Charge mode –
When the hub disconnects to the computer it is working at Charge mode; and it may charge devices by high power
either at single unit or cascade connecting.
(3) The Green Energy function
The Green Energy function (push button at the rear panel) may cut off the power after all the charging is finished when the
hub is working at Charge mode (non-connecting to PC). It is not working while the hub is at Sync mode or charge function of
Sync mode. (Default setting of Green energy button is on)
Green energy ON: Button’s green LED illuminating.
a. The hub will shutdown in 60 seconds if the hub idles without charging devices connected at the first power on. And
the button’s green LED lights off.
b. When all devices are fully charged, the hub will shutdown in 10 seconds automatically. And the button’s green LED
lights off.
Green energy OFF: Button’s green LED lights off. When all devices are fully charged, the hub still keeps operating; and
the port LEDs keep green illuminating. Once it senses the device’s battery consumed, the hub starts recharging.
(4) Re-start the hub on cascade connections
Manually turns the power switch On for the 1st hub, the both 2 hubs will switch to Charge mode and work on same
function.
Once the 1st hub is connected to the computer again, the both 2 hubs will re-start and switch to Sync mode, and work on
same function.
(5) The Smart Link function
It is a must that both the 3.5mm M/M Link Cable and the USB cable are connected between the 2 hubs. And the power
switch of the 2nd hub must be turned at ‘ON’. The 1st hub can manage the 2nd hub to work on same function simultaneously
thru the Smart Link function.
To power on/off the both 2 hubs
To switch function to Sync/Charge mode
Using the appropriate USB cable
iPad, tablet or USB devices

7
(6) LCM display
Symbol Description
Port No. selected
Time to Auto Scan
The charging status
Output current of port selected
While the hub works at Sync mode; the LCM display will power down in 60 seconds if no charging devices connected.
Once the charging devices connected, it will turn on the digital panel of the LCM display automatically.
While the hub works at Sync mode; once the charging devices are fully charged the LCM display will shutdown
accordingly. When the devices are re-connected for charging, it will turn on the digital panel of the LCM display
automatically.
While the hub works at Charge mode; the hub & LCM display will shutdown in 60 seconds if the hub idles without
charging devices connected or the devices are fully charged.
While the hub works either at Sync mode or Charge mode, and the charging devices are connected; the LCM back light
will turn off in 5 minutes if no further operations performed. You may push or once to turn on the LCM back light.
And then the LCM back light will turn off again in 5 minutes for the idle hub.
(7) Push buttons
Push or once; it will scan one port from port 1~15 forward/backward, and so on. It is to select port 1~15 for
monitoring the charging status of the selected port. The manual monitoring will be paused in 30 seconds and turn to
Auto Scan.
If press for 3 seconds; you may alternatively switch function to Charge mode or Sync mode.
If press for 3 seconds, it will turn on/off the LCM display.
Push or is to turn on the LCM back light.
(8) Auto Scan/Manual Monitoring
Default setting: scans one port at every 30 seconds. The ports disconnected or fully charged will be passed by.
Note:
The Charging hub can be used with iTunes & Apple Configurator for synchronization and management of iPads and other iOS
devices. For this and any other application (on Windows, Linux, etc.) the charging hub acts as a USB hub. While these
instructions are specific to iPads, virtually the same steps can be used for iPhones and iPod Touch devices.
Please note that the charging hub only serves as a pathway for communication between your devices and the
computer. Actual management and synchronization is handled by software or apps independent of this charging hub.
[ For host computer configuring iTunes ]
Please create a library folder on host computer for synchronizing and transfers data to iPad.
Recommends automatic updates in your iTunes preferences (to avoid interference with automatic syncing). Please
check for updates manually to keep your software up to date.
[ For iPad, tablet configuring ]
Ensure each iPad, tablet has been charged completely at first if the objective iPad, tablet is new goods.
Please use the unit to synchronize iPad, tablet one after another, and configure at same way. (Login name, ID, the data
you want to synchronize etc.)
The user may adjust the brightness of screen when you are using the unit to synchronize iPad.
When the user may be requested by iTunes to configure manually, you will have to copy the configuration manually for
each iPad.
[ For host computer connection & sync ]
Connect iPad, tablet to the USB ports of front panel if each iPad, tablet is configured completely.
This unit does not contain accessory set of cables for iPad, tablet. It is especially important to use appropriate cables
(USB-A to device-specific connector) provided by the device manufacturer.
Get started synchronizing automatically once you connect the unit.
It may take a little while for this unit to recognize and sync. Please do not stop by the way once the unit starts
synchronizing.

8
[ For iOS update ]
User may not perform the iPad update when iPad is connected. You must update iOS on iPad one after another.
Daisy-chain (Cascade) connection
The 15-Port charging hub can extend another unit for Daisychain (Cascade) connection, the 2nd unit can sync simultaneously as
well. Maximum 2 units can be connected. (It allows connecting or charging maximum up to 30 USB devices
simultaneously.)
If user connects with two units, the 2nd unit may not be detected by some computers which have built in USB 3.0 hub.
(1) Follows the step of connection with host computer, and connects host computer with the 1st unit.
<Rear Panel>
(2) Turn off the power switch of the 2nd unit.
<Rear panel>
(3) Plug the power adaptor to the power jack of the 2nd unit.
(4) Put the plug of power adaptor into the wall outlet.
<Rear Panel>
1s
t
Unit
Power switch
2n
d
Unit
2n
d
Unit
To the computer

9
(5) Turn on the power switch of the 2nd unit.
<Rear Panel>
(6) Use the USB cable provided and connects both USB ports of the 1st and 2nd units.
(7) Use the audio cable provided and connects the jack To next level of the 1st unit and the jack From pre-level of the 2nd unit.
Additional info:
The 15-Port unit may start/cut off the fans automatically when the unit temperature goes higher/lower limits. (Not recommend
putting the unit at places of high temperature such as computer facilities, boiler/steam room, glass workshop, casting work, kiln
plants etc.)
For the High-temp protection, if the unit’s heat is over the setting, it would cut off all of the output current immediately. At the
mean time, the whole LEDs of the 15 ports would be green blinking; and the rear fans start working.
If you still cannot diagnose the problem, please call your distributor for technical support.
Power switch

10
Regulatory Compliance
Disclaimer
Information in this document is subject to change without notice. The manufacturer does not make any representations or
warranties (implied or otherwise) regarding the accuracy and completeness of this document and shall in no event be liable for
any loss of profit or any other commercial damage, including but not limited to special, incidental, consequential, or other
damages.
No part of this document may be reproduced or transmitted in any form by any means, electronic or mechanical, including
photocopying, recording or information recording and retrieval systems without the express written permission of the
manufacturer.
All brand names and product names used in this document are trademarks, or registered trademarks of their respective holders.
Table of contents
