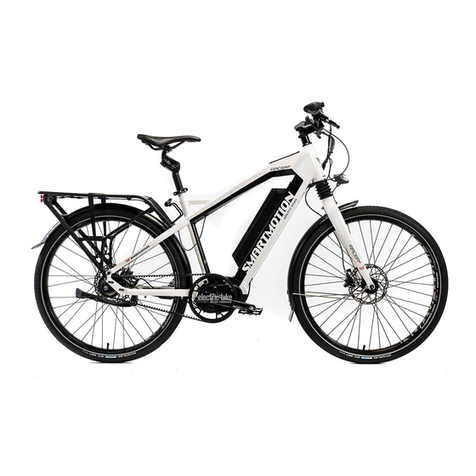
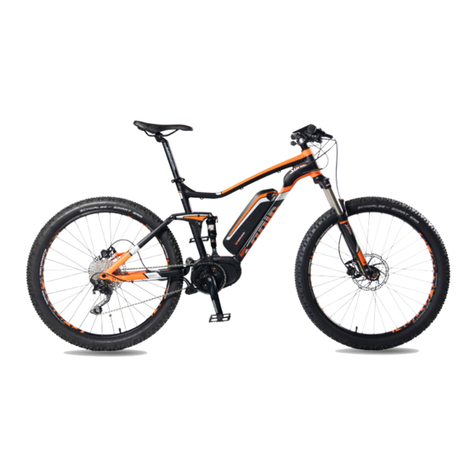
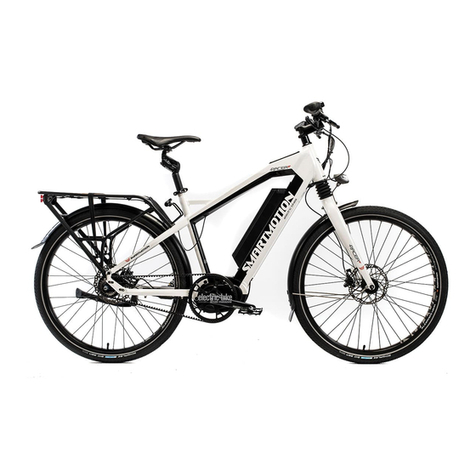
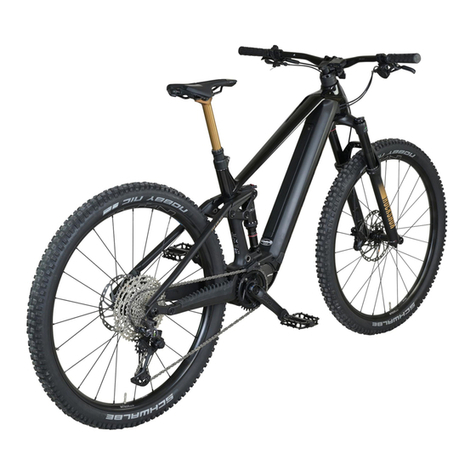
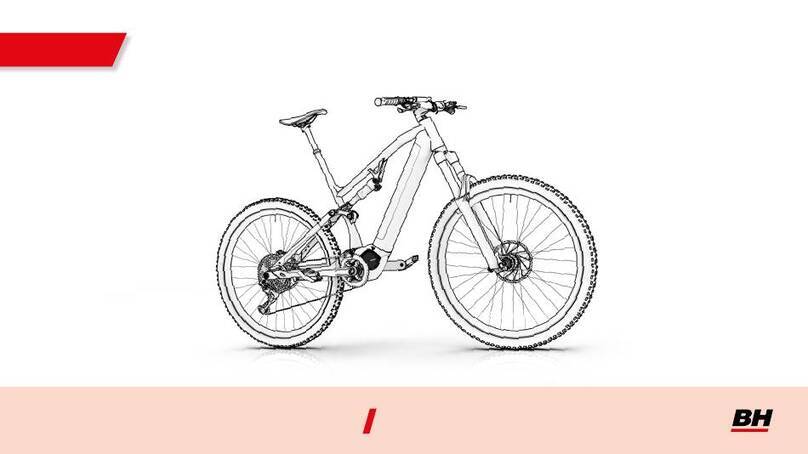
smartmotion HyperSonic User manual

User Manual
Sonic user manual.indd 1 9/4/2017 3:50:41 PM
With LFC
(Light/fender/carrier)

Contents
1. Service Record
2. Assembly instructions
3. Safe Riding Recommendations
4. Maintenance & Adjustment
5. Main Specifications
6. Do’s and Don’ts
7. Display Panel
8. Display Panel Controls
9. Battery instructions
10.Warranty
User Manual
1. Smartmotion electric bicycle
2. Battery charger
3. 2X Pedals
4. 2X keys for battery lock
5. Front wheel barrel shaft
Congratulations for purchasing a Smartmotion electric
bicycle!
Please read this guide fully BEFORE using your electric
bike.
In the Hypersonic box you will find the following items:
Sonic user manual.indd 2 9/4/2017 3:50:43 PM
6. Frontlight*
*Forthebikewith LFC.
7. Frontmudguard*

1. Service Record
Check for damage
Adjust and Tension
Lubricate
Frame & Fork
Rims
Cables & connections
Spokes
Gears
Seat
Reflectors
Handlebars, Stem, Grips
Brakes
Cranks & Motor Axle
Wheel Axles
All Fasteners
Chain
Derailleur
Seatpost
Model:
Serial Numbers: Dealer:
Purchase Date:
6 Weeks/200km
Date:
Shop:
Mechanic:
6 Months
Date:
Shop:
Mechanic:
12 Months
Date:
Shop:
Mechanic:
24 Months
Date:
Shop:
Mechanic:
Sonic user manual.indd 3 9/4/2017 3:50:43 PM

Sonic user manual.indd 2 9/4/2017 3:50:43 PM
1. Unpack
Do not activate the brakes until the bike is
fully assembled. Squeezing brake levers
while calipers have no disc rotor between
them can damage the brakes.
2. Assembly Instructions
Sonic user manual.indd 4 9/4/2017 3:50:45 PM
To Prepare
It is highly recommended that a trained and qualied
bicycle mechanic assembles your bike. Your bike is 85%
We recommend that you familiarise yourself
with the bike parts before assembling. Gather all
required tools. Be sure to work in a clean, dry space
with plenty of room.You might wish to lay down a
tarpaulin or old blanket to protect the bike during
frame on a block or sturdy box under the battery
housing to work with it in an upright position.
Please watch the balance when installing wheels.
assembly. You may nd it helpful to stand the bike
assembled in its carton, and the following steps must
be taken to ensure it is ready and safe to ride
Break the seal and lift the two aps on the top of
the box. Remove the recyclable protective materials
rst, then carefully lift the Hypersonic upwards from
the carton (this is best done by two people). Carefully
proceed to remove all of the protective materials,
and rest the bike on its fork. We recommend that the
Hypersonic is inspected for shipping damage or
defects before further setup progress is made.
Please pay attention to the hub side caps when
removing the front wheel protectors, which may be
left on the front wheel protectors.

2. Assembly Instructions
Sonic user manual.indd 5 9/4/2017 3:50:48 PM
Prepare and inspect the thru-axle supplied with
your Hypersonic. Ask a friend to carefully lift the
bike up by the handlebars and lower the forks
onto the front wheel, making sure to guide the
brake rotor into the calliper. Once the wheel is
in place, put the axle nuts in the left side of fork
insert the thru-axle from the right side. Use 8mm
allen key to tight the axle, the correct torque
should be 10-12 N·m
2. Front wheel
Note: if you are not well trained in cycle assembly,
this procedure must be checked by a cycle technician.
3. Mudguard *
nstall the front mudguard and front light on the
front mudguard hanger mount on the inside of
the fork then put the front light bracket on. Put
the bolt through the fork then fasten the bolt with
a 5mm allen key.
I
*For the bike with LFC

2. Assembly Instructions
Sonic user manual.indd 6 9/4/2017 3:50:52 PM
4. Handlebar and Stem
Thestem connects the handlebar to thefork and
frontwheel, and it is very importantthat these
boltsare tightened correctly. Loosen the topscrew
andtwo clamp bolts on the rearside of the stem,
andensure that the handlebar is perpendicularto
thefront wheel. Hand-tighten the top screwto 12Nm
securethe position, then fasten the twoclamp
boltsto 8Nm. Finally, loosen the fourclamp bolts
atthe front of the stem, adjustthe handlebar
positionas required, and tighten the fourbolts to
5– 8Nm.
5. Front light*
Loosenthe front screw of the stemwith 2pcs 4mm alley key,
installthe front light bracket into thestem, and fasten the
screwsto 6Nm. Finally connect the light cable.
*For the bike with LFC

2. Assembly Instructions
Sonic user manual.indd 7 9/4/2017 3:50:56 PM
7. Pedals
Attach the pedals to the cranks, paying attention to
the markings on the axle.The pedal marks inside
showing side, L means left and R means Right.
Note: the pedals have opposing threads –
screw in the left pedal counterclockwise and
screw in the right pedal clockwise. Instal L pedal
counterclockwise and the right pedal clockwise.
6. Seat
Release the seat post clamp lever and set the
seat post height to the position which is suitable
for you to comfortably reach the ground when
you are sitting on the bike, then refasten the
seat post clamp.The maximum height should be
within the max height markings on the seatpost.

.
3. Safe Riding Recommendations
Sonic user manual.indd 8 9/4/2017 3:50:56 PM
bicycle to anyone who is unfamiliar with it. The bicycle can
legally only be used on the road by a person aged 14 years or
over.
2. If you are in a country where wearing a cycle helmet is not
compulsory, we still strongly advise you to always wear one.
If you are unfamiliar with cycling, we also advise you to attend
your local SmartMotion dealer.Your e-bike is not a toy and
should be considered a serious mode of transport.
3. As with all bicycles it is important that you stay within safe
limits. If you feel you are traveling too quickly for the road
conditions you probably are, so slow down! High speed will
increase forces in the case of an accident and increase the
possibility of injury.
4.Test your brakes prior to using the bike every time you use
it and remember the bike will not stop as quickly in wet or icy
conditions as it would on a dry road.
5. Check the tyres, rims, pedals, stem, cables, chain, etc for
general condition regularly.
at dusk, at night, or at other times of poor visibility. If you must
ride under these conditions, check and be sure you comply
with all local laws about night riding; follow the rules of the
road.Take the following additional precautions: make sure that
your bicycle is equipped with correctly positioned and securely
moves will help you get the attention of approaching motorists,
anything else you are carrying on your bicycle doesn’t obstruct
do so.
heeding the seat manufacturer’s safety instructions and that
the combined weight of the seat and child do not exceed the
8.You must not leave the bike unattended or use the kickstand
to stand the bike without your support when a child is in the
rear seat as the bike could tip over and cause serious injury.
9. Make sure the rear suspension underside of your seat is out
10. Your bicycle must be returned to your servicing dealer
or bicycle/motorcycle mechanic after six weeks or 200km
of riding (which ever comes rst) to re-tension the spokes.
Then every six months or 1000km (which ever comes rst)
for a general service and thorough inspection. Failure to do
this can void your warranty due to unnecessary wear.
7. If a rear child seat is tted, ensure that the seat is installed
load capacity of the Smartmotion bike’s rear rack, and that the
child is no heavier than the listed maximum carrying capacity
of the child seat product. Before use, ensure that the child is
securely fastened.

3. Safe Riding Recommendations
Sonic user manual.indd 9 9/4/2017 3:50:56 PM
Pre-ride Checklist
Please make sure the brake lever sequence is
correct for your country before riding. In UK, NZ
and Australia the left brake lever is for rear brake
and the right brake is for the front brake. In all
other countries it is the other way: left for front,
right for rear.
Check the tyres for any visible damage.
Check tyre pressures are 40-60psi(275-410KPA),
and adjust ifnecessary.
Check brake functions, cable tension, pad
clearance, etc.
Check all electronic functions are ok (functions
detailed later in this manual).
working (detailed later in manual).
Torque Settings
Check bolts are tightened according to the following
a. Brake Disc bolts 6-8N.M
b. Seat angle clamp bolt/s Refer to markings
c. Crank bolts 45N.M
d. Gear shifter bolts 4N.M
e. Rear carrier bolts 8N.M
f. Mudguard bracket nuts/bolts 8N.M
g. Quick release axles. Measured torque not typically
used. Common industry practice is resistance at
lever half way through swing from open to fully
closed.
For all other nuts/bolts, the torque depends on the
thread diameter: M4 2.5-4.0N.M
M5 4.0-8.0N.M
M6 6.0-9.0N.M
Rear wheel axle 10-12N.M

4. Maintenance & Adjustment
Sonic user manual.indd 10 9/4/2017 3:50:56 PM
For basic adjustment, tools Required
• Allen/Hex Key Set: 8mm, 6mm, 5mm, 4mm, 3mm,
2.5mm
• Philips Screw driver
Shock pump
1. Gear Adjustment
Adjust the cable tension Adjustment Bolt to align
guide pulley with the centre of the cogs (setting this
in gear 5 or 6 is easiest). Low adjustment: In 1st gear
check and if necessary, turn the L adjustment screw
so that the guide pulley moves to a position directly
in line with the largest (1st gear) sprocket. High
adjustment: turn the crank arm while gear shifting
the derailleur to move the derailleur to the top gear
position, and then check and if necessary, turn the H
adjustment screw to adjust so that the guide pulley
H adjustment screw
L adjustment screw
Adjustment Bolt
is in line with the outer line of the smallest sprocket
when looking from the rear.Turn the crank arm to
set the derailleur to the low position.
2. Bike setup
It is important to set up your bicycle up for both
safety and comfort, failure to do say may result in
fatigue or injury.
Set the seat height:
• Sit on the saddle
• crank in the lowest position)
• Adjust the seat height so your leg is fully straight.
• Once height is set, move your foot so the pedal
is under the ball of your foot, check that your leg
has a slight bend at the knee.
Important! Do not extend the seatpost past the
Minimum insertion mark. Doing so may result in
frame/post failure. Serious injury may be caused.
If in doubt contact your local Samartmotion retailer
for advice.
Tyre pressure:
Check tyre pressure before every ride. Ensure
pressure is kept between the limits found printed on
the side wall of the tyre.
•

4. Maintenance & Adjustment
Sonic user manual.indd 11 9/4/2017 3:50:56 PM
3. Lubrication
Once a month lubricate all pivot points on your
derailleur and the derailleur pulleys with suitable
chain lube.
Every three months lubricate the brake lever pivots,
gears and chain with suitable oil.
4. Brakes
power. Like a car, it is important to regularly
(recommended yearly or if brakes feel soft and
spongy) bleed brakes to remove air bubbles from
the system.
For adjustment and bleeding of hydraulic disc
brakes, see brake manufacturers instructions.
Brakes should be rm and privide good stopping
5. Fork & Rear Shock Adjustment
Your Hypersonic is equipped with a rear shock and
fork which works by both air and coil resistance. For
proper setup, you must use a shock pump (not
included) to tune the fork and rear shock to the
correct pressures and settings for your prole and
riding requirements. This is best done by your
Smartmotion dealer.
5.1 Fork
To adjust the fork pressure, remove the air valve
cap found on the left side of the fork crown.
Connect the shock pump and inate to desired
pressure. The correct pressure can be found by
applying your bodyweight to the handlebars
(without bouncing) so that the fork sags. The
O-ring marker displays the maximum sag, so
adjust the fork pressure until the O-ring sags
around 40mm (30%). You can adjust the
compression by turning the black lever on the
right side of the crown, and the rebound by
turning the red knob underneath the fork.
5.2 Rear Shock
To adjust the shock pressure, connect the shock
pump to the shock and inate to the desired
pressure. The correct pressure can be found by
sitting on the saddle, where the shock should
sag 30% as indicated by the O-ring marker.
Adjust the shock pressure until approx. 30% sag
is indicated. Adjust the compression by turning
the blue lever, and the rebound by turning the
red knob.

4. Maintanance & Adjustment
Sonic user manual.indd 12 9/4/2017 3:50:56 PM
6. Cleaning your electric bike
Warmsoapywaterandaclothcanbeusedtoclean
theframeofyourbike,butcaremustbetakennot
toimmerseanyoftheelectricalcomponents;they
arerainproofbutcannotbeimmersedinwater.The
motorcanbecleanedwithasoapycloth,butalso
mustnotbeimmersedinwater.Thebatteryshould
becleanedseparatelywithadampcloth,thendried
afterwards.Note:insaltyconditionsitisessentialto
cleanandlubeyourbikeregularly.Donotcleanyour
electricbikewithhigh-pressurewaterfromahoseor
power-washer.
7. Other Maintenance
Your bicycle must be returned to your servicing
dealer or bicycle/motorcycle mechanic after six
to re-tension the spokes.Then every six months
service and thorough inspection. Failure to do this
can void your warranty due to unnecessary wear
and tear.
Excluding the electronic components, your
The electric drive system is maintenance free and
has self-diagnostic codes that will be displayed on
the LCD console (detailed later in this user guide)
should anything go wrong. Again, speak to your
dealer should any issues arise.
Smartmotion e-bike uses regular bicycle components
which are subject to proper care and maintenance
requirements. Lubrication, adjustments and
replacement consumables such as brake pads are
available from authorized Smartmotion dealers,
where a full consultation should be available.
Donotinatetheforkorshockbeyondthemaximum
indicatedpressuresandensurethatenoughpressure
isintheforkandshockbeforeeveryride.Itis
recommendedthatyouservicetheforkandrearshock
periodicallytoensurealongproductlife. weeks or 200km of riding(which ever comes rst)
or 1000km(which ever comesrst)for ageneral
5.3 Pressure Adjustment
Fork: minimum70psi/maximum200psi
Shock:minimum120psi/maximum200psi

5. Main Specifications
HyperSonic
FRAME
FORK
SHOCK
HEAD SET
HANDLE BAR
STEM
SEAT
SEAT POST
BRAKE
CHAINWHEEL
CHAIN
CASSETTE
FRONT HUB
SPOKES
RIM
TYRE
DEREAILLEUR
MOTOR
OPERATION
DISPLAY
BATTERY
27.5” soft tail aluminium frame, 16”/18”/20” size options
Smartmotion 140mm travel air suspension fork with rebound and air lockout adjustment.
Exaform 588RL 190x50mm air shock,50MM travel with rebound and lockout.
Integrated bearing tapered.
Alloy MTB Handle bar 780*22.2*31.8,6 degree.
Front load 28.6x50x31.8mm,H=45MM.
Smartmotion VACUUM SADDLE.
31.6x350mm alloy.
Hydraulic Brake with rotors.
18T narrow wide alloy, 170mm crank.
X11 Sport NP/NP 11/128"*116.
LTWOO 11-50T 11-speed cassette.
Alloy double sealed bearing @15*13G*36H*110W
SDL SUS304 Black Stainless 13G.
MT MTSC35D Black aluminium 27.5*13G*36H.
Schwable Nobby Nic 27.5x2.6” MTB tyre.
ltwoo RD-A11-X CS50T 11-speed derailler and shifter.
MOTINOVA Volans Plus mid-drive 250w with CANBus.
Torque sensor with two Smart mode,throttle for option.
Multifunction full color LCD system including cadence rpm, speed, avg speed, max speed,
trip, battery level,Tempreture of motor and battery.
36V 16Ah/575Wh Frame-integrated with CANBus.
Sonic user manual.indd 13 9/4/2017 3:50:56 PM
REAR HUB Alloy four sealed bearing @12*13G*36H*148W
LIGHT * Integrated front and rear light powered from the main battery.
*Forthebike with LFC.

6. Do’s and Don’ts
-
Sonic user manual.indd 14 9/4/2017 3:50:57 PM
Do
to last well… keep it stored somewhere secure and
away from the weather elements.
Don’t treat your ebike as a dirt-bike!The motor and
battery are weather proof, but not water-tight. It is
ok in rain, but not to ford streams, etc!
Never take your ebike on the beach as salt water
and sand will drastically shorten the lifespan of
many of the ebike’s components (motor, gears,
wiring connections, etc).
Note: Your warranty is void if evidence of salt, sand,
or water damage are present within the components.
Important: If you live very close to the sea, you
should keep your bike indoors when not in use.
This will ensure the longevity of your ebike and its
subcomponents and will help streamline maintenance
Don’t power up the throttle while the eBike is held
stationary. Motor operation for more than a few
seconds while the wheel is locked/stationary can
damage the motor and controller.
Important: Your bike will arrive with the battery
partially charged.You should connect the battery
to it’s charger before using for the rst time. It’s
also best to fully use all of the battery capacity
for it’s rst use. However “top-up” charging the
battery between these intervals is ok.
Note: The Voltage Meter displayed on the LCD may
represent lower values when the motor unit is under
load(on hills, etc), this is normal. Battery capacity
readings are most accurate when the bike is idle and
not under load or use.
Dotake extra care on the road as you will be
travelling faster than you normally do on a bike and
your bike is now power-assisted, so will behave
Don’t let others ride your eBike unless you have
properly explained safe and appropriate use to
them.
Don’t use your charger outdoors. It is for indoor
use only.
and care duties.
Doreturn your eike to the Smartmotion dealer where
pruchased for service and maintenance.
treatyourebike like any bicycle you wouldwant

6. Do’s and Don’ts
-
-
Sonic user manual.indd 15 9/4/2017 3:50:57 PM
Don’t attempt to open the motor or battery
should your system malfunction, or for any other
reason. Anti-tampering labels are applied to both
the motor and battery units and breakage of the
Dotop up your battery where practical. Lithium
batteries prefer shallow discharge patterns. Keeping
yourbattery topped up between rides will prolong
Dodisconnect your battery from the charger when it
is charged. Leaving it connected permanently when
not in use will shorten cell life.
Never leave a fully discharged battery uncharged
for more than a week.Doingthiscausesirreparable
damage to your battery and is a listed exclusion in
the Limited Warranty.
Don’t leave your battery for more than 3 months
without checkingit’scapacityand top-up charging
Note: A Smartmotion battery neglected for a prolonged
period of time causes exponential voltage loss and
associated cell damage. This will void the battery’s
2-year warranty. It is to your advantage to properly
care for your battery and is the most valuable
Important:
Lithium Ion batteries contain a vast amount of
electrical and chemical energywhichis stablewithin
the scope of normal usage and care. Long-term
deviation from the recommendations detailed in
the Battery Care Guide can expose your battery and
surrounding property to risk of combustion. While
betakenbythe owner to ensure that all associated
risks are mitigated through careful and proper use.
seals will void the Limited Warranty
Domake sure you charge the battery according to
recommendatuons dound in the battery care guide.
the life of your battery.
Always charge your Smartmotion battery in a safe
and isolated space, away from combustibles and in
a well-ventilated area. Ensure airfolw is available
a well-ventilated area. Ensure airfolw is available
it where needed.
Ebike batteries can be dangerous!
extremely unlikely that whisoccurs,precautions must
component on your samrtmotion ebike.

Your display is easily controlled with 4 buttons located
on your handlebars
Walk Mode
Press and hold down for at least 3 seconds
Power On/Off
Press to start the display and power up the
bike. To turn off, press and hold the button for 2
seconds.
Note: the display will power off after 5minutes
without use.
Pedal Assist
Pedal Assist is controlled with the
buttons. Press to turn the assist up, and
Press
to turn it down.
Night Mode/White Screen
With the display on, press and hold for 3
seconds to enter the dim black background (night
mode). Press and hold for another 3
seconds and it will flip to a white background.
7. LCD Display Panel Controls
SET
Sonic user manual.indd 16 9/4/2017 3:50:57 PM
Smart Assist Mode
to toggle between Normal andDouble press
USB Charging
Press and hold and to enter USB charging
SET
mode, it will show USB icon when USB charging
mode is on.
when not pedaling to enter walk mode. The bike
will then slightly accelerate up to 6kph to assist
you when walking the bike up a steep hill.
You could use throttle to enter walk mode too
when not pedaling. Walk mode reach the top
Smart modes. Normal mode has 5 levels of assist
Sport(S). Smart modes combines RPM,speed and
torque input data to actively adjust the ratio of
human power to motor assist so that the rider can
Tour Mode: Engages up to 75% motor output via
focus on riding, while the bike adjusts the desired
level of assist.
Sport mode: Engages up to 100% motor output
dynamic power assist. Suitable for longer rides
where terrain is easier
via dynamic power assist. Suitable when you need
max power for steep terrain.
available.Smart mode has 2 levels :Tour(T) and
speed 6KPH at the smallest gear.
Turn Light On/Off *
Click button to toggle the light on/off.
*Forthebike with LFC.

Average Speed, Max Speed
Click to change between displaying range,
average speed and max speed.
Setup
Press and hold for 2 seconds to enter the
setup menu.
Touch to select the menu.
Use and to change the value.
Touch again to choose the “Save & Exit” option
to finish the setup.
7. LCD Display Panel Controls
Sleep Mode
If the bike remains stationary for 5 minutes, the
LCD automatically powers down.
Error Code Display
If there is something wrong with the electronic
control system, the display will show the error code
automatically. Should you receive an error code,
contact your local dealer for advice.
Before contacting service center check all plugs for
loose connections.
SET
SET
SET
SET
Sonic user manual.indd 17 9/4/2017 3:50:57 PM
Code
Description
Solution
10
Over Current Protectiton
Recovery In 5 Secs
11 Low Voltage Protectiton Charge Battery
12
Over Voltage Protectiton
Change Battery
13
Stalling Protection
Reset
14 OverHeat Protectiton Wait 30Mins
15 NTC Fault Contact Service
16
Speed Sensor Fault
Replace Sensor
17
Torque Sensor Fault
Contact Service
18 Motor Hall Fault Contact Service
19 BMS Check Fault Replace Battery
20
PBU Check Fault
Replace PBU
21
HMI Check Fault
Replace Display
22 Lack Phase Contact Service
23 Cadence Sensor Fault Contact Service
24
Throttle Fault
Replace Fault
25
MOS Short Circuit
Contact Service
26 Bus Voltage Abnormal Replace Battery
27
MCU Fault
Contact Service
28
Circuit Fault
Contact Service
29
TE MCU Fault
Contact Service
30 TE Circuit Fault Contact Service
40
Over Current Alarm
Stop for a while
60
Up Button Fault
Replace Button
61
Down Butten Fault
Replace Button
65 Power Butten Fault Replace Button
70
Communication Fault
Contact Service

Cadence
This outer ring lights up to show you your
Pedalling RPM (Cadence).The color of ring
Motor Tempreature
Shows current tempreture of motor
Power Meter
Shows how much power the motor is using.
8. LCD Display Panel
Sonic user manual.indd 18 9/4/2017 3:50:57 PM
Trip Meter
Displays the distance you have travelled from
when you last reset the meter.
Speedometer
Large display of your current speed. You can
toggle between average and max speed also.
Pedal RPM
Shows your current pedalling RPM in numbers.
Battery Temperature
Shows current temperature of motor
will change with current cadence to show
motor efficiency.
Range
Calculates the approx. number of assist
kilometres remaining.
USB Charging
Shows USB charging mode is on.

Battery Indicator
When the battery is full all battery segments are
colorful.When the battery is low the bars will
turn to grey and red.
Ride Time
Elapsed ride time.
Odometer
Displays the total distance the bike has
travelled.
Power/Assist
Displaystheselected assistlevel.
1–5: incrementalassist modes
T:Tourmode S: SportMode
Both T and S mode are Smart mode.
8. LCD Display Panel
Sonic user manual.indd 19 9/4/2017 3:50:57 PM
Light Mode
Displaysifthe lights*are switchedon.
*Forthebike withLFC.
Battery Level
Shows current battery percentage.

9. Battery Instructions
Sonic user manual.indd 20 9/4/2017 3:51:03 PM
Charging your Battery
You can charge your battery while it is mounted on
the bike, or separately. Safe charging practice is
covered in the Battery Care Guide.
Plug the assembled charger unit into the outlet, lift
the rubber grommet out of the charging socket and
connect the charger. Do not be alarmed if electrical
sparks appear, this is normal.
The light on the charger will display a red color LED
light. This remains red while charging, and turns to
green when the battery is fully charged. Once a
desired capacity is reached, disconnect the charger
Battery Removal
The battery is secured by double lock. To remove the
battery,
you need to insert the key and turn.Then turn
Note: Before loading the battery, please make sure the
tube.
key lock is in unlocked position.To secure the battery,
please turn the key clockwise after loading the battery.
Unlock Lock
Other manuals for HyperSonic
1
Table of contents
Other smartmotion Bicycle manuals
