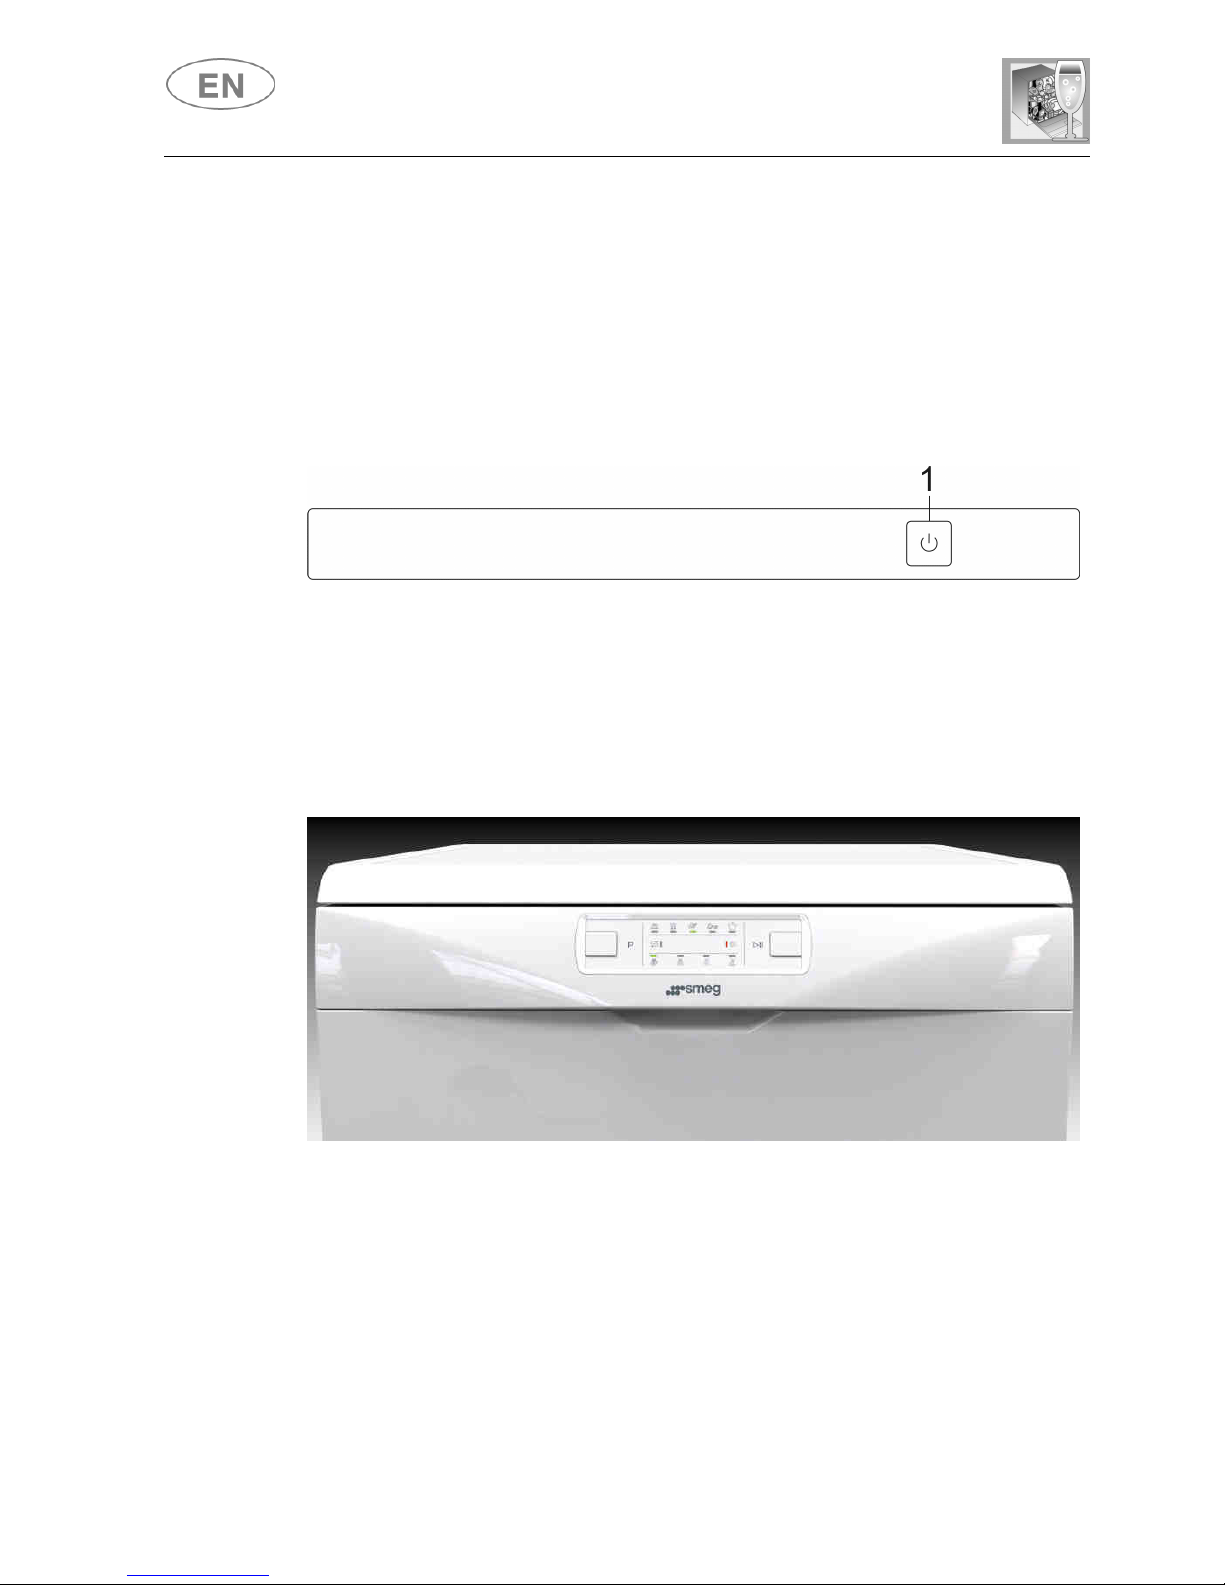
Smeg LS647XNL2 User manual

INSTRUCTION MANUAL
GUIDE FOR USING THE DISHWASHER AND THE WASHING PROGRAMS


Contents
1
1.
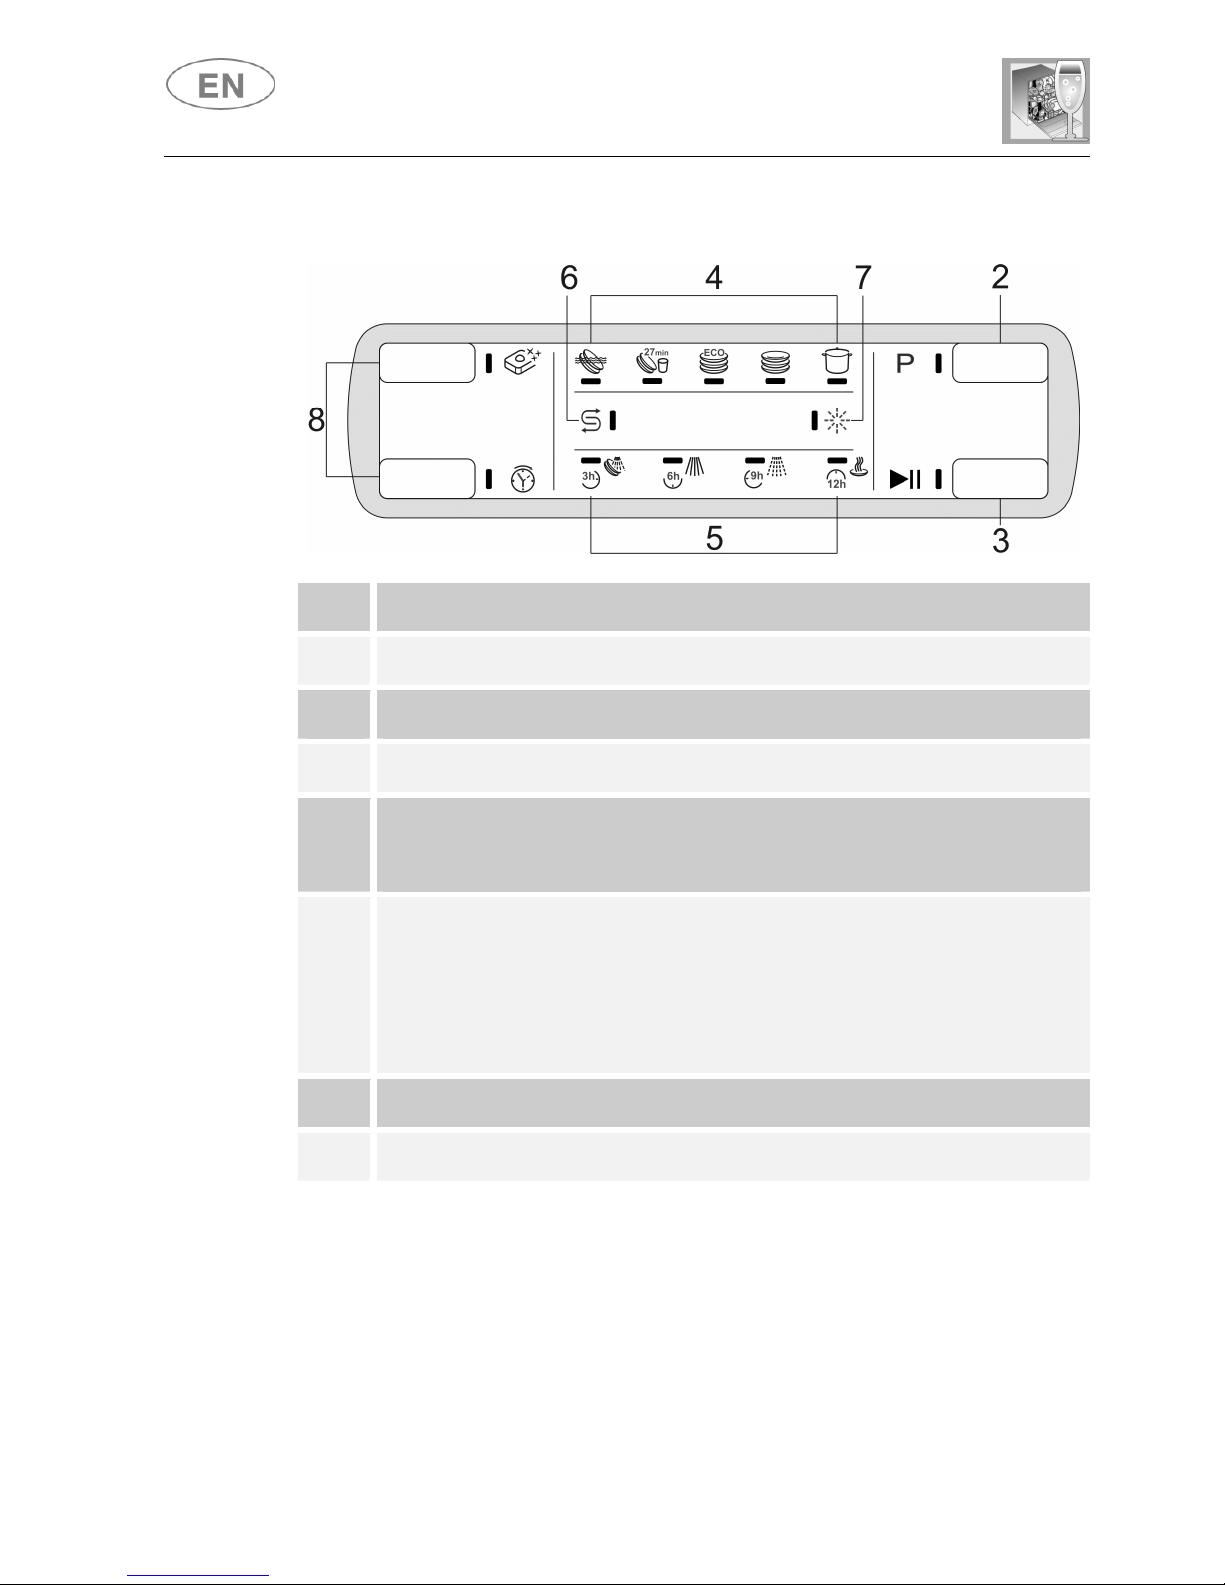
Description of the controls ________________________________3
2.
Operating instructions___________________________________ 15
3.
Cleaning and maintenance_______________________________27
4.
Troubleshooting _______________________________________ 31
Thank you for choosing one of our products.
You are advised to read this manual carefully; it contains all the
information you need about the right conditions for the proper, safe use
of your dishwasher.
The individual sections are laid out to provide you with a step-by-step
guide to all your appliance's functions; the texts are easy to understand
and are complete with detailed illustrations.
Recommendations are given for the correct use of the baskets, spray
arms, containers, filters, washing programs, and for operating the
controls.
Following the cleaning instructions provided here will keep your
dishwasher's performance at peak levels in the long term.
This user-friendly manual will provide answers to all your questions
about use of the dishwasher.
USER INSTRUCTIONS: these consist of recommendations for using the
appliance, a description of its controls and of the correct cleaning and
maintenance procedures.

User instructions
2
1. Description of the controls
1.1 Front panel
The ON/OFF is on the top edge of the panel, and all the dishwasher’s
other controls and monitoring devices are on the central display.
Programming and option selection are only possible with the door
closed.
NOTA:
The displays illustrated in the instruction manual are purely guideline;
symbols, programs and options may vary depending on the model
purchased.

User instructions
3
VERSION WITHOUT OPTIONS
1 ON/OFF BUTTON
2 SELECTION PROGRAMS BUTTON
3 START/PAUSE BUTTON
4 PROGRAMS LIGHTS
5 PHASES/PROGRAM LIGHTS
6
WATER HARDNESS ADJUSTMENT ON INDICATOR LIGHT
The light flashes to indicate that the appliance is in “water
hardness adjustment” mode.
SALT WARNIN LIGHT
Illumination of this light denotes a regenerating salt warning level.
7 NO RINSE AID LIGHT

User instructions
4
VERSION WITH OPTIONS
1 ON/OFF BUTTON
2 SELECTION PROGRAMS BUTTON
3 START/PAUSE BUTTON
4 PROGRAMS LIGHTS
5 PHASES/PROGRAM LIGHTS +
PROGRAM DELAY (if the option is included)
6
WATER HARDNESS ADJUSTMENT ON INDICATOR LIGHT
The light flashes to indicate that the appliance is in “water
hardness adjustment” mode.
SALT WARNIN LIGHT
Illumination of this light denotes a regenerating salt warning level.
7 NO RINSE AID LIGHT
8 OPTIONS (on some models only)

User instructions
5
<<OPTIONS(8)>>
Depending on the model, this zone may contain one or more of the
following options, identified by the relative symbols and described in
more detail in the relevant sections of the manual.
It is not possible to select any options when the soak program is being
used. All options except "Flexi Tabs" are disabled at the end of the
wash cycle. To disable the “Flexi Tabs” option, press the relative
button (the light goes out).
Flexi Tabs
Specifically for the use of products which contain salt and
rinse aid as well as detergent.
HYCLEAN
Adds a final antibacterial rinse to the selected program.
Spread HALF LOAD WASH
Allows washing of just a few dishes placed in both baskets.
PROGRAM DELAY
Allows the program to be set to start with a delay of 3, 6, 9 or
12 hours.
PROGRAMS TABLE
The manual contains the programs table for several models. To find the
table for your dishwasher, compare the program symbols at the top of the
table with those on your control panel.

User instructions
6
PROGRAMS TABLE
PROGRAMME
NUMBER
& SYMBOL
LOAD CROCKERY AND
CUTLERY
PROGRAM
PROGRESS
DURATION
CONSUMPTION
MINUTES
(1)
WATER
LITRES
POWER
KWh (1)
1
SOAK
Pans and dishes awaiting
completion of the load Cold prewash
15 3,5 0,02
2 RAPID
Dishes with light dirt,
washed immediately after
use
Wash at 38°C
Rinse at 50°C
27
6,5 0,70
3
ECO (*)
EN 50242
Dishes with normal dirt,
even with dried-on
residues
Cold prewash
Wash at 50°C
Rinse at 65°C
Dry
**
** **
4 NORMAL
IEC/DIN***
Dishes with normal dirt,
even with dried-on
residues
Cold prewash
Wash at 65°C
Cold rinse
Rinse at 70°C
Dry
105
13,5 1,35
5 SUPER
****
Very dirty pans and
dishes, even with dried-on
residues.
Hot prewash
Wash at 70°C
Cold rinse (2)
Rinse at 70°C
Dry
155
15,5 1,60
IMPORTANT: see “NOTES AND REFERENCES” table on the following pages.
If the dishwasher door is open or not properly closed, the washing cycle
will not start.

User instructions
7
PROGRAMS TABLE
PROGRAMME
NUMBER
& SYMBOL
LOAD CROCKERY AND
CUTLERY
PROGRAM
PROGRESS
DURATION
CONSUMPTION
MINUTES
(1)
WATER
LITRES
POWER
KWh (1)
1
SOAK
Pans and dishes awaiting
completion of the load Cold prewash
15 3,5 0,02
2 RAPID
Dishes with light dirt,
washed immediately after
use
Wash at 38°C
Rinse at 50°C
27
6,5 0,70
3
ECO (*)
EN 50242
Dishes with normal dirt,
even with dried-on
residues
Cold prewash
Wash at 50°C
Rinse at 65°C
Dry
**
** **
4 NORMAL
IEC/DIN***
Dishes with normal dirt,
even with dried-on
residues
Cold prewash
Wash at 65°C
Cold rinse
Rinse at 70°C
Dry
105
13,5 1,35
5
ULTRA
CLEAN
****
Very dirty pans and
dishes, even with dried-on
residues.
Hot prewash
Wash at 70°C
Cold rinse (2)
Rinse at 70°C
Dry
155
15,5 1,60
The
ULTRA CLEAN
program terminate with an extra anti-bacteria rinse that ensures a further
reduction in the bacteria level. If the temperature falls during this stage of the program (e.g.
because the door is opened or due to a power blackout), the program lights (4) flash to warn
that the anti-bacteria effect is not guaranteed.
IMPORTANT: see “NOTES AND REFERENCES” table on the following pages.
If the dishwasher door is open or not properly closed, the washing cycle
will not start.

User instructions
8
PROGRAMS TABLE
PROGRAMME
NUMBER
& SYMBOL
LOAD CROCKERY AND
CUTLERY
PROGRAM
PROGRESS
DURATION
CONSUMPTION
MINUTES
(1)
WATER
LITRES
POWER
KWh (1)
1
SOAK
Pans and dishes awaiting
completion of the load Cold prewash
15 3,5 0,02
2 RAPID
Dishes with light dirt,
washed immediately after
use
Wash at 38°C
Rinse at 50°C
27
6,5 0,70
3
ECO (*)
EN 50242
Dishes with normal dirt,
even with dried-on
residues
Cold prewash
Wash at 50°C
Rinse at 65°C
Dry
**
** **
4 HALF LOAD
Half load of dishes with
normal dirt, washed
immediately after use.
Wash at 65°C
Cold rinse
Rinse at 70°C
Dry
90
11 1,20
5
ULTRA
CLEAN
****
Very dirty pans and
dishes, even with dried-on
residues.
Hot prewash
Wash at 70°C
Cold rinse (2)
Rinse at 70°C
Dry
155
15,5 1,60
The
ULTRA CLEAN
program terminate with an extra anti-bacteria rinse that ensures a further
reduction in the bacteria level. If the temperature falls during this stage of the program (e.g.
because the door is opened or due to a power blackout), the program lights (4) flash to warn
that the anti-bacteria effect is not guaranteed.
IMPORTANT: see “NOTES AND REFERENCES” table on the following pages.
If the dishwasher door is open or not properly closed, the washing cycle
will not start.

User instructions
9
NOTES AND
REFERENCES
Only
run the soak program with half loads.
Options cannot be used with the soak program.
* Standard programme under
EN 50242
.
** See information sheet provided
***
IEC/DIN
reference programme.
**** Reference program for laboratories: Detergent:
20g
in the
dispenser
+
10g
in
the door or tablet. Configuration: see photo in “Using the baskets”.
(1) The cycle duration and power consumption may vary according to the water
and room temperatures, and the type and amount of dishes.
(2) 1 or 2 cold rinses depending on the model.
REFERENCES for the ENERGY LABEL supplied with the dishwasher:
- Annual energy consumption is based on 280 standard wash cycles with cold
water and consumption of low-energy operating modes. Actual consumption
depends on the way in which the appliance is used.
- Water consumption is based on 280 standard wash cycles. Actual
consumption depends on the way in which the appliance is used.
- Information refers to the EN 50242 STANDARD programme (identified in the
programmes table), which is the most effective in terms of combined energy
and water consumption. The programme is recommended for dishes with a
normal level of dirt.
- Energy consumption in “sleep” mode = 0.02 W.
- Energy consumption in “on” mode = 1.5 W.
- Drying efficiency class on a scale from “G” (minimum efficiency) to “A”
(maximum efficiency).

User instructions
10
1.2 Washing programs
The dishwasher is equipped with a control panel, described in chapter
"3. Description of the controls", from which it is possible to carry out all
the power switch-on, switch-off and programming operations.
Before starting a washing program make sure that:
•The water supply tap is open.
•The correct amount of detergent has been added to the
dispenser.
•The baskets have been correctly loaded.
•The spray arms are able to rotate freely and without
obstruction.
•The dishwasher door is securely closed.
SWITCHING ON
When the ON/OFF button (1) is pressed, the dishwasher switches on.
PROGRAMMING
Programming operations are only possible with the door closed.
PROGRAM SELECTION
Press the
PROGRAM SELECTION
button
(2)
several times until the light
of the program required comes on.

User instructions
11
STARTING THE PROGRAM
To start the dishwasher, press the START/PAUSE button (3) for a few
seconds, until the light of the first phase of the selected program starts to
flash (confirmation beep).
As the program runs, the PHASES/PROGRAM lights (5) will indicate the
current cycle status.
The light of the phase in progress will flash, while the lights of the
subsequent phases remain on.
N.B. during execution of programs which do not include a prewash, the
first PHASES/PROGRAM light (5) will remain off.
DISPLAY OF END OF WASH CYCLE
Short sound from buzzer >>> PROGRAM SELECTION BUTTON light
flashes until appliance is switched off or a new wash cycle is set.
INTERRUPTION A PROGRAM
To interrupt a program in progress:
•press the START/PAUSE button (3 ) for a few seconds; the light of
the phase in progress remains on and the light of the program in
progress flashes (confirmation beep);
•you may now restart the program by pressing button (3) again until it
restarts, or change or annul the program (see "CHANGING A
PROGRAM", or "ANNULLING A PROGRAM").
CHANGING
A
PROGRAM
To change the running program it is necessary:
•to interrupt the running program (see “INTERRUPTION A PROGRAM”);
•select the new program;
•start the program (see “STARTING THE PROGRAM”).

User instructions
12
ANNULLING A PROGRAM
To annul the program
•press the START/PAUSE button (3 ) for a few seconds; the light of
the phase in progress remains on and the light of the program in
progress flashes (confirmation beep);
•Keep the START/PAUSE button (3) pressed until the PROGRAM
PHASES lights (5) go out (confirmation beep). The lights of
programs 4 and 5 come on.
The water in the tank will be pumped out and the program will end at the
point where it was interrupted. When the operation is complete, the
PROGRAM PHASES lights (5) flash.
In case that the door is opened during the operation, to the next door
closing it is going to be necessary to start the program as shown in
paragraph “
S
TARTING THE PROGRAM”. The program will resume from the
point in which it was interrupted.
In case that the tub temperature is higher than 50°C the program
will start about 30 seconds later.
OPTION SELECTION
Options are selected by pressing the relative button by the symbol of the
option required; the light comes on to confirm that the option has been
activated.
•It is not possible to select any options when the soak
program is being used.
•All options except "Flexi Tabs" are disabled at the end of the
wash cycle. To disable the “Flexi Tabs” option, press the
relative button (the light goes out).
•All options, including " Flexi Tabs " are disabled when a
program is CANCELLED after it has begun.
Flexi Tabs
Ideal for multi-function detergents, this option allows washing to be
optimised, with full benefits from the combined-action tablets. When this
option is activated, any salt and rinse aid in the relative containers will
not be used.
If the option is not provided, we recommend the use of conventional
products (separate detergent, salt and rinse aid), because with
conventional washing cycles, combined products might create problems
such as a white deposit, poor drying results and residues left on dishes.

User instructions
13
N.B.:
When the salt and rinse aid containers are empty, the relative lights will
remain on even if the “Flexi Tabs” option is selected.
IMPORTANT:
when no longer required, the option must be deactivated by pressing
the relative button (the light goes out).
If the water hardness has been set on a value above H3, and the “
Flexi
Tabs” option is activated, the relative light flashes, warning of a setting
error. Multi-function products are not suitable for use with very "hard"
water; this does not prevent the use of the option, but the washing
results might not be of the best.
PROGRAM DELAY
The PROGRAM DELAY button can be pressed to delay the start of the
washing program by 3,6 or 9 hours, indicated by the PROGRAM
DELAY/PROGRAM PHASES (5) lights. This function allows you to set
the dishwasher to work at your preferred time of day.
After selecting the delay, start the program (see relative section).
The appliance will prewash the dishes, after which the “program delay”
set previously will come into effect (option
light and light of selected
program on).N.B.: It is not possible to select the PROGRAM DELAY
option once the cycle has begun.
Remaining program delay time:
with this option active, the user can view the time left before the washing
cycle starts.
•press the START/PAUSE button (3); the light of the first phase (5)
of the selected program (4) comes on, while the program light
flashes (confirmation beep);
•press the PROGRAM DELAY button. One of the PROGRAM
DELAY lights (5) will flash to indicate whether less than 3, 6, 9 or
12 hours are left before the dishwasher starts.

User instructions
14
HYCLEAN
The "HYCLEAN" option prolongs the final hot rinse to ensure a further
reduction in the bacteria level. If the temperature in the tank falls during
this stage of the program (e.g. because the door is opened or due to a
power blackout), the light of the option and the program lights flash to warn
that the additional washing phase has not been completed successfully.
This does not mean that the wash program has been less effective than
usual.
SPREAD HALF LOAD
Suitable when there are not many dishes to be washed, it saves energy
and reduces the program duration. Place dishes in both baskets then
load the detergent dispenser than less than the normal amount for a full
load.
TO SAVE ON ENERGY! … AND PROTECT THE ENVIRONMENT
•Always try to run the dishwasher fully loaded.
•Do not wash the dishes in running water.
•Use the washing program that is most appropriate for each type of
load.
•Do not carry out any preliminary rinsing.
•If available, connect the dishwasher to a hot water supply up to
60°C.
TO CUT DOWN ON DETERGENT CONSUMPTION! … AND PROTECT
THE ENVIRONMENT
The phosphates contained in dishwasher detergents are harmful to the
environment. To avoid using excessive amounts of detergent and to
save on electricity, observe the following:
•separate the more delicate items from dishes that are more
resistant to aggressive detergents and high temperatures;
•do not pour the detergent directly on the dishes.
REMOVING THE DISHES
At the end of the washing program, wait at least 20 minutes before
removing the dishes, to allow them to cool down. To prevent any water
droplets on the upper basket from falling on the dishes in the lower
basket, it is advisable to unload the lower basket first, and then the
upper basket.

User instructions
15
2. Operating instructions
Once the dishwasher has been correctly installed, prepare for use as
follows:
•Adjust the water softening system;
•Add the regenerating salt;
•Add the rinse aid and detergent.
2.1 Using the water softening system
The amount of scale contained in the
water (water hardness index) can cause
whitish staining on the dry dishes, which
tend to become dull over time. The
dishwasher is equipped with an automatic
softening system which uses a special
regenerating salt to reduce the hardness
of the water.
The dishwasher is factory set for water
hardness level 3
(average hardness
41-60°dF – 24-31°dH ).
When using water of medium hardness, the regenerating salt container
should be refilled after approximately 20 washing cycles. The salt
container can hold approximately 1.7 Kg of salt in grains. The container
is situated at the bottom of the dishwasher. After removing the lower
basket, unscrew the salt container cap by turning it anticlockwise and
pour in the salt using the funnel supplied with the dishwasher. Before
replacing the cap, remove any salt residues from around the opening.
•When using the dishwasher for the first time, in addition to the salt it
is also necessary to add one litre of water to the container.
•Each time the salt container is refilled, make sure that the cap is
securely closed. The mixture of water and detergent must never
penetrate the salt container, as this would compromise the operation
of the regeneration system. In the event of this occurring, the
warranty will be invalidated.
•Only use regenerating salt specially formulated for domestic
dishwashers. If using salt tablets, do not fill the container
completely.
SALT

User instructions
16
•Do not use table salt as it contains insoluble substances which,
over time, may damage the water softening system.
•When necessary, refill the regenerating salt container before
starting the washing program. In this way, the excess saline
solution will be immediately removed by the water; the prolonged
presence of salt water inside the tank may lead to corrosion.
Be careful not to confuse the salt and detergent packages; adding
detergent to the salt container will damage the water softening system.
ADJUSTING THE
WATER SOFTENING SYSTEM
The dishwasher is equipped with a device which allows the softener
setting to be varied to suit the hardness of the mains water. The
hardness is set using the PROGRAM SELECTION BUTTON (2).
To access the setting function, hold the button down for more than 15
seconds. The WATER HARDNESS ADJUSTMENT INDICATOR LIGHT
(6) flashes, while the SELECTED PROGRAM INDICATOR LIGHTS (4)
show the current setting. Each pressure on the button changes the
setting following the sequence in the table below:
>

User instructions
17
WATER HARDNESS TABLE
WATER HARDNESS
SETTING
German
degrees (°dH) French
Degrees (°dF)
0 - 4 0 - 7 All lights off
(no salt)
5 - 15 8 - 25 One light on
16 - 23 26 - 40 Two lights on
24 - 31 41 - 60 Three lights on
32 - 47 61 - 80 Four lights on
48 - 58 81 - 100 Five lights on
Contact your local water board for information on the hardness of your
water supply.
After adjustment or display of the current setting, simply do not touch the
button for a few seconds; the dishwasher will automatically return to
standard mode, quitting the adjustment mode.
2.2 Using the rinse aid and detergent dispensers
The detergent and rinse aid
dispensers are situated on the inner
part of the door: the detergent
dispenser is on the left, and the
rinse aid dispenser is on the right.
With the exception of the SOAK program, before every washing cycle it
is necessary to add the required amount of detergent to the detergent
dispenser. The rinse aid, on the other hand, should only be added as
required.

User instructions
18
ADDING THE RINSE AID
The rinse aid helps the dishes dry faster and
prevents the formation of scale deposits and
staining; it is automatically added to the water
during the final rinse cycle, from the container
situated on the inner side of the door.
To add rinse aid:
•Open the door.
•Rotate the container cap anticlockwise by ¼ of a turn and remove it.
•Add the rinse aid until the container is full (approximately 140 cc).
The optical level indicator on the side of the cap should be
completely obscured. Refill the rinse aid when the optical level
indicator becomes clear again, or when the rinse aid warning light
illuminates.
•Replace the cover and turn it in a clockwise direction.
•Use a cloth to remove any spillage of rinse aid which might lead to
the formation of excess foam.
ADJUSTING THE RINSE AID DISPENSER SETTING
The dishwasher is factory set for medium water hardness. However it
possible to change the setting by turning the dispenser’s selector to the
desired position: the amount of rinse aid dispensed is proportional to the
selector position.
•To adjust the rinse aid setting, rotate the dispenser cap through a
quarter turn in an anticlockwise direction and remove it.
•Then use a screwdriver to rotate the rinse aid selector to the desired
position.
•Replace the cap, turning it clockwise.
•The amount of rinse aid must be increased if the washed dishes
appear dull or feature circular stains.
•If, on the other hand, the dishes are sticky or have white streaks, it
is necessary to reduce the rinse aid setting.
This manual suits for next models
2
Table of contents
Other Smeg Dishwasher manuals