Smeg PL45XME User manual

INSTRUCTION MANUAL
DISHWASHER

ENGLISH 3-28
FRANÇAIS 29-54

Contents
1. Safety and operating instructions ___________________________4
2. Installation and hook-up __________________________________7
3. Description of the controls_________________________________9
4. Operating instructions ___________________________________14
5. Cleaning and maintenance _______________________________25
Thank you for choosing this product.
We advise you to carefully read all the instructions contained in this
manual, in order to understand how to operate your dishwasher safely
and correctly.
The manual is divided into paragraphs, which provide a step by step
description of the dishwasher functions, with clear instructions
accompanied by detailed illustrations.
Recommendations are given for the correct use of the baskets, spray
arms, containers, filters, washing programs, and for operating the
controls.
Follow the recommended cleaning procedures to ensure that your
dishwasher always remains in perfect working order.
This manual provides a quick and easy reference for answering all your
questions concerning the use of your new dishwasher.
INSTALLATION INSTRUCTIONS: these are intended for the qualified
technician who must carry out the installation, hook-up and testing of
the appliance.
USER INSTRUCTIONS: these consist of recommendations for using the
appliance, a description of its controls and of the correct cleaning and
maintenance procedures.

Safety instructions
1. Safety and operating instructions
THIS MANUAL FORMS AN INTEGRAL PART OF THE APPLIANCE: IT MUST
ALWAYS BE KEPT INTACT TOGETHER WITH THE DISHWASHER. BEFORE
USING THE APPLIANCE, CAREFULLY READ ALL THE INSTRUCTIONS
CONTAINED IN THIS MANUAL.
INSTALLATION MUST BE PERFORMED BY A QUALIFIED TECHNICIAN, IN
COMPLIANCE WITH THE REGULATIONS IN FORCE. THIS APPLIANCE IS
INTENDED FOR DOMESTIC USE, AND COMPLIES WITH THE EEC
DIRECTIVES 72/23, 897336 (INCLUDING 92/31) CURRENTLY IN FORCE,
INCLUDING THE PREVENTION AND ELIMINATION OF RADIO FREQUENCY
INTERFERENCE.
THE APPLIANCE IS DESIGNED FOR THE FOLLOWING PURPOSE: WASHING
AND DRYING OF DISHES; ANY OTHER USE SHALL BE CONSIDERED
IMPROPER. THE MANUFACTURER DECLINES ALL RESPONSIBILITY FOR
USES OTHER THAN THOSE DESCRIBED ABOVE.
THE NAME PLATE FEATURING THE TECHNICAL DATA, SERIAL NUMBER
AND MARKINGS IS VISIBLY POSITIONED ON THE INNER EDGE OF THE
DOOR. THE NAME PLATE ON THE INNER EDGE OF THE DOOR MUST
NEVER BE REMOVED.
DO NOT LEAVE THE DISCARDED PACKAGING MATERIALS UNSUPERVISED
WITHIN THE HOME. SEPARATE THE VARIOUS MATERIALS WHICH MAKE
UP THE PACKAGING AND TAKE THEM TO THE NEAREST SORTED WASTE
COLLECTION CENTRE.
THE APPLIANCE MUST BE PROVIDED WITH AN EARTH CONNECTION IN
ACCORDANCE WITH THE ELECTRICAL SAFETY REGULATIONS IN FORCE.
THE MANUFACTURER DECLINES ALL RESPONSIBILITY FOR DAMAGE TO
PERSONS OR PROPERTY RESULTING FROM THE FAILURE TO EARTH THE
APPLIANCE OR FROM A DEFECTIVE EARTH CONNECTION.
THE POWER SUPPLY LEAD PLUG AND THE RELATIVE SOCKET MUST BE
OF THE SAME TYPE AND COMPLY WITH THE RELEVANT REGULATIONS.
CHECK THAT THE MAINS VOLTAGE AND FREQUENCY ARE THE SAME AS
THE VALUES MARKED ON THE NAMEPLATE. DO NOT USE ADAPTERS OR
SHUNTS. NEVER DISCONNECT THE PLUG BY PULLING ON THE POWER
SUPPLY LEAD.

Safety instructions
•AFTER INSTALLATION, THE PLUG MUST REMAIN ACCESSIBLE.
•IN THE EVENT OF DAMAGE TO THE POWER CORD, HAVE IT
REPLACED BY A QUALIFIED TECHNICIAN.
•AFTER CHANGING THE POWER CORD, MAKE SURE THAT THE
BRACKET WHICH SECURES THE CORD IS FIXED SECURELY IN
PLACE.
IF THE APPLIANCE IS INSTALLED ON A CARPETED OR COVERED FLOOR,
ENSURE THAT THE OPENINGS ON ITS UNDERSIDE ARE NOT
OBSTRUCTED.
ALWAYS SWITCH OFF THE DISHWASHER AFTER EACH USE TO AVOID
WASTING ELECTRICITY.
OBSOLETE APPLIANCES MUST BE RENDERED UNUSABLE. CUT OFF THE
MAINS POWER CORD AFTER UNPLUGGING IT FROM THE WALL OUTLET,
AND MAKE SAFE ANY COMPONENTS WHICH MIGHT BE DANGEROUS FOR
CHILDREN (LOCKS, DOORS, ETC.). THE APPLIANCE MUST THEN BE TAKEN
TO A SORTED WASTE COLLECTION CENTRE.
IN THE EVENT OF A FAULT, DISCONNECT THE DISHWASHER FROM THE
ELECTRICAL POWER SUPPLY AND SHUT OFF THE WATER TAP. THEN
CALL IN A QUALIFIED TECHNICIAN.
DO NOT USE APPLIANCES WHICH HAVE BEEN DAMAGED DURING
TRANSIT! IF IN DOUBT, CONSULT YOUR DEALER.
THE APPLIANCE MUST BE INSTALLED AND CONNECTED IN ACCORDANCE
WITH THE INSTRUCTIONS PROVIDED BY THE MANUFACTURER OR BY A
QUALIFIED TECHNICIAN.
THE APPLIANCE IS INTENDED FOR USE BY ADULTS. DO NOT ALLOW
CHILDREN TO COME NEAR OR PLAY WITH THE DISHWASHER. KEEP
CHILDREN AWAY FROM DETERGENTS AND FROM THE OPEN
DISHWASHER DOOR. THE PACKAGING MATERIALS (PLASTIC BAGS,
POLYSTYRENE, METAL BARS, ETC.) MUST NOT BE LEFT WITHIN THE
REACH OF CHILDREN.
KEEP CHILDREN AWAY FROM THE OPEN DISHWASHER. THE APPLIANCE
MAY CONTAIN RESIDUES OF DETERGENT WHICH CAN CAUSE
IRREVERSIBLE DAMAGE TO THE EYES, MOUTH, AND THROAT, AS WELL
AS POSSIBLE DEATH BY SUFFOCATION.
DO NOT INTRODUCE SOLVENTS SUCH AS ALCOHOL OR TURPENTINE
WHICH MAY CAUSE AN EXPLOSION.
DO NOT LOAD DISHES THAT ARE SOILED WITH ASH, WAX OR PAINTS.

Safety instructions
LEANING OR SITTING ON THE DISHWASHER DOOR WHEN OPEN MAY
CAUSE THE APPLIANCE TO OVERTURN, PUTING PEOPLE AT RISK.
DO NOT DRINK THE WATER RESIDUES WHICH MAY BE PRESENT INSIDE
THE DISHES OR DISHWASHER AT THE END OF THE WASHING PROGRAM
AND BEFORE THE DRYING CYCLE.
KNIVES OR OTHER SHARP-ENDED COOKING UTENSILS MUST BE PLACED
IN THE CUTLERY BASKET BLADE-DOWN, OR LAID HORIZONTAL IN THE
TOP BASKET. TAKE CARE NOT TO CUT YOURSELF AND ENSURE THAT
THEY DO NOT PROJECT FROM THE BASKET.
AQUASTOP MODELS
THE AQUASTOP DEVICE PREVENTS FLOODING IN THE EVENT OF A
WATER LEAK. WHEN THE AQUASTOP DEVICE IS TRIPPED, CALL IN A
QUALIFIED TECHNICIAN TO IDENTIFY AND REPAIR THE FAULT.
IN MODELS EQUIPPED WITH THE AQUSTOP DEVICE, THERE IS A
SOLENOID VALVE INSIDE THE WATER INTAKE HOSE. DO NOT CUT THE
HOSE AND DO NOT ALLOW THE SOLENOID VALVE TO DROP INTO
WATER. IN THE EVENT OF DAMAGE TO THE WATER INTAKE HOSE,
DISCONNECT THE APPLIANCE FROM THE ELECTRICAL POWER SUPPLY
AND FROM THE WATER SUPPLY.
IMMEDIATELY AFTER INSTALLING THE DISHWASHER, PERFORM A QUICK
TEST OF THE APPLIANCE FOLLOWING THE INSTRUCTIONS BELOW. IF
THE DISHWASHER FAILS TO OPERATE CORRECTLY, DISCONNECT IT
FROM THE ELECTRICAL POWER SUPPLY AND CALL THE NEAREST
TECHNICAL SERVICE CENTRE. DO NOT ATTEMPT TO REPAIR THE
APPLIANCE.
THE DISHWASHER MEETS ALL THE REQUIREMENTS SET OUT BY THE
REGULATIONS IN FORCE CONCERNING SAFETY AND ELECTRICAL
EQUIPMENT. ANY TECHNICAL CHECKS SHOULD BE CONDUCTED
EXCLUSIVELY BY A TRAINED AND AUTHORISED TECHNICIAN: REPAIRS
CARRIED OUT BY UNAUTHORISED PERSONS WILL INVALIDATE THE
WARRANTY, AS WELL AS POSING A POTENTIAL HAZARD TO THE USER.
The manufacturer declines all responsibility for damage to persons or property
resulting from failure to observe the above precautions, from tampering with
even a single component of the appliance, or from the use of non original
spare parts.

Installation instructions
2. Installation and hook-up
Remove the polystyrene basket retainers. Position the appliance in the
desired place of installation. The back or sides of the dishwasher may be
placed up against walls or other furniture units. If the dishwasher is
installed near a heat source, fit the special insulating panel to prevent
overheating and malfunction of the appliance. To ensure stability, install
integrated or built-under dishwashers only under continuous worktops,
and screw them to the adjacent units. To facilitate the installation
procedure, the intake and drain hoses can be positioned in any direction;
make sure that the hoses are not kinked, crushed or pulled too tightly.
Make sure to tighten the locking ring-nut once the pipes have been
placed in the direction required. A hole at least 8 cm in diameter is
required to allow the power supply cable and pipes to pass.
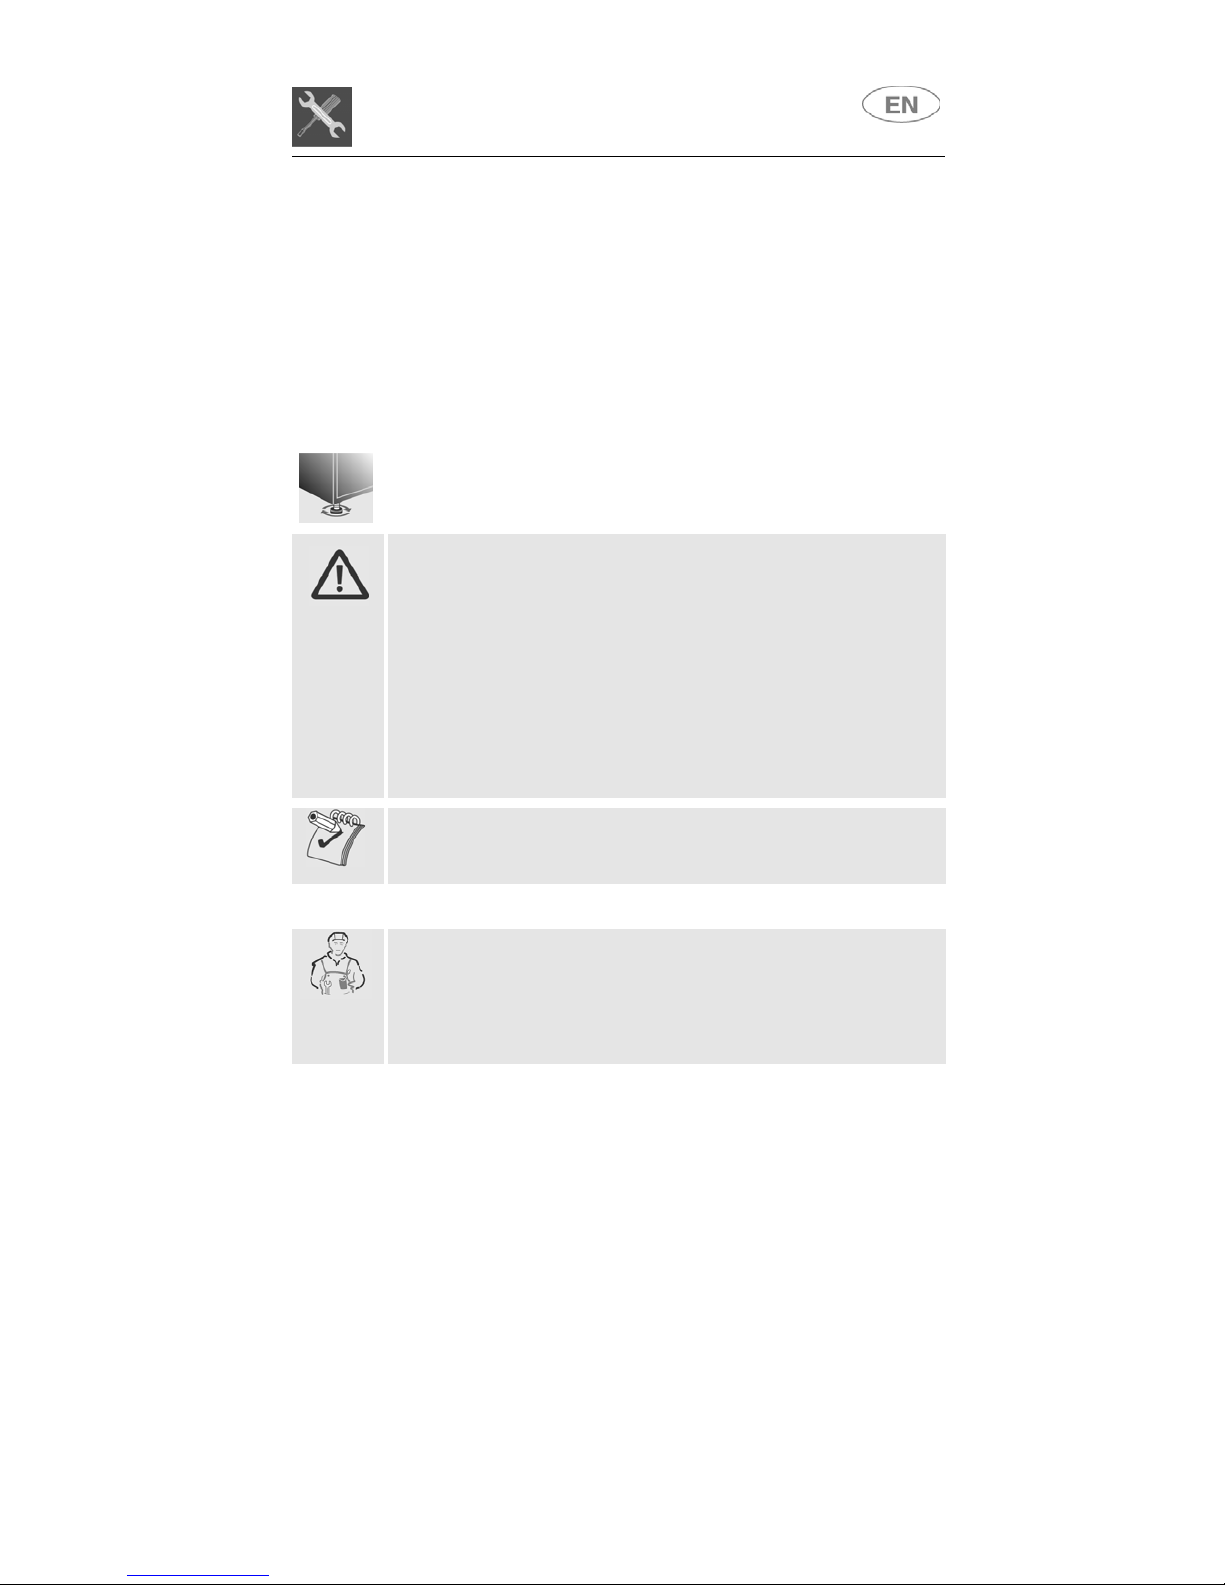
Level the appliance on the floor using its adjustable feet. This operation
is essential for ensuring correct operation of the dishwasher.
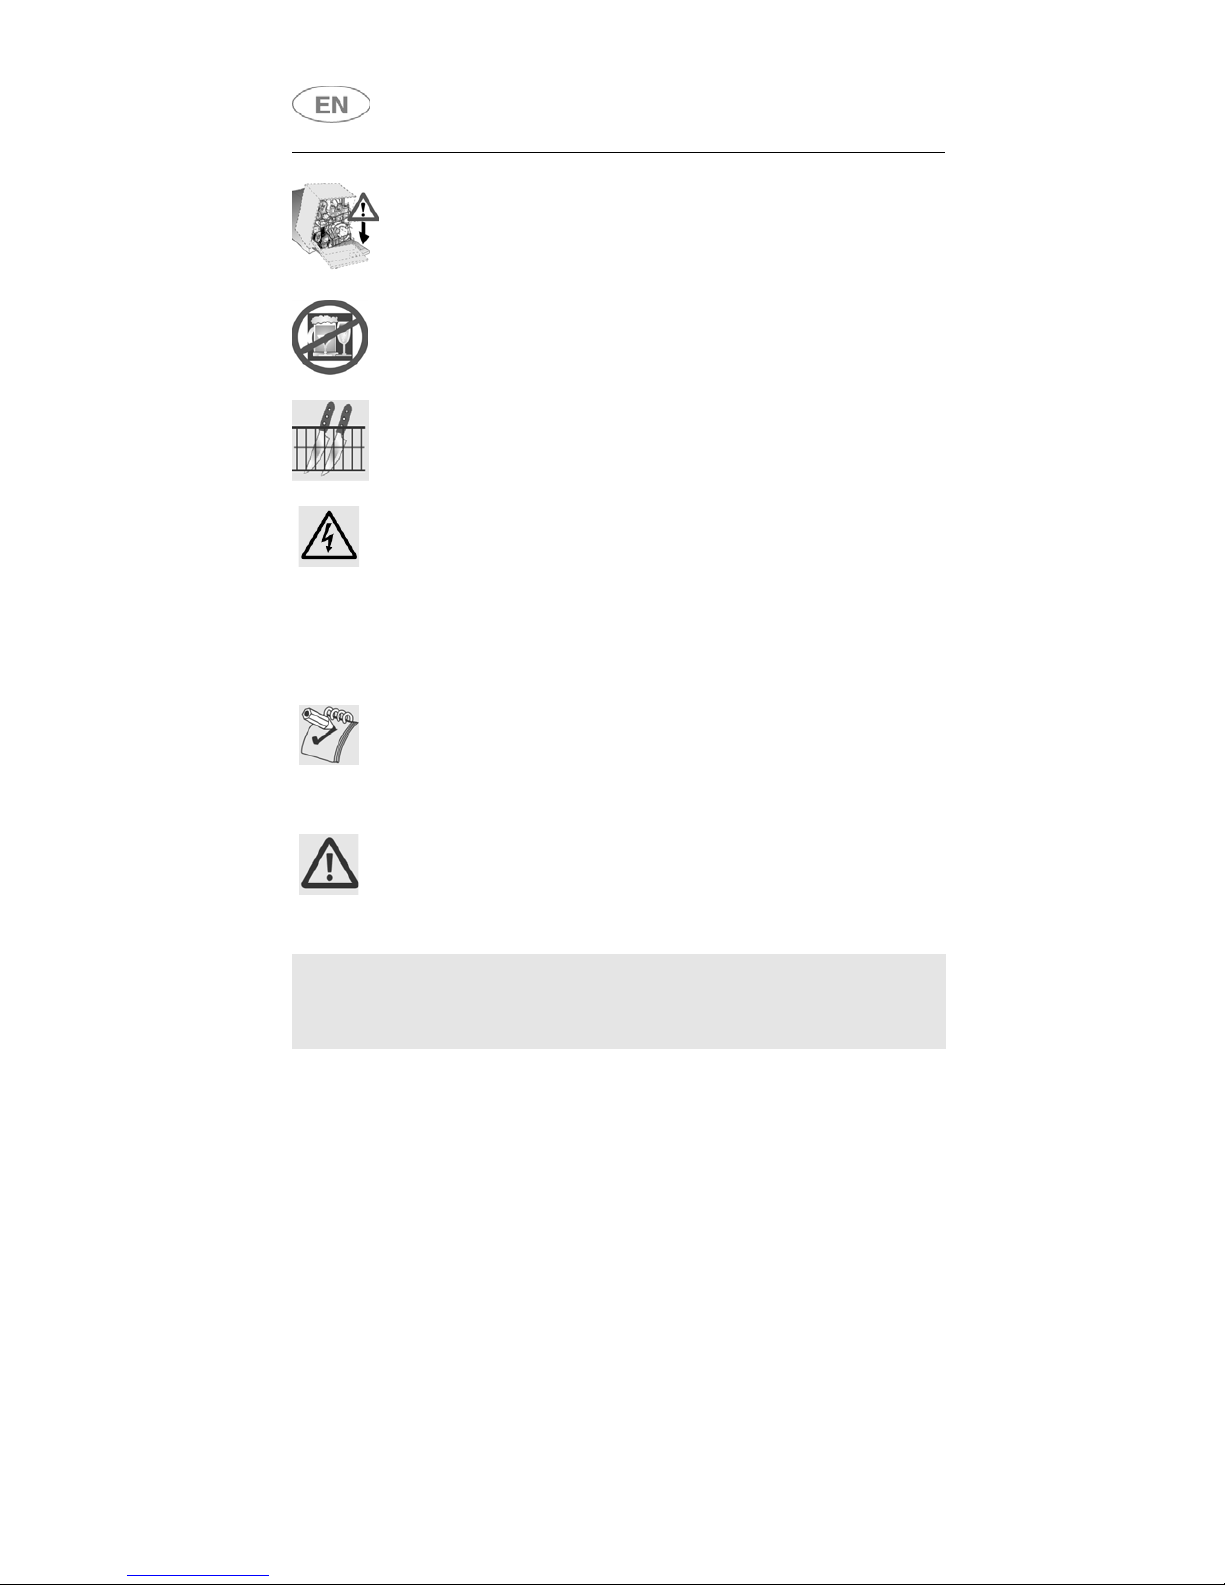
Installing a hob on top of a free-standing dishwasher is absolutely
forbidden. Building-in a dishwasher underneath a ceramic hob is
absolutely forbidden.
A dishwasher can be built-in underneath a conventional hob provided
there is no break in the kitchen worktop, and the dishwasher and hob
are installed and secured correctly, so that no hazards are
generated.
For free-standing models only: if the appliance is not built-in and is
therefore accessible on one side, the door hinge area must be covered
for safety reasons (injury hazard).
The covering fixtures are available as an accessory from specialist
dealers or the After-Sales Service.
Some models are equipped with only one adjustable foot at the rear,
which can be adjusted by turning the screw on the lower front part of the
appliance.
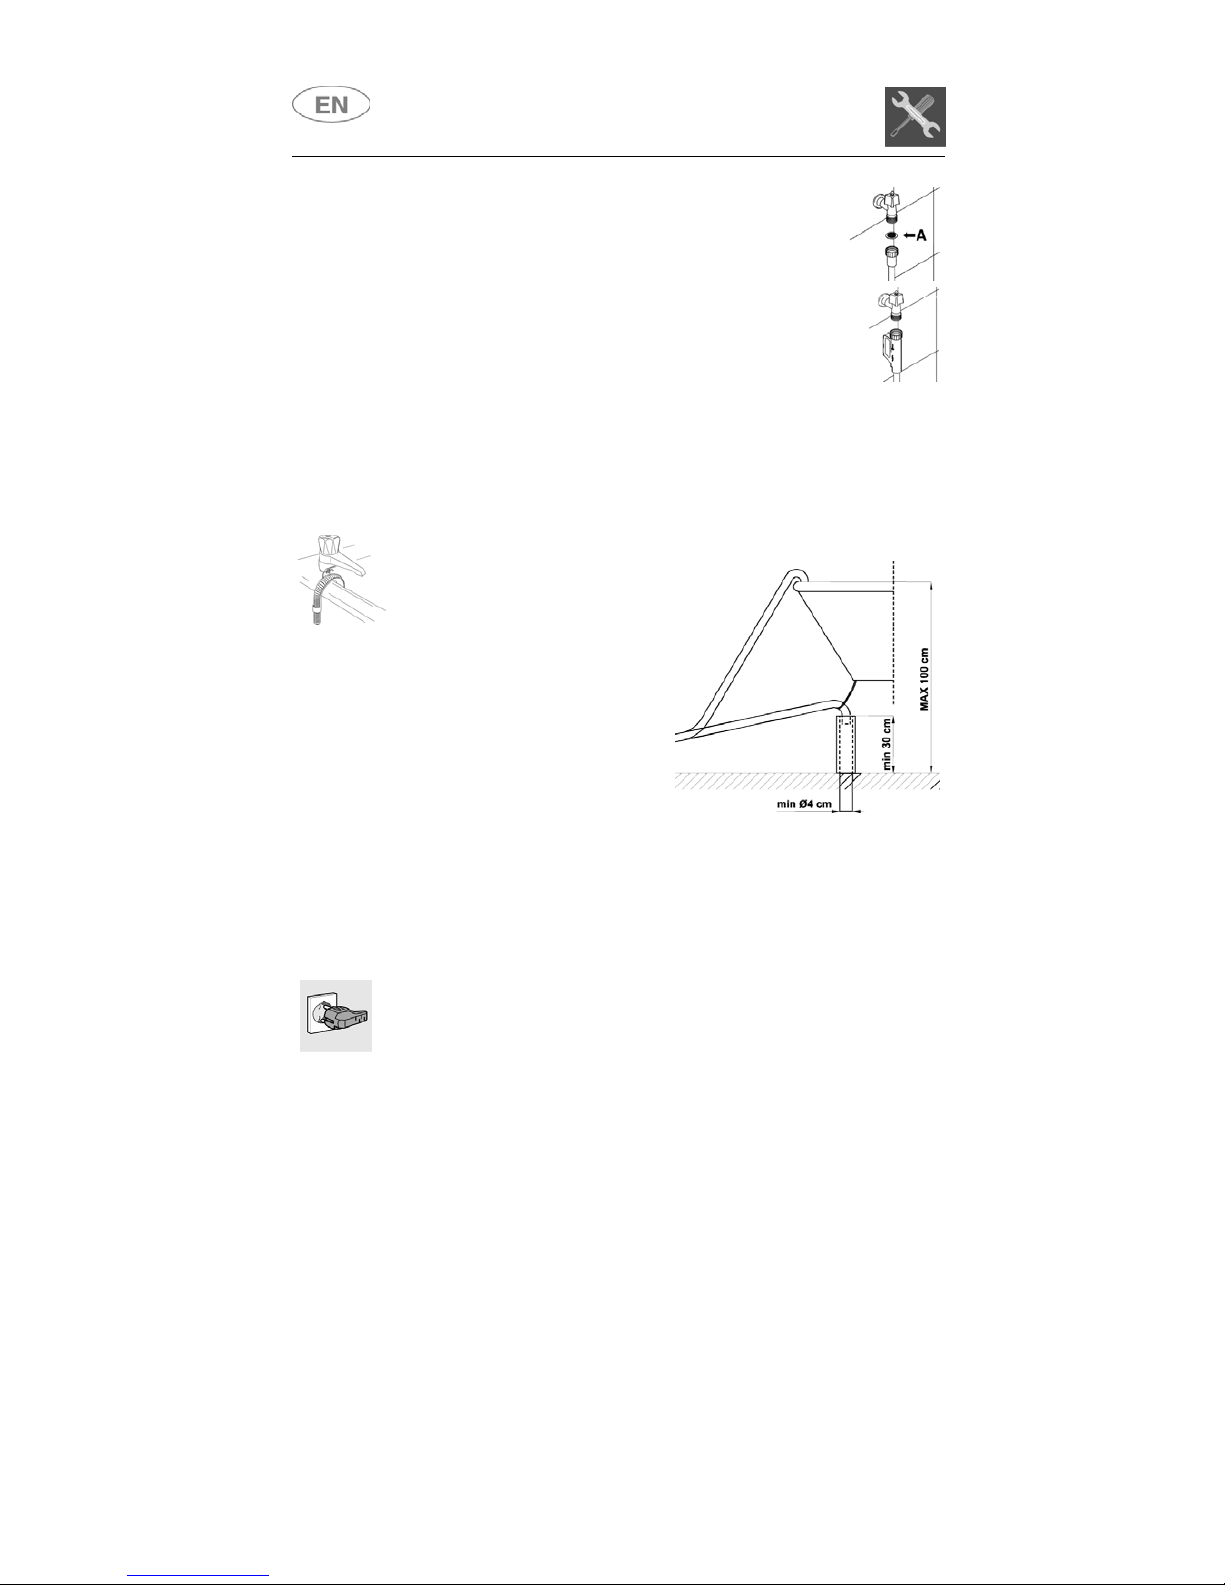
2.1 Water supply connection
Preventing the risk of clogging or damage: if the water pipe is new or
has not been used for a long time, before connecting to the water supply
check that the water is clear and free of impurities, to prevent damage to
the appliance.
The dishwasher must always be connected to the water system
with new hoses; old or used hoses must never be reused.

Installation instructions
CONNECTING TO THE WATER SUPPLY
Connect the intake hose to a cold water supply with ¾”
gas thread, inserting the filter Asupplied with the
dishwasher. Take care to screw the hose firmly into
place with your hands and then complete by
tightening about ¼ of a turn with pliers.
In dishwashers equipped with the ACQUASTOP
device, the filters is already fitted inside the threaded
ring.
The dishwasher can also be connected to a hot water supply not
exceeding 60°C. Supplying the appliance with hot water cuts down the
washing time by approximately 20 minutes, but slightly reduces its
effectiveness. Make the connection to the domestic hot water supply using
the same procedure described for connecting to the cold water supply.
DRAIN CONNECTION
Insert the dishwasher’s drain hose
into a drain pipe having a diameter
of at least 4 cm, or alternatively,
place it inside the kitchen sink
using the plastic support provided,
taking care not to crush or
excessively bend the hose. It is
important to prevent the hose from
coming loose and falling. For this
purpose, the plastic support is
equipped with a hole for tying it to
the wall or water tap.
The free end should be positioned at a height of between 30 and 100
cm, and should never be submerged in water. If a horizontal drain
extension hose is used (for a maximum of 3 m) the drain hose can be
placed at a maximum height of 85 cm from the ground.
2.2 Electrical connection
Plug the power cord into a suitable electrical outlet, according to the
instructions given in chapter "1. Safety and operating instructions".

User instructions
3. Description of the controls
3.1 Front panel
All the dishwasher controls are grouped on the front panel.
1WASHING PROGRAM SELECTOR
2ON/OFF KEY
3ON/OFF INDICATOR LIGHT
4NO SALT WARNING LIGHT (certain models only)
5RECESSED DOOR HANDLE

User instructions
SETTING THE WASHING PROGRAM
To select the most suitable washing program, refer to the table below
which indicates the recommended washing according to dish type and
the degree of soiling.
After using the table to identify the most appropriate washing program,
turn the PROGRAM SELECTION knob (1) (see section "3. Description
of the controls") to set the program of choice by aligning the pointer with
the program number.
TABLE OF PROGRAMS
AMOUNT OF
DETERGENT DURATION CONSUMPTION
SELECTOR
AND CYCLE
TYPE OF
CUTLERY
AND DEGREE
OF DIRTNESS
PROGRAM
SEQUENCE GRAMS MINUTES
(2)
WATER
LITRES (1)
POWER
KWh (2)
1PRE-WASH
Pots and
crockery,
before a wash
programme.
Cold prewash _6' 3,5 0,01
2INTENSIVE
Heavily soiled
crockery,
pots, not for
delicate
crockery.
Cold prewash cycle
Wash cycle at 65°C
2 cold water rinse cycles
Rinse cycle at 68°C
Drying cycle with hot hair
25 90' 22 1,30
3NORMAL
Normally
soiled
crockery pots.
Cold prewash cycle
Wash cycle at 65°C
Cold rinse cycle
Rinse cycle at 68°C
Drying cycle with hot hair
25 90' 18,5 1,24
4DAILY
(*) EN 50242
Slightly soiled
crockery
washed
immediately
after use.
Wash cycle at 65°C
Cold rinse cycle
Rinse cycle at 68°C
Drying cycle with hot hair
25 85' 16 1,10
5
DRYING/
PLATE
WARM
Cycle for
rising and
drying clean
or dusty
crockery.
Cold rinse cycle
Rinse cycle at 68°C
Drying cycle with hot hair
_45' 90,70
Only run the soak program with half loads.
(*) Reference program as per EN 50242 standard.
(–) Not present.
(1) Average power consumption with the softener set on level 2.
(2) The cycle duration and power consumption may vary according to the water and room
temperatures, and the type and amount of dishes.

User instructions
The washing cycle will not take place if the dishwasher door is left open
or not properly closed.
TABLE FOR CERTIFICATION BODIES
Reference standard EN 50242
Reference program (*) Selector on 4
Load 9 place-settings
Type of detergent B
Amount of detergent 25 g
Rinse aid setting Depending on the model 3/4 or 4/6
EN 50242
The upper basket must be set in the low position.
3.2 Washing programs
Before starting a washing program make sure that:
•The water supply tap is open.
•The correct amount of detergent has been added to the
dispenser.
•The baskets have been correctly loaded.
•The spray arms are able to rotate freely and without
obstruction.
•The dishwasher door is securely closed.

User instructions
CANCELLING THE CURRENT PROGRAM
To cancel the program in progress the dishwasher must be switched off
by pressing the ON/OFF key (2).
Turn the program selector to SOAK and wait for the dishwasher to start.
On completion of the program, switch off the dishwasher by pressing the
ON/OFF key (2).
CHANGING THE PROGRAM
To change the program in progress the dishwasher must be switched off
by pressing the ON/OFF key (2).
Turn the program selector to the program required and then switch the
dishwasher on again by pressing ON/OFF key (2).
The dishwasher will carry out the new program automatically.
TO SAVE ON ENERGY! … AND PROTECT THE ENVIRONMENT
•Always try to run the dishwasher fully loaded.
•Do not wash the dishes in running water.
•Use the washing program that is most appropriate for each type of
load.
•Do not carry out any preliminary rinsing.
•If available, connect the dishwasher to a hot water supply up to
60°C.
•When possible, skip the drying cycle by leaving the door open
when the washing cycle is complete; the air and the residual heat
will dry the dishes perfectly.
TO CUT DOWN ON DETERGENT CONSUMPTION! … AND PROTECT
THE ENVIRONMENT
The phosphates contained in dishwasher detergents are harmful to the
environment. To avoid using excessive amounts of detergent and to
save on electricity, observe the following:
•separate the more delicate items from dishes that are more
resistant to aggressive detergents and high temperatures;
•do not pour the detergent directly on the dishes.

User instructions
If it is necessary to open dishwasher door during the washing cycle,
there will be a 1-minute delay before the program can be resumed.
After correctly closing the door, the washing program will start again from
where it was interrupted. This operation may negatively affective the
progress of the washing cycle.
END OF CYCLE
At the end of the washing program the selector will be on one of the
STOP markers, depending on the program carried out. Switch off the
dishwasher by pressing the ON/OFF key (2).
REMOVING THE DISHES
At the end of the washing program, wait at least 20 minutes before
removing the dishes, to allow them to cool down. To prevent any water
droplets on the upper basket from falling on the dishes in the lower
basket, it is advisable to unload the lower basket first, and then the
upper basket.

User instructions
4. Operating instructions
Once the dishwasher has been correctly installed, prepare for use as
follows:
•Adjust the water softening system;
•Add the regenerating salt;
•Add the rinse aid and detergent.
4.1 Using the water softening system
The amount of scale contained in the
water (water hardness index) can cause
whitish staining on the dry dishes, which
tend to become dull over time. The
dishwasher is equipped with an automatic
softening system which uses a special
regenerating salt to reduce the hardness
of the water.
The dishwasher is factory set for water
hardness level 3(average hardness
41-60°dF –24-31°dH).
When using water of medium hardness, the regenerating salt container
should be refilled after approximately 20 washing cycles. The salt
container can hold approximately 1.5 Kg of salt in grains. Some models
are equipped with an optical no-salt indicator. In these models, the cap
of the salt container contains a green float which descends as the salt
concentration in the water drops. When the green float can no longer be
seen through the transparent cap, the container must be topped up with
regenerating salt. The container is situated at the bottom of the
dishwasher. After removing the lower basket, unscrew the salt container
cap by turning it anticlockwise and pour in the salt using the funnel
supplied with the dishwasher. Before replacing the cap, remove any salt
residues from around the opening.
•When using the dishwasher for the first time, in addition to the salt it
is also necessary to add one litre of water to the container.
•Each time the salt container is refilled, make sure that the cap is
securely closed. The mixture of water and detergent must never
penetrate the salt container, as this would compromise the operation
of the regeneration system. In the event of this occurring, the
warranty will be invalidated.
•Only use regenerating salt specially formulated for domestic
dishwashers. If using salt tablets, do not fill the container
completely.
SALT

User instructions
•Do not use table salt as it contains insoluble substances which,
over time, may damage the water softening system.
•When necessary, refill the regenerating salt container before
starting the washing program. In this way, the excess saline
solution will be immediately removed by the water; the prolonged
presence of salt water inside the tank may lead to corrosion.
Be careful not to confuse the salt and detergent packages; adding
detergent to the salt container will damage the water softening system.
ADJUSTING THE WATER SOFTENING SYSTEM
The dishwasher is equipped with an device for the user to adjust the
water softening system according to the hardness of the water supply.
According to the machine model, the selector which acts on the
adjustment may be located:
•inside the plastic locking ring located on the right-hand side, inside
the dishwasher;
•inside the water softener, just below the cap.
Both allow for adjustment to 5settings:

User instructions
WATER HARDNESS TABLE
WATER HARDNESS
German Degrees (°dH) French Degrees (°dF) SETTING
0 - 4 0 - 7 Setting N. 1 NO SALT
5 - 15 8 - 25 Setting N. 1
16 - 23 26 - 40 Setting N. 2
24 - 31 41 - 60 Setting N. 3
32 - 47 61 - 80 Setting N. 4
48 - 58 81 - 100 Setting N. 5
Contact your local water board for information on the hardness of your
water supply.
4.2 Using the rinse aid and detergent dispensers
The detergent and rinse aid
dispensers are situated on the inner
part of the door: the detergent
dispenser is on the left, and the
rinse aid dispenser is on the right.
With the exception of the SOAK program, before every washing cycle it
is necessary to add the required amount of detergent to the detergent
dispenser. The rinse aid, on the other hand, should only be added as
required.

User instructions
ADDING THE RINSE AID
The rinse aid helps the dishes dry faster and
prevents the formation of scale deposits and
staining; it is automatically added to the water
during the final rinse cycle, from the container
situated on the inner side of the door.
To add rinse aid:
•Open the door.
•Rotate the container cap anticlockwise by ¼ of a turn and remove it.
•Add the rinse aid until the container is full (approximately 140 cc).
The optical level indicator on the side of the cap should be
completely obscured. Refill the rinse aid when the optical level
indicator becomes clear again, or when the rinse aid warning light
illuminates.
•Replace the cover and turn it in a clockwise direction.
•Use a cloth to remove any spillage of rinse aid which might lead to
the formation of excess foam.
ADJUSTING THE RINSE AID DISPENSER SETTING
The dishwasher is factory set for medium water hardness. However it
possible to change the setting by turning the dispenser’s selector to the
desired position: the amount of rinse aid dispensed is proportional to the
selector position.
The setting must be increased when the washed dishes appear dull or
have circular staining.
•To adjust the rinse aid setting, rotate the dispenser cap through a
quarter turn in an anticlockwise direction and remove it.
•Then use a screwdriver to rotate the rinse aid selector to the desired
position.
•Replace the cap, turning it clockwise.
•The amount of rinse aid must be increased if the washed dishes
appear dull or feature circular stains.
•If, on the other hand, the dishes are sticky or have white streaks, it
is necessary to reduce the rinse aid setting.

User instructions
ADDING THE DETERGENT
To open the detergent dispenser cap, lightly press
the button P. Add the detergent and close the cap
carefully.
During the washing cycle, the dispenser will be
opened automatically.
•Use only detergents specially formulated for dishwashers. For
optimal washing results it is important to use a good quality
detergent.
•The detergent packs must be sealed and stored in a dry place to
prevent the formation of lumps which may negatively affect washing
results. Once opened the detergent packs should not be kept for too
long, otherwise the detergent loses its effectiveness.
•Do not use detergents formulated for washing dishes by hand,
because they produce a great deal of foam and may negatively
affect the operation of the dishwasher.
•Add the correct amount of detergent. An insufficient amount of
detergent will result in a partial removal of dirt from the dishes,
whereas an excessive amount is wasteful and does not improve the
washing results.
•The market offers liquid and powder detergents with differing
chemical compositions, which may contain phosphates, or be
phosphate-free but contain natural enzymes.
- Detergents containing phosphates are more effective against
grease and starch at temperatures above 60°C.
-Enzyme detergents, on the other hand, are also effective at lower
temperatures (from 40 to 55°C) and are more easily
biodegradable. With enzyme detergents it is possible to obtain at
low temperatures comparable results to those which can only be
achieved at 65°C using traditional detergents.
For the safeguarding of the environment we recommend the use of
phosphate- and chlorine free detergents.

User instructions
•Also available are tablet detergents which state that that no salt or
rinse aid is required. In some cases, these detergents might not give
good results, especially with short and/or low-temperature washing
cycles.
If performance problems (e.g. a white coating on the tank or dishes,
poor drying, dirt on dishes at the end of the wash) are noted, users
are advised to return to conventional products (granular salt, powder
detergent and liquid rinse aid).
However, please note that on return to the use of conventional salt,
a number of cycles will be required before the system becomes fully
efficient again, so traces of white coating may still be found on the
tank and dishes. If the problem persists for too long, contact the
After-Sales Service.
•When using detergent in tablet form (bear in mind that we
recommend the use of three separate products: detergent, salt and
rinse aid), place the tablets in the cutlery rack. The dispenser is
designed to use powder or liquid detergent and the door does not
open completely during the washing cycle. This means that a tablet
is not completely dissolved (released), which may lead to the
following:
-not enough detergent released during the cycle, with poor washing
results;
-the detergent forms a solid block in the distributor and is released
during the final rinse cycle.
The introduction of detergent into the rinse aid dispenser, even in
liquid form, will damage the dishwasher.

User instructions
4.3 General warnings and recommendations
Before using the dishwasher for the first time, it is advisable to read the
following recommendations concerning dish types to be washed and
their loading.
There are generally no constraints on the washing of domestic dishes,
but in certain cases it is necessary to take their characteristics into
account.
Before loading the dishes into the baskets it is necessary to:
•remove coarse food remains: e.g. bones, fish-bones, etc. which
may clog the filter or damage the wash pump.
•soak any pots or pans with burnt-on food remains on the bottom to
facilitate removal, then load them into the LOWER BASKET.
There is no need to pre-wash the dishes under running water before
loading them into the baskets since this only wastes water.
Correct loading of the dishes helps ensure optimal washing
results.
WARNING!
•Make sure that the dishes are securely in place so that they cannot
tip over or obstruct the rotation of the spray arms during the
washing cycle.
•Do not place very small objects in the baskets as these could fall
and obstruct the spray arms or the wash pump.
•Containers such as cups, bowls, glasses and pots should always
be loaded with the opening facing downwards and with any cavities
at an angle, to allow the water to drain out.
•Do not stack dishes or place them in such a way that they cover
one other.
•Do not place glasses too close together because they may knock
against each other and break, or there might be staining at the
point where they touch.
MAKE SURE that the items being washed are dishwasher-safe.
Table of contents
Other Smeg Dishwasher manuals

Smeg
Smeg Dishwasher DDW104 User manual

Smeg
Smeg STA6544TC User manual

Smeg
Smeg PL454NE User manual

Smeg
Smeg DWAFI6214-2 User manual

Smeg
Smeg DWD409SS User manual

Smeg
Smeg lvs367sx User manual

Smeg
Smeg DDW115 User manual

Smeg
Smeg Dishwasher ST1144S User manual

Smeg
Smeg SA4510X User manual

Smeg
Smeg LVS145FX User manual