SNAIGE RF390 User manual


1

10
11
22
2

SAFETY INSTRUCTIONS
! CAREFULLY READ THE INSTRUCTION MANUAL. If instructions are not followed, there is a
risk of injury, damage to the appliance, and loss of the right to free warranty service. We
recommend to keep the Instruction manual the whole time you have the appliance. When you sell the
appliance, pass the Instruction manual to the new owner of the appliance.
WARNING! Do not cover the ventilation holes at the top and on the sides of the appliance.
WARNING! Do not use any mechanical means or electrical devices to hasten the thawing
process when cleaning the freezer compartment.
WARNING! If the supply cord is damaged it must be replaced by the manufacturer,
manufacturer service agent or a similarly qualified person, in order to avoid a hazard.
WARNING! Disposal of the appliance should be according to national rules.
WARNING! Do not damage the appliance refrigeration system. It contains the refrigerant gas
R600a. If the refrigeration system is damaged:
Do not use any open flame.
Avoid sparks ― do not turn on any electrical appliances or lighting fixtures.
Immediately ventilate the room.
WARNING! Do not allow children to play with the appliance or to plug it in or unplug from the
electricity supply socket. Do not allow children to play with the packaging material from the
appliance.
WARNING! The appliance should not be used by children or mentally challenged individuals,
unless they have previously been shown how to operate the appliance by someone
responsible for their safety.
If the appliance is brought in from the cold (temperature is not higher than +12 °C), you should wait for
two hours before connecting it to the mains.
The appliance should not be connected to the mains until all packing and transport materials aren’t
removed.
Once the appliance is unpacked, make sure that it is complete, that the body and the electrical cord aren’t
damaged.
It is forbidden to use a technically damaged appliance.
WARNING! IF THE APPLIANCE IS PRODUCED WITH THE SPECIAL SUPPLY CORD IT CAN BE
EXCHANGED ONLY BY THE SAME SPECIAL SUPPLY CORD PROVIDED BY THE
MANUFACTURER.
WARNING! The appliance must be plugged in to an earthed electricity supply socket. The
earthed electrical socket by which the appliance is connected to the mains should be in an
accessible place.
WARNING! The frequency and power of the electricity supply in your house must conform to
the general data parameters of the appliance as it is shown in the table.
WARNING! When positioning the appliance, be careful that the electrical cord isn’t squeezed
in order to avoid its damage. Do not store heavy objects such as cooling devices, furniture or
other domestic devices next the appliance in such a way that they could squeeze and
damage the electrical cord. This can cause a short circuit and a fire.
WARNING! Make sure that the plug of the electrical cord is not squeezed by the back wall of
the appliance or otherwise damaged. A damaged plug can be the cause of a fire!
IF THE APPLIANCE IS UNPLUGGED (FOR CLEANING, MOVING TO ANOTHER PLACE, ETC.), IT MAY BE
REPEATEDLY SWITCHED ON AFTER 15 MIN.
The appliance should be used only for freezing and storing foodstuffs.
Before cleaning, switch off the appliance and unplug the electricity supply cord plug from the electrical
socket. Read more about this in the section CLEANING AND CARE
.
The appliance can’t be disposed of by burning.
Do not place any switched on electrical devices (such as microwave ovens, hair dryers, irons, electric
kettles or other electrical devices) on top of the appliance because this may cause ignition of plastic parts.
GB
3

GB
Do not place any dishes with liquids on top of the appliance and do not keep flowers in vases or other
liquid-filled vessels on the appliance.
Do not climb on or sit on the appliance, do not lean on or hang on the appliance doors, and do not allow
children to do this.
!IF THE APPLIANCE IS OUT OF ORDER AND IT IS NOT POSSIBLE TO REPAIR IT BY MEANS OF GIVEN
RECOMMENDATIONS, UNPLUG IT, OPEN THE DOORS AND CALL THE SERVICE EXPERT. ONLY A
SERVICE REPRESENTATIVE CAN REMEDY ALL TECHNICAL OR CONSTRUCTION FAULTS.
TRANSPORT
! THE MANUFACTURER WILL NOT BE RESPONSIBLE FOR ANY DAMAGE TO THE APPLIANCE THAT
RESULTS FROM NON-COMPLIANCE WITH THE INSTRUCTIONS FOR TRANSPORTATION.
The appliance should be transported only in the vertical position.
When being transported, the appliance should be protected from atmospheric conditions (rain,
snow, dampness).
The appliance should be firmly secured in place while being transported, to avoid slippage or any
shocks in the transport vehicle.
If the appliance was transported not vertically, it may be connected to the mains after 4 hours at
least. If this is not done, the appliance compressor may fail.
ENVIRONMENTAL PROTECTION INFORMATION
This symbol indicates that once the appliance is no longer needed, it cannot be disposed together
with other miscellaneous municipal waste. It should be collected and eliminated separately, i.e. in
containers specially marked with this symbol in large-dimension rubbish collection areas.
Full information on where to submit the old appliance safety can be obtained from local
government authorities, the shop where you bought the appliance, or the manufacturer’s representatives.
If you decided to scrap the appliance, make it impossible to use in order to prevent possible misadventure.
Pull out the electric plug from the electricity supply socket and then cut off the cord. Tear off the gasket.
Break the door lock if any.
WARNING! Do not dismantle the appliance yourself. Pass it on to recycling companies.
GENERAL INFORMATION
The appliance is a two–compartment refrigerator-freezer combination. The refrigerator compartment
is intended for storage of fresh foodstuffs; the freezer compartment is intended for freezing and long-
term storage of foodstuffs.
! THE APPLIANCE IS ECOLOGICALLY CLEAN, CONTAINING NO MATERIALS HARMFUL TO THE OZONE
LAYER: the refrigerant used is R600a, the foaming agent used for the appliance insulation is
cyclopentane C5H10.
! THE MANUFACTURER GUARANTEES RELIABLE OPERATION OF THE REFRIGERATOR WHEN THE
AMBIENT TEMPERATURE IS +16 TO +32 DEGREES CELSIUS AND THE RELATIVE AIR HUMIDITY NOT
GREATER THAN 70 PER CENT.
The appliance climate class is N.
NOTE. The manufacturer reserves the right to make future changes to technical parameters and
specifications.
4

Model RF390
390 L
RF360
360 L
KKG 360
RF315 RF310
310L
KKG 310
RF300
300 L RF270
270 L
Total gross volume, L 365 341 314 309 273 261
Freezer gross volume, L 112 112 77 114 112 83
Refrigerator net volume, L 253 225 229 193 161 170
Freezer net volume, L 90 90 61 92 90 61
Temperature in the
refrigerator compartment from 0 °C to +10 °C
Temperature in the freezer
compartment -18 °C and lower
Dimensions (HxWxD), cm 200x60x6
0
191x60x6
0
173x60x6
0173x60x60 163x60x6
0
145x60x6
0
Energy efficiency class
according to the directive
0,96 0,93 0,85 0,68 0,89 0,86 0,79
Energy consumption,
kWh/24 h A A+ A A
Freezing capacity, kg/24 h 12 12 5 8 12 12 5
Freezer temperature rising
time from storage
temperature to -9 ºC after
power-cut, h
17
Rated input, W 170 140
Voltage used, V 220-230V/50Hz
DESCRIPTION OF THE APPLIANCE, BASIC PARTS (Fig. 1)
WARNING! THE APPLIANCE ACCESSORIES LISTED BELOW MAY DIFFER FROM THE ACCESSORIES
OF THE APPLIANCE YOU HAVE BOUGHT IN QUANTITY AND IN DESIGN.This description is adapted
for entire group of two–compartment refrigerator-freezer combinations.
A– refrigerator compartment B– freezer compartment
1-2 Interior lighting lamp, interior lighting lamp cover 13 Frozen products section(s)
3Thermostat - temperature regulator 15 Thaw water channel
4Thermostat position indicator 18 Bottle tray
5Electric supply indicator (green light) 19 Door trays
7Adjustable height shelves 20 Egg tray
9Thaw water channel cleaner (red colour) 22 Condenser
10 Shelf (glass) 23 Thaw water drip tray
12 Fruit and vegetable boxes 24 Compressor
PREPARING THE APPLIANCE FOR OPERATION
! It is recommended to prepare the appliance for operation with a helper.
�Remove package. Lift the appliance away from foamed polystyrene base. Tear off adhesive tapes.
�When positioning the appliance in chosen location, it will move more easily into position if you lift
the front a little and incline it backward, allowing it to roll on its casters.
�Remove all red-coloured parts from the shelves (fig. 3) and the support from the bottom cover
(fig. 2). Tear away the red-coloured adhesive tapes from the door trays – they are intended only for
the transport of the appliance.
�Suitably dispose the packaging material.
�Take two supports from the bag (fig. 4) and insert them into the guides at the top back part of the
appliance.
! We recommend the model RF390 to fix additionally to the wall:
�Inserts the supports into the guides at the top back part of the appliance (fig. 4).
�Mark on the wall the position of the holes in the supports.
�Drill holes in the wall and insert fixing bushings. Secure the appliance to a wall.
GB
5
Model RF390 RF360 RF315 KGC310A+ RF310
KGC361 RF300 RF270
Total gross volume, L 365 341 314 309 273 261
Refrigerator net volume, L 253 225 229 193 161 170
Freezer net volume,L 90 90 61 92 90 61
Ac tual co nsu mpti on wi ll de pe nd on h ow t he ap pl ian ce i s use d and w he re it i s l ocat ed
Energy efficiency class A A+ A A A A+
Energy consumption:
kWh/ 24 h
kWh / year
0,960
350
0,930
339
0,850
310
0,728
266
0,890
325
0,860
314
0,790
288
0,638
233
Climate class N
Noise level, dB(A) re 1pw 42 41 40
Freezing capacity, kg/24 h 12 12 5 8 12 12 5
Dimensions (HxWxD), cm 200x60x60 191x60x60 173x60x60 173x60x60 163x60x60 145x60x60
Freezer temperature rising
time from storage
temperature to -9 ºC after
power-cut, h
17
Electrical Data see in the product label

POSITIONING
Place the appliance in a dry, well ventilated room.
WARNING! The appliance should not be operated in an unheated room or porch. Place the
appliance away from heat sources such as kitchen stove/oven, radiators, or direct sunlight.
WARNING! The appliance must not touch any pipes for heating, gas or water supply, or
any other electrical devices.
Do not cover the ventilation holes at the top of the appliances– it must be a good air circulation
around the appliance. There should be a gap of at least 10 cm between the top of the appliance
body and any furniture that may be above it (fig. 5). If this requirement is not followed, the
appliance consumes more electrical energy and its compressor may overheat.
If the appliance is placed in a corner, a gap of at least 1 cm must be left between the appliance
body and the wall so that the freezer compartment door can be opened enough to pull out the
frozen product drawer (fig. 6).
The appliance must stand on a level surface and must not touch the wall. If necessary, regulate the
height of the appliance by adjusting the levelling feet: by turning them clockwise – the front of the
appliance rises, by turning them counter clockwise – it comes down. If the appliance is tilted slightly
backward – the doors will close by themselves.
CHANGING THE OPENING DIRECTION OF THE DOORS
It is recommended that changing the opening direction of the doors should be done with a helper.
You will need two spanners No. 8 and No. 10 and a Philips head screwdriver.
! When changing the opening direction of the doors, YOU CAN NOT lay the refrigerator horizontally.
Do the actions below in the order they are listed (fig. 11):
WARNING! Turn off the appliance and pull the plug out of the electricity supply socket.
1. Remove the bottom cover 15. Unscrew two screws 12 and remove the bottom bracket 13
together with the washers 11 on the axle and the spacer 10. Remove the bottom door 9.
2. Uncrew the fixing screws 7of the middle bracket 6. Remove the middle bracket 6together with
with washers on the axle and the spacer 5. Remove the top door 4.
3. Unscrew the axle 2together with the nut 1 and the washers 3from the upper bracket and screw
all this set on the left side of the door. Displace the plug 21 the upper door and the plug 19 from
the bottom door on the right side.
4. Take out the pins 20 from the cabinet in the zone of the cross element and displace the to the
right side. Hang the upper door on the axle 2.
5. Prior to screwing the middle bracket 6with washers and spacers on the left side of the cabinet,
insert the bracket axle into the upper door. Hang the bottom door on the middle bracket axle.
6. Prior to unscrewing the bracket 16 and exchanging it with the bottom bracket 13 (together with
the set of washers and spacers), insert the bracket axle into the bottom door. The brackets 14
which are under the brackets 13 and 16 remain in their places.
7. Unscrew fixing screws 17 from doors, remove handles 18 and screw it on the eight side of the
door therefore taken out plugs. Cover the holes in which the handle was screwed with taken out
plugs.
CHANGING THE INTERIOR LIGHT BULB
When changing the interior light bulb (7 fig.), do the actions below in the order they are listed:
1. Unplug the appliance from the mains by pulling the plug out of the electricity supply socket.
2. Push the interior light bulb lid retainer to the right with a flat screwdriver and with your other
hand pull it down.
3. First check whether the bulb has really burnt out: unscrew it and screw it back in. Plug the
appliance into the electricity supply. If the bulb lights up, it is not necessary to change it.
4. If the bulb does not light up, replace it with another 15 W bulb of the same type with an E14 lamp
holder.
5. When the bulb is replaced, first put the lamp lid in the right position, then on the left side push up
until the lid fixes in position.
6. Plug the appliance into the electricity supply socket.
GB
6

TEMPERATURE REGULATION
The temperature in the refrigerator compartment is controlled using the thermostat knob 3(fig. 1) by
turning it to one side or the other. The temperature indication in digits is shown beside the thermostat
knob. When the appliance door is closed, the thermostat position is seen on the thermostat position
indicator 4(fig. 1).
The temperature is regulated on the scale of five digits.
0= Compressor is switched off. WARNING! Electric current is not switched off.
1 = highest temperature (lowest cooling)
5 = lowest temperature (highest cooling)
If food products in the refrigerator compartment are too cold, set the thermostat knob to 1,2or 3. If
food products in the refrigerator compartment are not being chilled sufficiently, set the thermostat
knob to 4or 5.
!Please set the desired temperature in the appliance according to your own requirements.
!THE TEMPERATURE IN THE REFRIGERATOR COMPARTMENT MAY VARY DEPENDING ON AMBIENT
TEMPERATURE, THE AMOUNT OF FOODSTUFFS, THE TEMPERATURE OF THE FOODSTUFFS, AND
HOW OFTEN THE APPLIANCE DOOR IS OPENED AND CLOSED.
Therefore we recommend:
�locate the appliance away from heat sources,
�food placed in the appliance should not be warmer than the room temperature,
�appliance door must not to be left open,
�the appliance door should not be open longer than it is necessary to take out or put in foodstuffs.
!IF THE ROOM IS COOL, THE APPLIANCE COOLS LESS. THE TEMPERATURE IN THE APPLIANCE MAY
THEREFORE RISE. Use the thermostat wheel to set a lower temperature.
DEFROSTING OF THE REFRIGERATOR COMPARTMENT
The refrigerator compartment defrosts automatically. Drops of ice that form on the back wall of the
refrigeration compartment thaw during the time the compressor is not working and the thaw water
runs down the thaw water runoff channel to the tray on top of the compressor , where it evaporates.
FREEZING OF FOOD STUFFS IN THE FREEZER COMPARTMENT
In the freezer compartment, the fast-freeze section is marked with the symbol
Fresh foodstuffs prepared for freezing should be placed in one or two layers in the fast-freeze section.
The thermostat knob should be set to 5. After 24 hours, the frozen food products should be replaces
from the quick-freeze section to the storage section drawer(s). When the products are frozen, the
thermostat wheel should be set at its earlier position.
�DO NOT EXCEED THE INDICATED MAXIMUM AMOUNT OF FOOD FOR FREEZING: FOR MODELS
RF390, 390 L,RF360, KKG 360, 360 L,RF310, KKG 310, 310 L,RF300, 300 L IT IS 12 KG
PER 24 HOURS, FOR MODELS RF270, 270L AND RF315, IT IS 5 KG PER 24 HOURS.
�Leave a gap of not less than 3 cm between the foodstuffs being frozen and the upper partition
(fig. 10).
�Do not place unwrapped foodstuffs in the freezer sections.
�Fresh food for freezing should not touch already frozen foodstuffs.
�Do not freeze foodstuffs that are warmer than the room temperature.
�Do not freeze liquid foodstuffs in glass vessels or bottles. Do not freeze carbonated beverages.
�Strictly observe the frozen food product validity dates indicated by the manufacturer on the product
packaging.
�WE RECOMMEND THAT FROZEN FISH AND SAUSAGE SHOULD BE STORED IN THE FREEZER
COMPARTMENT NOT LONGER THAN 6 MONTHS; CHEESE, POULTRY, PORK, LAMB – NOT MORE
THAN 8 MONTHS; BEEF, FRUIT AND VEGETABLES – NOT LONGER THAN 12 MONTHS.
GB
7
FREEZING OF FOOD STUFFS IN THE FREEZER COMPARTMENT
In the freezer compartment, the fast-freeze section is marked with the symbol
Fresh foodstuffs prepared for freezing should be placed in one or two layers in the fast-freeze section.
The thermostat knob should be set to 5. After 24 hours, the frozen food products should be replaces
from the quick-freeze section to the storage section drawer(s). When the products are frozen, the
thermostat wheel should be set at its earlier position.
�DO NOT EXCEED THE INDICATED MAXIMUM AMOUNT OF FOOD FOR FREEZING.
�Leave a gap of not less than 3 cm between the foodstuffs being frozen and the upper partition.
�Do not place unwrapped foodstuffs in the freezer sections.
�Fresh food for freezing should not touch already frozen foodstuffs.
�Do not freeze foodstuffs that are warmer than the room temperature.
�Do not freeze liquid foodstuffs in glass vessels or bottles. Do not freeze carbonated
beverages.
�Strictly observe the frozen food product validity dates indicated by the manufacturer on the product
packaging.
�WE RECOMMEND THAT FROZEN FISH AND SAUSAGE SHOULD BE STORED IN THE FREEZER
COMPARTMENT NOT LONGER THAN 6 MONTHS; CHEESE, POULTRY, PORK, LAMB – NOT MORE
THAN 8 MONTHS; BEEF, FRUIT AND VEGETABLES – NOT LONGER THAN 12 MONTHS.

DEFROSTING THE FREEZER COMPARTMENT
The freezer compartment should be thawed not less than twice a year or when a layer of ice thicker
than 5 mm forms in it. Do the actions below in the order they are listed:
WARNING! Turn the appliance off and pull the plug out of the electrical socket.
Remove foodstuffs from freezer compartment. The frozen foodstuffs will not warm up too much
while you are thawing the freezer compartment if you cover them with a thick cloth and keep them
in a cool place.
Remove bottom cover (Fig. 9). Place a dish under the thaw water channels.
Leave door of freezer compartment open.
When the ice melts, clean and wipe dry the surfaces and fixtures of the freezer compartment.
Close the freezer compartment door.
Plug in and turn on the appliance.
MAKING ICE-CUBES
Ice-cubes are prepared in a tray for making ice-cubes. Fill each space in the ice cube tray ¾ full of
drinking water. Place the ice-cube tray in the fast-freeze section. When you want to remove the ice-
cubes from the ice-cube tray, leave it for 5 min at room temperature and then shake the cubes into
the special dish for them.
CLEANING AND CARE
! REGULARLY CLEAN THE APPLIANCE.
! Remember that before defrosting the freezer compartment and cleaning the back part of
the appliance body you must disconnect the appliance from the electrical energy supply
socket by pulling the plug out of the electricity outlet.
Protect the appliance inner surfaces and plastic parts from fats, acids and sauces. In case of
accidental spills – immediately clean with warm soapy water or dishwashing detergent. Wipe dry.
Clean the appliance inner surfaces with warm soapy water. Dishwashing detergent may also be
used.
Wipe dry inner and outer surfaces.
Regularly clean the hermetic gaskets of the doors. Wipe dry.
Regularly wash the trays and other accessories.
WARNING! REGULARLY CLEAN THE THAW WATER CHANNEL SPACE WITH A SPECIAL CLEANER
FOR THAT PURPOSE 9(Fig. 1).
At least once a year clean dust away from the back part of the appliance body and the compressor.
A soft brush, electrostatic cloth or vacuum cleaner may be used for cleaning.
DO NOT use detergents containing abrasive particles, acid, alcohol or benzene for cleaning the
appliance inner and outer surfaces.
DO NOT use for cleaning cloths or sponges that have coarse surfaces intended for scrubbing.
PRACTICAL TIPS AND OBSERVATIONS
Do not keep bananas in the refrigerator – these fruits are sensitive to cold.
Do not keep prepared food and ready-to-cook (“heat and eat”) food in the same container.
Store in an airtight container in the appliance any foodstuffs that have a strong odour (e.g. fresh
fish, pâté de foie gras goose liver pâté, and cheese).
Frozen foodstuffs should be thawed in the refrigerator compartment. Food that thaws slowly retains
better flavour properties and spread cold will help to maintain the set temperature in the
refrigeration compartment. Do not consume ice made in the freezer chamber straight away.
Products will freeze more quickly if they are divided up and packed in small portions.
IF THE APPLIANCE IS TO BE LEFT SWITCHED OFF FOR AN EXTENDED PERIOD, LEAVE ITS DOORS
OPEN.
GB
8

Remarks on the appliance operating noise
As the appliance operates and goes through the freezing cycle, various noises will be emitted. This is
normal and is not a sign of any malfunction.
As the refrigerant circulates around the refrigeration system, it causes sounds like murmuring,
bubbling, or rustling.
Louder sounds like popping or clicking may be heard for a short time as the refrigerator’s
compressor switches on.
OPERATION PROBLEMS AND THEIR SOLUTIONS (TROUBLESHOOTING)
What if …
The appliance is plugged in to the mains but it does not work and the electricity supply
voltage indicator is not illuminated. Check that your house electricity supply installations are in
order. Check that the plug is correctly inserted into the electricity supply socket.
The noise has become louder. Check that the appliance is standing stable, on a level place. To
make it level, regulate the front feet. Check if the appliance is not touching any furniture, and that
no part of the refrigeration system at the back part of the appliance body is touching the wall. Pull
the appliance away from any furniture or walls. Check that the cause of increased noise isn’t due to
bottles, cans or dishes in the appliance that might be touching each other.
Water has appeared at the bottom of the refrigerator compartment. Check whether a thaw
water channel space isn’t blocked. Clean the thaw water channel space with a cleaner intended for
that purpose.
Water has appeared on the tempered glass shelves. Food items or dishes in the refrigeration
compartment are touching the back wall of the compartment. Do not let food items or dishes touch
the back wall.
Water has appeared under the appliance. The thaw water collection tray has slipped off the
compressor. Place the tray on top of the compressor.
When the appliance door is opened, the rubber sealing gasket pulls out. The gasket is
smeared with sticky foodstuffs (fat, syrup). Clean the sealing gasket and the groove for it with
warm water containing soap or dishwashing detergent and wipe dry. Put the rubber sealing gasket
back into the place.
High temperature in appliance, the compressor operation pauses are short. Ascertain
whether the appliance door is shutting tightly, whether the door wasn’t kept open longer than
necessary when taking out or putting in foodstuffs, or whether a large amount of warm food was
placed in the appliance.
The top of the appliance has condensation on it. The ambient relative air humidity is above 70
%. Ventilate the room where the appliance stands, and if possible remove the cause of the
humidity.
WARRANTY SERVICE
! IF YOUR APPLIANCE IS NOT WORKING PROPERLY, ASCERTAIN WHETHER YOU CAN REMEDY THE
CAUSE OF THE FAULTY FUNCTIONING OF THE APPLIANCE YOURSELF. If you cannot solve the
problem yourself, contact the nearest refrigerator service representative by telephone or in writing.
When making contact, necessarily indicate the refrigerator model 1and number 2. You will find this
data on the product label, which is glued to the left wall of the refrigerator compartment, near the
fruit and vegetable trays.
GB
9

NL
VEILIGHEIDSINSTRUCTIES
! Lees de veiligheidsinstructies aandachtig door. Indien de instructies niet zorgvuldig
worden toegepast, kunnen er risico’s onstaan of kan er schade worden aangericht met als
gevolg het vervallen van de volledige garantie. Het is aanbevolen om de veiligheidsinstructies te
bewaren gedurende de gehele levensduur van de koelkast. Indien de koelkast wordt verkocht, dient
men tevens de veiligheidsinistructies aan de nieuwe eigenaar te geven.
WAARSCHUWING! Let erop dat de ventilatieopeningen aan de bovenkant en zijkanten
niet afgedekt worden.
WAARSCHUWING! Tijdens het reinigen van het vriesgedeelte geen gebruik maken van
mechanische of elektrische hulpmiddelen om het ontdooingsproces te versnellen.
WAARSCHUWING! Indien de voedingskabel beschadigd is, dient deze door de fabrikant,
zijn onderhoudspersoneel of door een gespecialiseerd vakman te worden vervangen om
schade te voorkomen.
WAARSCHUWING! Wanneer de koelkast wordt afgedankt, dient dit volgens de landelijke
wetgeving plaats te vinden.
WAARSCHUWING! Zorg dat het koelsysteem van de koelkast niet wordt beschadigd.
Indien het koelsysteem wordt beschadigd:
Geen vuur gebruiken.
Vermijd vonken ― gebruik geen elektrische apparaten of verlichtingen.
Ventileer onmiddelijk de ruimte waar de koelkast zich bevindt.
WAARSCHUWING! Laat kinderen niet met de koelkast spelen of de stekker uit het
stopcontact halen of deze in het stopcontact steken-. Laat kinderen niet met het
verpakkingsmateriaal van de koelkast spelen.
WAARSCHUWING! De koelkast dient niet gebruikt te worden door kinderen of personen
die geestelijk niet onafhankelijk zijn, tenzij diegene die verantwoordelijk is voor hun
veiligheid hen de werking heeft laten zien.
Indien de koelkast vervoerd wordt bij lage externe temperatuur (niet hoger dan +12 °C), dient u 2
uur te wachten voordat u de koelkast kunt aansluiten.
Alle verpakkings- en vervoermaterialen dienen verwijderd te worden voordat u de koelkast met het
voedingsnet verbindt.
Als de koelkast eenmaal uit zijn verpakkig is gehaald, controleer of zowel de koelkast als de
voedingskabel niet beschadigd zijn.
Het is verboden om technisch beschadigde apparaten te gebruiken.
WAARSCHUWING! De koelkast moet op een geaard stopcontact aangesloten worden. De
geaarde stekker waarmee het apparaat met het voedingsnet wordt verbonden, dient
gemakkelijk bereikbaar te zijn.
WAARSCHUWING! INDIEN DE KOELKAST VOORZIEN IS VAN DE SPECIALE
VOEDINGSKABEL, KAN DEZE ENKEL VERVANGEN WORDEN DOOR EEN GELIJKSOORTIGE
KABEL DIE DOOR DE FABRIKANT WORDT GELEVERD.
WAARSCHUWING! De frequentie en de stroomtoevoer in uw huis moeten conform zijn
aan de algemene richtlijnen van de koelkast zoals beschreven in het schema.
WAARSCHUWING! Bij het plaatsen van de koelkast moet gecontroleerd worden of de
voedingskabel niet gekneld zlt en zodoende beschadigd wordt. Bij het plaatsen van
eventuele zware objecten zoals bijvoorbeeld koelelementen, meubels of andere
huishoudelijke apparaten naast de koelkast, dient men ervoor te zorgen dat de
voedingskabel niet bekneld raakt. Dit kan namelijk kortsluiting en brand veroorzaken.
WAARSCHUWING! Controleer of de stekker van de voedingskabel niet achter de koelkast
gekneld zit of dat het op andere wijze beschadigd wordt. Een beschadigde stekker kan
brand veroorzaken!
ALS DE STEKKER VAN DE KOELKAST UIT HET HET STOPCONTACT WORDT GEHAALD, (BIJ
SCHOONMAAK, VERPLAATSING, ENZ.), KAN HET APPARAAT NA 15 MINUTEN WEER
AANGESLOTEN WORDEN.
10

De koelkast dient uitsluitend voor het koelen en vriezen van levensmiddelen gebruikt te worden.
Voordat men de koelkast schoonmaakt, dient deze uitgezet te worden en dient de stekker uit het
stopcontact gehaald te worden.
De koelkast mag niet door verbranding vernietigd worden.
Laat de oppervlaktes in de koelkast niet in aanraking komen met vet, zuur of sauzen.
Plaats geen andere werkende elektrische apparaten (zoals magnetrons, haardrogers, strijkijzers,
elektrische ketels of andere apparaten) boven op de koelkast want deze kunnen de plastic
onderdelen ervan doen verbranden.
Plaats geen borden met vloeistoffen, vazen met bloemen of andere vloeistofhouders op de koelkast.
Klim of zit niet op de koelkast, hang niet aan de deuren en vermijd dat kinderen dit doen.
!ALS DE KOELKAST NIET WERKT EN ALS HET NIET MOGELIJK IS OM DEZE VOLGENS DE
AANBEVOLEN RICHTLIJNEN TE REPAREREN, DIENT MEN DE STEKKER UIT HET STOPCONTACT TE
HALEN, DE DEUREN TE OPENEN EN CONTACT OP TE NEMEN MET DE ERKENDE
ONDERHOUDSMONTEUR. ALLEEN DE ERKENDE ONDERHOUDSMONTEUR IS BEVOEGD OM
TECHNISCHE OF PRODUCTIEFOUTEN TE HERSTELLEN.
VERVOER
! DE FABRIKANT IS NIET VERANTWOORDELIJK VOOR SCHADE DIE BEROKKEND WORDT BIJ HET
NIET RESPECTEREN VAN DE VERVOERAANWIJZINGEN.
De koelkast dient uitsluitend in verticale positie te worden vervoerd.
Tijdens het vervoer dient de koelkast beschermd te worden tegen alle weersomstandigheden
(regen, sneeuw, vocht).
De koelkast dient tijdens het vervoer stevig vastgezet te worden om verschuivingen en stoten te
vermijden.
Indien de koelkast niet in verticale positie wordt vervoerd, dient deze niet eerder dan na op z’n
minst 4 uur op het voedingsnet te worden aangesloten. Indien deze tijd niet wordt gerespecteerd,
zou de compressor buiten werking kunnen raken.
RICHTLIJNEN m.b.t. MILIEU
Dit symbool geeft aan dat dit product niet als huishoudafval mag worden behandeld. Het
moet separaat opgehaald en gerecycled worden door het bijvoorbeeld naar containers met
bovenvermeld symbool in daartoe bestemde afvalwerverkingscentra te brengen.
Voor meer informatie over het recyclen van het product, kan men contact opnemen met de
gemeentelijke dienst, de winkel waar u het product heeft gekocht of met de fabrikant.
Indien u beslist het product te recyclen, zorg er dan voor dat dit niet door anderen gebruikt kan
worden en vermijd hierdoor eventuele ongelukken Haal de stekker uit het stopcontact en verwijder
de voedingskabel. Verwijder het deurrubber. Maak de deurvergrendeling ongedaan indien aanwezig.
WAARSCHUWING! Demonteer de koelkast niet zelf. Laat dit door een recyclingsbedrijf
doen.
ALGEMENE INFORMATIE
De koelkast is voorzien van een tweedelig koel- en vriesgedeelte. Het koelgedeelte is bestemd voor
het bewaren van verse levensmiddelen; het vriesgedeelte is bestemd voor het invriezen en het
langdurig bewaren van levensmiddelen.
! DE KOELKAST IS VERVAARDIGD MET MILIEUVRIENDELIJKE MATERIALEN DIE NIET SCHADELIJK
ZIJN VOOR DE OZONLAAG: de koelvloeistof is R600a, en het schuimmiddel dat gebruikt wordt voor de
isolatie is Cyclopentaan C5H10.
! DE WERKING VAN DE KOELKAST WORDT DOOR DE FABRIKANT GEGARANDEERD BIJ EEN
OMGEVINGSTEMPERATUUR TUSSEN +16°C EN +32°C EN EEN VOCHTIGHEIDSGRAAD DIE NIET
HOGER DAN 70% IS.
De klimaatklasse van deze koelkast is N.
LET OP. De fabrikant behoudt zich het recht voor om in de toekomst eventuele wijzigingen aan de
technische gegevens en specificaties aan te brengen.
NL
11

NL
Model RF390 RF360 RF315 RF310 RF300 RF270
Totale bruto inhoud, L 365 341 314 309 273 261
Bruto inhoud
vriesgedeelte, L 112 112 77 114 112 83
Nuttige inhoud
koelgedeelte, L 253 225 229 193 161 170
Nuttige inhoud
vriesgedeelte, L90 90 61 92 90 61
Temperatuur
koelgedeelte, °C van 0 tot +10
Temperatuur
vriesgedeelte, °C -18 en lager
Afmetingen (HxBxD), cm 200x60x60 191x60x60 173x60x60 173x60x60 163x60x60 145x60x60
Energieverbruik,
kWh/24 h 0,96 0,93 0,85 0,68 0,89 0,86 0,79
Energieklasse volgens
A A+ A A
Invriescapaciteit, kg/24 h 12 12 5 8 12 12 5
Stijgingstijd
vriestemperatuur van
invriesmoment tot -9 ºC
na onder-breking van
elektriciteitstoevoer
17
Opgenomen vermogen,
W170 140
Gebruikte voltage, V 220-230V/50Hz
BESCHRIJVING VAN DE KOELKAST, BASISONDERDELEN (afb. 1)
WAARSCHUWING! DE HIERONDER AANGEGEVEN LIJST MET ONDERDELEN KAN ZOWEL IN
HOEVEELHEID ALS IN ONTWERP VERSCHILLEN MET DE ONDERDELEN VAN DE KOELKAST DIE U
HEEFT AANGESCHAFT. Deze beschrijving is geldig voor de gehele reeks tweedelige koel-en
vriescombinaties. A– koelgedeelte B– vriesgedeelte
1-2 Verlichting, Afdekkapje verlichting 13 Groentelade
3Thermostaatknop 15 Dooiwaterafvoergootje
4Het wieltje van de tempera-tuurregelaar met de aanduiding 18-19 Flessenrek
5Elektriciteit (groen licht) 20 Eierrek
7In hoogte verstelbare rekken 22 Condensator
9Renser Reiniger afvoerwatergootje odkleurig) 23 Druppelbak
10 Glazen rek 24 Compressor
12 Fruit- en groentelades
VÓÓR DE INGEBRUIKNAME
! De werkzaamheden kunnen het beste door 2 personen worden uitgevoerd.
�Pak de koelkast uit. Til de koelkast uit de schuimbasis.
�Verwijder het plakband.
�Bij het verplaatsen van de koelkast in de gewenste positie, is het gemakkelijker deze te verzetten
indien u de voorkant een beetje optilt en naar achteren kantelt zodat de koelkast op de wieltjes kan
bewegen.
�Verwijder alle roodgekleurde onderdelen van de rekken. Verwijder de roodgekleurde plakbandstrips
van de deurvakken– deze zijn enkel bedoeld voor het vervoeren van de koelkast (afb. 2).
�Zorg ervoor dat al het verpakkingsmateriaal op de juiste wijze wordt gerecycled.
�Monteer twee van de steunen uit het onderdelentasje (afb. 4) op hun plaats aan de
achterbovenkant van de koelkast.
12
Model RF390 RF360 RF315 KGC310A+ RF310
KGC361 RF300 RF270
Totale bruto inhoud, L 365 341 314 309 273 261
Nuttige inhoud
koelgedeelte, L 253 225 229 193 161 170
Nuttige inhoud
vriesgedeelte, L90 90 61 92 90 61
Feitelijk verbruik is afhankelijk van de gebruiksomstandigheiden en van de plaats van gebruik
Energieklasse A A+ A A A A+
Energieverbruik: kWh/24 h
kWh/jaar
0,960
350
0,930
339
0,850
310
0,728
266
0,890
325
0,860
314
0,790
288
0,638
233
Klimaatklasse N
Geluidsniveau, dB(A) 42 41 40
Invriescapaciteit, kg/24 h 12 12 5 8 12 12 5
Afmetingen (HxBxD), cm 200x60x60 191x60x60 173x60x60 173x60x60 163x60x60 145x60x60
Stijgingstijd vriestemperatuur van invriesmoment tot -9 ºC na onder-breking van elektriciteitstoevoer – 17h
Elektrische gegevens zie typeplaatje

! We raden u aan om het model RF390 extra vast te zetten op de wand:
Plaats de steunen in de gleuven aan de bovenachterkant van de koelkast (afb. 4).
Teken op de wand de positie van de gaten in de steunen.
Boor gaten in de muur en plaast de stoppen. Bevestig de koelkast aan de muur.
PLAATSING
Plaats de koelkast in een droog en goed geventileerde ruimte.
WAARSCHUWING! De koelkast dient niet in een ruimte zonder verwarming of op een veranda
geplaatst te worden. Plaats de koelkast ver van warmtebronnen zoals keukenovens,
verwarmingsradiatoren en vermijd direct zonlicht.
WAARSCHUWING! De koelkast dient niet in aanraking te komen met verwarmings- gas-
of waterleidingen of andere elektrische apparaten.
Let erop dat de ventilatieopeningen aan de bovenkant niet afgedekt worden– er moet een goede
luchtventilatie rondom de koelkast verzekerd worden. Er dient een ruimte te zijn van minstens 10
cm tussen de bovenkant van de koelkast en eventuele andere meubels die boven het apparaat
worden geplaatst (afb. 5). Indien deze aanbeveling niet wordt nageleefd, zal de koelkast
meerstroom gebruiken en kan de compressor oververhit raken.
Indien de koelkast in een hoek wordt geplaatst, dient er een ruimte van minstens 1 cm behouden te
worden tussen de koelkast en de muur zodat de deur van het vriesgedeelte zodanig geopend kan
worden dat de lade van het gedeelte verwijderd kan worden (afb. 6).
De koelkast moet waterpas staan en moet de muur niet aanraken. Indien nodig, kan de hoogte van
de koelkast door middel van de afstelpoot ingesteld worden: de voorkant van de koelkast stijgt als
de afstelpoten met de klok mee gedraaid worden en daalt als deze tegen de klok in gedraaid
worden. De deuren sluiten vanzelf als de koelkast ietwat naar achteren helt.
OPENINGSRICHTING VAN DE DEUREN WIJZIGEN
Deze werkzaamheden kunnen het beste uitgevoerd worden door 2 personen. U heeft van twee
schroefsleutels Nr. 8 en Nr. 10 nodig en een Philips kruiskopschroevendraaier.
! Tijdens het wijzigen van de openingsrichting, mag de koelkast NIET in horizontale positie geplaatst
worden.
Volg onderstaande aanwijzingen in de volgorde waarin ze beschreven zijn (afb. 11):
WAARSCHUWING! Zet de koelkast uit en haal de stekker uit het stopcontact.
1. De bodemplaat 15 verwijderen.
2. Twee schroeven 12 uitdraaien en de bodembeugel 13 samen met de set sluitringen 11 op de as
en de bus 10 verwijderen. De onderste deur 9verwijderen.
3. De bevestigingsschroeven 7van de middelste beugel uitdraaien. De middelste beugel 6samen
met de sluitringen op de as en bus 5verwijderen. De bovenste deur verwijderen.
4. Van de bovenste beugel de as 2losschroeven samen met de moer 1en de sluitringen 3en de
volledige set vastschroeven aan de tegenovergestelde zijde van de deur.
5. De plug 21 van de bovenste deur en de plug 19 van de onderste deur naar de tegenovergestelde
zijde verplaatsen.
6. De pluggen 20 verwijderen en naar de tegenovergestelde zijde van de kast verplaatsen. De
bovenste deur op de as van de bovenste deur plaatsen.
7. Alvorens de middelste beugel met de set sluitringen en bussen aan de tegenovergestelde zijde
van de kast te monteren, eerst de beugel-as in de bovenste deur plaatsen. De onderste deur op
de middelste beugel-as plaatsen.
8. Alvorens de beugel 16 en de bodembeugel samen met de set sluitringen en bussen om te zetten
naar de tegenovergestelde zijde, eerst de beugel-as in de onderste deur plaatsen. De beugels 14
die zich onder de beugels 13 en 16 bevinden blijven op hun plaats.
9. De bevestiginsschroeven 17 uit beide deuren losschroeven, de deur-grepen 18 verwijderen en de
rechterzijde van de deur vast te schroeven, eers pluggen verwijderen. De schroefgaten van de
verwij-derde deurgreep met de plugen afsluiten. De bodemplaat 15 terugplaatsen.
NL
13

NL
INTERN LAMPJE VERWISSELEN
Bij het vervangen van het binnenlampje (afb. 7), dient men onderstaande aanwijzingen in de
volgorde waarin ze beschreven zijn, op te volgen:
1. De koelkast uit contactleiding uit te schakelen.
2. Fixeertoets van het plafond rechts afslaan en wegnemen, indien naar beneden trekken.
3. Het lampje wisselen. Lampje 15 W, patroon E 14.
4. Ten eerste het plafond rechts instellen, nadat boven drukken tot het fixeert.
5. De koelkast in contactleiding inschakelen.
TEMPERATUUR INSTELLEN
De temperatuur in het koelgedeelte wordt bediend door de thermostaatknop 3(afb. 1) in de
gewenste stand te draaien. De temperatuur wordt naast de thermostaatknop aangegeven.
0= Compressor is uitgeschakeld. WAARSCHUWING! Elektriciteit is niet uitgeschakeld.
1 = hoogste temperatuur (laagste koeling)
5 = laagste temperatuur (hoogste koeling)
Indien de levensmiddelen in het koelgedeelte te koud zijn, zet dan de thermostaatknop op stand 1,2
of 3. Indien de levensmiddelen in het koelgedeelte niet voldoende worden gekoeld, zet dan de
thermostaatknop op stand 4of 5.
!Regel de gewenste temperatuur in de koelkast naar uw eigen wensen.
!DE TEMPERATUUR IN HET KOELGEDEELTE KAN IN HOGE MATE BEÏNVLOED WORDEN DOOR DE
OMGEVINGSTEMPERATUUR, DE HOEVEELHEID LEVENSMIDDELEN DIE BEWAARD WORDEN EN DOOR
DE REGELMAAT WAARMEE DE DEUR GEOPEND WORDT. Het is daarom aangeraden om:
�de koelkast niet naast warmtebronnen te plaatsen,
�levensmiddelen die in de koelkast worden bewaard nooit warmer te laten zijn dan de
omgevingstemperatuur,
�de deur moet nooit open te laten staan,
�de deur nooit langer open te houden dan nodig is om levensmiddelen te plaatsen of te verwijderen.
!ALS DE OMGEVINGSTEMPERATUUR LAAG IS, ZAL DE KOELKAST MINDER KOELEN. DE
TEMPERATUUR IN DE KOELKAST KAN DAAROM STIJGEN. Gebruik de thermostaatknop om een lagere
temperatuur in te stellen
GEBRUIK VAN HET VRIESGEDEELTE
Het snelvriesgedeelte wordt in het vriesgedeelte aangegeven met het teken
Verse levensmiddelen die ingevroren dienen te worden, moeten in een of twee lagen in het
snelvriesgedeelte worden geplaatst. De thermostaatknop moet op stand 5worden gezet. Na 24 uur
dienen de gevroren levensmiddelen verplaats te worden van het invriesgedeelte naar de andere laden.
Als de producten ingevroren zijn, dient de thermostaatknop op zijn vroegere stand teruggezet te
worden.
�VRIES NOOIT MEER LEVENSMIDDELEN TEGELIJK IN DAN DE AANBEVOLEN HOEVEELHEID: VOOR
MODEL RF390, 390 L,RF360, KKG 360, 360 L,RF310, KKG 310, 310 L,RF300, 300 L IS
DEZE 12 KG PER 24 UUR. VOOR MODEL RF315,RF270, 270L IS DEZE 5 KG PER 24 UUR.
�Behoud een ruimte van minstens 3 cm tussen de levensmiddelen en de bovenwand van het
vriesgedeelte (afb. 10).
�Bewaar geen onverpakte levensmiddelen in het vriesgedeelten.
�Vries nooit koolzuurhoudende vloeistoffen in.
�Nog niet ingevroren levensmiddelen mogen niet in aanraking komen met reeds ingevroren middelen.
�Vries nooit levensmiddelen in die warmer zijn dan de omgevingstemperatuur.
�Gebruik voor het invriezen van vloeistoffen geen glazen houders of flessen.
�Houd u streng aan de invriesdata die op de verpakking van de levensmiddelen zijn vermeld.
�ER WORDT AANGERADEN OM INGEVROREN VIS EN WORST NIET LANGER DAN 6 MAANDEN IN HET
VRIESGEDEELTE TE BEWAREN; KAAS, KIPPEN-, VARKENS- EN LAMSVLEES NIET LANGER DAN 8
MAANDEN; RUNDVLEES, FRUIT EN GROENTE NIET LANGER DAN 12 MAANDEN.
14
GE BRUIK VAN HE T V RI E SG EDE ELT E
Het snelvriesgedeelte wordt in het vriesgedeelte aangegeven met het teken
Verse levensmiddelen die ingevroren dienen te worden, moeten in een of twee lagen in het
snelvriesgedeelte worden geplaatst. De thermostaatknop moet op stand 5worden gezet. Na 24 uur
dienen de gevroren levensmiddelen verplaats te worden van het invriesgedeelte naar de andere laden.
Als de producten ingevroren zijn, dient de thermostaatknop op zijn vroegere stand
teruggezet te worden.
� VRIES NOOIT MEER LEVENSMIDDELEN TEGELIJK IN DAN DE AANBEVOLEN HOEVEELHEID.
�Behoud een ruimte van minstens 3 cm tussen de levensmiddelen en de bovenwand van het
vriesgedeelte.
�Bewaar geen onverpakte levensmiddelen in het vriesgedeelten.
�Vries nooit koolzuurhoudende vloeistoffen in.
�Nog niet ingevroren levensmiddelen mogen niet in aanraking komen met reeds ingevroren middelen.
�Vries nooit levensmiddelen in die warmer zijn dan de omgevingstemperatuur.
�Gebruik voor het invriezen van vloeistoffen geen glazen houders of flessen.
�Houd u streng aan de invriesdata die op de verpakking van de levensmiddelen zijn vermeld.
�ER WORDT AANGERADEN OM INGEVROREN VIS EN WORST NIET LANGER DAN 6 MAANDEN IN HET
VRIESGEDEELTE TE BEWAREN; KAAS, KIPPEN-, VARKENS- EN LAMSVLEES NIET LANGER DAN 8
MAANDEN; RUNDVLEES, FRUIT EN GROENTE NIET LANGER DAN 12 MAANDEN.

ONTDOOIEN VAN HET VRIESGEDEELTE
Het vriesgedeelte moet minstens twee keer per jaar worden ontdooit of wanneer er een ijslaag
ontstaat van meer dan 5 mm. Verricht de volgende handelingen in de aangegeven volgorde:
Schakel de koelkast uit en verwijder de stekker uit het stopcontact.
Verwijder alle levensmiddelen uit het vriesgedeelte. Als u de ingevroren etenswaren in een dikke
doek wikkelt en deze op een koele plaats legt, zullen de levensmiddelen niet al te veel van
temperatuur veranderen terwijl u het vriesgedeelte ontdooit.
Zet een blad onder het afvoergootje (Afb. 9). Zet een bord onder de afvoerkanalen.
Laat de deur van het vriesgedeelte open.
Nadat de ijslaag ontdooit is de freezer schoonmaken en de oppervlakte drogen.
Sluit de deur van het vriesgedeelte.
Plaats de stekker terug in het stopcontact en zet het apparaat weer aan.
IJSBLOKJES MAKEN
IJsblokjes worden in daartoe bestemde bakjes gemaakt. Vul de bakjesvoor ¾ met drinkwater. Zet
het bakje in het snelvriesvak. Wanneer u de ijsblokjes uit de bakjes wilt verwijderen, laat ze dan
gedurende 5 minuten op kamertemperatuur en schut ze dan op het daarvoor bestemde bord.
SCHOONMAAK EN ONDERHOUD
! REINIG DE KOELKAST REGELMATIG.
! Vergeet niet om de stekker uit het stopcontact te halen voordat u het vriesgedeelte
ontdooit en de achterkant van de koelkast schoonmaakt.
Vermijd dat de interne oppervlaktes en de plastic onderdelen in aanraking komen met vetten, zuren
en sauzen. Reinig bij morsen onmiddelijk met warm zeepwater of afwasmiddel. Daarna afdrogen.
Reinig de oppervlakte aan de binnenkant met warm zeepwater. U kunt ook afwasmiddel gebruiken.
Droog de oppervlaktes binnen en buiten af.
Reinig regelmatig het deurrubber. Daarna afdrogen.
Was de lades en de accessoires regelmatig.
WAARSCHUWING! REINIG REGELMATIG DE AFVOER VAN HET ONDOOISYSTEEM MET HET
DAARTOE BESTEMDE SCHOONMAAKELEMENT 9(Afb. 1).
Verwijder stof aan de achterkant van de koelkast en de compressor minstens één keer per jaar.
Gebruik hiervoor een zachte borstel, een elektrostatische doek of een stofzuiger.
Gebruik voor de schoonmaak van de koelkast GEEN schoonmaakmiddelen die schurende of zure
elementen of alcohol of benzeen bevatten.
GEBRUIK GEEN doeken of sponsen met een ruwe oppervlakte.
PRAKTISCHE TIPS EN AANWIJZINGEN
Bewaar nooit bananen in de koelkast– ze zijn niet bestand tegen koude temperaturen.
Bewaar nooit in hetzelfde bakje gekookte levensmiddelen en kant-en-klare maaltijden.
Levensmiddelen met een sterke geur (bijv. verse vis, pâté de foie gras, en kaas) moeten altijd in een
goed afgesloten bak bewaard worden.
Ingevroren levensmiddelen dienen in het koelgedeelte te worden ontdooit. Levensmiddelen die
langzaam ontdooien, behouden hun geur beter en de kou die door deze levensmiddelen wordt
afgeveven, helpt de temperatuur in het koelgedeeltte constant te houden.
Eet nooit ijs dat van de ijslaag in het vriesvak afkomstig is.
Levensmiddelen vriezen sneller in als ze in kleine porties verdeeld worden.
LAAT DE DEUREN OPEN ALS U DE KOELKAST VOOR EEN LANGE PERIODE UIT MOET ZETTEN.
NL
15

NL
Opmerkingen over het geluid
Tijdens de werking van de koelkast en bij het invriezen van de levensmiddelen, kunnen er
verschillende soorten geluiden ontstaan. Dit is normaal en dit betekent niet dat er een storing is.
Aangezien de koelvloeistof in het koelsysteem circuleert, onstaan er borrelende, suizende of
druppelende geluiden.
Er kunnen sterkere geluiden voor een korte periode onstaan zoals ploffen of klikken bij het aangaan
van de compressor.
PROBLEMEN EN OPLOSSINGEN
Wat te doen indien …
De stekker aangesloten is maar de koelkast niet werkt en het aan/uit licht uitgeschakeld
is. Controleer of er stroom in huis is. Controleer of de stekker op de juiste wijze in het stopcontact
is gestoken.
Het geluid neemt toe. Controleer of de koelkast rechtop en waterpas staat. Verstel hiertoe de
poten aan de voorkant. Controleer of de koelkast geen andere meubels aanraakt, en of geen enkel
deel van het koelingssysteem op de achterkant van de koelkast tegen de wand steunt. Laat de
koelkast niet dichtbij andere meubels of muren staan. Controleer of de geluidstoename niet
veroorzaakt wordt door flessen, blikjes of borden die in de koelkast elkaar aanraken.
Er is water op de bodem van de koelafdeling. Controleer of het afvoergootje van het
ondooingswater niet verstopt is. Reinig het afvoergootje met een daarvoor bestemd
schoonmaakelement.
Er is water op de gedeelten van gehard glas. Levensmiddelen of borden staan tegen de
achterwand van het koelgedeelte. Plaats geen levensmiddelen of borden tegen de achterwand.
Er is water onder de koelkast. De dampbak bevindt zich niet op de juiste manier op de
compressor. Zet de bak bovenop de compressor
Bij het openen van de koelkast, gaat het deurrubber los. Het deurrubber is in aanraking
gekomen met vette voedselresten (vet, stroop). Reinig het rubber en de behuizing met warm
zeepwater of afwasmiddel en droog het af. Doe het deurrubber terug op zijn plaats.
De temperatuur in de koelkast is gestegen, de pauses van de compressor zijn kort.
Controleer of de deur van de koelkast goed afsluit, of de deur niet langer dan nodig geopend is
gebleven om levensmiddelen te plaatsen of te verwijderen en of er niet veel warme levensmiddelen
in de koelkast geplaatst zijn.
Er is condensatie op de bovenkant van de koelkast. De vochtigheidsgraad van de omgeving is
boven 70%. Ventileer de ruimte waar de koelkast zich bevindt en verwijder indien mogelijk de
oorzaak van het vocht.
GARANTIE
! INDIEN U KOELKAST NIET OP DE GEWENSTE MANIER FUNCTIONEERT, CONTROLEERT U DAN
EERST OF U DIT ZELF KUNT VERHELPEN. Indien u het probleem niet zelf kunt oplossen, neemt u
dan telefonisch of schriftelijk contact op met de dichtsbijzijnde servicedienst. Geef altijd het
koelkastmodel 1en het serienummer 2aan. Deze gegevens staan op het plaatje dat zich op de
linkerwand van het koelgedeelte bevindt, naast de fruit- en groentelade.
16

SICHERHEITSHINWEISE
! LESEN SIE BITTE DIE GEBRAUCHSANWEISUNG SORGFÄLTIG DURCH. Bei
Nichtbeachtung der in der Gebrauchsanweisung genannten Anweisungen besteht die
Gefahr der Beschädigung des Geräts und des damit verbundenen Verlusts des Rechts auf
Garantieleistungen. Wir empfehlen ihnen, die Gebrauchsanweisung bis zum Ende der Betriebszeit
aufzubewahren und sie im Falle eines Verkaufs des Geräts an den neuen Eigentümer weiterzugeben.
ACHTUNG! Halten Sie die Lüftungsöffnungen im Gerategehäuse oder in möglichen
Seitenwändenvon umgebenden Einbauwänden frei von Hindemissen.
ACHTUNG! Benutzen Sie keine mechanichen Gegenstände order andere Mittel, um den
Abtauprozess zu beschleunigen, ausser den vom Hersteller empfohlenen.
ACHTUNG! Das Kühlsystem des Geräts nicht beschädigen. Verwendetes Kühlmittel: R 600a.
Falls das Kühlsystem beschädigt ist:
Kein offenes Feuer verwenden.
Funkenschlag vermeiden, keine elektrischen sowie Beleuchtungsgeräte einschalten.
Den Raum sofort durchlüften.
ACHTUNG! Kinder nicht mit dem Kühlschrank spielen oder ihn ans Netz anschließen oder
den Stecker ziehen lassen. Kinder nicht mit der Verpackung spielen lassen.
ACHTUNG! Diese Gerät ist nict dafür bestimmt durch Personen (einschließlich Kinder), mit
eingeschränkten physischen, sensorischen oder geistigen Fähigkeiten oder mangels
Erfahtung und/oder mangels Wissen benutzt zu warden, es sei denn sie warden durch
eine für ihre Sicherheit zuständige Person beaufsichtigt order erhielten von ihr
Anweisungen wie das Gerät zu benutzen ist.
Falls der Kühlschrank sich in kühler Umgebung befunden hat (Außentemperatur weniger als +12 oC),
diesen erst nach Ablauf von zwei Stunden ans Netz anschließen.
Das Gerät nicht ans Netz anschließen ohne vorher alle Verpackungs- und Transportelemente
entfernt zu haben.
Bitte überprüfen Sie nach dem Auspacken des Geräts, ob alle Bestandteile vorhanden sind und ob
Gehäuse und Kabel keine Beschädigungen aufweisen.
Die Benutzung eines technisch nicht einwandfreien Geräts ist zu unterlassen.
ACHTUNG! Das Kühlgerät unbedingt an eine geerdete Steckdose anschließen. Die
geerdete Steckdose für den Netzanschluss des Geräts sollte sich an gut zugänglicher
Stelle befinden.
ACHTUNG! VOR DEM AUFSTELLEN EIN DEFEKTES KABEL UNBEDINGT DURCH EIN NEUES
VOM SELBEN TYP WIE DAS VOM HERSTELLER DES KÜHLGERÄTS VERWENDETE
ERSETZEN, UM SCHADEN AN GESUNDHEIT UND EIGENTUM ZU VERMEIDEN.
ACHTUNG! Netzspannung und -frequenz müssen mit den in Angaben in der Tabelle über
die allgemeinen Eigenschaften des Kühlschranks übereinstimmen.
ACHTUNG! Beachten Sie bitte beim Aufstellen des Kühlgeräts, dass dieser das Netzkabel
nicht beschädigt. Nichts Schweres wie Kühlgeräte, Möbel oder andere Haushaltgeräte auf
das Stromkabel stellen, um dieses nicht zu beschädigen. Andernfalls könnte dies zu einem
Kurzschluss und zu einem Brand führen.
ACHTUNG! Achten Sie darauf, dass die Rückwand des Kühlgeräts den Netzstecker nicht
berührt oder letzterer in irgendeiner Weise beschädigt ist. Ein defekter Netzstecker kann
zu einem Brand führen!
NACH DEM AUSSCHALTEN DES GERÄTS (ZUR REINIGUNG, ZUM AUFSTELLEN AN EINEM ANDEREN
PLATZ USW.) DIESES ERST NACH MINDESTENS 15 MINUTEN WIEDER ANS NETZ ANSCHLIEßEN.
Das Kühlgerät nur zur Kühlung und Aufbewahrung von Esswaren verwenden.
Vor der Reinigung das Gerät ausschalten und den Netzstecker aus der Steckdose ziehen.
Das Gerät darf nicht verbrannt werden.
Schützen Sie die Innenwände und alle Kunststoffteile des Kühlgeräts vor Kontakt mit Fett, Säuren
und Soßen.
DE
17

DE
Bitte keine elektrischen Geräte wie Mikrowellengeräte, Haartrockner, Bügeleisen, Wasserkocher und
ähnliche auf den Kühlschrank stellen: Kunststoffteile könnten sich entzünden.
! NUR DER SERVICE-FACHMANN IST IMSTANDE, TECHNISCHE MÄNGEL ZU BEHEBEN.
TRANSPORT
! BEI NICHTBEACHTUNG DER TANSPORTVORSCHRIFTEN KANN DER HERSTELLER NICHT FÜR
ENTSTEHENDE SCHÄDEN HAFTBAR GEMACHT WERDEN.
Das Kühlgerät nur in vertikaler Lage transportieren.
Während des Transports muss das Kühlgerät vor atmosphärischen Einwirkungen (Regen, Schnee,
Feuchtigkeit) geschützt sein.
Das Kühlgerät muss gut befestigt sein, um Verrutschen und Beulen durch Schläge während des
Transports zu vermeiden.
Falls das Gerät nicht in vertikaler Lage transportiert wurde, darf es erst nach mindestens vier
Stunden ans Netz angeschlossen werden. Bei Nichtbeachtung dieser Vorschrift droht der Ausfall des
Kompressors.
UMWELTHINWEISE
Dieses Symbol bedeutet, dass der Kühlschrank nach Ablauf der Betriebszeit nicht über den
normalen Haushaltsabfall entsorgt werden darf, sondern getrennt, in speziellen, mit diesem
Zeichen versehenen Containern, über eine spezielle Sammelstelle entsorgt werden muss.
Genauere Informationen, wo alte Kühlschränke zur Entsorgung abgegeben werden können, erhalten
sie von den örtlichen Behörden, dem Geschäft, in dem Sie den Kühlschrank gekauft haben, oder vom
Hersteller.
Vor der Entsorgung des Geräts machen Sie dieses bitte unbrauchbar, damit mögliche Unfälle
verhindert werden können. Ziehen Sie den Netzstecker aus der Steckdose, zerschneiden sie das
Kabel. Reißen Sie dann den Dichtungsgummi vom Kühlgerät. Falls vorhanden, machen Sie das
Türschloss unbrauchbar.
ACHTUNG! Zerlegen Sie das Kühlgerät auf keinen Fall selbst. Bringen Sie es zu einem
Abfallentsorgungsunternehmen.
ALLGEMEINE DATEN
Bei Ihrem Kühlgerät handelt es sich um ein Zweikammer-Kühl-Gefrier-Kombigerät (weiter Kühlschrank
genannt). Im der Kühlfach werden Frischprodukte aufbewahrt, im Gefrierfach werden Nahrungsmittel
eingefroren und für längere Zeit aufbewahrt.
! DER KÜHLSCHRANK IST UMWELTFREUNDLICH, ER BEINHALTET KEINE DIE OZONSCHICHT
SCHÄDIGENDEN MATERIALIEN: als Kühlmittel wird R 600a verwendet, die Isolierung Ihres Geräts
besteht aus Zyklopentan C5H10.
! DER HERSTELLER GARANTIERT EINE ZUVERLÄSSIGE FUNKTION DES KÜHLSCHRANKS BEI EINER
UMGEBUNGSTEMPERATUR VON +16 BIS +32 GRAD CELSIUS UND EINER VERHÄLTNISMÄSSIGEN
LUFTFEUCHTIGKEIT VON BIS ZU 70 PROZENT.
Der Kühlschrank gehört der Klimaklasse Nan.
Geräuschemission ‹ 70 dB(A)
ANMERKUNG. Der Hersteller behält sich das Recht vor, die in der Gebrauchsanweisung genannten
technischen Eigenschaften des Geräts sowie dessen Ausstattung zu ändern
18
This manual suits for next models
6
Table of contents
Languages:
Other SNAIGE Freezer manuals
Popular Freezer manuals by other brands
Blomberg
Blomberg KNM4553Ei operating instructions

Iceking
Iceking HZ552WE Installation and operating manual
Zanussi
Zanussi ZEC 41 Instruction booklet
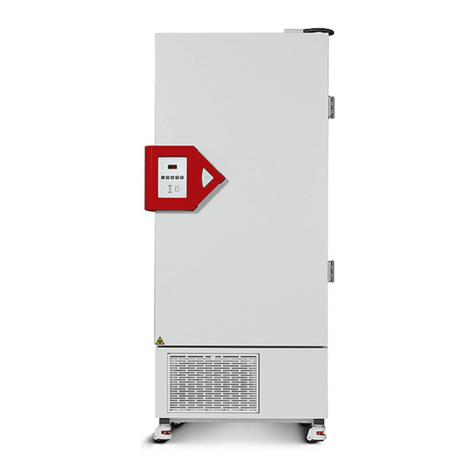
Binder
Binder ULTRA.Guard UF V 500 Translation of the original operating manual
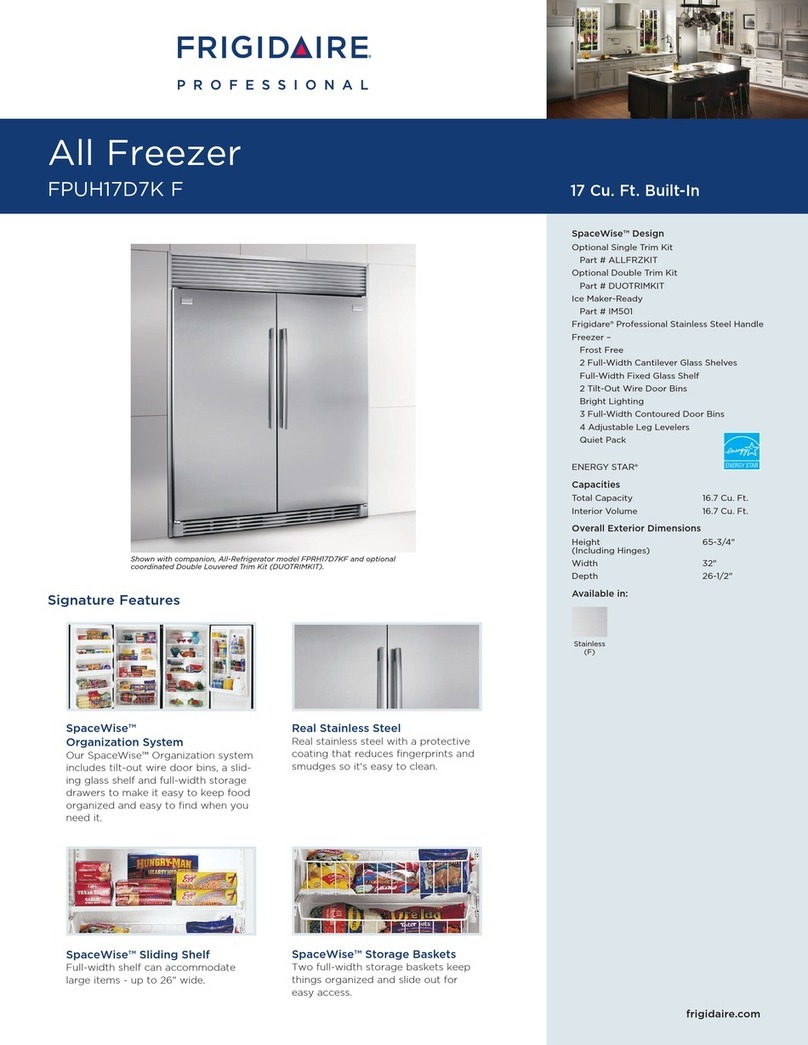
Frigidaire
Frigidaire FPUH17D7KF Specification sheet
Zanussi
Zanussi ZRB34103XA user manual
