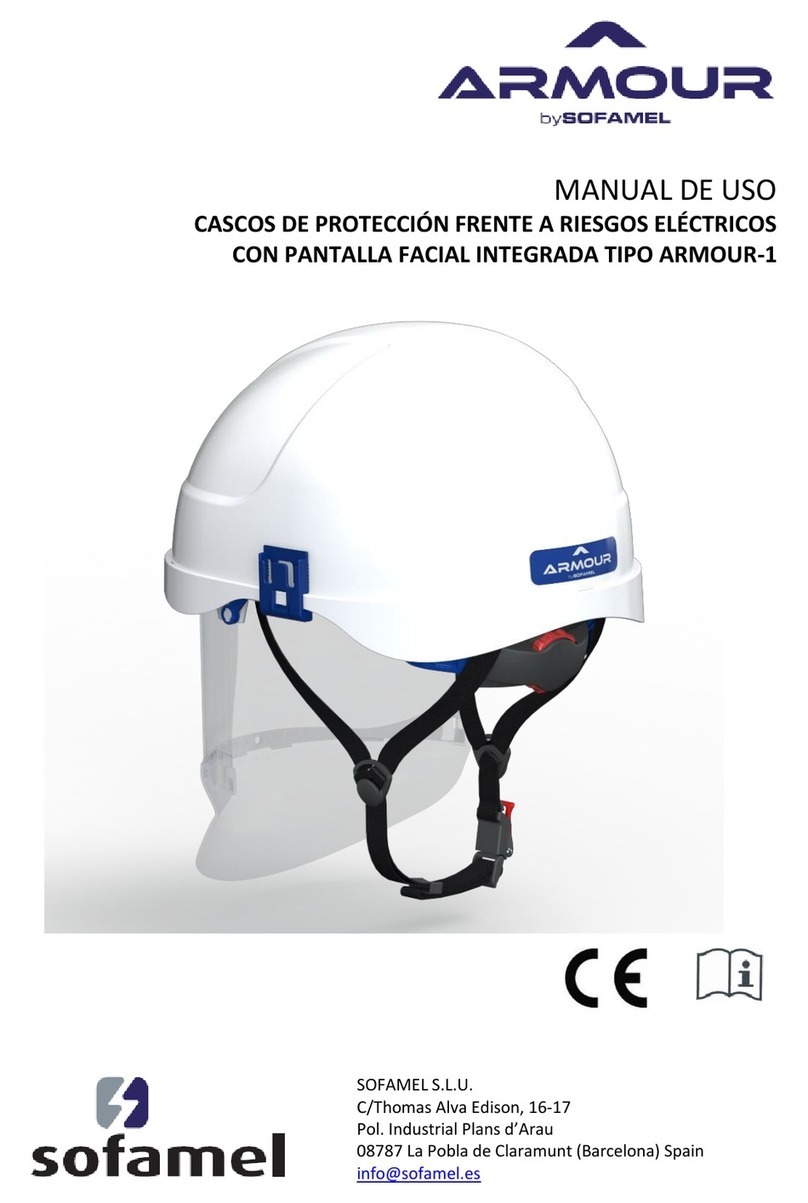
Sofamel ARMOUR-2 ATPV36 User manual

2
2021.03/e 1
MANUAL DE USO 7 ES
OPERATING MANUAL
15 EN

3
1
3
2
1
2
3
Fig. 1
Fig. 2
1
2
3
Fig. 3
1
2
2
1
Fig. 4
Fig. 5

4
Fig. 6
Fig. 7
PROD
MM/YY
UTIL
MM/YY
1
2
Fig. 8
1
2
3
4
5
6
7

5
Fig. 10
Fig. 9
Fig. 11
1
2
1
2

6
1
2
3
Fig. 12
Fig. 13
Fig. 14

7
MANUAL DE USO
CASCOS DE PROTECCIÓN FRENTE A RIESGOS ELÉCTRICOS
CON PANTALLA FACIAL INTEGRADA
Tipo: ARMOUR-2 ATPV36
Clase 0 (1 000 V), Box Test - clase 2
EN 397:2012 + A1:2012, EN 50365:2002, EN 166:2001, GS-ET 29: 2011-05
Clase E (20 kV)
ANSI/ISEA Z89.1:2014
Fabricante:
SOFAMEL S.L.U.
C/Thomas Alva Edison, 16-17
Pol. Industrial Plans d’Arau
08787 La Pobla de Claramunt (Barcelona) Spain
Tel.: +34 93 808 79 80, www.sofamel.com, info@sofamel.es
El organismo notificado que ha efectuado el examen UE de tipo:
Casco –CIOP-PIB, (nº 1437), ul. Czerniakowska 16, 00-701 Warszawa,
Protección facial –CIOP-PIB, (nº 1437), ul. Czerniakowska 16, 00-701 Warszawa.
El organismo notificado que ha efectuado el procedimiento de evaluación de la
conformidad con el tipo basada en el control interno de la producción más control
supervisado de los productos a intervalos aleatorios (módulo C2):
CIOP-PIB, (nº 1437), ul. Czerniakowska 16, 00-701 Warszawa.
1. USO PREVISTO
Los cascos de tipo ARMOUR-2 sirven para proteger la cabeza contra las lesiones
provocadas por objetos caídos, constituyendo a la vez la protección contra el choque
eléctrico de la clase 0 (1000 V) EN 50365:2002 y la clase E (20 kV) ANSI/ISEA Z89.1:2014
previniendo el flujo de corriente de descarga a través de la cabeza. Asimismo,
constituyen la protección contra el arco eléctrico y fragmentos de metal proyectados.
Es especialmente recomendable como equipo de protección personal durante los
ESPAÑOL

8
trabajos en tensión, trabajos en altura y operaciones de conexión. La temperatura de
servicio es de -40 °C a +60 °C.
Las pantallas de la protección facial cuentan con un revestimiento resistente a los
arañazos y tienen propiedades antiniebla. La estructura del casco permite proteger
contra el arco eléctrico (clase 2- Box Test). Son, a la vez, la protección contra el impacto
de partículas de energía media, gotas y salpicaduras de líquidos. Los cascos cuentan
también con los filtros que protegen contra la radiación UV.
2. ETIQUETA
Etiquetado grabado en el interior del casquete:
Símbolo de trabajo en tensión,
Clase 0 Clase eléctrica para instalaciones de tensión nominal hasta 1000 V de corriente
alterna y de 1500V de corriente continua,
EN 50365:2002 Norma de referencia “Cascos eléctricamente aislantes para utilización en
instalaciones de baja tensión”,
Categoría 3: ATPV 36 cal/cm2
NFPA 70E Norma de referencia “Seguridad Eléctrica en Lugares de Trabajo” de consenso
general de la National Fire Protection Association
Logo del fabricante,
ARMOURModelo del casco,
ABS Material del casquete,
53-63cm Rango de ajuste del perímetro de la cabeza,
207/8-245/8inch Rango de ajuste del perímetro de la cabeza,
EN 397:2012+A1:2012 Norma de referencia “Casos de protección industriales”,
-40°C Temperatura muy baja (hasta –40 °C),
LD Resistencia a las deformaciones laterales,
MM Resistencia a las salpicaduras del material fundido,
440Vac Aislamiento eléctrico (de acuerdo con la EN 397),
ANSI/ISEA Z89.1-2014 Norma de referencia “American National Standard for Industrial
Head Protection”,
Type I Tipo de casco de acuerdo con la ANSI/ISEA Z89.1-2014,
Class E Clase eléctrica del casco de acuerdo con la ANSI/ISEA Z89.1-2014,
LT Temperatura inferior de acuerdo con la ANSI/ISEA Z89.1-2014,
HT Temperatura superior de acuerdo con la ANSI/ISEA Z89.1-2014,
CE 1437 El marcado de conformidad con el Reglamento 2016/425 y el número del
organismo notificado que efectúa control supervisado de los productos a
intervalos aleatorios (módulo C2),
LOT NO: XXX Número de serie,
www.sofamel.com Dirección de la página donde está disponible la declaración de
conformidad.
etiquetado grabado en la parte trasera externa del casquete:
PROD MM/YY Fecha de fabricación (mes/año),
UTIL MM/YY Fecha de eliminación (mes/año).

9
etiquetado en la parte trasera externa del casquete:
ARMOURTipo de casco.
etiquetado en la pantalla:
1000V
Símbolo de trabajos en tensión de acuerdo con RFU nº 03-025/2012
2C-1,2 Número de código y grado de protección del filtro UV
SOFAMEL Nombre del fabricante
1 Clase óptica
B Resistencia a los impactos de energía media
8-2-0 Protección contra el arco eléctrico
8 Símbolo de protección de acuerdo con la EN 166:2001
-2 Protección contra los riesgos térmicos derivados del arco eléctrico clase 2 (7kA/0,5s) de
acuerdo con GS-ET 29:2011-05 “Supplementary requirements for the testing and
certification of face shields for electrical works”
-0 Coeficiente VLT >75% clase 0, de acuerdo con GS-ET 29:2011-05
N Resistencia a la formación de la niebla
CE El marcado de conformidad con el Reglamento 2016/425.
Etiquetado grabado en la parte inferior de la protección facial, protección del
mentón:
SOFAMEL nombre del fabricante,
EN 166:2001 norma de referencia “Protección individual de ojos. Requisitos”,
3 protección contra las gotas y salpicaduras del líquido,
8 protección contra el arco eléctrico,
B resistencia a los impactos de energía media.
3. AJUSTES
Antes de usar el casco, efectúe un ajuste adecuado para que proporcione una protección
eficaz. El usuario deberá ajustar el casco a su cabeza, ajustar la altura y la longitud de la
correa del mentón de modo que el casco le encaje bien, no se desplace ni se incline.
AJUSTE DEL PERÍMETRO DE LA CABEZA
El casco cuenta con un ajuste progresivo del perímetro de la cabeza cada 3 mm en el
rango de 53 cm a 63 cm. Una vez puesto el casco en la cabeza, ajústelo según el
perímetro de la cabeza girando el regulador (1) situado en la parte trasera del casco (Fig.
1). El giro a la izquierda (2) permite aflojar la banda perimetral, mientras que el giro a la
derecha (3) cierra la banda del regulador.
AJUSTE DE LA ALTURA
El casco cuenta con dos posiciones de ajuste de altura de uso (Fig. 2). Una vez puesto en
la cabeza, asegúrese de que las bandas estén bien ajustadas según la altura de le cabeza.
Los elementos de fijación de la banda (1) suelen instalarse en la posición poco profunda

10
(2). Para cambiar la altura de uso, fije los cuatro elementos de fijación de la banda en la
posición profunda (3).
AJUSTE DE LA CORREA DEL MENTÓN
La correa del mentón (Fig. 3) cuenta con un ajuste de su longitud, por separado para la
parte derecha e izquierda de la correa. Se puede cambiar la longitud de la sección frontal
(1) y trasera (2) de cada una de las partes desplazando la correa por el elemento de
separación (3).
CIERRE/APERTURA DE LA CORREA DEL MENTÓN
Para cerrar la correa, introduzca el elemento de la correa (2) en el cierre (1) (Fig. 4). Para
abrir la correa, tire el cierre (1) y suelte el elemento de la correa (2) del mismo. (Fig. 5)
BAJAR/SUBIR LA PROTECCIÓN FACIAL
1. Para bajar (abrir) la protección facial (Fig. 6), sujétela delicadamente con ambas manos
(pulgares) por el interior (1) y tire (2) hasta que salga por completo del casco (3), luego
gire la protección del mentón tirándola hacia sí (4) hasta que se oiga un clic de los
elementos de fijación en el mentón.
2. Para subir (cerrar) la protección facial (Fig. 7), primero gire la protección del mentón
(5) hasta que se oiga un clic de la cubierta del mentón (6) y luego introduzca la protección
facial en el casco empujando hacia arriba (7).
¡Atención! Un uso desconforme (con el manual), una apertura / un cierre incorrecto
puede provocar daños. No presione demasiado en las partes de la protección facial ni la
cierre / abra demasiado rápido.
4. CONTROL ANTES DE CADA USO
Cada vez antes de empezar el trabajo inspeccione el casco y la protección facial.
Compruebe lo siguiente:
ola ausencia de defectos en el casco,
oel funcionamiento correcto del ajuste perimetral de la cabeza,
oel cierre correcto de la correa del mentón,
ola ausencia de defectos visibles de la protección,
oel funcionamiento correcto de la protección,
oel periodo de uso.
Si se detectan daños mecánicos (fisuras, arañazos profundos etc.) o químicos (manchas
de color, pérdida de color etc.) del casquete, daños del arnés, funcionamiento
defectuoso del ajuste del perímetro de la cabeza, fijación incorrecta, cierre defectuoso
o daños de la correa del mentón, así como daños mecánicos (fisuras, arañazos
profundos, perforación) o químicos (manchas de color, opacidad etc.) de la protección
facial o su funcionamiento incorrecto, así como si surgen dudas en cuanto al nivel
óptimo de protección, el casco deberá retirarse del uso.
Preste atención al periodo de uso que es de 60 meses contando desde la fecha de
producción grabada en el casco. Después de este periodo el casco con la protección
deberá retirarse del uso y eliminarse.

11
Un casco sucio no podrá usarse para trabajos en tensión.
Si el casco está húmedo, séquelo bien antes del uso.
¡ATENCIÓN! Antes de empezar el trabajo, el usuario deberá comprobar si las
restricciones eléctricas para los cascos corresponden con el valor nominal de la tensión
y la categoría o la clase de peligro que puedan darse durante el uso.
5. PRECAUCIONES DURANTE EL USO
El casco no deberá usarse en situaciones donde exista el riesgo de disminución parcial
de sus propiedades aislantes. Siga las instrucciones contenidas en los manuales de
organización de trabajos en tensión.
6. PRECAUCIONES DESPUÉS DEL USO
Si el casco o la protección facial están sucios o contaminados, especialmente, sus
superficies externas, efectúe una limpieza minuciosa de acuerdo con las instrucciones
del fabricante contenidas en el punto 8.
7. ALMACENAMIENTO Y TRANSPORTE
El casco deberá almacenarse y transportarse en una bolsa de transporte o un recipiente
separados. Durante el almacenamiento o el transporte, la protección facial deberá
encontrarse en el interior del casco. Mantenga el casco fuera de las fuentes de calor.
Proteja el casco contra daños mecánicos, exposición solar, humedad, gases de escape,
etc. No coloque el casco directamente en las ventanas de habitaciones o lunas de
coches. Es recomendable almacenarlo a temperaturas de 20±15 0C.
8. LIMPIEZA Y DESINFECCIÓN:
El casco y la protección facial deberán limpiarse después de cada uso, lo que permite
controlarlos y prevenir irritaciones cutáneas. Limpie el casco solo con el agua y jabón.
Séquelo bien después de lavar. Para limpiar no use disolventes, detergentes ni
materiales abrasivos. Si las bandas de sudor están muy gastadas, deberán sustituirse por
nuevas.
Limpie la protección facial solo con el agua y el jabón. Séquela bien después de lavar.
Para limpiar la superficie de la pantalla use siempre el paño de microfibra adjunto al
casco.
¡ATENCIÓN! Algunas sustancias químicas agresivas podrían dañar la protección. Para
limpiar no use disolventes, detergentes ni materiales abrasivos.
9. REPUESTOS DE USO
Los elementos del casco excesivamente gastados o dañados deberán sustituirse por
nuevos. El fabricante proporciona un servicio completo del producto ofrecido. Un
elemento dañado del casco podrá ser sustituido por el propio usuario o por el fabricante
al que deberá entregarse el casco con el elemento dañado.

12
El listado de los repuestos reemplazables por el usuario:
ARM-BSF banda de sudor frontal
ARM-BST banda de sudor trasera
ARM-AC arnés completo
ARM-CM correa del mentón con elementos de seguridad, completa
ARM-PF2protección facial, completa
ARM-PP paño para limpiar la pantalla
ARM-BAT bolsa de almacenamiento y transporte
Los manuales actuales están disponibles en www.sofamel.com
10. SUSTITUCIÓN DE LOS REPUESTOS
BANDA DE SUDOR
Las bandas de sudor (Fig. 9) están fijadas a la banda principal - banda de sudor frontal
(1) y a la banda trasera –banda de sudor trasera (2) por medio de los velcros. Para
sustituir la banda de sudor frontal, abra los seis velcros que la fijan alrededor de la
banda. Para sustituir la banda de sudor trasera, agárrela y tirando ligeramente sepárela
del ajuste del perímetro de la cabeza. Instale nuevas bandas de sudor en lugar de las
viejas.
ARNÉS
Para sustituir el arnés (Fig. 10), entre el aro y el elemento de fijación del arnés introduzca
un destornillador plano (de 3 mm de ancho). Luego incline ligeramente el
destornillador hasta que se suelte el cierre del elemento de fijación del arnés (1). Repita
esta operación en otros elementos de fijación. Una vez soltados todos los cuatro
elementos de fijación, sujételos y, tirando ligeramente (2), separe el arnés del aro del
casco (Fig. 11).
Fije un arnés nuevo en lugar del viejo dañado. Para ello, introduzca los elementos de
fijación del arnés en los agujeros del aro, luego presiónelos uno tras otro hasta que se
oiga un “clic”(cierre de los elementos de fijación).
CORREA DEL MENTÓN
Para sustituir la correa del mentón (Fig. 12), agarre el elemento de fijación de la correa
(1) y tirando con fuerza sepárelo del casco. Repita esta operación en otros cuatro
elementos de fijación.
Fije una correa nueva en lugar de la vieja dañada. Para ello, introduzca el elemento de
fijación de la correa (2) en la espiga en el aro (3) y luego tírelo hacia arriba (Fig. 13) hasta
que se bloquee el elemento de fijación (Fig. 14).
PROTECCIÓN FACIAL
La sustitución de las protecciones faciales se describe en un manual aparte.

13
11. ACCESORIOS ADICIONALES
Opcionalmente, el casco puede estar dotado de accesorios adicionales:
ARM-APA dos adaptadores para fijar las protecciones auditivas instalados por el
fabricante o por su propia cuenta
ARM-PA protecciones auditivos para su montaje en los adaptadores por su
propia cuenta
ARM-PCA protecciones laterales contra el arco para el montaje por su propia
cuenta
ARM-PM braga de cuello o pasamontañas
La información relativa a los accesorios adicionales y la forma de su montaje se
encuentra en los respectivos manuales.
Los manuales actuales están disponibles en www.sofamel.com
12. PERIODO DE USO
El periodo de uso del casco con la protección es de 60 meses contando desde la
puesta en servicio. La fecha de producción mes/año (1) y la fecha de eliminación mes/
año (2) están grabadas en la parte posterior externa del casco(Fig. 8).
UNA VEZ VENCIDO EL PLAZO INDICADO DE ELIMINACIÓN [Fig.8 (2)], ES OBLIGATORIO
RETIRAR EL CASCO DEL USO Y ELIMINARLO.
¡ATENCIÓN!
EL CASCO DEBERÁ RETIRARSE DEL USO DESPUÉS DE CADA IMPACTO, SI APARECEN
FISURAS O DAÑOS EN EL MISMO.
EN EL CASO DE: FISURAS, PERFORACIÓN U OPACIDAD DE LA PROTECCIÓN, EL CASCO
DEBERÁ RETIRARSE DEL USO O SUSTITUIR LA PROTECCIÓN.
13. GARANTÍA
El fabricante concede al casco una garantía de 24 meses contando desde la fecha de su
compra. La garantía no cubre los elementos del casco con marcas de desgaste normal,
alterados y modificados, almacenados de modo incorrecto, dañados debido a
accidentes, negligencia y usos desconformes.

14
¡ADVERTENCIA!
•El casco deberá retirarse del uso después de cada impacto, si aparecen fisuras o daños
en el mismo.
•No haga modificaciones ni elimine elementos originales del casco.
•El casco de protección frente a los riesgos eléctricos no podrá usarse como el único
equipo de protección personal durante los trabajos en tensión
•En función del riesgo existente en un determinado trabajo, además del casco, es
necesario usar un equipo de protección adicional.
•El fabricante no asume responsabilidad si se hacen cambios, ajustes individuales de los
elementos de trabajo no incluidos en el equipamiento del casco ni adaptados para los
trabajos en tensión sin su autorización.
•No cubra el casco o la protección facial con pinturas, barnices, etc.
•No coloque etiquetas autoadhesivas en el casco o la protección facial sin la
autorización del fabricante.
•Para limpiar el casco o la protección facial no use disolventes, detergentes ni
materiales abrasivos.
•No lance, ni apriete, ni use el casco como soporte.
•Antes de empezar el trabajo, compruebe si las restricciones eléctricas para los cascos
corresponden con el valor nominal de la tensión y la categoría o la clase de peligro que
puedan darse durante el uso.
•Las protecciones faciales pueden usarse solo con el casco ARMOUR-2
•La protección facial protege contra los riesgos solo si está bajada por completo.
•No use complementos como gorros, aislantes, etc. debajo del casco que no se hayan
sometido a ensayos junto con el casco. El uso de un complemento inadecuado podrá
reducir el nivel de protección.
•Con el casco use solo complementos (p.ej. braga de cuello, pasamontañas)
recomendados por el fabricante.
•Mantenga la protección facial limpia y, en particular, la pantalla transparente.

15
OPERATING MANUAL
ELECTRICALLY INSULATING HELMET
WITH INTEGRATED FACE SHIELD
Type: ARMOUR-2 ATPV36
Class 0 (1 000 V), Box Test –class 2
EN 397:2012 + A1:2012, EN 50365:2002, EN 166:2001, GS-ET 29:2011-05
Class E (20 kV)
ANSI/ISEA Z89.1:2014
Manufacturer :
SOFAMEL S.L.U.
C/Thomas Alva Edison, 16-17
Pol. Industrial Plans d’Arau
08787 La Pobla de Claramunt (Barcelona) Spain
Tel.: +34 93 808 79 80, www.sofamel.com, info@sofamel.es
The notified body that carried out the EU-type examination:
Helmet–CIOP-PIB, (No 1437), ul. Czerniakowska 16, 00-701 Warszawa,
Face shield –CIOP-PIB, (No 1437), ul. Czerniakowska 16, 00-701 Warszawa.
The notified body carrying out the conformity assessment procedure to type based on
internal production control plus supervised product checks at random intervals (Module
C2):
CIOP-PIB, (No 1437), ul. Czerniakowska 16, 00-701 Warszawa.
1. INTENDENT USE
ARMOUR-2 type helmet is intended to protect the head against injuries caused by falling
objects and at the same time, against electric shock class 0 (1000 V) EN 50365:2002 and
class E (20 kV) ANSI/ISEA Z89.1:2014 caused by flow of electric current through the head,
against electric arc, and against projected droplets of molten metal. It is recommended
as a personal protection equipment to be used during live work, work at heights, and
work on electrical connections. Working temperature in the range from -40 °C to +60 °C.
ENGLISH

16
The face shield has an external scratch-resistant and an internal anti-fog surface. The
face shields protect the user against short-circuit electric arc (class 2 - Box Test). It also
protects against the impact of particles with medium energy, the risk of projected solid
objects and liquids. The face shield also has filter to protect against UV radiation.
2. MARKING
marking stamped on the helmet shell:
indicates a product intended for live work,
Klasa 0 Class 0 - electrical class for use up to rated mains voltage of 1 000 V AC and
1 500V DC,
EN 50365:2002 applicable standard Electrically insulating helmets for use on low voltage
installations,
identification of the manufacturer,
ARMOURmodel name (hard hat),
ABS material of helmet shell,
53-63cm range of head circumference adjustment,
207/8-245/8inch range of head circumference adjustment,
EN 397:2012+A1:2012 applicable standard Industrial safety helmets,
-40°C resistance to very low temperatures (down to -40 °C),
LD resistance to lateral deformation,
MM resistance to projected droplets of molten metal,
440Vac electrical properties (according to the EN 397 standard),
ANSI/ISEA Z89.1-2014 applicable standard American National Standard for Industrial Head
Protection,
Type I protection against shocks at the top of the head, according to the standard
ANSI/ISEA Z89.1,
Class E electrical class, according to ANSI/ISEA Z89.1,
LT lower temperature (according to the ANSI/ISEA Z89.1 standard,
HT higher temperature (according to the ANSI/ISEA Z89.1 standard),
CE 1437 marking of conformity with the Regulation 2016/425 and the number of the
Notified Body carrying out supervised product checks at random intervals
(module C2),
LOT NO: XXX serial number,
www.sofamel.com website address where a declaration of conformity is available.
marking stamped on the rear, outer part of shell:
PROD MM/YY production date (month/year),
UTIL MM/YY expire date (month/year).
marking on the rear, outer part of shell:
ARMOURtype of helmet.

17
marking on the visor:
1000V
indicates a product intended for live work (according to the RFU no 03-025/2012),
2C-1,2 protection level of the UV filter,
SOFAMELidentification of the manufacturer,
1 optical class,
B resistance to medium-energy impacts,
8-2-0 protection against short-circuit electric arc,
8 protection against electric arc according to EN 166:2001,
-2 protection against thermal effects associated with electrical arc - class 2 (7kA/0,5s)
according to GS-ET 29:2011-05 “Supplementary requirements for the testing and
certification of face shields for electrical works”,
-0 coefficient VLT >75%, class 0, according to GS-ET 29:2011-05,
N resistance to fogging,
CE marking of conformity with the Regulation 2016/425.
marking stamped on the lower part of the shield - the chin protection:
SOFAMEL identification of the manufacturer,
EN 166:2001 applicable standard Personal eye protection. Specifications,
3 protection against projected liquid,
8 protection against electric arc,
B resistance to medium-energy impacts.
3. ADJUSTMENT
Before use, the helmet must be properly adjusted to provide effective protection. The
user should adjust the hard hat to the circumference of the head, changing the wearing
height and the length of the chin strap in such a way that the hard hat fits well, does not
move or tilt.
HEAD CIRCUIT ADJUSTMENT
The hard hat is equipment with a ratchet mechanism to adjust to the circumference of
the head with the precision of 3 mm over a range of 53 cm to 63 cm. After putting the
helmet on the head, adjust it to the head circumference by turning the knob of the
headband (1) located on the back of the helmet (Fig. 1). Turning to the left (2) allows
you to loosen and turn to the right (3) to tighten the headband.
ADJUSTMENT OF WEARING HEIGHT
The hard hat has two adjustment positions for the wearing height (Fig. 2). After putting
the helmet on the head, make sure that the cradle is properly adjusted to the height of
the head. As standard, the attachment of the headband (1) is mounted in the low
position (2). To change the wearing height, attach the attachment of the headband to
the high position (3).

18
ADJUSTMENT OF THE CHIN STRAP
The chinstrap (Fig. 3) has a length adjustment, individually for the left and right of the
strap. For each part, the length of the front (1) and rear (2) sections can be changed by
sliding the strip through the splitter (3).
FASTENING OF THE CHIN STRAP
To fasten the strap, insert the strap element (1) into the clip (2) (Fig. 4) To unfasten the
strap, pull the clip (1) and release the strap element (2) from the clip (Fig. 5).
OPENING/CLOSING OF THE FACE SHIELD
1. To lower (open) the face shield (Fig. 6), gently grab it with both hands, with thumbs
on the inside (1), pull it down (2), until it fully extends to the outside of the helmet (3),
and then turn the chin cover by pulling it towards you (4), until you hear a click of the
hinges of the chin cover
2. To lift (close) the face shield (Fig. 7), first turn the chin cover (5), until you hear a click
of the chin cover hinges (6), and then slide the face shield into the helmet, by pushing it
upward (7).
WARNING! Incorrect (not according to the instruction) use/opening/closing of the face
shield may cause its damage. Do not press on parts of the face shield too hard and do
not close/open it too fast.
4. CHECKS BEFORE EACH USE
The hard hat and the face shield must be checked each time before work is resumed.
During the visual inspection, the following items must be checked:
oabsence of visible defects on hard hat,
oproper operation of the head circumference adjustment mechanism,
oproper operation of the chin strap fastener,
oabsence of visible defects on the shield,
oproper operation of the shield's mechanisms,
othe period of use or expire date.
In the event of a mechanical damage of the shell (cracks, deep scratches, etc.) or
chemical (discoloration, fading, etc.), improper operation of the head circumference
adjustment or of the chin strap fastener and mechanical (cracks, deep scratches,
perforations), or chemical (discoloration, tarnishing etc.) damage to the face shield or
its malfunction and if there is any doubt as to the optimal level of protection, the helmet
must not be used for work on live equipment and it should be withdrawn from use.
Pay attention to the lifetime of the helmet, which is 60 months from the date of
production marked on the helmet. After this period, the helmet and shield should be
taken out of service and recycled.
If the expire date has passed, the helmet must be disposed of.
If the helmet is wet, it must be completely dried before use.

19
WARNING! Before starting work, the user should check whether the electrical limits for
helmets correspond to the voltage rating and the category or class of hazards that they
are likely to encounter during use.
5. PRECAUTION IN USE
The helmets should not be used in situations where there is a risk which could partially
reduce its insulating properties. Follow the requirements of the live work organization
instructions.
6. PRECAUTION AFTER USE
If the helmet or face shield becomes dirty or contaminated, particularly their external
surfaces, they should be thoroughly cleaned in accordance with the manufacturer's
recommendations (see 8.)
7. STORAGE AND TRANSPORT
The helmet must be stored and transported in a special transport bag or other protective
packaging. During storage or transport, the face shield should be hidden inside the
helmet. Keep the helmet away from any sources of heat. Protect the helmet against
mechanical damage, compression, sunlight (UV), humidity, exhaust gases, etc. Do not
place the helmet in direct vicinity of windows or car windows. The recommended
storage temperature is (20±15) °C
8.CLEANING AND DISINFECTION:
The hard hat and face shield should be cleaned after each use, which enables precise
control and prevents skin irritation of the user. The hard hat should be cleaned only with
soap and water. Do not use any solvents, detergents, and abrasives for cleaning. The
sweatbands must be regularly replaced.
The face shield should be cleaned only with soap and water. After washing, dry the shield
properly. To clean the surface of shield visor, use a microfiber cloth, attached to each
helmet.
WARNING! The face shield can be damaged by certain aggressive chemical substances.
Do not use any solvents or detergents and abrasives to clean the face shield.
9. SPARE PARTS
Parts of the helmet that are very worn or damaged must be replaced with new ones.
The manufacturer provides full service of the product it offers and its dedicated
accessories. The users can replace damaged elements of the helmet by themselves or
send the helmet with a damaged part to the manufacturer.
List of spare parts to be replaced by the user himself:

20
ARM-BSF front sweatband
ARM-BST rear sweatband
ARM-AChead harness, complete
ARM-CM chinstrap with safety catches, complete
ARM-PF face shield, complete
ARM-PP visor cleaning cloth
ARM-BAT storage and transport bag
The latest instructions are available at www.sofamel.com
10. REPLACEMENT OF SPARE PARTS
SWEATBAND
The sweatbands (Fig. 9) are fixed to the main strap –front sweatband (1) and the back
strap –back sweatband (2) using Velcro fasteners. To replace the front sweatband,
remove the six Velcro, which fasten it around the headband. To replace the back
sweatband, grab it and separate them from the regulator by gently pulling them. In
place of worn sweatband attach new ones.
HARNESS
To change the harness (Fig. 10), put a flat screwdriver (3 mm wide) between the rim and
the attachment of the harness. Then lightly pull the screwdriver until the attachment of
the harness becomes opened (1). Perform the same procedure on all the attachments.
After releasing all four attachments, grasp them and pull gently (2) to separate the
harness from the rim of the helmet (Fig. 11).
To replace a damaged harness with a new one, insert the attachments of the harness in
the openings of the rim, push them one after another until a clicking sound can be heard,
and then check if they have been fastened properly.
CHIN STRAP
To change the chinstrap (Fig. 12), grasp the attachment of the chinstrap (1) and separate
it from the anchorage on the rim of hard hat by pulling it with force. Perform the same
procedure on the remaining attachments. Replace the new one in place of the damaged
chinstrap.
Insert the attachments of chin strap (2) on the anchorage of the rim (3) and then pull
them up (Fig. 13) until securing the attachments (Fig. 14).
FACE SHIELD
The replacement of face shields is included in a separate manual.
Table of contents
Languages:
Other Sofamel Motorcycle Accessories manuals
Popular Motorcycle Accessories manuals by other brands
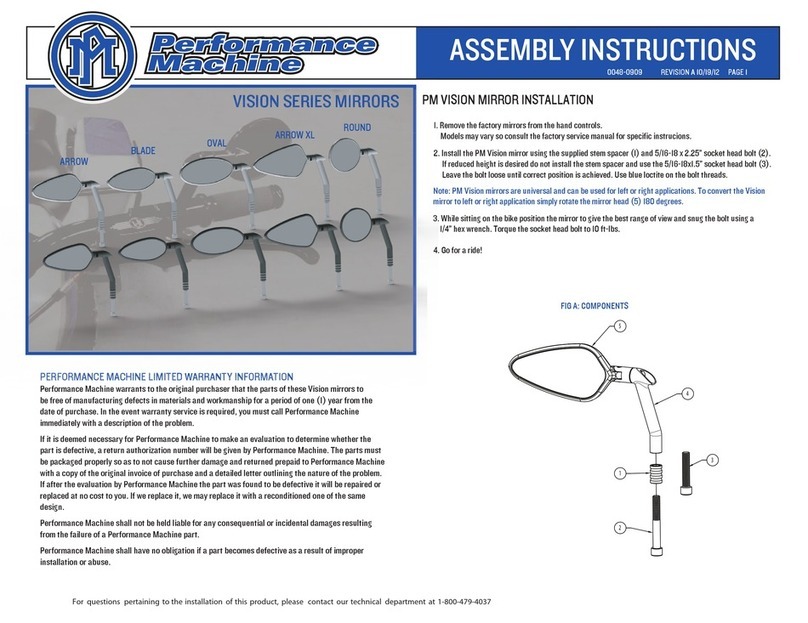
Performance Machine
Performance Machine Vision Series Assembly instructions
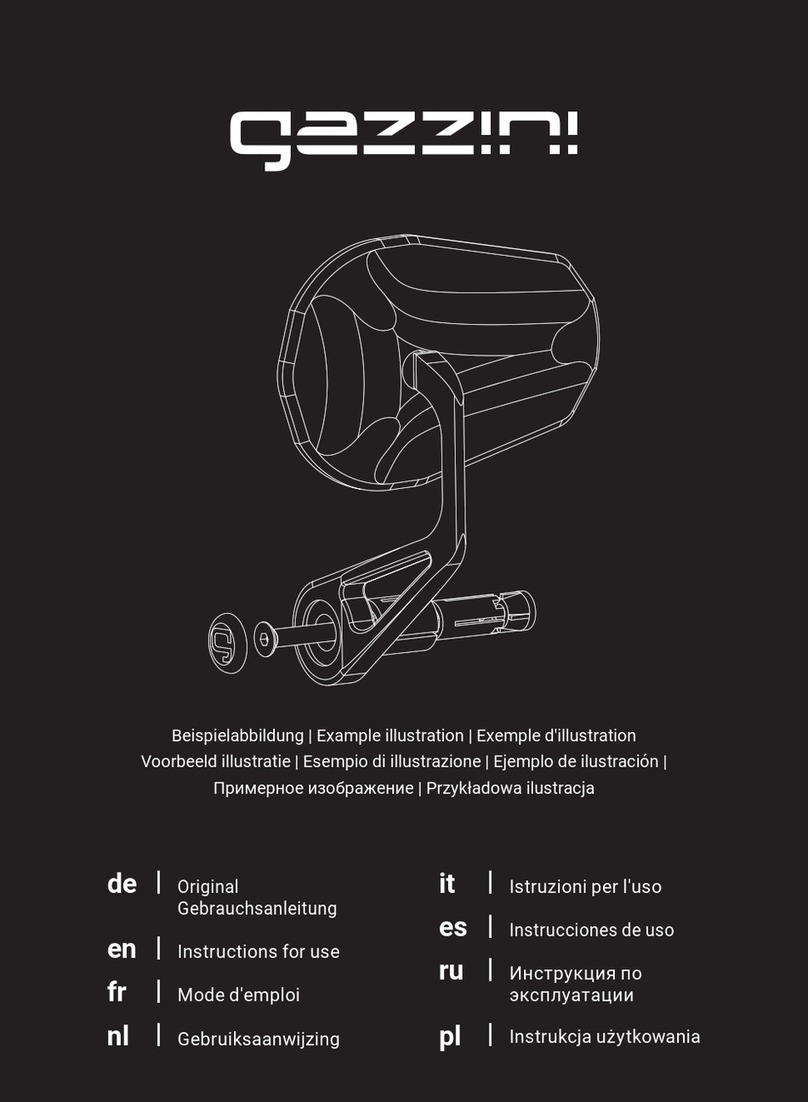
Gazzini
Gazzini 10030234 Instructions for use
hepco & becker
hepco & becker 6536507 00 01 Mounting instructions
hepco & becker
hepco & becker Easyrack 6617616 01 01 quick start guide
Cardo Systems
Cardo Systems SMARTPACK Pocket guide
SW-Motech
SW-Motech KFT.01.890.65000/B Mounting instructions

