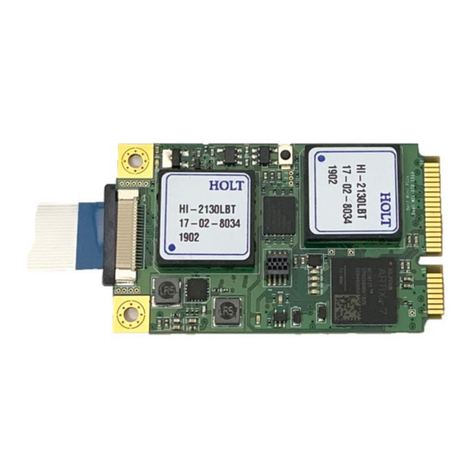
Softing CANpro PC/104plus Instructions for use

V1.00.03
Softing Industrial Automation GmbH
Richard-Reitzner-Allee 6
D-85540 Haar
Tel.: (++49) 89/4 56 56-0
Fax.: (++49) 89/4 56 56-399
http://www.softing.com
CANpro PC/104plus
(dual channel)
Hardware User Manual
Part number: CAN-PRO2-PC104+
and
CAN-PRO2-PC104+XT (extended temperature)
©Copyright Softing Industrial Automation GmbH, Munich Germany
Information in this document is subject to change without notice.

Page: 2
1 Installation
To properly install the CAN-PRO2-PC104+ in your PC, please follow the instructions detailed
in the next sections.
1.1 System requirements
To run the CAN-PRO2-PC104+ on a PC, the PC must meet the following requirements:
•PC/104plus socket with active PCI signaling
•Windows7, Windows XP or Windows 2000 installed
1.2 Software installation
The CAN-PRO2-PC104+ software is part of the “CAN Drivers and API” CD which is also
available from the download section at www.softing.com.
•Insert the CD in your PC’s CD/DVD drive.
•Run the CANDriversAndSoftware32.exe for 32 bit operating systems or
CANDriversAndSoftware64.exe for 64 bit operating systems.
•Please follow the instructions given by the setup software.
NOTE:
Make sure to install the software b e f o r e you install
your CAN-PRO2-PC104+ hardware for the first time.
1.3 Hardware and driver installation
Once the software setup is finished please shut down the PC and follow the steps listed
below to install the CAN-PRO2-PC104+ hardware.
NOTE:
To prevent damage to the CAN-PRO2-PC104+ or to the
PC, discharge yourself on a grounded object such as the
metal housing of the PC before touching the board.
•First switch OFF the PC.
•Make sure that all peripheral devices are powered down.
•Remove the housing cover (refer to the PC manual).
•Plug the board at a suitable location within your PC/104plus stack.
•PC/104plus requires to select a distinct “PCI slot” not in use by any other device. This is
accomplished by the jumpers “A” and “B” (see illustration below).

Page: 3
PCI-Slot-Select
(A) (B)
PCI slot selection
Termination
ON
CAN1 CAN2
Drain (CAN1) Drain (CAN2)
Status-LEDs
Jumper (A) Jumper (B) PCI slot number
open open 0 (default)
closed open 1
open closed 2
closed closed 3
The CAN-PRO2-PC104+ is configured for PCI
slot 0 by default.
Bus termination with 120 Ohms between CAN-
H and CAN-L is activated for each CAN
channel by default. It can be switched off by
moving the respective jumper one position to
the right.
Status-LED PCI slot number
off no power or in reset state
flashing green in initialization state
solid green CAN started
flashing red CAN error passive
solid red CAN bus off
•Fix the PC/104plus stack with appropriate mounting parts and reassemble the housing.
•Turn ON the PC and applicable peripherals. ->The computer will recognize the new hardware.
•When “New Hardware Wizard” asks if Windows Update should be connected
select No.
•In the next step select automatic software installation.This will install all required drivers.
1.4 Driver configuration
CAN-PRO2-PC104+ is recognized by the driver automatically. Nothing more is usually
required. However, advanced configuration – like changing the name of a CAN channel or
setting a default baudrate - is possible with the Softing CAN Interface Manager.
•Click Start – All Programs – CAN – Runtime System Configuration – Softing CAN
Interface Manager (SCIM)
•For more details on the driver configuration click
Start – All Programs – CAN – Runtime System Configuration – SCIM_Manual
1.5 Application Software
How to use CAN-PRO2-PC104+ and how to write application software, is described in the
Software Manual.
•To open this manual click
Start – All Programs – CAN – CAN_API - DOC – Softing Layer2
2 RoHS Information
CAN-PRO2-PC104+ is RoHS compliant.
PCI slot configuration, status LED and
bus termination

Page: 4
3 CE Information
This device complies with the requirements of the EC directive 2004/108/EC
"Electromagnetic Compatibility" (EMC directive).
The product meets the following requirements:
•Emission: EN61000-6-4:2007 Generic emission Standard (industrial environments)
EN55022:2006 + A1:2007 Class B (ITE Product Standard)
EN55011:2007 + A2 :2007 Group1 Class B (ISM Product Standard)
•Immunity: EN61000-6-2:2005 Generic Immunity Standard (industrial environments)
A "Declaration of Conformity" in accordance with the above standards has been made and is
filed at Softing AG, Germany.
NOTE:
•To satisfy the EMC requirements, the equipment used (PC, monitor, CAN stations, etc.)
also has to meet the EMC requirements.
4 Pin Assignment
The CAN D-Sub 9 connectors are plugged into the
PC/104 interface by a 10 pin ribbon cable connector.
They can be individually fixed at the housing of the PC
as required by the target system. The connector
pinning complies to CiA standard DS 102.
Pinning of the 9 pin D-Sub connector
The shield is connected to system GND via the PC housing. To prevent high compensation
currents due to ground loops, the cable shield can be connected instead to pin 5 of the D-
Sub 9. This signal is also available at the mounting hole on the PCB near the onboard
connector. In this case the CAN-PRO2-PC104+ must be installed using isolated screws.
5 Technical data
•Unit: PC/104plus card, acc. to PC/104plus specification V 2.0
•CPU: XC161, 40 MHz with internal TwinCAN CAN controller
•Memory: 256 kbytes XC161 on-chip Flash, 512 kbytes RAM,
•PC interface: PCI specification V2.2 compliant, 512 kbytes shared RAM
•PC interrupt: controlled by the operating system
•CAN interface: galvanically isolated (1kV) CAN high speed according to
ISO 11898-2
•CAN connector: 2 Sub-D 9 pin male, pin assignment acc. to CiA DS102
•Baud rate: 3.125 kbit/s up to 1 Mbit/s
•Power supply: +5V (±5%); typ. 350mA
+3.3V (±5%); typ. 150mA
•Temperature range: Operation: 0 (-40) °C … 70 (85)°C (board ambient, inside the PC)
(XT version in brackets) 0 (-25) °C … 55 (75)°C (typ. PC ambient)
Storage: -20 (-40)°C … 70 (85)°C
•Relative humidity < 90% (non-condensing)
Pin Signal
1 N.C.
2 CAN_L
3 Isolated GND
4 N.C.
5 Drain (1M/2.2n to isolated
GND)
6 Isolated GND
7 CAN_H
8 N.C.
9 N.C.
This manual suits for next models
2
Table of contents
Other Softing PCI Card manuals
Popular PCI Card manuals by other brands

SMC Networks
SMC Networks WPCI-GM - annexe 2 Quick installation guide

ASROCK
ASROCK ULTRA QUAD M.2 installation guide

StarTech.com
StarTech.com PEXUSB311AC2 quick start guide

JMC
JMC PD570 PRO HDMI user manual

SMC Networks
SMC Networks EZ Card SMC1244TX-1 Quick installation guide

Dolphin
Dolphin MXH94 Series user guide