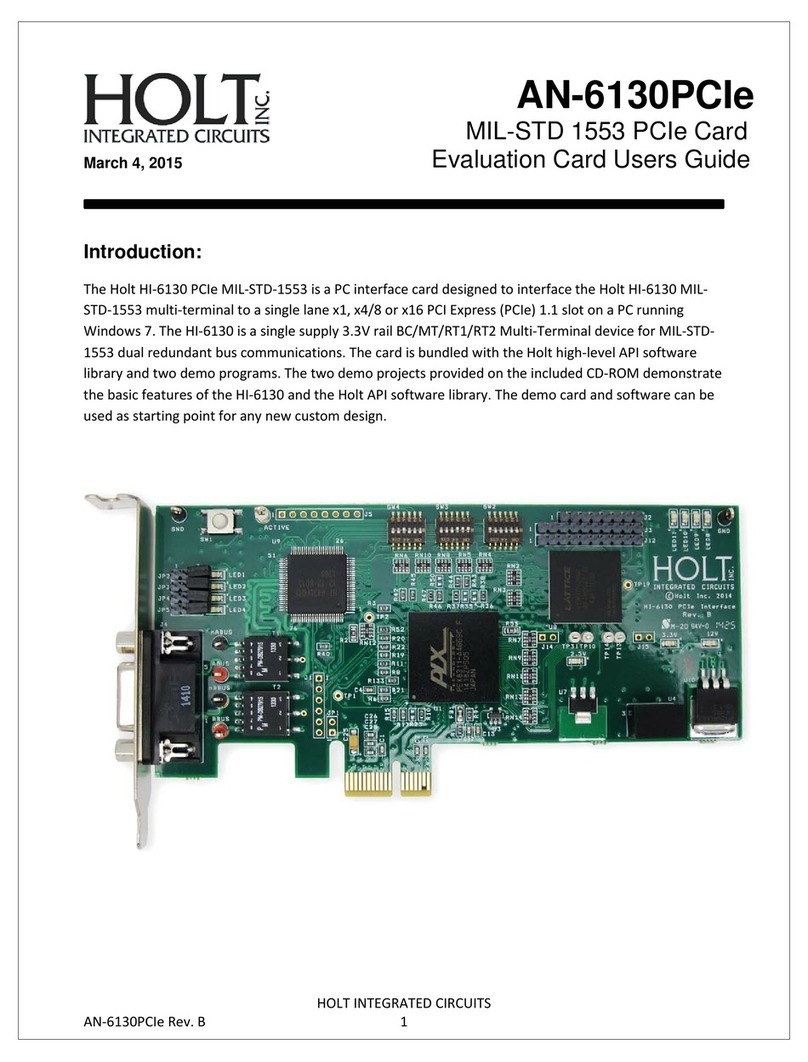
HOLT ADK-2130 User manual

QSG-2130mPCIe_Win10_New 06/20
A
ADK-2130mPCIe Windows 10
Quick Start Guide
June 15, 2020

Holt Integrated Circuits
2
REVISION HISTORY
Revision
Date
Description of Change
QSG-2130mPCIe_Win10
Rev. Prelim.
05/05/2020
Beta Release 1.0
QSG-2130mPCIe_Win10
Rev. New
06/15/2020
Release 1.0

Holt Integrated Circuits
3
Introduction
The Holt Mini PCIe reference design features one or two Holt HI-2130 MIL-STD 1553 dual redundant terminals
with integrated transformers on a single size F2 Mini PCIe card. The card is designed to operate in a PC or Single
Board Computer with accessible Mini PCIe slots running under Windows 10 or Linux. This demonstration release
focuses on Windows 10. The demonstration software uses the Holt API Library functions, providing an
abstraction layer that greatly simplifies host programming. A console menu is presented in a Windows
Command Shell window where commands are executed. This Quick Start Guide provides instructions related to
driver installation, and running the demonstration software. For a full description of the projects and the Visual
Studio tool-chain refer to AN-2130mPCIE_Win10 application note.
Figure 1 –Mini PCIe card EV-2130mPCIe-2F
Figure 2 –Mini PCIe breakout board mPCIe_breakout-2F

Holt Integrated Circuits
4
Release 1.0 Kit Contents
This Release Kit unzips into a directory named _MiniPCIeDualWin10ProjectFiles. When this Quick-Start Guide
uses the phrase “top-level”, it should be inferred that this means inside the _MiniPCIeDualWin10ProjectFiles
directory. In this distribution, inside the top-level directory, we have a folder named Projects which is where
our Visual Studio Projects reside. They can reside anywhere in a file-system that is read-writeable. Our
convention typically is that “Projects” is in our home folder for ease of access.
The release kit includes:
Release note (ReleaseNotes.pdf)
Quick Start Guide (QSG-2130mPCIe_Win10.pdf);
Technical Manual (AN-2130mPCIe_Win10.pdf);
Mini PCIe card, Single HI-2130: EV-2130mPCIe-1F or Dual HI-2130: EV-2130mPCIe-2F;
Holt Visual Studio projects for the demonstration software
Holt-1553 Windows driver (binary only), catalog and info files;
Break Out board:
omPCIe_Breakout-1F (single channel) or mMPCIe_Breakout-2F (dual channel).
This release currently demonstrates the following:
The demo executable operates on a single mini PCIe EV-2130mPCIe-1F or -2F card. But multiple
instances of either the static or dynamically linked executable can be running concurrently–each
managing a different EV-2130mPCIe-1F or -2F card. (The -2F card is demonstrated below)
It uses an officially-signed driver by Holt’s Certification Authority.
Quick Start Demo Requirements
PC requirements:
Operating System: Windows 10 (with Visual Studio 2019 free community version)
System RAM: 4G RAM minimum. 8-16G is recommended for Visual Studio use –not
required for the QSG demos presented here.
Hard Drive Capacity: 4G recommended for the Visual Studio projects: Holt 1553 Lib + Demo
Mini PCIe Slot: if no Mini PCIe slot is available, but a PCIe x1 slot is available, an adapter
board that can convert from Mini PCIe to PCIe may be used. One such
adapter board is available from Ableconn: PEX-MP117 Mini PCI-E to
PCI-E Adapter Card (X001XH1PCR).
Demo configurations
The cables on the Break Out board should be connected to a MIL-STD 1553 bus coupler. See AN-551 for
recommended bus connections.
The Holt Break Out board is connected to the Mini PCIe card using a small ribbon cable. The cable connector
strain reliefs are delicate so care must be exercised to avoid damage. Since the HI-2130 shares the same 1553
bus pins (BUSA, nBUSA) with all four internal terminals (BC, RT, RT2 and SMT) in each device, the RT responds
to commands transmitted by the BC in the same device.

Holt Integrated Circuits
5
The cables on the Break Out board should be connected to a MIL-STD 1553 bus coupler. See AN-551 for
recommended bus connections.
Triple BUCK Power
supply
LTC3545 (1 spare)
3.3VMOSFET
switch
100MHz
MEMS
OSC
Quad SPI
FLASH
JTAG
8 pin
to
FPGA
3.3aux
VCCINT 1V
MGTAVCC1V
VCC1.8V
(JTAG)
VCCO
3V3
52 pin
PCIe
conn.
Xilinx ARTIX-7
XC7A127-2CPG238I
10 x 10
HI-2130
(36) 16 bit address/data EBI
(6) Int,int,RTxMC8
nCS, nWE, nRD, TEST,MCLK, nMR,
TXINHA/B
PCIe
x1 lane
2x1.6
4x4 14.99 sq.
14.99 sq.
3.3aux
Optional
TBD 6x LED’s:
done, init_b,
rst, urst,
pcie_link,
heartbeat.
Bank 34
HI-2130-1
HI-2130-2
PCIe TX,RX, REFCLK
Bank 14
Bank 14Bank 16
JTAG,Misc Bank 0
ACTIVE TP
14.99mm sq.
TXHIBx,BCENA,BCTRIG AND 1553 BUS
1V
reg
MGTAVTT1V2
1V
reg
1V5
GOOD
1V5
J4
Figure 3 –Mini PCIe board block diagram

Holt Integrated Circuits
6
PWR D1, Green
VCCO3V3 switched power.
Done D2, Green
FPGA initialized from SPI Flash
Complete D3, Green
FPGA initialize complete.
LED D6, Green
FPGA rst signal
LED D7, Green
FPGA urst signal
LED D8, Green
FPGA PCIe Link Up –must be on for
the card to work.
LED D9, Green
FPGA Heart Beat
Table 1 –LEDs
Getting Started
Windows Preparation
This Holt mini PCIe release uses:
An officially-signed Holt1553.sys driver (including a security catalogue and associated info file);
The Holt 1553 library, and user-space demonstration code which leverages the Microsoft Visual C++
Redistributable for Visual Studio 2019.
The distribution is released in a Win Archive file (MiniPCIeDual2130Win10.zip) which needs to be unzipped. It
contains the following top-level hierarchy:
Note: Filenames and dates may appear different in these screen shots.

Holt Integrated Circuits
7
Note to customers who installed the Beta Release 1.0 distribution from Holt IC
If you installed the Holt Mini PCIe Dual2130VS release, then the following applies:
During that procedure, Holt asked that you place your host development Windows 10 system in test driver
signing mode. You now need to disable that (unless you need test-signing mode for reasons outside of the
Holt Mini PCIe driver installation) and then uninstall the Holt Mini PCIe Driver. This is done as follows:
1. To remove test signing mode, open an Administrator Cmd shell and execute :
bcdedit.exe –set TESTSIGNING OFF
2. To uninstall the device drive, right mouse-click the Win10 Start icon and select the Device Manager
then select and expand the Holt PCIe Device. If you have multiple cards, you will see multiple entries
as in the following display. Select Uninstall device and when the uninstall dialogue opens, select the
option to “Delete the driver software for this device”and then click Uninstall. Repeat this for all Holt
PCIe devices. When complete, pull down the Action dialogue and select Scan for hardware changes.

Holt Integrated Circuits
8
3. In the \Windows\System32\Drivers subdir, manually remove the holt1553.sys file.
4. In you Windows Home directory, open an Admin Cmd shell and “cd” to your AppData/Local/Temp
directory and manually remove the holtpcie subdirectory.
5. Reboot your computer and verify that the system no longer displays the Test Mode banner on the
Desktop.
6. Verify once again in the Device Manager if the Holt driver is present. If it is, it should be disconnected
because it is a test-signed driver which is no longer valid. Re-uninstall it if it’s present before starting
the official installation of this release below.
Mini PCIe Card Installation
1. Instruct Windows to shut down and then either physically turn off the power on your system’s power
supply or physically disconnect the power cord to the system’s power supply(s). (Some systems leave
residual power to various components when shutdown. It’s always good practice to ensure that the
power is disconnected after shutdown if you are inserting or removing internal hardware.)
2. Install the Holt Mini PCIe card using standard ESD safe handling practices (e.g. ground strap, static
limiting work-area…)
3. Insert the EV-2130mPCIe-1F/2F board(s) into the Mini PCIe slot(s) on your system’s motherboard. If
you are using Mini PCIe-to-PCIe X1 adapter boards, mount the EV-2130mPCIe-1F/2F card into the
adapter board and insert it into a PCIe X1 slot. Carefully insert the small ribbon cable to the Mini Card
J4 connector and the other end to the Break Out board on the EV-2130mPCIe-1F/2F cards. The cable
is fine pitched and the connector plastic fasteners are delicate so care must be exercised to avoid
damaging the connector.
4. Power on the system and login as normal.

Holt Integrated Circuits
9
Software Installation
This release includes two software installers: one for the Driver software, and one for the Demo+Libs. We’ll
perform the driver installation first.
Driver Installation
The top level directory of the release kit has a directory called driver_installer which includes the
holt_pcie.exe driver installer. At this time, Holt is not releasing the source code to the driver, but this structure
is identical to our build procedure. In this step, we’ll install the Holt Windows driver. But first let’s make sure
Windows detects the new hardware.
1 . Start the Windows Control Panel and Click on Device Manager. In the Action tab, select “Scan for hardware
changes”;
2. If you have 2 mini PCIe cards installed, you’ll see a display as follows – typically under Other devices:

Holt Integrated Circuits
10
3. Open an explorer window to driver_installer:
Right click the holt_pcie.exe and select Run as Administrator:
A popup dialogue is produced –select Yes to allow the executable to make changes to your system:
Another popup: Select Install:

Holt Integrated Circuits
11
The Windows Driver installer pops up: click Next

Holt Integrated Circuits
12
Click Finish and observe the Device Manager has now replaced the Other PCIe drivers with Holt’s:

Holt Integrated Circuits
13
6. If you have a more than one Mini PCIe card, update the other drivers using the same steps. (In this example,
we demonstrate two cards have been installed).
7. Verify the Holt Mini PCIe driver is installed.
Change dir to the top level folder containing this demo’s distribution. Select the top-level/projects/driver-
test and run x1553_find.exe. It should report the number of devices found accurately and then quit. For a
two card system, it would be similar to the following:
If it doesn’t find the Holt PCIe cards, then something is wrong with the driver just loaded. Remember that
your connection strings won’t match ours because the revision section of the string &rev_00#something
unique#(3a3e415…) is unique.
Demonstration and Holt API Library Installation
The top level directory of the release kit has a directory called demo_installer. In this step, we’ll install the
Holt Windows Demonstration and Librarys.
1. Open an explorer window to driver_installer. Select the holt_demo.exe executable and right click to Run
as administrator:

Holt Integrated Circuits
14
Click yes on this dialogue:
Click next on this dialogue:
Click Install on this dialogue:

Holt Integrated Circuits
15
And finally Close:
2. Left click on the Windows Start Menu window to reveal the applications tray. Browse down to the H
applications and observe that the Holt applications are now installed (along with an uninstaller):

Holt Integrated Circuits
16
3. The icon: TheDir will open an explorer window to where the applications were installed:
Visual Studio Installation
In order to execute the Holt Mini PCIe demonstration, you will need the C++ Windows Redistributable
distribution which is a part of the Windows SDK (which is included in the Visual Studio.) While the
redistributable is part of the SDK, the redistributable can be obtained without Visual Studio. At Holt, we have
proceeded down a path that includes VS2019 –If you do not use VS2019, then to use the demonstration, you
may have to download the Windows redistributable download from Microsoft directly. If you already have
Visual Studio or Pro installed, you will need to enable the Desktop Development with C++ Workload, and the
C++ Redistributable collateral. If you don’t have VS2019, you can download the free community edition from
here:
https://visualstudio.microsoft.com/thank-you-downloading-visual-studio/?sku=Community&rel=16
When installing the Desktop Development with C++ Workloads. Ensure that the following are checked:

Holt Integrated Circuits
17
Before clicking install in the Visual Studio installer, select the Individual Components dropdown tab to also
select the following elements:

Holt Integrated Circuits
18
and:
and finally:
Click install. After installation, you should be able to build and run the Holt executables.
More Information on the Windows Redistributable program may be found here:
https://docs.microsoft.com/en-us/visualstudio/releases/2019/redistribution
Running the Demonstration
Both the static and the dynamic library variants perform identically. We’ll use the static variant here. The
program initializes the four RT’s with the following RT addresses (these can be changed later using command
‘9’). In some demos and in the software RT1 may also be referred to as RT. RT2 will always be referred to RT2.
Connect the desired 1553 channel coax cables to a properly terminated bus coupler. See AN-551 for
information how to connect 1553 devices to a bus coupler. To just see the data on the console this may not be
required but it’s advisable.
Table 2 –Device RT Addresses
DEVICE/IC
RT
RT ADDRESS
ADK Board
Dev 0 / U7
RT (RT1)
3
ADK-2130mPCIe-1F
Dev 0 / U7
RT2
1
ADK-2130mPCIe-1F
Dev 1 / U8
RT (RT1)
3
ADK-2130mPCIe-1F
ADK-2130mPCIe-2F
Dev 1 / U8
RT2
1
ADK-2130mPCIe-1F
ADK-2130mPCIe-2F

Holt Integrated Circuits
19
1. Open a windows command shell: press the <Win Logo Key> and type cmd observing that the Command
Prompt option is displayed.
2. Cd to the top-level/Projects/PcieDual2130VS/Demo/build/x64/bin and execute HoltPCIeDemoWIN.exe
3. In Cmd Shell, if you have more than one card installed, the program will ask you to select a card –select 1:
C:\ Users\home\Burt\Projects\PcieDual2130VS\Demo\build\x64\bin> HoltPCIeDemoWIN.exe
Holt Integrated Circuits
Mini PCIe Windows 10 Demonstration
Release 1.0
Windows found 2 PCIe Cards
Choose PCIe Card <1..2>: 1
Card Selected = 1
Opening Device: …#4&171d4e2e&0&00e3#...\ch0
Success: chan 0
Opening Device: …#4&171d4e2e&0&00e3#...\ch1
Success: chan 1
Number of Devices found: 2
Initial default RT addresses:
DEV0:RT1=3 DEV0:RT2=1 DEV1:RT1=3 DEV1:RT1
Optionally use console command '9' to change these RT addresses BEFORE
RUNNING RT
*************************************************
Holt Integrated Circuits
Mini PCIe Dual HI-2130 API Demo
Demo Rev: 1.0 Compiled: May 4 2020 17:26:04
API Lib Rev: 03-5-0
*************************************************
BC On SMT On RT1 On RT2 On
Press 'a' or 'A' to run Dev0 or Dev1 BC Async demo.
Press 'b' or 'B' to run Dev0 or Dev1 RT demo.
Press 'c' or 'C' to run Dev0 or Dev1 RT2 demo.
Press 'k' or 'K' to Enable Dev0 or Dev1 RTMT.
Press 'l' or 'L' to send high priority BC message.
Press 'h' or 'H' to send low priority BC message.
Press 'n' or 'N' to run Dev0 or Dev1 BC Major Minor Frame demo.
Press 'x' or 'X' to stop Dev0 or Dev1 BC transmissions.
Press 'S' to run SMT demo.

Holt Integrated Circuits
20
Press 't' to display RT Traffic Toggle.
------------ Utilities -------------
Press 'r' or 'R' to Display Dev0 or Dev1 HI-2130 Registers.
Press 'w' for Memory Watch window
Press 'f' Reads J4 connector and FPGA control signals
Press '1' for Register Write
Press '2' for Memory Write
Press '3' RT Mode Code data word reads
Press '4' Master Reset and reinitializes terminals
Press '5' Toggle Dev0 BCENA on/off
Press '6' Toggle Dev1 BCENA on/off
Press '9' Set RT addresses
Press '0' Toggle between User and Demo(default) modes
Press 'M' for menu, or press any valid menu key. >>
The menu commands are very similar to other Holt ADK’s such as the ADK-6138, ADK-6130-2 or ADK-6131.
Lower case characters ‘a’, ‘n, ‘b’, ‘c’ and ‘r’ executes commands on the (Dev0) and ‘A’, ‘N’, ‘B’, ‘C’ and ‘R’
executes commands on Dev1. With a -1F card (only one HI-2130) the upper case commands will not be
presented.
Command ‘r’ and ‘R’ is used to display system registers names and values on the screen.
Command ‘w’ displays a memory dump of device memory showing up to 256 words. This is useful for viewing
other areas of memory such as the illegalization tables, control blocks and data buffers.
4. Repeat steps 1-3: opening a new (second) command shell, invoking: HoltPCIeDemoWIN.exe and this time
selecting card #2.
5. At this point, you will have two windows open, each running the static executable, and each waiting for
command input. This is where the demonstration exercises begin.
Demo exercises using Device 0
Perform the following in command shell 1:
1. This will demonstrate BC transmitting 15 messages and RT1 captures and displays the traffic data.
Commands ‘n’ or ‘N’ initializes the BC to transmit 15 messages. To display RT data traffic some additional
commands must first be executed. Five sets of three repeating messages are transmitted by the BC. SA30 is
configured for data loop-back. So the data transmitted to the RT from the first Receive command is loaded
into the same buffer location the RT will reference when transmitting data back to the BC. Just these three
commands verify that both A and B buses are properly communicating with the BC. The data word values
will match the data from the first Receive command.
BC > RT Receive Cmd, SA30, 32 words, BusA: 03-R-30-00
RT > BC Transmit Cmd, SA30, 32 words, BusB 03-T-30-00
RT > BC Transmit Cmd, SA30, 32 words, BusA 03-T-30-00
Table of contents
Other HOLT PCI Card manuals