manuals.online logo
Brands
  1. Home
  2. •
  3. Brands
  4. •
  5. Sol-Expert
  6. •
  7. Toy
  8. •
  9. Sol-Expert Smiley User manual

Sol-Expert Smiley User manual

Parts list: Check and sort out parts!
Firmenanschrift aufbewahren -
Keep the address of the company -
Veuillez conserver l'adresse -
Adres bewaren -
Nicht geeignet für Kinder unter 3 Jahren! - Verschluckbare
Kleinteile! Not suitable for children under 3 years! -
Contains small parts! Ne convient pas pour les enfants de moins
de trois ans! - Contient de petites pièces pouvant être absorbées! Niet
geschikt voor kinderen beneden 3 jaar! - Kleine onderdelen Kunnen worden ingeslikt!
Tel.: +49 (0)7502 - 94115-0 - Fax: +49 (0)7502 - 94115-99
[email protected] - www.sol-expert-group.de
SOL-EXPERT group, C.Repky - Mehlisstrasse 19 - D-88255 Baindt
Qty. Part Value/Description
1 Circuit board Round 60 mm, 96620
2 LED 5 mm (LED17/LED18) Red colour, red lens
16 LED 5 mm (LED1 - LED16) Red colour, white lens
2 Sliding switch (SW1/SW2) Selector switch, 2-pin
3 Resistor (R3/R4/R7) 1K5 Ohm
2 Resistor (R5/R6) 3K9 Ohm
2 Resistor (R1/R2) 330 Ohm
2 Transistor (T1/T2) BC547B
2 Capacitors (C1/C2) 47uF/10V
1 Photoresistor (R8) NSL-19M51
1 Battery clip (J3) for 9 V block
1 Wooden parts kit 5-piece
You will also need:
Soldering iron, solder, 9 V block battery, wire cutters,
wire strippers
SOL-EXPERT
group
group
No. 76333
4 037373 763337
MADE IN EUROPE
10+
Return the device
to a certified provider at the
end of its useful life!
Smiley, the mood barometer
battery operated soldering kit
Recommendation for children
and teenagers: Assembly
and soldering should be
supervised by an adult.
Safety notes
Keep this manual for future reference! It contains important information.
When the battery is drained, always replace it with a new battery with the same rating. (9 V block)
This kit is intended for battery operation only.
The soldering iron, solder and the parts being soldered become very hot. Be very careful!
Always use a mat when soldering! This prevents parts and the circuit board from slipping.
We recommend using a soldering iron holder to set the soldering iron down safely during use.
Never connect the kit to 230 V mains voltage! Acute danger to life!
!
The 'Smiley' soldering kit
How 'Smiley' the mood barometer works
Generally: This soldering kit is intended to introduce to the
basics of soldering. It is excellent for instructor-led courses at
schools and workshops.
The soldering kit can also be used at holiday programmes, school camps and other events related to soldering.
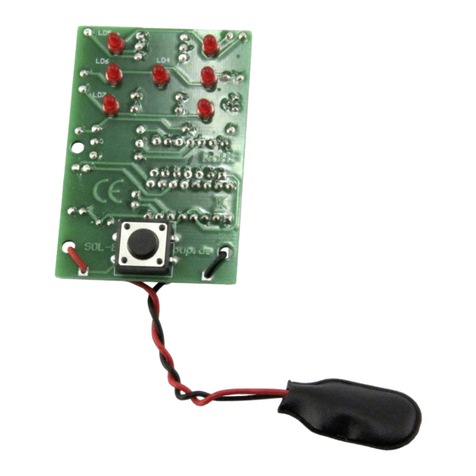
Good or bad mood? Smiley the mood barometer soldering kit shows everybody. The circuit board kit allows you to set the switch
to show your mood. Smiley will either smile or frown depending on the setting.
And the eyes will wink, with the photoresistor changing the frequency based on the incidence of light. The kit with over 30 parts is
excellent to introduce to soldering. Smiley is battery powered with a 9 Volt battery, which is not included.
Decorate the included plywood face however you'd like. Dimensions: 80 x 80 x 50 mm, over 30 parts
BC547
47 uF
QR Codes
https://www.sol-expert-group.de/Rund-ums-
Loeten/Pfiffige-Loetbausaetze/Smiley-das-
Stimmungsbarometer-
Loetbausatz::1262.html?language=de
https://www.sol-expert-group.de/All-about-
soldering/Smart-kits-for-
soldering/::1262.html?language=en
https://www.sol-expert-group.de/Autour-de-la-
soudure/Kits-astucieux-pour-la-
soudure/::1262.html?language=fr
https://www.sol-expert-group.de/Rond-
solderen/Clever-kits-voor-het-
solderen/::1262.html?language=nl
Click here for the instructions:
Hier geht es zur Anleitung: Klik hier voor de instructies:
Cliquez ici pour les instructions:
Board direction for soldering: '9V+' must be visible! Solder on
seven resistors, paying attention to the resistor values.
The polarity of the resistor is not important!
Solder on two transistors. Pay attention to the direction of the
transistors (1)! Slightly bend the middle transistor leg to the
back (2). Trim excess wires after soldering.
Solder on two sliding switches
in any
direction
Trim excess wires.
Solder on two capacitors. Pay attention to the
polarity - direction shown on the board!
Trim excess wires.
3K9 Ohm
2 x
1K5 Ohm
3 x
330 Ohm
2 x
2 x
3K9 Ohm 3K9 Ohm
1K5 Ohm 1K5 Ohm
330 Ohm
flat sideflat side
rounded side rounded side
+
+
-
-
2 x
BC547
flat side
rounded side
Transistor
top view
1
flat side
rounded
side
Transistor
Seitenansicht
bend
middle
leg to
the back
2
10 mm
Parts needed
Parts needed
Parts needed
Bend the resistor
wires so they easily
slide between
the lands
Generally: Please return the electronics to a certified provider at the end of their useful life. These will then ensure the parts are
disposed of in compliance with directives. This is good for the environment and an important part of actively protecting the environment.
Battery ordinance: You have purchased a battery-powered product. The battery has a limited life and therefore eventually needs to be
replaced. Do not dispose of used batteries in the household waste. Consumers are required by law to return batteries to a suitable
collection point. Used batteries contain valuable raw materials which are recyclable. You can also send your used batteries to us: SOL-
EXPERT group, Mehlisstrasse 19, 88225 Baindt.
Environmental notes
A
C
B
ASSEMBLY INSTRUCTIONS
D E
Parts needed
47 uF
2 x
47 uF
+
-
IMPORTANT!
Imprint '-'
The longer
leg is ' '+
After soldering, use wire cutters
to trim the excess wires on the
opposite side to
approx. 2 mm.
1K5 Ohm
Now turn over the board.
Solder on the
photoresistor and
trim excess wires 1 x flat side
= short wire
Solder on LEDs, trim wires. Pay attention to the polarity - polarity
shown on the board! The longer leg on the LED is always
POSITIVE!
Insert the battery cable from the back through the contacts
(1). Then solder on from the front (2).
Glue the wooden parts together with wood glue
Connect battery - FINISHED!
(1) (2)
push through solder on
Parts needed
F G
H
J
I
glue on underneath
glue on underneath
Attach between
the LEDs
Parts needed
16 x 2 x
+ +
- -
Side view
flat side
ATTENTION: the soldered on LEDs must be
flat on the board.
To do so, solder on the 4 marked LEDs
then the others. When soldering,
make sure the legs do not short-circuit!
A short-circuit is caused by e.g. accidentally
soldering together 2 wires with solder.
Perform a visual inspection:
Check all soldering points to determine if the solder has caused short-circuits with
other soldering points. If so, you can correct these short-circuits by removing the
short-circuit with the soldering iron.
TROUBLESHOOTING:
LED doesn't light up: check LED for short-circuit
Eyes don't blink: check transistors for short-circuit
SWITCH for:
FUNCTIONS:
ON / OFF MODE:
Happy / Grumpy

Other Sol-Expert Toy manuals

Sol-Expert eMaxchen User manual

Sol-Expert

Sol-Expert eMaxchen User manual

Sol-Expert 40295 User manual

Sol-Expert

Sol-Expert 40295 User manual

Sol-Expert Solar dolphin 86300 User manual

Sol-Expert

Sol-Expert Solar dolphin 86300 User manual

Sol-Expert 1818584 Instruction manual

Sol-Expert

Sol-Expert 1818584 Instruction manual

Sol-Expert 50040 User manual

Sol-Expert

Sol-Expert 50040 User manual

Sol-Expert 79810 User manual

Sol-Expert

Sol-Expert 79810 User manual

Popular Toy manuals by other brands

Flex innovations RV-8 60E G2 instruction manual

Flex innovations

Flex innovations RV-8 60E G2 instruction manual

Fisher-Price 77606 manual

Fisher-Price

Fisher-Price 77606 manual

3D Hobby Shop Extra 330LT Assembly manual

3D Hobby Shop

3D Hobby Shop Extra 330LT Assembly manual

Fisher-Price W3573 instructions

Fisher-Price

Fisher-Price W3573 instructions

SAB Heli Division Goblin Kraken user manual

SAB Heli Division

SAB Heli Division Goblin Kraken user manual

Smoby 312105 quick start guide

Smoby

Smoby 312105 quick start guide

Connoisseur Models GWR HYDRA Diagram G19 Instruction booklet

Connoisseur Models

Connoisseur Models GWR HYDRA Diagram G19 Instruction booklet

LOOPING MAGIC MAT manual

LOOPING

LOOPING MAGIC MAT manual

Dansing Wings 1:7 Stearman PT-17 instruction manual

Dansing Wings

Dansing Wings 1:7 Stearman PT-17 instruction manual

QABA Spring Rocking Horse Assembly lnstructions

QABA

QABA Spring Rocking Horse Assembly lnstructions

Hasbro Star Wars Revenge of the Sith Droid Tri... quick start guide

Hasbro

Hasbro Star Wars Revenge of the Sith Droid Tri... quick start guide

FMS EDF Jet 70mm F-18F V2 PNP instruction manual

FMS

FMS EDF Jet 70mm F-18F V2 PNP instruction manual

Elenco Electronics Electronic Snap Circuits Pro SC-500 instruction manual

Elenco Electronics

Elenco Electronics Electronic Snap Circuits Pro SC-500 instruction manual

Fisher-Price 72791 instructions

Fisher-Price

Fisher-Price 72791 instructions

MGA Entertainment Lalaloopsy Dance With Me Peanut Big Top quick start

MGA Entertainment

MGA Entertainment Lalaloopsy Dance With Me Peanut Big Top quick start

Ravensburger Gravitrax TRAMPOLINE manual

Ravensburger

Ravensburger Gravitrax TRAMPOLINE manual

Faller Angel dozer with drive quick start guide

Faller

Faller Angel dozer with drive quick start guide

Fisher-Price CMK04 manual

Fisher-Price

Fisher-Price CMK04 manual

manuals.online logo
manuals.online logoBrands
  • About & Mission
  • Contact us
  • Privacy Policy
  • Terms and Conditions

Copyright 2025 Manuals.Online. All Rights Reserved.