SolarEdge Smart EV Charger User manual

Installation Guide
Smart EV Charger
For North America
Version 1.0

Disclaimers
Important Notice
Copyright © SolarEdge Inc. All rights reserved.
No part of this document may be reproduced, stored in a retrieval system or
transmitted, in any form or by any means, electronic, mechanical, photographic,
magnetic or otherwise, without the prior written permission of SolarEdge Inc.
The material furnished in this document is believed to be accurate and reliable.
However, SolarEdge assumes no responsibility for the use of this material. SolarEdge
reserves the right to make changes to the material at any time and without notice. You
may refer to the SolarEdge web site (https://www.solaredge.com/us/) for the most
updated version.
All company and brand products and service names are trademarks or registered
trademarks of their respective holders.
Patent marking notice: see https://www.solaredge.com/us/patent
The general terms and conditions of delivery of SolarEdge shall apply.
The content of these documents is continually reviewed and amended, where
necessary. However, discrepancies cannot be excluded. No guarantee is made for the
completeness of these documents.
The images contained in this document are for illustrative purposes only and may vary
depending on product models.
Smart EV Charger Installation MAN-01-00657-1.0
1 Disclaimers

FCC Compliance
This equipment has been tested and found to comply with the limits for a Class B digital
device, pursuant to part 15 of the FCC Rules.
These limits are designed to provide reasonable protection against harmful interference
in a residential installation. This equipment generates, uses and can radiate radio
frequency energy and, if not installed and used in accordance with the instructions,
may cause harmful interference to radio communications. However, there is no
guarantee that interference will not occur in a particular installation. If this equipment
does cause harmful interference to radio or television reception, which can be
determined by turning the equipment off and on, you are encouraged to try to correct
the interference by one or more of the following measures:
Reorient or relocate the receiving antenna.
Increase the separation between the equipment and the receiver.
Connect the equipment into an outlet on a circuit different from that to which the
receiver is connected.
Consult the dealer or an experienced radio/TV technician for help.
Changes or modifications not expressly approved by the party responsible for
compliance may void the user’s authority to operate the equipment.
Disclaimers 2
Smart EV Charger Installation MAN-01-00657-1.0

Revision History
Version 1.0 , December 2019 - first release
Smart EV Charger Installation MAN-01-00657-1.0
3 Revision History

Contents
Disclaimers 1
Important Notice 1
FCC Compliance 2
Revision History 3
Contents 4
HANDLING AND SAFETY INSTRUCTIONS 6
Safety Symbols Information 6
RISK OF FIRE AND ELECTRIC SHOCK PREVENTION
IMPORTANTSAFETYINSTRUCTIONS 7
Smart EV Charging Safety Instructions 12
Chapter 1: Introduction to Smart EV Charger 13
Packages Contents and Required Equipment 14
Chapter 2: Connectors and Interfaces 15
Buzzer 16
Main Procedures 17
Chapter 3: Configuring and Using Smart EV Charger with mySolarEdge 20
Using mySolarEdge 20
Chapter 4: Charging Instructions 21
Chapter 5: Professional Installer- Connecting the AC Directly to the Smart
EVCharger 22
Required Equipment 22
Main Procedure 22
Grid Connection Guidelines 22
Setting the Circuit Breaker Ratings 22
Supported ACGrids 24
Removing the Smart EV Charger Covers 24
Disconnecting the AC Plug 26
Directly Connecting the AC Grid to the Smart EV Charger 27
Connecting the Smart EV Charger to the Single phase inverter with HD-Wave
technology 29
Closing the Smart EV Charger Covers 34
Chapter 6: Professional Installer - Setting Up Communication 36
Communication Options 36
Communication Connectors 37
Creating an Ethernet (LAN) Connection 38
Creating an RS485 Bus Connection to SolarEdge Inverter or Gateway 42
RS485 Bus Configuration 42
Contents 4
Smart EV Charger Installation MAN-01-00657-1.0

Verifying the Connection to the Monitoring Platform 43
Chapter 7: Processional Installer - Configuring and Using Smart EV Charger
with SetApp 44
Configuring the Smart EV Charger 44
Configuring Communication Options 44
Viewing Communication Status 45
Chapter 8: Errors and Troubleshooting 46
Appendix A: Professional Installer - Connecting the Smart EV Charger to an
Energy Meter 49
Energy Meter DIPSwitches 49
Mechanical Specifications 52
Technical Specifications - Smart EV Charger (North America) 53
Support Contact Information 55
Smart EV Charger Installation MAN-01-00657-1.0
5 Contents

HANDLING AND SAFETY INSTRUCTIONS
During installation, testing and inspection, adherence to all the handling and safety
instructions is mandatory. Failure to do so may result in injury or loss of life and
damage to the equipment.
Safety Symbols Information
The following safety symbols are used in this document. Familiarize yourself with the
symbols and their meaning before installing or operating the system.
WARNING!
Denotes a hazard. It calls attention to a procedure that, if not correctly
performed or adhered to, could result in injury or loss of life. Do not proceed
beyond a warning note until the indicated conditions are fully understood and
met.
AVERTISSEMENT!
Dénote un risque: il attire l'attention sur une opération qui, si elle n'est pas faite
ou suivi correctement, pourrait causer des blessures ou un danger de mort. Ne
pas dépasser une telle note avant que les conditions requises soient
totallement comprises et accomplies.
CAUTION!
Denotes a hazard. It calls attention to a procedure that, if not correctly
performed or adhered to, could result in damage or destruction of the
product. Do not proceed beyond a caution sign until the indicated conditions
are fully understood and met.
ATTENTION!
Dénote un risque: il attire l'attention sur une opération qui, si elle n'est pas faite
ou suivi correctement, pourrait causer un dommage ou destruction de
l'équipement. Ne pas dépasser une telle note avant que les conditions requises
soient totallement comprises et accomplies.
NOTE
Denotes additional information about the current subject.
IMPORTANTSAFETYFEATURE
Denotes information about safety issues.
HANDLING AND SAFETY INSTRUCTIONS 6
Smart EV Charger Installation MAN-01-00657-1.0

RISK OF FIRE AND ELECTRIC SHOCK PREVENTION
IMPORTANTSAFETYINSTRUCTIONS
SAVETHESEINSTRUCTIONS
PRÉVENTION DES RISQUES D'INCENDIE ET D'ÉLECTROCUTION
CONSIGNES DE SÉCURITÉ IMPORTANTES
CONSERVEZ CES INSTRUCTIONS
Warning!
When using electric products, basic precautions should always be followed,
including the following. This manual contains important instructions that shall
be followed during installation, operation and maintenance of the unit.
a. Read all the instructions before using this product.
b. This device should be supervised when used around children.
c. Do not put fingers into the electric vehicle connector.
d. Do not use this product if the flexible power cord or EV cable is frayed, has
broken insulation, or any other signs of damage.
e. Do not use this product if the enclosure or the EV connector is broken,
cracked, open, or shows any other indication of damage.
f. Flexible cord use in accordance with CE code, Part I,Rule 4-012, is to be
determined by the local inspection authority having jurisdiction.
1. An insulated grounding conductor that is identical in size, insulation
material, and thickness to the grounded and ungrounded branch-circuit
supply conductors, except that it is green with or without one or more
yellow stripes, shall be installed as part of the branch circuit that supplies the
device or system.
2. The grounding conductor described in item 1 shall be grounded to earth at
the service equipment or, when supplied by a separately derived system, at
the supply transformer.
AVERTISSEMENT!
Des mesures de précautions de base devraient être utilisées avec tous les
produits électriques, y compris les mesures indiquées ici. Ce manuel contient
d’importantes instructions à suivre au moment de l’installation, de l’utilisation et
de l’entretien de l’appareil.
a. Lire toutes les instructions avant d’utiliser ce produit.
Smart EV Charger Installation MAN-01-00657-1.0
7 RISK OF FIRE AND ELECTRIC SHOCK PREVENTION
IMPORTANTSAFETYINSTRUCTIONS

b. Ce dispositif ne devrait pas être laissé sans surveillance s’il est utilisé près
d’enfants.
c. Ne pas mettre les doigts dans la prise du véhicule électrique.
d. Ne pas utiliser ce produit si le cordon souple ou le câble VE est effiloché, si
l’isolant est endommagé, ou s’il présente tout autre signe
d’endommagement.
e. Ne pas utiliser ce produit si le boîtier ou la prise EV est endommagé, fissuré,
ouvert, ou s’il présente tout autre signe d’endommagement.
f. L'utilisation du cordon flexible doit être conforme à la règle 4-012 de la
partie I du code CE et doit être déterminée.
1. Un conducteur de mise à la terre isolé dont les dimensions, le matériau
d'isolation et l'épaisseur sont identiques aux conducteurs d'alimentation de
circuit de dérivation mis à la terre et non mis à la terre, sauf qu'il est vert avec
ou sans une ou plusieurs bandes jaunes circuit qui alimente l'appareil ou le
système.
2. Le conducteur de mise à la terre décrit à l'article 1 doit être relié à la terre à
l'équipement de service ou, lorsqu'il est alimenté par un système dérivé
séparément, au transformateur d'alimentation.
WARNING!
Before operating the Smart EV Charger, ensure that the Smart EV Charger is
grounded properly. This product must be connected to a grounded, metal,
permanent wiring system, or an equipment-grounding conductor must be run
with the circuit conductors and connected to the equipment grounding
terminal or lead on the product.
AVERTISSEMENT!
Avant d'utiliser Smart EV Charger monophasé, assurez-vous que Smart EV
Charger est correctement mis à la terre. Ce produit doit être raccordé à un
système de câblage fixe, métallique, l'équipement-le conducteur de mise à la
terre doit être exécuté avec les conducteurs de circuit et raccordé à
l'équipement borne de mise à la terre ou de plomb sur le produit.
NOTE
Use only copper conductors rated for a minimum of 167°F.
NOTE
The symbol appears at grounding points on the SolarEdge equipment. This
symbol is also used in this manual.
RISK OF FIRE AND ELECTRIC SHOCK PREVENTION
IMPORTANTSAFETYINSTRUCTIONS 8
Smart EV Charger Installation MAN-01-00657-1.0

WARNING!
The Smart EV Charger must be connected to a dedicated AC branch circuit with
a maximum Overcurrent Protection Device (OCPD) of 50A.
WARNING!
Le chargeur EV intelligent doit être connecté à un circuit AC dedié avec un
protecteur de surtension de 50A.
Smart EV Charger Installation MAN-01-00657-1.0
9 RISK OF FIRE AND ELECTRIC SHOCK PREVENTION
IMPORTANTSAFETYINSTRUCTIONS

WARNING!
SolarEdge products can expose you to chemicals including antimony trioxide,
which is known to the State of California to cause cancer. For more information,
go to www.P65Warnings.ca.gov .
AVERTISSEMENT!
Les produits SolarEdge peut vous exposer à des agents chimiques, y compris
trioxyde d'antimoine, identifiés par l'État de Californie comme pouvant causer le
cancer. Pour de plus amples informations, prière de consulter
www.P65Warnings.ca.gov.
CAUTION!
This unit must be operated according to the technical specification datasheet
provided with the unit.
ATTENTION!
Cette unité doit être utilisée selon les spécifications de fonctionnement, comme
décrit dans la dernière fiche technique des spécifications.
NOTE
This Smart EV charger s provided with an IMI (Isolation Monitor Interrupter) for
ground fault protection
NOTE
Ce chargeur pour Véhicule électrique est fourni avec un interrupteur de
moniteur d’isolation (IMI) pour la protection contre les défauts à la terre
NOTE
The Smart EV Charger is NEMAtype 3R rated . Unused conduit entry and glands
should be sealed with appropriate seals.
NOTE
The local inspection authority having jurisdiction will determine if the Smart EV
Charger power cord connected to the outlet is suitable for use in accordance
with CE code, part I, rule 4-012.
NOTE
C’EST À L’AUTORITÉ LOCALE COMPÉTENTE EN MATIÈRE D’INSPECTION
QU’INCOMBE DE DÉTERMINER SI UN CORDON SOUPLE PEUT ÊTRE UTILISÉ
CONFORMÉMENT À L’ARTICLE 4-012 DU CCÉ,PREMIÈRE PARTIE
WARNING!
Risk of electric shock. Do not remove cover. No user serviceable parts inside.
Refer servicing to qualified service personnel.
AVERTISSEMENT!
Risque de choc électrique. Ne pas retirer le couvercle. Pas de pièces sujettes à
maintenance. Laissez la maintenance à du personnel qualifié.
RISK OF FIRE AND ELECTRIC SHOCK PREVENTION
IMPORTANTSAFETYINSTRUCTIONS 10
Smart EV Charger Installation MAN-01-00657-1.0

Grounding Instructions
This product must be grounded. If it should malfunction or break down,
grounding provides a path of least resistance for electric current to reduce the
risk of electric shock. This product is equipped with a cord having an equipment
grounding conductor and a grounding plug. The plug must be plugged into an
appropriate outlet that is properly installed and grounded in accordance with all
local codes and ordinances.
CONSIGNES DE MISE À LA TERRE
Ce produit doit être mis à la terre. En cas de mauvais fonctionnement ou de
rupture, la mise à la terre offre un trajet de moindre résistance au courant
électrique ce qui réduit le risque de chocélectrique. Ce produit est munid’un
cordon contenant unconducteur et une fiche demise à la terre. La fiche doit être
introduite dans une prise appropriée, installée correctement et mise à la terre
conformément aux codes et règlements locaux
WARNING!
Improper connection of the equipment-grounding conductor might result in a
risk of electric shock. Check with a qualified electrician or serviceman if you are
in doubt as to whether the product is properly grounded. Do not modify the
plug provided with the product – if it will not fit the outlet, have a proper outlet
installed by a qualified electrician.
AVERTISSEMENT
Une mauvaise connexion du conducteur de mise à la terre peut présenter un
risque de choc électrique. Consultez un électricien ou un technician qualifié si
vous avez des doutes quant à la qualité de la mise à la terre. Ne pas modifier la
fiche qui équipe le produit – si elle ne convient pas à la prise, faire installer une
prise appropriée par un électricien qualifié.
Smart EV Charger Installation MAN-01-00657-1.0
11 RISK OF FIRE AND ELECTRIC SHOCK PREVENTION
IMPORTANTSAFETYINSTRUCTIONS

Smart EV Charging Safety Instructions
WARNING!
Do not charge a vehicle indoors if it requires ventilation. Contact your EV service
representative for information.
AVERTISSEMENT!
Ne pas recharger un véhicule à l’intérieur si il nécessite une ventilation.
Contactez votre représentant de service pour plus d’informations.
WARNING!
Automatic CCID (charge circuit interrupting device) reset provided.
AVERTISSEMENT!
Réinitialisation CCID (charge circuit interrupting device) automatique incluse.
CAUTION!
Do not use this product if there is any damage to the unit.
ATTENTION!
Ne pas utiliser pas ce produit si l'appareil est endommagé.
CAUTION!
Do not use an extension cord between the Smart EV Charger Cable and the
Smart EV Charger. You may use a conversion adapter only if it has been
approved by SolarEdge.
ATTENTION!
Ne pas utiliser de rallonge entre le câble du chargeur EV SolarEdge et Smart EV
Charger. Vous ne pouvez utiliser un adaptateur de conversion que s'il a été
approuvé par SolarEdge
Smart EV Charging Safety Instructions 12
Smart EV Charger Installation MAN-01-00657-1.0

Chapter 1: Introduction to Smart EV Charger
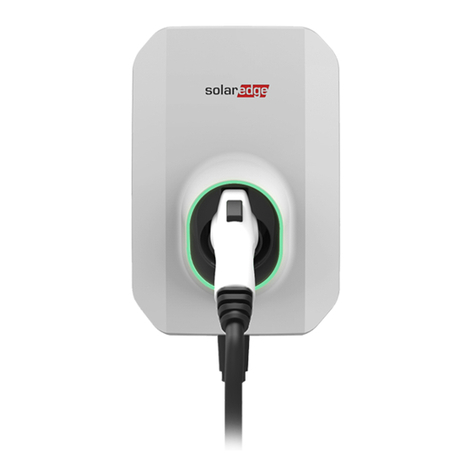
The Smart EV Charger is designed to provide reliable and economical charging of an
electric vehicle (EV). It provides Level 2 EV charging from the AC and the PV system, and
is designed to work with all plug-in vehicles with J1772 (Type 1) socket.
The Smart EV Charger is also used for hanging the Smart EV Charger cable, protecting
the plug from rain when not plugged into the vehicle.
The Smart EV Charger offers the following connection options to the grid:
AC plug (NEMA 6-50) used for plugging the Smart EVCharger into the wall socket
for connecting to the alternating current (AC).
Direct AC connection to the Smart EV Charger. To be performed only by a
professional installer.
Additionally, there is an option for connecting the Smart EV Charger to a Single phase
inverter with HD-Wave technology at your site, enabling to use PV power as well as grid
power for EV charging. This option is to be performed only by a professional installer.
Figure 1: Smart EV Charger
Smart EV Charger Installation MAN-01-00657-1.0
13 Chapter 1: Introduction to Smart EV Charger

Packages Contents and Required Equipment
Smart EV Charger Package
Smart EV Charger Station
Smart EV Charger mounting bracket and tightening screws
EV Cable Package
EV Cable
EVCable Locker
Required Equipment
Screwdriver
Unibit Drill
Chapter 1: Introduction to Smart EV Charger 14
Smart EV Charger Installation MAN-01-00657-1.0

Chapter 2: Connectors and Interfaces
Figure 2: Smart EV Charger connectors and interfaces
Smart EV Charger cable connector: Used for connecting the cable to the Smart EV
Charger
AC plug :Used for plugging the Smart EVCharger into the wall socket
Smart EV Charger push button: Pressing the button has the following functionality:
Press Description
Short press
In case of malfunction restarts the Smart EV Charger.
In case the Smart EV Charger is on scheduling mode press to
immediately start charging.
Long press Turn on the Wi-Fi
Communication gland - for professional installer:
For connection of Smart EV Charger communication options, refer to
Professional
Installer - Setting Up Communication
on page 36 for more information.
Smart EV Charger Installation MAN-01-00657-1.0
15 Chapter 2: Connectors and Interfaces

Plug holder: Holds the plug when not being used.
Smart EV Charger LED ring indicator: Indicates the Smart EV Charger statuses as
described in the following table:
Color Description
OFF No AC power
Red ON - Error
Green
ON - Charging
Blinking -Connected but not charging
Breathing (1) - Ready to charge
Orange
ON - Charging. No network connection.
Blinking- Connected but not charging. No network connection
Breathing -Ready to charge. No network connection.
Purple
Fast blinking - Wi-Fi is available, Smart EV Charger not
connected to the network.
ON - Wi-Fi is available and Smart EV Charger is connected
to the network.
Buzzer
The Smart EV charger includes a buzzer with the following indications:
Event Buzzer Indication
Connected to EV 1 short beep
Charging starts 2 short beeps + 1 long beep
Error 5 beeps
(1)The light switches on slowly and gradually increases up to maximum and then slowly decreases back to
off
Chapter 2: Connectors and Interfaces 16
Smart EV Charger Installation MAN-01-00657-1.0

Main Procedures
The Smart EV Charger is supplied with a mounting bracket kit.
1. Mount the Smart EV Charger bracket
2. Mount the Smart EV Charger on the bracket
3. Connect the Smart EV Charger cable to the Smart EV Charger
4. Set the circuit breaker rating DIP switches
5. Plug in the AC plug
Follow the detailed procedures in the following sections to mount and connect the
Smart EV Charger
To mount the Smart EV Charger bracket:
Figure 3: Mounting bracket
1. Determine the Smart EV Charger mounting location, on the mounting surface.
2. Maintain the following minimum clearance areas between the Smart EV Charger and
other objects:
8" from the top and sides of the Smart EV Charger
At least 18" from the bottom of the Smart EV Charger if installing it indoors, 24” if
outdoors. If you are connecting the Smart EV Charger directly to the AC leave
sufficient clearance for the conduit as well.
3. Position the mounting bracket against the mounting surface and mark at least three
drilling hole locations (refer to
Mechanical Specifications
on page 52 for mounting
Smart EV Charger Installation MAN-01-00657-1.0
17 Main Procedures

bracket dimensions). Drill holes in the locations you marked and mount the bracket.
Verify that the bracket is firmly attached to the mounting surface.
To mount the Smart EV Charger on the bracket:
1. Lift and hang the Smart EV Charger on the mounted bracket (see the following
figure).
2. Fasten the supplied bolt to the Smart EVCharger.
To connect the Smart EV charger cable:
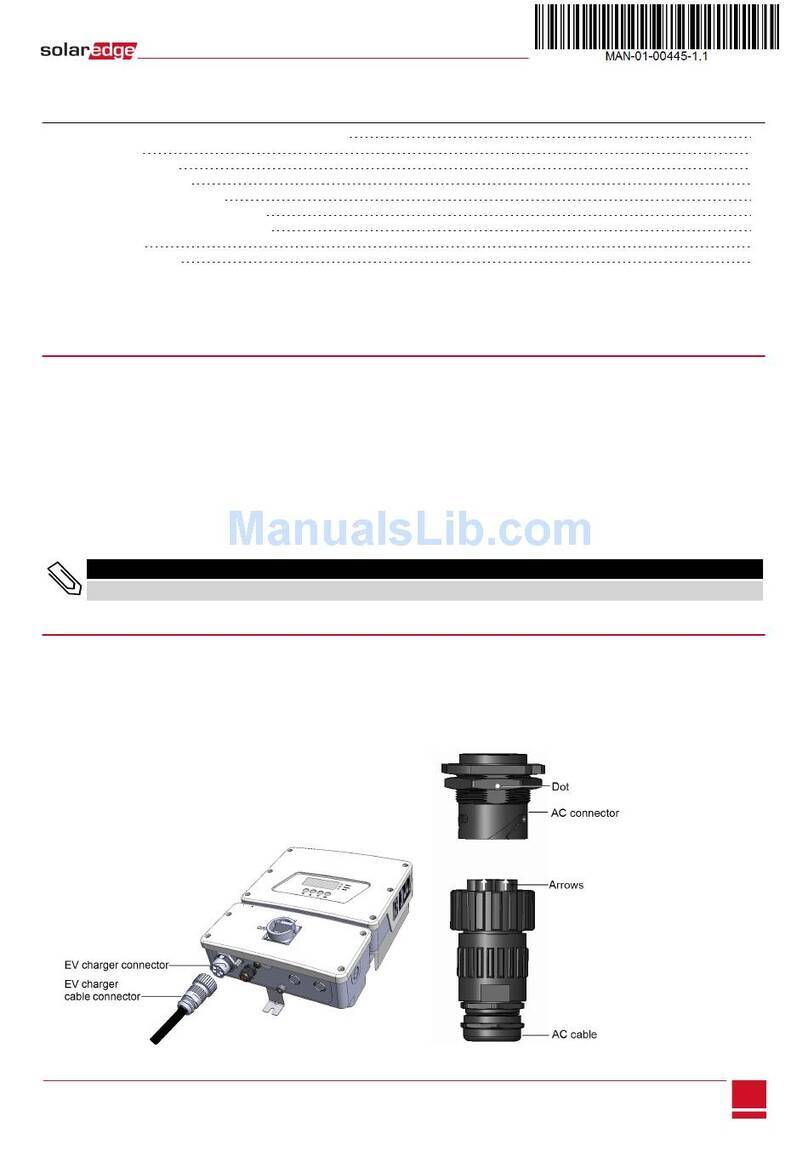
1. Align the two white arrows on the Smart EV charger cable connector with the white
dot on the Smart EV Charger connector located at the bottom of the Smart EV
Charger. The dot should be between the two arrows (see the following figure).
2. Plug the cable connector into the Smart EV charger connector (see the following
figure).
Chapter 2: Connectors and Interfaces 18
Smart EV Charger Installation MAN-01-00657-1.0

3. Rotate the cable connector clockwise to fasten it (see the following figure).
4. Assemble the two parts of the cable lock around the cable connector. Push the parts
together until they click to lock (see the following figure).
Smart EV Charger Installation MAN-01-00657-1.0
19 Main Procedures
This manual suits for next models
1
Table of contents
Other SolarEdge Batteries Charger manuals
Popular Batteries Charger manuals by other brands
Microchip Technology
Microchip Technology MCP1630 NiMH user guide
National Railway Supply
National Railway Supply ELC-24/10-M-D Installing, operating and service instructions
Hitachi
Hitachi UC 9SD Technical data and service manual
Fullwat
Fullwat FUM - 1205CBP user manual
CFS
CFS DINEX DuraTherm DX2011208 Operating and maintenance manual

Bebob
Bebob VS2-RL user manual
