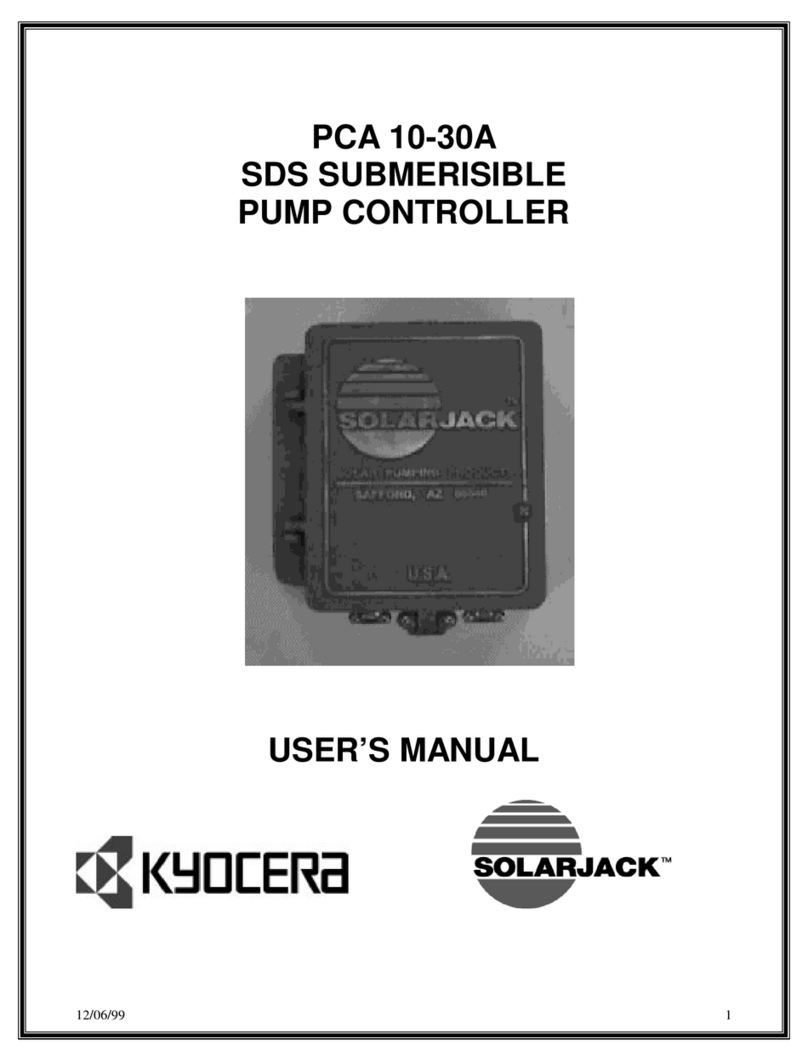
SOLARJACK PCA10-30A - REV 0297 User manual

OPERATION AND INSTALLATION
MANUAL FOR THE
PCA10-30A
SOLAR ELECTRIC PUMP CONTROLLER
MANUFACTURED BY:
GOLDEN GENESIS CO
SOLARJACK
7812 E. Acoma Dr.
SCOTTSDALE, ARIZONA 85260
UNITED STATES OF AMERICA
PHONE # (800) 223-9580
FAX # (480) 483-6431
DC# 5223-0001-A
REV 0297
For controllers with serial numbers 18057 and above
Table of Contents
1.0 Introduction
2.0 Product Overview
2.1 Features
2.2 Application
3.0 Installation and Operation
3.1 Location
3.2 Wiring
3.3 Water Sensors
3.4 Adjustment Procedures
4.0 Troubleshooting
5.0 Technical Specifications
6.0 Warranty Statement

1.0 Introduction
Thank you for selecting the PCA10-30 pump controller. The PCA series of pump controllers
are a high quality, solid state DC power converters designed as the interface between a
Solarjack SDS series pump and a DC power source. The purpose of the controller is to
maximize the total daily water output while providing protection for the pump and the DC
power source as well as providing interface with other related pumping system equipment.
Although the PCA series pump controllers are easy to use, please read this manual to
become familiar with the controller features, functions, connection points and various
configurations. For future reference, keep this manual and other relevant product
information in a safe place.
PRECAUTIONS
•Safety First - Always understand what you are doing when working with any form of
electricity. Guessing at something is not worth the potential of product damage and/or
severe personal injury.
•Shut down all power when working on the system.
•Do not attempt to feed live wires into the PCA or product damage and/or personnel
injury may result.
•Do not exceed the power rating of the controller.
•Do not splash water on the controller when the cover is open.
•When working with batteries, be careful not to short the battery terminals, as thousands
of amperes can flow. Remove all jewelry, use insulated tools and secure all
conductors.
•Batteries can produce explosive hydrogen gas. Be sure battery housing is well
ventilated.
2.0 Product Overview
The PCA series of controllers are designed to operate with a variety of DC power sources.
Typically these include solar electric modules, wind generators and batteries, or any
combination of the three. When properly installed and configured, the unique features
incorporated into this line of controllers will automatically control and protect your pump
system permitting several years of dependable, trouble free service.
When used in a solar electric panel direct system or a wind generator direct system, the
PCA series of controllers will provide pump protection from over-voltage and over-current
conditions as well as current boosting in low sunlight conditions or low wind conditions
respectively.
In a battery powered system, the PCA series controllers are not to be used as a solar electric
charge regulator between the solar electric panel and the battery bank. However, the PCA
controllers feature a Low Voltage Cut-off function when used on battery-sourced systems.
This feature will prevent excessive battery discharge conditions thereby helping to extend
the battery bank life. In addition, the PCA controllers will provide a degree of protection for
your charge regulator by attenuating inductive voltage spikes generated when pump motors
switch on or off.

2.1 Features
1. Current boosting for matching the load requirements of the pump motor.
2. Voltage regulation of the solar electric array at its maximum power point.
3. Low Voltage Cut-off function for battery-sourced installations.
4. Over-current protection via integrated automatic resetting electronic circuit breaker.
5. Reverse polarity protection (10 amperes maximum).
6. Voltage and current limiting to pump motor.
7. Transient protection and surge suppression.
8. Adjustable pump motor voltage setting for precision system tuning.
9. Adjustable input voltage (solar and wind) for system optimization.
10. System ON/OFF switch.
11. LED indicators - Red = power in, Green = power out, Yellow = over current
shutdown.
12. Weather resistant cast aluminum enclosure with hinged door and strain relief
connectors.
13. Rising clamp screw terminal blocks - no fork terminals required.
14. User selectable pre-adjusted input voltage configuration and power source
selection.
15. Remote switch interface - float switch or remote shutdown - N.O. or N.C. user
selectable.
16. Water level electrode interface - user selectable high or low water level cut-off.
17. 2 year limited warranty
2.2 Application
The only application the PCA series of standard controllers are designed to operate on is
the interface between the Solarjack SDS series of pumps and the DC power source as well
as peripheral pump system signal devices. The PCA series controllers are capable of
operating with a variety of DC inputs, including solar electric modules, wind generators and
batteries or any combination of the three. Of these, solar electric modules are the most
common.
No other applications or DC power sources are recommended or warranted unless written
approval is provided by Solarjack management.
3.0 Installation and Operation
The following sections are outlined in a step by step format to guide you through the
installation, configuration and system power-up of the PCA series controllers. Read all
product manuals and review all system components to gain physical and electrical
familiarity before undertaking the installation effort. Check all equipment for any product
damage. Refer to applicable figure(s) as a guide during the installation.
The PCA series controllers are limited to a maximum power output of 300 watts, which is 30
volts at 10 amps. Providing more power to the input of the controller will not increase
pump flow rate.
WARNING
Reverse polarity on a battery sourced system or a panel system capable of producing
over 10 amps will result in non-warranted product damage.
NEC compliance and local electrical inspectors

3.1 Location
As the majority of system installations vary greatly, only general comments can be made as
to location. Prior to installing the system, it is suggested to make a system layout plan.
During the system layout, take into consideration any potential shading of the solar electric
modules, wire runs, wire size, conduit runs, trenching, controller accessibility, tank location,
pump head and etc.. There is no substitute for a good plan!
The PCA series controllers can either be mounted indoors or outdoors. Locate all system
equipment as close as possible to each other. Generally the controller is mounted to the
side of a pole which has solar electric modules or wind generator mounted atop of it. The
pole is the located a few feet from the well head. This general physical layout is
conducive to clean installation, not only aesthetically, but also electrically.
3.2 Wiring
Prior to connecting any wires to the controller be sure you have a system wiring diagram to
use as a reference. Generic system wiring diagrams are included in this manual for your
convenience. Guessing at polarity and connection points is not worth the risk of potential
product damage and/or personal injury. Furthermore, ensure the wire sizes are of adequate
diameter (gauge) to minimize voltage drop.
All other system equipment should be installed before proceeding with wiring the controller.
Pre-configure the controller switches prior to wiring. Refer to “Adjustment Procedures” for
details. double check polarity and wire termination tightness before powering up the
system.
1. Turn “ON/OFF” switch to the OFF position.
2. Connect ground rod conductor to controller chassis ground block.
3. Connect frame ground conductor to controller chassis ground block.
4. Connect pump ground conductor to controller chassis ground block.
5. Connect pump motor negative (-) conductor to controller terminal labeled “L-”.
6. Connect pump motor positive (+) conductor to controller terminal labeled “L+”.
7. Connect DC source supply negative (-) conductor to controller terminal labeled “PV -”.
8. Connect DC source supply positive (+) conductor to controller terminal labeled “PV +”.
9. Refer to the next section for “Water Sensors and Remote Control” connections and
“Adjustment Procedures” for configuration (if applicable) and then return to this point.
10. At this point, all system components are installed and wired, double check
conductor polarities, wire termination tightness and controller configuration.
11. Turn “ON/OFF” switch to the ON position. The system should be operational. If the
system is not working refer to the “Troubleshooting” section.
3.3 Water Sensors and Remote Control
The PCA series controllers feature remote peripheral interface functions with easy
programming. These include two independent ports. First is a remote switch interface
which supports float switches (storage tank level) or a remote system “ON/OFF” toggle switch.
The second peripheral is a water level electrode interface that requires three E-1s brass
electrodes. Refer to sample system wiring diagrams as a guide during hook-up.

Remote Switch
The Remote Switch interface can serve as an automatic system shutdown when used with a
water storage tank mounted float switch. It can also serve as a manual system shutdown
with a remote system ON/OFF toggle switch. The majority of installations will use this port
for float switch interface. Both applications are configured and operate the same way.
Please refer to the following operational scenarios for configuration options.
With switch number 5 in the OFF position, the controller is configured to accommodate a
Normally Open (N.O.) float switch or remote toggle switch. In this configuration the
controller will operate as follows:
PUMP ON
float switch open = water tank low = pump ON
PUMP OFF
float switch closed = water tank high = pump OFF
With switch number 5 in the ON position, the controller is configured to accommodate a
Normally Closed (N.C.) float switch or remote toggle switch. In this configuration the
controller will operate as follows:
PUMP ON
float switch closed = water tank low = pump ON
PUMP OFF
float switch open = water tank high = pump OFF
Water Level Electrodes
The water level electrodes interface serve as an automatic system shutdown when properly
installed and configured. The PCA series of controllers are capable of two configurations;
high or low level shutdown. The high level shutdown is typically used to interface with a
water storage tank to achieve the same system control results as a float switch. The low-
level shutdown is intended to monitor the well water level and shutdown the system if the
water level in the well drops to a critical point.
To use this interface, three E-1s brass electrodes must be used. One is for the ground
(reference) , the second is for the low-level point and the third is for the high level point.
Please refer to the system wiring diagrams and the following operation scenarios for
configuration options.
With switch number 6 in the OFF position, the controller is configured to interface with
electrode water level sensors for a water level HIGH pump shutdown and a LOW water level
pump activation.
PUMP ON
low and high level electrode exposed = water tank low = pump ON
PUMP OFF
low and high level electrode submerged = water tank high = pump OFF
With switch number 6 in the ON position, the controller is configured to interface with
electrode water level sensors for a water level LOW pump shutdown and a HIGH water level
pump activation.

PUMP ON
low and high level electrode submerged = well water level ok = pump ON
PUMP OFF
low and high level electrode exposed = well water level critical = pump OFF
3.4 Adjustment Procedures
The PCA series controllers have several adjustment features. Some are system
configuration adjustments are user selectable by a six positions DIP switch located on the
face of the controller. These include pre-adjusted DC source selection, remote switch
selection and water level cut-off. The remaining adjustments are for input and output
voltage fine-tuning that are independently adjustable by high precision multiple turn (brass
screw) trimmers.
The pre-adjusted DC source selection allows the user to choose the nominal input voltage
and basic source configuration. These consist of four pre-adjusted voltage settings
consisting of solar panel or battery in nominal 12 volt or 24-volt sources. The first four
switches on the DIP switch are used for this selection. For proper controller operation, only
one of these first four switches should be in the ON position. Please refer to the chart below
for the switch position identification and setting options.
Switch No. Description Setpoint Note
112 V. Battery 11.80 V 1
2 12 V. Panel 13.10 V. 2
324 V. Battery 23.60 V. 1
4 24 V. Panel 26.00 V. 2
5 Remote Switch HI/LO 3
6Water Cut-off HI/LO 4
NOTES:
1. Set-point is Low Voltage Cut-off. The controller will turn off the pump if the battery
voltage drops below set-point preventing excessive battery discharge conditions thereby
helping to extend battery life.
2. Set-point is solar module input constant voltage hold approximately at solar modules
maximum power point. These voltages will work with most standard solar modules
available in the marketplace today. The voltage can be easily adjusted to optimize
system performance, see procedure above. Use the “Panel” selection options when a
non regulated wind generator is utilized as the power source.
3. With switch number 5 in the OFF position, the controller is configured to accommodate
a Normally Open (N.O.) float switch; float switch open = water tank low = pump water or
float switch closed = water tank high = shut off pump. With switch number 5 in the ON
position, the controller is configured to accommodate a Normally Closed (N.C.) float
switch; float switch closed = water tank low = pump water or float switch open = water
tank high = shut off pump.
4. With switch number 6 in the OFF position, the controller is configured to interface with
electrode water level sensors for a water level HIGH pump shutdown and a LOW water
level pump activation. With switch number 6 in the ON position, the controller is
configured to interface with electrode water level sensors for a water level LOW pump
shutdown and a HIGH water level pump activation.

The input and output voltage set-points are calibrated at the factory and typically will not
require end user adjustment for proper system operation. However, if system “fine tuning” is
desired for optimal performance, please refer to the adjustment procedures below.
INPUT VOLTAGE ADJUSTMENT
The purpose of this procedure is to adjust the voltage of the solar electric panel to its peak
power point and thus obtain maximum water delivery from the system. In a solar electric
application, this procedure should be performed with the solar electric panel at its normal
operating temperature at mid-day to match as close as possible the worst case maximum
voltage operating point. On a battery source system, it is not recommended to adjust the
input voltage set-point.
1. With the system installed, controller properly configured and pumping water, turn the
solar electric panel away from the sun until the pump flow rate is reduced by
approximately 50%. If this is not possible then shade the panels slightly until the same
results are obtained.
2. Connect an accurate DC volt meter to the pump side of the controller (L+ and L-).
3. Slowly turn the “Panel Input Voltage” trimmer located on the face of the controller until
the highest possible output voltage is obtained.
4. Return the solar electric panel(s) to their normal or unshaded position. The pump will
then operate at its maximum output.
NOTE: Counter Clockwise lowers input voltage and Clockwise increases input voltage.
OUTPUT VOLTAGE ADJUSTMENT
The purpose of this procedure is to adjust the output voltage of the controller to reduce the
water flow of the pump. Typically this not recommended as the PCA controllers are factory
calibrated for optimum voltage output for the SDS series of pumps.
A common case scenario as to when the controller might be readjusted for a lower voltage
output would be an installation where the static water level drops rapidly when the pump
system is performing at its peak, thus turning off the pump system. The low water level
electrode located in the well would detect this low water level. The well could take a long
time recharge to a water level high enough (as detected by the high water level electrode
located in the well) to reactive the pumping process. This scenario could cause the pump
system to cycle on and off unnecessarily through out the day and possibly reduce system
water production as compared with the following solution. The solution in this case would
be to reduce the controller output voltage to the pump, thereby reducing water flow to a
level where the well can maintain the water level above the low water level electrode. This
will allow longer pumping durations at a lower rate and probably higher net water
production per day.
1. With the system installed, controller properly configured and pumping water, connect
an accurate DC volt meter to the pump side of the controller (L+ and L-).
2. Slowly turn the “Output Voltage” trimmer located on the face of the controller until
desired output voltage and water production is achieved. This process will probably
take a few attempts to “balance” the system for optimum water production.
NOTE: Counter Clockwise lowers input voltage and Clockwise increases input voltage.
4.0 Troubleshooting

PUMP DOES NOT RUN
1. Check wiring diagram for proper connections. Confirm all electrical
terminations are tight and secure.
2. Check for proper voltage selector switch settings for your DC source input.
If the incoming voltage is less than the set-point voltage, the controller will
not turn on.
3. On battery sources systems, make sure the batteries are at a full state of
charge and that the controller voltage selector switch is in the proper
position for your nominal voltage input configuration.
4. Check for proper controller input and output with a volt meter. A quick look at
the LED indicator lights will verify power coming from the DC source supply
going to the controller (red), power going from the controller to the pump
(green) and overcurrent shut down (yellow). If the red LED is on and the
green and yellow LED’s are not, make sure the system on/off switch is on,
disconnect the remote switch and electrode wires, if used, and turn switch
#5 and #6 off. If the green LED is still not on, disconnect the pump wires, L-
and L+. If the green light does not turn on then check voltage on L- and L+
with a volt meter to confirm no output voltage. THEN WHAT?
5. For additional pump test, connect a jumper wire across terminals PV- and
L-. This will bypass the controller and allow the pump to run directly from
the DC source. This step will confirm pump operation. If the DC source is a
solar array, the test must be conducted when full sunlight is available for a
valid test.
RED AND GREEN LEDS ARE ON, YELLOW LED IS OFF AND THE PUMP
DOES NOT RUN
To verify power coming out of the controller, connect a DC voltmeter across L+
and L-. If 12 Volts or more is coming out then:
1. Check the splice above the pump for proper connections.
2. Check for broken wire leading to the pump.
Check for open motor winding. With an ohmmeter set on the R x 1 scale, check
between the two pump lead wires. The meter reading should be between .5 to
50 ohms. If the resistance is higher than this, disconnect the pump at the
splice above the pump and check again.

NO VOLTAGE AT THE L+ AND L- TERMINALS
Note: To bypass all remote switching circuits, disconnect all wires from the
sensor interface terminal block in the controller housing (the small terminal
block) and switch program switches #5 and #6 to the OFF position.
1. Make sure the system ON/OFF switch is ON.
2. Check to see if the water level is above the top electrode when low water
cut-off circuit is being used.
3. Check to see if the float switch, if used, is functioning properly.
4. Check the controller for proper programming and adjustment. If the voltage
setting on the controller is higher than the incoming voltage, the controller
will not turn on, (See controller adjustment section)
Make sure the Yellow LED (over-current shut down) is not on. If it is, switch
OFF the system ON/OFF switch, wait a minute and then switch it ON.
EXCESSIVE CURRENT DRAW (More than the rating of the pump, but less than
the rating of the controller)
1. Check wiring diagram for proper connection.
2. Check for skinned wires or faulty underwater splice.
3. Check for locked motor armature. With the pump out of the well, bypass the
controller and connect power directly to the motor leads. If the pump still
does not run and the current is over 1.5 amps, the pump is in a locked rotor
condition and must be repaired.
5.0 Technical Specifications
6.0 Warranty Statement
PCA and PCB Series of Pump Controllers
Limited Warranty - Twenty Four Months
Solarjack warrants to the original consumer that its products shall be free from defects in
material and workmanship under normal applications and service conditions for a period
of twenty four (24) months after the original date of purchase, but not to exceed thirty (30)
months from the date of manufacture.
At its option, Solarjack will repair or replace the Solarjack product that proves to be
defective within such warranty period. This limited warranty shall not apply if the
Solarjack product has been damaged by unreasonable use, accident, negligence,
shipping, service or modification by anyone (other than by Solarjack), or failure which are
caused by products not manufactured by Solarjack, or should the products serial number
be altered, or by damage that is attributable to an act of God, or by any other causes
unrelated to defective materials or workmanship.
The original purchaser MUST complete and send in the warranty registration card, with
the pump serial number and the controller serial number for warranty validation. No

warranty performance will be rendered without a valid warranty card o file at the Solarjack
factory.
There are no express warranties except as listed above. Solarjack shall have no
responsibility for damage to property, persons, animals, or other loss or injury resulting from
the use of a Solarjack product.
Except for the warranty that the products are made in accordance with the specifications
therefore supplied or agreed to by customer, Solarjack makes no warranty expressed or
implied, and any implied warranty of merchantability or fitness for a particular purpose
which exceeds the forgoing warranty is hereby disclaimed by Solarjack and excluded from
any agreement made by acceptance of any order pursuant to this quotation. UNDER NO
CIRCUMSTANCES WILL SOLARJACK BE LIABLE FOR ANY CONSEQUENTIAL OR
INCIDENTAL DAMAGES, LOSS OR EXPENSE ARISING IN CONNECTION WITH THE
USE OF OR THE INABILITY TO USE ITS GOODS FOR ANY PURPOSE WHATSOEVER.
SOLARJACK’S MAXIMUM LIABILITY SHALL NOT IN ANY CASE EXCEED THE
CONTRACT PRICE FOR THE GOODS CLAIMED TO BE DEFECTIVE OR UNSUITABLE.
Solarjack is not responsible for labor, transportation, and related costs incurred by the
customer to make allegedly defective equipment available to the factory for inspection re-
installation, lost profits, costs caused by interruption of service. Solarjack is not
responsible for loss or damage to products, owned by customer and located on Solarjack's
premises, caused by fire or other casualties beyond Solarjack's control.
If a problem with the product develops during the warranty period, you may contact your
dealer. If the problem is not handled to your satisfaction, contact:
SOLARJACK, 7812 E. Acoma Dr., Scottsdale, AZ 85260 (800) 223-9580 Fax (480) 483-
6431
Table of contents
Other SOLARJACK Controllers manuals
Popular Controllers manuals by other brands
Digital Equipment
Digital Equipment DEC WANcontroller 622 Problem Solving
Crestron
Crestron MPC-M10 Addendum
National Instruments
National Instruments cRIO-9032 user manual
fossLED
fossLED FLWP4S user guide
Moeller
Moeller easyControl EC4-200 Hardware, Engineering and Function Description
Rockwell Automation
Rockwell Automation Allen-Bradley Guardmaster 440G-MZ Original instructions
