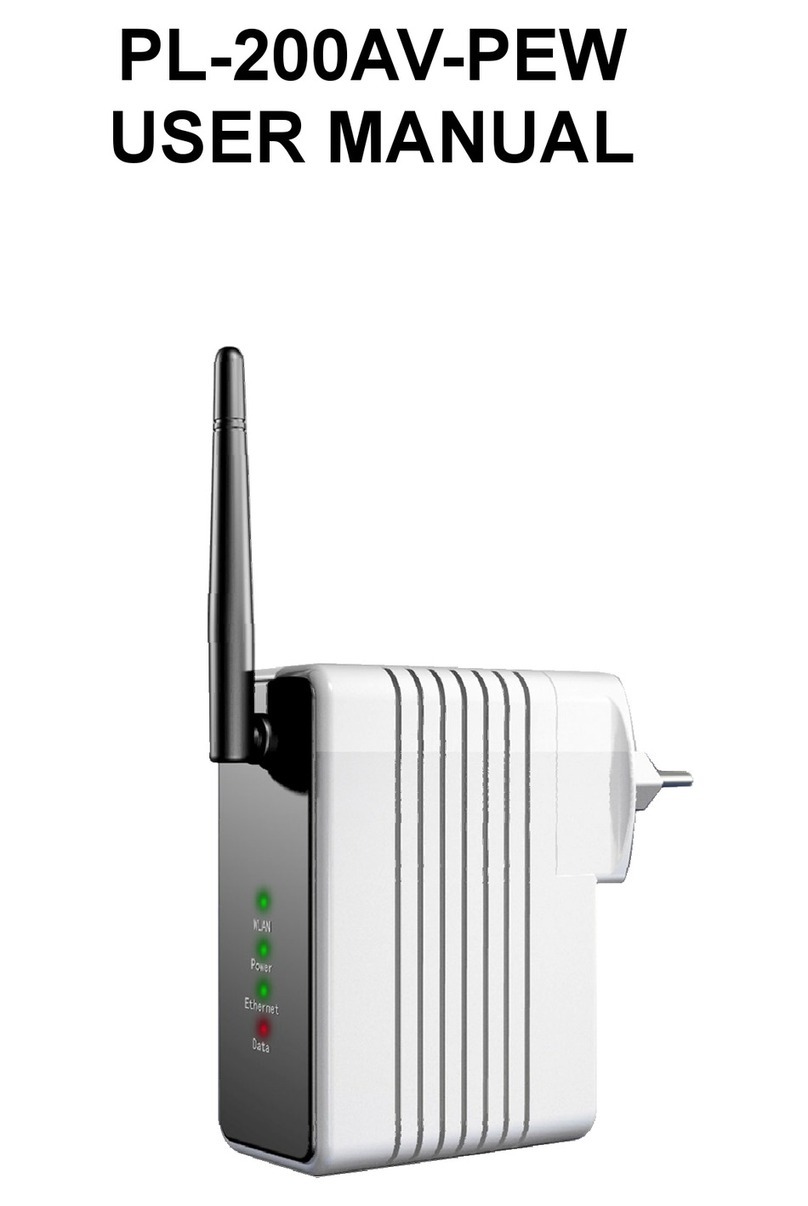
Solwise PL-500AV User manual

20130227 V1.

2
Table of Content
1. IMPORTANT INFORMATION ...................................................................................................... 4
1.1 IMPORTANT SAFETY NOTES .......................................................................................................... 4
1.2 FEDERAL COMMUNICATIONS COMMISSION INTERFERENCE STATEMENT........................................... 6
2.INTRODUCTION .......................................................................................................................... 9
2.1 PACKAGE CONTENT..................................................................................................................... 9
2.2 PRODUCT OVERVIEW ................................................................................................................. 10
2.2.1 BUTTONS AND LEDS............................................................................................................... 11
3. HARDWARE INSTALLATION................................................................................................... 12
3.1 APPLICATION 1 –EXTEND WIRELESS ACCESS POINT COVERAGE .................................................. 12
3.2 APPLICATION 2 – HIGH SPEED NETWORK FOR HD VIDEO STREAMING........................................ 13
3.3 QUICK WI-FI ENCRYPTED CONNECTION- WPS BUTTON ............................................................. 13
4. ENCRYPTED PLC NETWORK.................................................................................................. 14
4.1 CREATE AN ENCRYPTED PLC NETWORK GROUP ......................................................................... 14
4.2 REMOVE DEVICE FROM AN EXISTING NETWORK GROUP ............................................................... 15
4.3 CREATE ADDITIONAL ENCRYPTED NETWORK............................................................................... 15
5. ADVANCED WI-FI SETTINGS VIA WEB BROWER ................................................................. 16
5.1 GETTING STARTED..................................................................................................................... 16
5.2 HOME........................................................................................................................................ 17
5.2.1 Select Language --------------------------------------------------------------------------------------------------17
5.2.2 Setup Wizard-------------------------------------------------------------------------------------------------------17
5.2.3 Operation Mode Configuration ------------------------------------------------------------------------------18
5.3 INTERNET SETTINGS................................................................................................................... 20
5.3.1 LAN (Local Area Network Settings)------------------------------------------------------------------------20
5.3.2 DHCP Clients-------------------------------------------------------------------------------------------------------22
5.4 WIRELESS SETTINGS.................................................................................................................. 22
5.4.1 Basic (Basic Wireless Settings)-----------------------------------------------------------------------------22
5.4.2 Advanced (Advance Wireless Settings)------------------------------------------------------------------24
5.4.3 Security (Wireless Security/Encryption Settings) ----------------------------------------------------25
5.4.4 WPS (Wi-Fi Protected Setup)---------------------------------------------------------------------------------28

3
5.4.5 Station list-----------------------------------------------------------------------------------------------------------29
5.4.6 Site Survey (AP Mode Site Survey) ------------------------------------------------------------------------29
5.4.7 MAC Filter -----------------------------------------------------------------------------------------------------------29
5.5 ADMINISTRATION........................................................................................................................ 31
5.5.1 Management (System Management) ----------------------------------------------------------------------31
5.5.2 Upgrade firmware ------------------------------------------------------------------------------------------------32
5.5.3 Settings management ------------------------------------------------------------------------------------------32
5.5.4 Status-----------------------------------------------------------------------------------------------------------------33
5.5.5 Statistics-------------------------------------------------------------------------------------------------------------33
5.5.6 System log ----------------------------------------------------------------------------------------------------------34
5.6 REBOOT .................................................................................................................................... 34
5.6.1 Reboot System ----------------------------------------------------------------------------------------------------34
5.7 CHANNEL NUMBER .................................................................................................................... 35
6. ENHANCE PLC PERFORMANCE ............................................................................................ 36
AC OUTLETS CONNECTION ............................................................................................................... 36
CONNECTION VIA POWER STRIP ....................................................................................................... 37
ELECTRICAL INTERFERENCE ............................................................................................................ 37
ELECTRICAL WIRING........................................................................................................................ 37
7. SPECIFICATIONS ..................................................................................................................... 38

4
1. Important Information
1.1 Important Safety Notes
the Device is intended for connection to the AC power line. For installation instructions, refer
to the Installation section. The following precautions should be taken when using this
product..
Please read all instructions before installing and operating this product.
Please keep all instructions for later reference.
Please follow all warnings and instructions marked on the product.
For safety reason, when device is being powered on, this product should NOT be
installed in any electric socket which makes the surface with venting holes on
the product to face downward (facing the floor).
Unplug the Powerline device from the wall outlet before cleaning. Use a dry cloth
for cleaning. DO NOT use liquid cleaners or aerosol cleaners.
DO NOT operates this product near water.
This product should never be placed near or over a radiator, or heat register.
This product relies on the building’s electrical installation for short-circuit (over current)
protection.
DO NOT allow anything to rest on the product interconnect plug. DO NOT locates this
product where people may walk on the cords.
Because this product sends data over the power line, it is recommended that you plug
directly into a power outlet. Do not plug the Device into a UPS or power strip with surge
protection. The product has its own power filter for protection against surges.
Only a qualified technician should service this product. Opening or removing covers
may result in exposure to dangerous voltage points or other risks.
Unplug the product from the wall outlet and refer the product to qualified service
personnel for the following conditions:
When the interconnect cords are damaged or frayed.
If liquid has been spilled into the product.
If the product has been exposed to rain or water.
If the product does not operate normally when the operating instructions are
followed.
If the product exhibits a distinct change in performance.
CONSIGNES DE SECURITE
Avant d’utiliser l’appareil pour la premiere fois, veuillez lire attentivement ces

5
instructions se rapportant a la securite et les conserver pour reference
ulterieure.
Aucune piece de cet appareil ne peut etre reparee ou remplacee par l’utilisateur.
Confiez les reparations et l’entretien exclusivement a un personnel qualifie. Tout
demontage de l’appareil entrainera l’annulation de la garantie.
Attention : pour prevenir tout risque d’electrocution,
ne retirez pas le couvercle (ou le dos) de l’appareil.
Verifiez que la tension d’alimentation indiquee sur la plaque signaletique de la prise
correspond bien a celle de votre installation electrique.
N’utilisez pas l’appareil :
1. si la prise est endommagee de quelque facon que ce soit,
2. en cas de mauvais fonctionnement,
3. si un liquide a ete deverse sur le produit ou des objets ont penetre dans l’appareil,
4. si la prise a ete exposee a la pluie ou mis en contact avec de l’eau
5. si le boitier du produit est endommage,
6. ou si le produit ne fonctionne pas alors que toutes les instructions d’utilisation ont ete
suivies a la lettre.
Branchez l’adaptateur CPL sur une prise secteur facilement accessible.
L’adaptateur CPL est uniquement destine a une utilisation domestique en interieur.
N’installez pas l’adaptateur a proximite d’une quelconque source de chaleur, telle qu’un
radiateur, une arrivee d’air chaud, un four ou tout autre appareil (notamment les
amplificateurs)
produisant de la chaleur.
Veuillez ne pas exposer l’adaptateur a la lumiere directe du soleil et a la poussiere.
Utilisez l’adaptateur dans un endroit sec.
N’utilisez pas l’adaptateur a proximite d’eau ou d’une source d’humidite, telle qu’une
baignoire, un lavabo, un evier de cuisine, une piscine, dans un sous-sol humide ou tout
autre emplacement humide.
Ne placez pas de sources de flamme nues (une bougie allumee, par exemple) a
proximite de l’appareil.
Les fentes et ouvertures presentes sur de l’adaptateur CPL servent a l’aeration et ne
doivent
etre ni obstruees ni recouvertes.
N’utilisez jamais d’objets dans les ouvertures de l’adaptateur CPL ou pour acceder a
l’interieur de celles-ci.
Debranchez l’adaptateur pendant les orages ou au cours des longues periodes de
non-utilisation afin d’eviter de l’endommager.
Debranchez l’adaptateur pour couper l’alimentation de l’appareil.

6
Gardez l’adaptateur CPL hors de portee des enfants. Il convient de surveiller les
enfants pour s’assurer qu’ils ne jouent pas avec l’adaptateur.
Si vos prises fonctionnent de maniere inhabituelle, et particulierement s’ils emettent
des sons ou des odeurs qui vous paraissent anormaux, debranchez-les immediatement
et faites les examiner par un reparateur qualifie.
Debranchez l’adaptateur CPL avant tout nettoyage. Nettoyez-le uniquement a l’aide
d’un chiffon doux et sec et evitez l’usage d’aerosols.
Utilisez cet adaptateur uniquement dans des climats moderes. Evitez les climats
tropicaux et particulierement humides.
1.2 Federal Communications Commission Interference Statement
This equipment has been tested and found to comply with the limits for a Class B digital
device, pursuant to part 15 of the FCC Rules. These limits are designed to provide
reasonable protection against harmful interference in a residential installation. This
equipment generates, uses and can radiate radio frequency energy and, if not installed and
used in accordance with the instructions, may cause harmful interference to radio
communications. However, there is no guarantee that interference will not occur in a
particular installation. If this equipment does cause harmful interference to radio or television
reception, which can be determined by turning the equipment off and on, the user is
encouraged to try to correct the interference by one or more of the following measures:

7
-Reorient or relocate the receiving antenna.
-Increase the separation between the equipment and receiver.
-Connect the equipment into an outlet on a circuit different from that to which the receiver is
connected.
-Consult the dealer or an experienced radio/ TV technician for help.
CAUTION:
Any changes or modifications not expressly approved by the grantee of this device could
void the user's authority to operate the equipment.
Labeling Requirements
This device complies with Part 15 of the FCC Rules. Operation is subject to the following
two conditions: (1) this device may not cause harmful interference, and (2) this device must
accept any interference received, including interference that may cause undesired
operation.
RF Exposure Warning
This equipment must be installed and operated in accordance with provided instructions and
the antenna(s) used for this transmitter must be installed to provide a separation distance of
at least 20 cm from all persons and must not be co-located or operating in conjunction with
any other antenna or transmitter. End-users and installers must be provide with antenna
installation instructions and transmitter operating conditions for satisfying RF exposure
compliance.
Canada, Industry Canada (IC) Notices
This Class B digital apparatus complies with Canadian ICES-003 and RSS-210.
Operation is subject to the following two conditions: (1) this device may not cause
interference, and (2) this device must accept any interference, including interference that
may cause undesired operation of the Device.
Radio Frequency (RF) Exposure Information
The radiated output power of the Wireless Device is below the Industry Canada (IC) radio
frequency exposure limits. The Wireless Device should be used in such a manner such that
the potential for human contact during normal operation is minimized.
This device has also been evaluated and shown compliant with the IC RF Exposure limits
under mobile exposure conditions. (antennas are greater than 20cm from a person's body).

8
Canada, avis d'Industry Canada (IC)
Cet appareil numérique de classe B est conforme aux normes canadiennes ICES-003 et
RSS-210.
Son fonctionnement est soumis aux deux conditions suivantes : (1) cet appareil ne doit pas
causer d'interférence et (2) cet appareil doit accepter toute interférence, notamment les
interférences qui peuvent affecter son fonctionnement.
Informations concernant l'exposition aux fréquences radio (RF)
La puissance de sortie émise par l’appareil de sans fil est inférieure à la limite d'exposition
aux fréquences radio d'Industry Canada (IC). Utilisez l’appareil de sans fil de façon à
minimiser les contacts humains lors du fonctionnement normal.
Ce périphérique a également été évalué et démontré conforme aux limites d'exposition aux
RF d'IC dans des conditions d'exposition à des appareils mobiles (les antennes se situent à
moins de 20 cm du corps d'une personne).

9
2.INTRODUCTION
the Device is a wireless AP device with Powerlione Communication (PLC) technology
integrated. The Powerline Wireless N Extender turns your home’s existing wall outlet into
instant “WLAN-ready” access point. It takes advantages of your home’s existing wiring to
deliver high speed network and wireless high-speed Internet access at the same time.
This product is suitable for general users to operate in their homes/houses, while advanced
configurations through web-browser described in later chapters are suitable for seasoned
users to change and manage the Powerline Wireless N Extender product settings.
2.1 Package Content
Before starting the installation of the Device, please make sure the package contains the
following items:
Single pack Combo pack
Device
Accessories RJ-45 Cable x 1 RJ-45 Cable x 2
Powerline Ethernet
Bridge
Powerline Wireless
N Extender
Powerline Wireless
N Extender

10
2.2 Product Overview
500 Mbps Powerline Wireless N Extender
500 Mbps Powerline Bridge

11
2.2.1 Buttons and LEDs
LED
ON: Power on and ready.
Blinking: PLC group pairing.
OFF: Power off.
ON: PLC connection detected.
Blinking:
1. Fast:
Powerline data rate > 60Mbps
2. Normal:
60Mbps > Powerline data rate > 10Mbps
3. Slow:
10Mbps > Powerline data rate
OFF: No PLC connection detected.
(They are too far to communicate or it is alone in its logical network).
Steady Green: Wi-Fi network with security protection.
Flash Green: Wi-Fi network traffic in transaction with security protection.
Steady Red: Wi-Fi network without security protection.
Flash Red: Wi-Fi network traffic in transaction without security protection.
Blinking Green (0.5 sec ON / 0.5 sec OFF): WPS negotiation.
OFF:Wi-Fi disabled.
ON: Ethernet connection detected.
Blinking: Network traffic in transaction.
OFF: No Ethernet connection detected.
Buttons
WPS negotiation.
Press 10 seconds:
Randomly generate a new PLC network group name.
Press 2 to 3 seconds:
Start paring with the other PLC device. Paring procedure keeps for 2 minutes or
ends automatically when they are paired. It can be stopped manually by pressing
the button for 2 to 3 seconds again.
Power Button
Push to power on/off the Device.
Reset Button
Press 1 second: Reset to factory default setting.
Press the button when the Device is powered (not in standby mode)

12
3. HARDWARE INSTALLATION
3.1 Application 1 –Extend Wireless Access Point Coverage
To extend wireless AP coverage in different room or floor, user can place the Powerline
Wireless N extender near the mobile devices such as iPad, Tablet, Smartphone and
Notebook. Then connect the Powerline Wireless N extender to powerline network for
delivering Internet signal.

13
3.2 Application 2 – High Speed Network For HD Video Streaming
Wireless N Extender can serve as Powerline Ethernet Bridge to provide wired
connection for Ethernet compatible devices such as cable box or SmartTV. With advanced
Powerline technology, it can offer reliable and stable Internet network for HD video
streaming. Lag-Free.
3.3 Quick Wi-Fi Encrypted Connection- WPS Button
The default wireless encryption is set as “WPA-PSK” mode with Wi-Fi SSID and password
that appear on printing label at back of the Device.
For Quick Wi-Fi encrypted connection, user can simply press “WPS” button on the Device to
establish encrypted wireless network between your network compatible device and
powerline wireless N extender.

14
4. Encrypted PLC Network
4.1 Create an Encrypted PLC Network Group
The Powerline bridges are compliant HomePlug AV specification. Every ‘HomePlug AV’
compliant PLC device that has the same default network name, “HomePlug AV”, is capable
of communicating with other “HomePlug AV” devices. This is so called the “Public
Network”. Two or more powerline devices under the same network can communicate with
one another.
If you have a pair of powerline device, either one in the pair can be “device A” or “device B”.
By pressing the GROUP button more than 10 seconds; it will generate a random network
group (different from HomePlug AV). Users can take the following two steps to change the
public network group to the private network group to protect their data while transmitting
over the powerline. Users also can create more than one private network groups by
pressing GROUP button directly without software installation required.
*NOTE: Put the Devices side by side will be more convenient during the setting procedure. After network group
is set, the Devices can be deployed anywhere at home.
Step I: Clear Group Attribute
Clear the original network group of device B by pressing its GROUP button more than 10
seconds until all LED lights simultaneously turns off and on once. At this moment, its
network group name has been changed to a random name. It means that this device is (1)
ready to be assigned another network name or (2) to be used as a seed device so
other PLC devices can join to a private network group.
Step II: Join to Other Network Group
1. Press GROUP button of device A for 2 to 3 seconds (make sure POWER LED starts
blinking).
2. Press GROUP button of device B for 2 to 3 seconds (make sure POWER LED starts
blinking).
The Device B which has cleared its group attribute will join to the Device A which has not.
This step makes device A and B are under the same encrypted network. Additional device C
can be added into device A’s logical network by taking same steps, thus all of the Device A,
B, and C in the same encrypted network group. User can assign as many powerline devices
into the logical network group as described in the SPECIFICATION section.
*NOTE: It does not matter which device’s button is pressed first, but please press the second device’s

15
GROUP button within two minutes after pressing first device’s GROUP button. After 10 seconds, device will
start communicating with device A.
4.2 Remove Device from an Existing Network Group
If you would like to remove powerline device from an existing network group, you can
generate a new group name (referring to Step I) to stop communication with an existing
network group.
4.3 Create Additional Encrypted Network
If you want to create additional private network for your powerline devices that co-existence
with your existing powerline private network group, please repeat the Step 1 & 2 to generate
new private network group for selected powerline devices.
P.S. Users can press the RESET button to reset the network name back to its factory default.

16
5. ADVANCED WI-FI SETTINGS VIA WEB BROWER
5.1 Getting Started
The configuration of this device is through web-browser. The default IP address of the
Device is 192.168.2.253, and the subnet-mask is 255.255.255.0. The DHCP server inside
the Device is default to “Off” (Disable).
1. Plug Powerline Wireless N Extender into wall socket
2. Set up your computer IP to the same IP domain manually (Control panel > Network
connections > double click “Local area connection” > Properties > select “Internet
Protocol TCP/IP” and click Properties > select "Use the following IP address” ) ie.
192.168.2.xxx ( you can set xxx from 1 – 128 )
Then connect your computer to the Device.(wireless or wired)
3. Running Web browser and type the IP address of this device (192.168.2.253) on the
place you enter URL address, then you may link to the Device for further settings.
4. Login the Device
User name: root
Password: root
Note: Remember changing back to “ Obtain an IP address automatically “ after all setting are done.
5. At first login, please select the language you would like to use. (English, Traditional
Chinese, Simple Chinese)
Note: Please ensure there is not multiple DHCP servers in your network environment, otherwise it will cause
abnormal situation.

17
5.2 Home
5.2.1 Select Language
The Device provides 3 languages, English, Tradition Chinese and Simple Chinese for you to
select one you want to use.
5.2.2 Setup Wizard
The setup Wizard can help you to setup the Device with minimum setting. Open the page
from the left panel and click “Next” button.
Step 1:Set up account and password for login the Device configuration in the future.
Step 2:Set up LAN interface.
Step 3:The page is for basic wireless setting, to set network mode and SSID…etc
Step 4:Set wireless security and encryption to prevent from unauthorized access.
Step 5:Click “Finish” button and the Device will reboot to apply the settings.

18
5.2.3 Operation Mode Configuration
This device supports five operation modes for the IP network. Click to select one between
the following wireless operation modes, then click Apply button.
AP Mode
This device act as Wireless Access Point (AP) for wireless clients and provides a
connection to Ethernet and PLC.
Client Mode
This mode enables the establishment of connection with the other AP using infrastructure
/Ad-hoc networking types. With bridge operation mode, you can directly connect one of the
wired Ethernet port to your PC and the Device
become a wireless adapter

19
WDS (Root AP)
The wireless radio of device serves for the other AP and provides a connection to a wired
LAN (the other AP must use the same chipset with this device)
WDS + AP Mode
This mode combines WDS plus AP modes, and it not only allows WDS connections but also
the wireless clients can survey and associate to the Device
WDS Mode
The WDS system is used to create a network of AP’s that can be used as a single “virtual”
AP. The Device forwards the packets to another AP with WDS function. When this mode is
selected, all the wireless clients can’t survey and connect to the Device. The Device only
allows the WDS connection.

20
5.3 Internet Settings
5.3.1 LAN (Local Area Network Settings)
Table of contents
Other Solwise Extender manuals