manuals.online logo
Brands
  1. Home
  2. •
  3. Brands
  4. •
  5. Songmics
  6. •
  7. Rack & Stand
  8. •
  9. Songmics RTG01 User manual

Songmics RTG01 User manual

Other Songmics Rack & Stand manuals

Songmics GFS102 User manual

Songmics

Songmics GFS102 User manual

Songmics LLR40102 User manual

Songmics

Songmics LLR40102 User manual

Songmics LMR03/003 User manual

Songmics

Songmics LMR03/003 User manual

Songmics LMR08 User manual

Songmics

Songmics LMR08 User manual

Songmics LSN63 User manual

Songmics

Songmics LSN63 User manual

Songmics VASAGLE HSR065 User manual

Songmics

Songmics VASAGLE HSR065 User manual

Songmics LGR23/023 User manual

Songmics

Songmics LGR23/023 User manual

Songmics HSR13BK User manual

Songmics

Songmics HSR13BK User manual

Songmics GKR04 User manual

Songmics

Songmics GKR04 User manual

Songmics LLR40102 User manual

Songmics

Songmics LLR40102 User manual

Songmics HSR05 Instruction Manual

Songmics

Songmics HSR05 Instruction Manual

Songmics HSR65 User manual

Songmics

Songmics HSR65 User manual

Songmics VASAGLE LBC12 User manual

Songmics

Songmics VASAGLE LBC12 User manual

Songmics HSR61 User manual

Songmics

Songmics HSR61 User manual

Songmics HSR60 User manual

Songmics

Songmics HSR60 User manual

Songmics ULHR30 User manual

Songmics

Songmics ULHR30 User manual

Songmics HSR12 User manual

Songmics

Songmics HSR12 User manual

Songmics BCB12 User manual

Songmics

Songmics BCB12 User manual

Songmics HSR07 User manual

Songmics

Songmics HSR07 User manual

Songmics HSR06 User manual

Songmics

Songmics HSR06 User manual

Songmics LSN15 User manual

Songmics

Songmics LSN15 User manual

Songmics VASAGLE HSR47 User manual

Songmics

Songmics VASAGLE HSR47 User manual

Songmics LMR03 User manual

Songmics

Songmics LMR03 User manual

Songmics HSR62 User manual

Songmics

Songmics HSR62 User manual

Popular Rack & Stand manuals by other brands

Dynex DX-MP3MT Quick setup guide

Dynex

Dynex DX-MP3MT Quick setup guide

Konig & Meyer 24185 manual

Konig & Meyer

Konig & Meyer 24185 manual

ECG LD 326501 instruction manual

ECG

ECG LD 326501 instruction manual

Philips SB7S19S/00 quick start guide

Philips

Philips SB7S19S/00 quick start guide

Woodline KIT-250 lb instructions

Woodline

Woodline KIT-250 lb instructions

ricoo S1222 installation instructions

ricoo

ricoo S1222 installation instructions

Kanto P301 user manual

Kanto

Kanto P301 user manual

VidaBox VB MNT FFS2 installation guide

VidaBox

VidaBox VB MNT FFS2 installation guide

PROEL PLWIN60C user manual

PROEL

PROEL PLWIN60C user manual

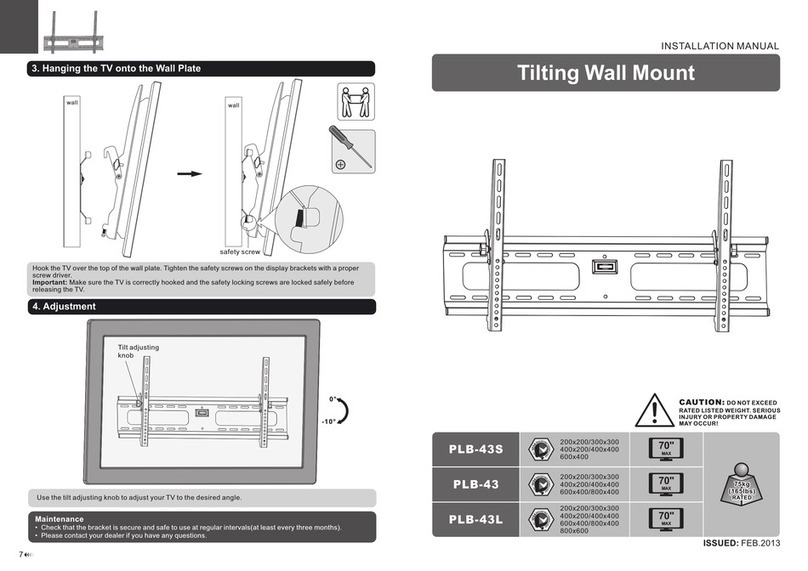
AllMounts PLB-43S instruction manual

AllMounts

AllMounts PLB-43S instruction manual

VMP VH-001 instruction sheet

VMP

VMP VH-001 instruction sheet

Nederman SYSTEM 920/400 instruction manual

Nederman

Nederman SYSTEM 920/400 instruction manual

Glasdon ORBIS POST MOUNTING KIT installation guide

Glasdon

Glasdon ORBIS POST MOUNTING KIT installation guide

Grape GM401 user manual

Grape

Grape GM401 user manual

FourStarGroup 11225296 manual

FourStarGroup

FourStarGroup 11225296 manual

CHIEF FLR100 installation instructions

CHIEF

CHIEF FLR100 installation instructions

FEC XDCAM EX PMW-EX30 manual

FEC

FEC XDCAM EX PMW-EX30 manual

OYPLA DIY 4122 user manual

OYPLA DIY

OYPLA DIY 4122 user manual

manuals.online logo
manuals.online logoBrands
  • About & Mission
  • Contact us
  • Privacy Policy
  • Terms and Conditions

Copyright 2025 Manuals.Online. All Rights Reserved.

RTG01
2
DE
FR
EN
Notes
ŸPlease strictly follow the procedures of the manual to assemble.
ŸPlease place the installed stand in a horizontal position and keep balance with adjustable leveling feet,
then confirm the stability of the parts before the use.
ŸRecommend to store the shoes from the lower to the upper in sequence and pay attention not to put too
heavy articles on the top, so as not to cause the stand tilt.
ŸNot be allowed children to play near the stand to prevent the accidental.
Hinweise
ŸBitte bauen Sie alle Teile in der korrekten Reihenfolge auf.
ŸBitte stellen Sie den Ständer auf eine horizontale Ebene, oder stellen Sie die Fußhöhe ein, damit der
Kleiderständer das Gleichgewicht hält. Und stellen Sie sicher, dass alle Einzelteile richtig
zusammengesetzt sind.
ŸStellen Sie die Schuhe zuerst in den unteren Fächern, und vermeiden Sie die schweren Schuhe in den
oberen Fächern zu platzieren (schwere Sachen unten, leichte oben).
ŸLassen Sie keine Kinder in der Umgebung vom Ständer spielen, um den Stoß und den zur Verletzung
führende Unfall zu vermeiden.
Notes
ŸIl faudrait suivre l’ordre de montage dans cette notice.
ŸDéposez l’étagère au sol plat pour vérifier si toutes les pièces sont montées correctement avant
l’utilisation, les pieds réglables au bas vous aideront à faire des régularisations de l’équilibre.
ŸIl est recommandé de remplir l’étagère de chaussures du bas vers le haut. Pour éviter la chute et
l’inclinaison, ne mettez pas les choses trop lourdes en haut.
ŸGardez les enfants loin de l’étagère.
IT
Note
ŸSeguire i pasi delle istruzioni per montare la scarpiera.
ŸPostare la scarpiera montata a un piano livello e regolare i piedi per mantenere l'equilibrio. Controllare il
saldamente d’installazione prima dell'uso
ŸMettere le robe dal ripiano inferiore a superiore, non mettere reba più pesante sulla scarpiera per evitare
caduta.
ŸNon lasciare i bambini giocare a vicino, per evitare gli incidenti.
ES
3
Notas
ŸHa de montar el producto siguiendo las instrucciones paso a paso.
ŸHa de utilizarlo en el suelo plano. Mantenga el equilibrio mediante girar los pies ajustables y asegúrese de
que las piezas estén fijadas firmemente.
ŸEs recomendable que se coloquen los zapatos de la balda inferior a la superior. Tenga en cuenta que no
deje los pesados en la balda superior, para evitar la inclinación.
ŸDeje a los niños alejados al producto, para evitar la caída o lesiones.
4
A× 2
A1 A2
B× 2
C× 2
C1 C2
5
G H I
× 48 × 1 × 2
D E F
× 20 × 1 × 8
1
2
6
6PCS
F
20PCS
G
A1
A2
B
F
D
G
3
7
C1
C2
G
4PCS
G
4
8
20PCS
G
G
D
Version QM:1.0
Stand:11.07.2018
5
9
EUZIEL International GmbH
F
IB
G
E
ŸDer Schrank muss lotrecht aufgestellt werden. Es wird
empfohlen, dass sie an eine Wand gelehnt werden.
Der Boden der Aufstellfläche sollte möglichst eben
und fest sein. Um zu verhindern, dass der Schrank
umkippt, muss er mit dem beigepackten Kippschutz
fest an der Wand verankert werden. Die
Befestigungsart ist abhängig vom Wandmaterial. Bitte
Schrauben und Dübel entsprechend der
Wandbeschaffenheit verwenden. Bei diesbezüglichen
Fragen den örtlichen Fachhandel zu Rate ziehen.
ŸIl est recommandé de mettre le produit contre le mur
et sur le sol plat. Pour éviter le renversement, le
produit s’équipe des pièces pour se fixer au mur. En
raison de la variété des constructions, il est peut-être
nécessaire d’acheter des pièces de fixation
appropriées en fonction de votre mur. Veuillez
consulter les techniciens locals pour des conseils
professionnels.
ŸIt is recommended that the product is placed against
the wall and on the flat ground. To avoid turnover,
please fix this item to the wall with the accompanied
security accessories. Please only use wall plugs and
retaining screws that are suitable for your type of wall.
Please consult the local dealers and get some advice.
ŸQuesto prodotto deve essere messo in verticale, si
raccomanda che il guardaroba venga posizionato
contro una parete. Per ridurre il rischio di ribaltamento,
è necessario mettere il guardaroba su un pavimento
pianeggiante. Si conviene fissare il guardaroba alla
parete. Si utillizza diversi accessori per fissare il
guardaroba ai diversi tipi di parete, si prega di ottenere
maggiore informaizone utile da tecnico locale.
ŸEste producto debe ser colocado en posición vertical,
es mejor contra una pared. El suelo debe ser plano.
Para reducir el riesgo de volcarse, es necesario fijar el
armario a la pared mediante los accesorios de fijación.
Por favor, consulte al técnico profesional para adquirir
los accesorios apropiados para la pared de su casa.